


In this article, we’ll walk through the process, end to end, on how to set up a CI pipeline. We’ll be using the ApexSQL DevOps toolkit web dashboard but the same principles apply to configuring the toolkit to run with PowerShell scripts and build-server plug-ins.
Also, the concepts and fundamentals are the same for Continuous delivery, although we may add a companion article, covering this process at a later time.
Initial setup and configuration of the dashboard
The first step is to download and install the ApexSQL DevOps toolkit and install it and do basic configuration to set up users, email addresses for notifications and default paths for ApexSQL application project files and output from pipeline processing, if we don’t want to accept the defaults.
Pipeline configuration
Next we are going to focus on a few key configuration items particular to our new pipeline.
At a minimum we’ll need data sources for:
- Our source control repository
- Our test database
The source control repository is where all of our latest database changes reside. We’ll be pulling schemas and static data from this repository to build our test database with the latest changes. Our test database will be destroyed and recreated each time our changes are integrated. We’ll populate it with data and run a series of steps on it, which if successful, will allow us to manually test our changes and later run a deployment to production, if needed.
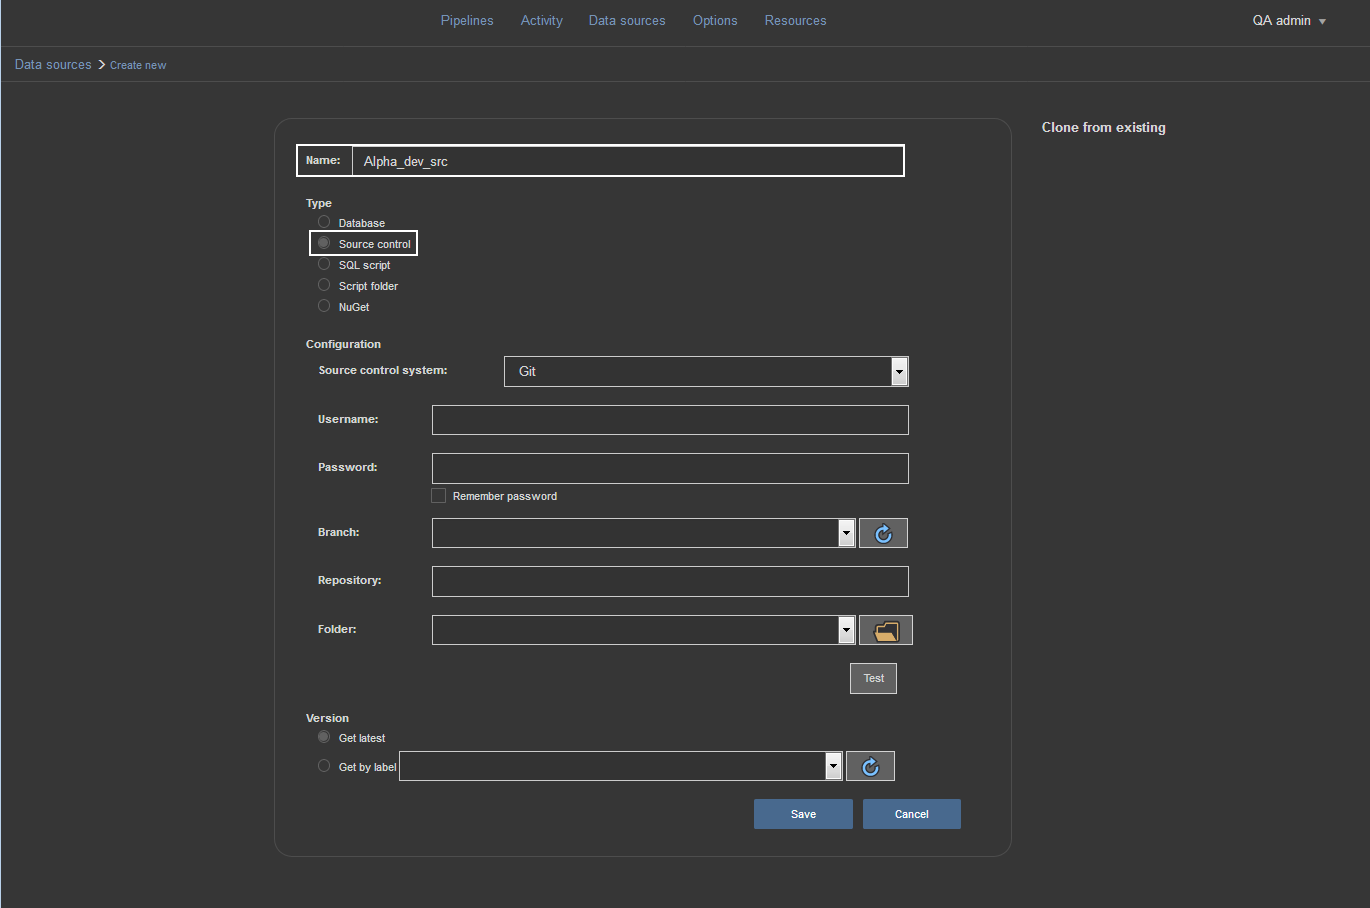
Let’s go ahead and set up the Source control data source. To do that, we select the Data source view and choose Create new option to open the new data source configuration view.

First thing to do here is to type in the name of the data source and make sure to use the name that will allow easy recognition of the repository we are going to use. From the selection of data source types choose the Source control type.
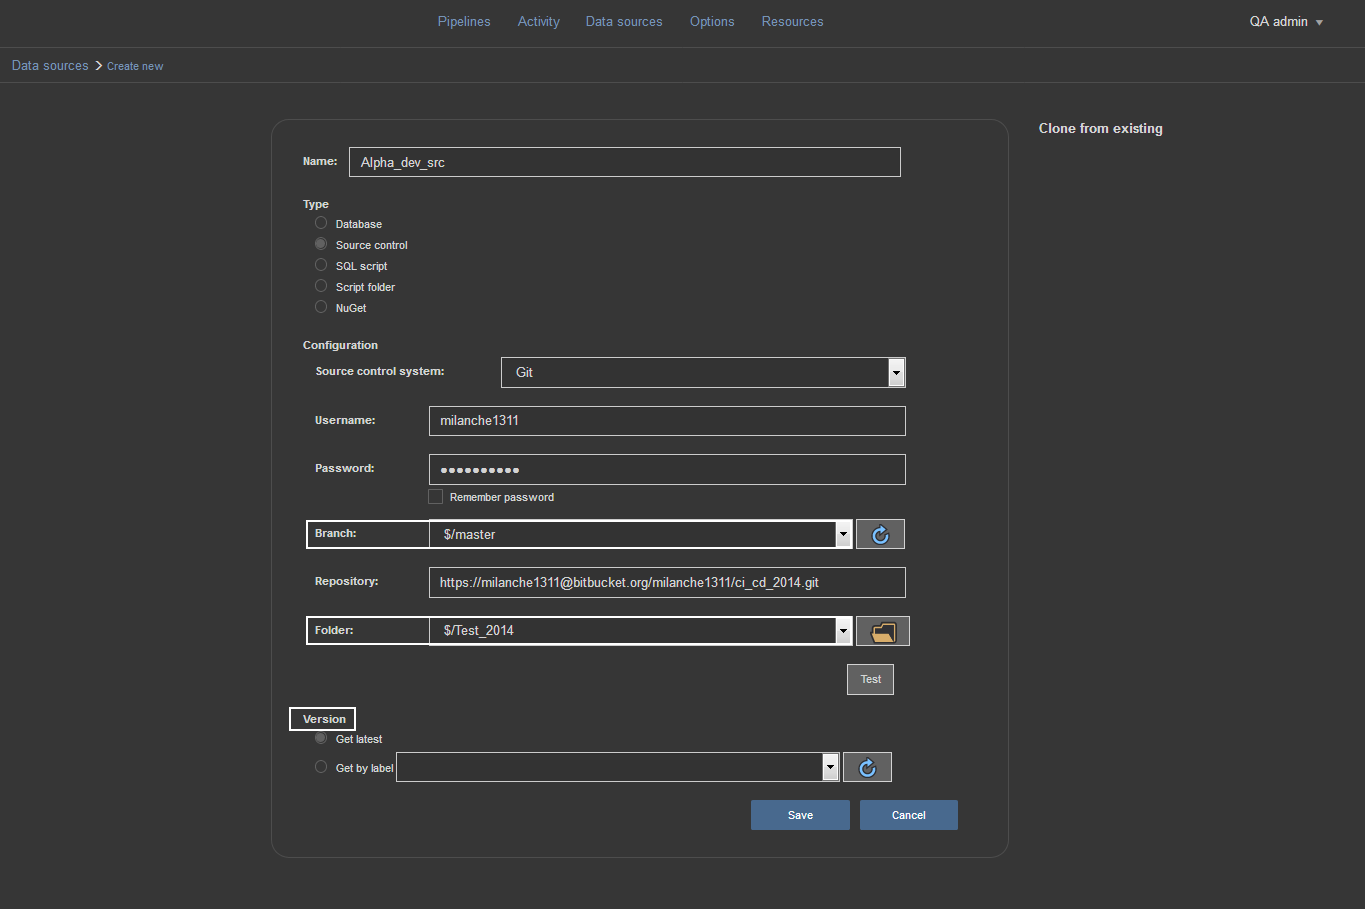
For our Source control data source, we’ll use a remote Git repository we created on the Bitbucket host using ApexSQL Source Control. We need to enter the same user credentials used to log on to Bitbucket and enter the URL for the repository where the database changes are committed. To establish connection and load the selection of repository branches and folders, just use the refresh icon and the message will appear that “SC info loaded”.

After that, we just need to pick the desired branch and folder where the changes are committed. In addition, we can even choose the version of the committed changes by entering the version label in the designated field, but assuming we are using the latest version we’ll leave the field blank and save this data source.
Note: see the article How to link a SQL Server database to a Git repository on how to prepare source control repository to be used as data source.
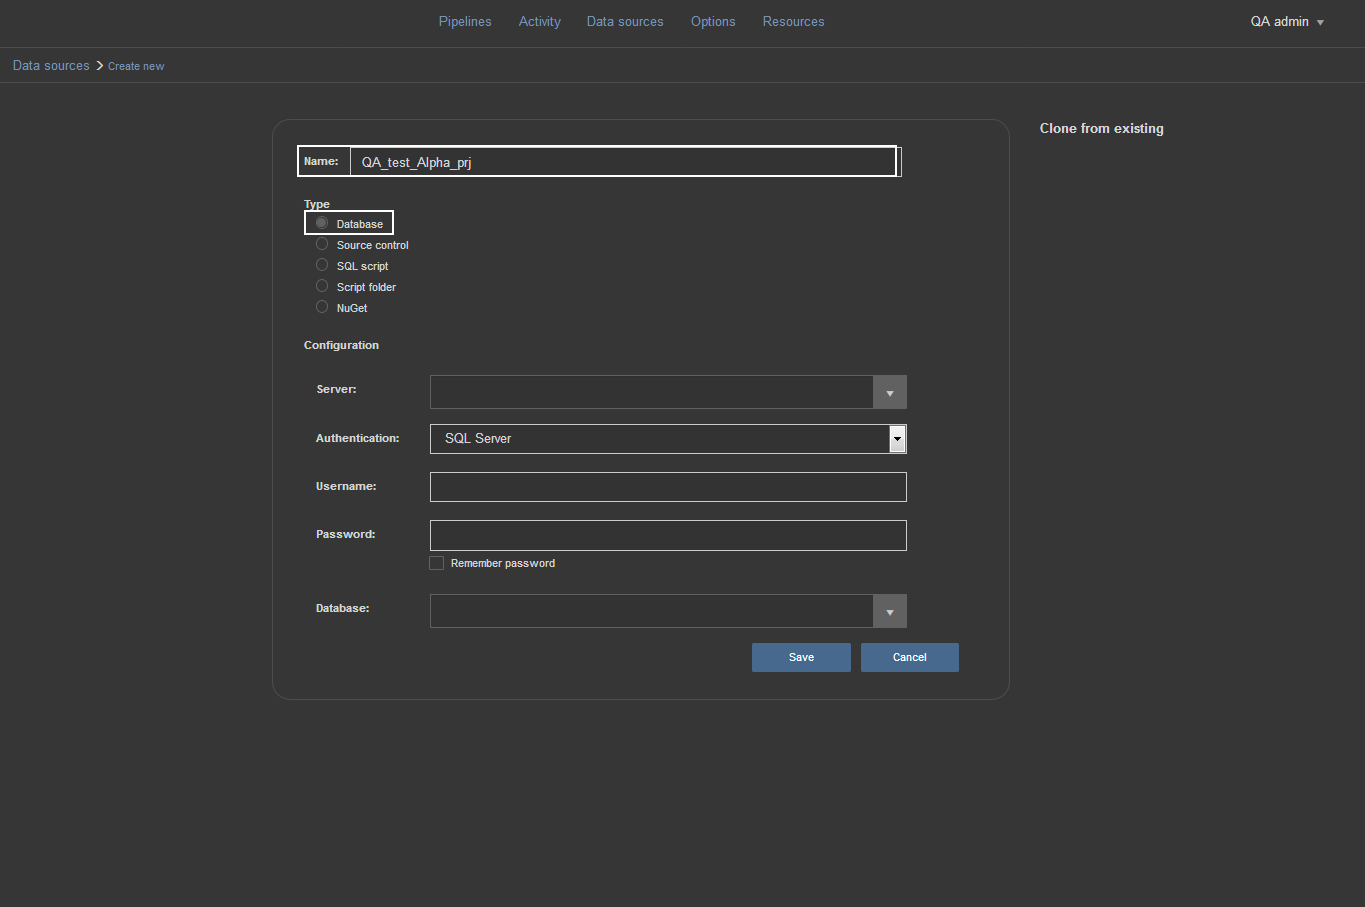
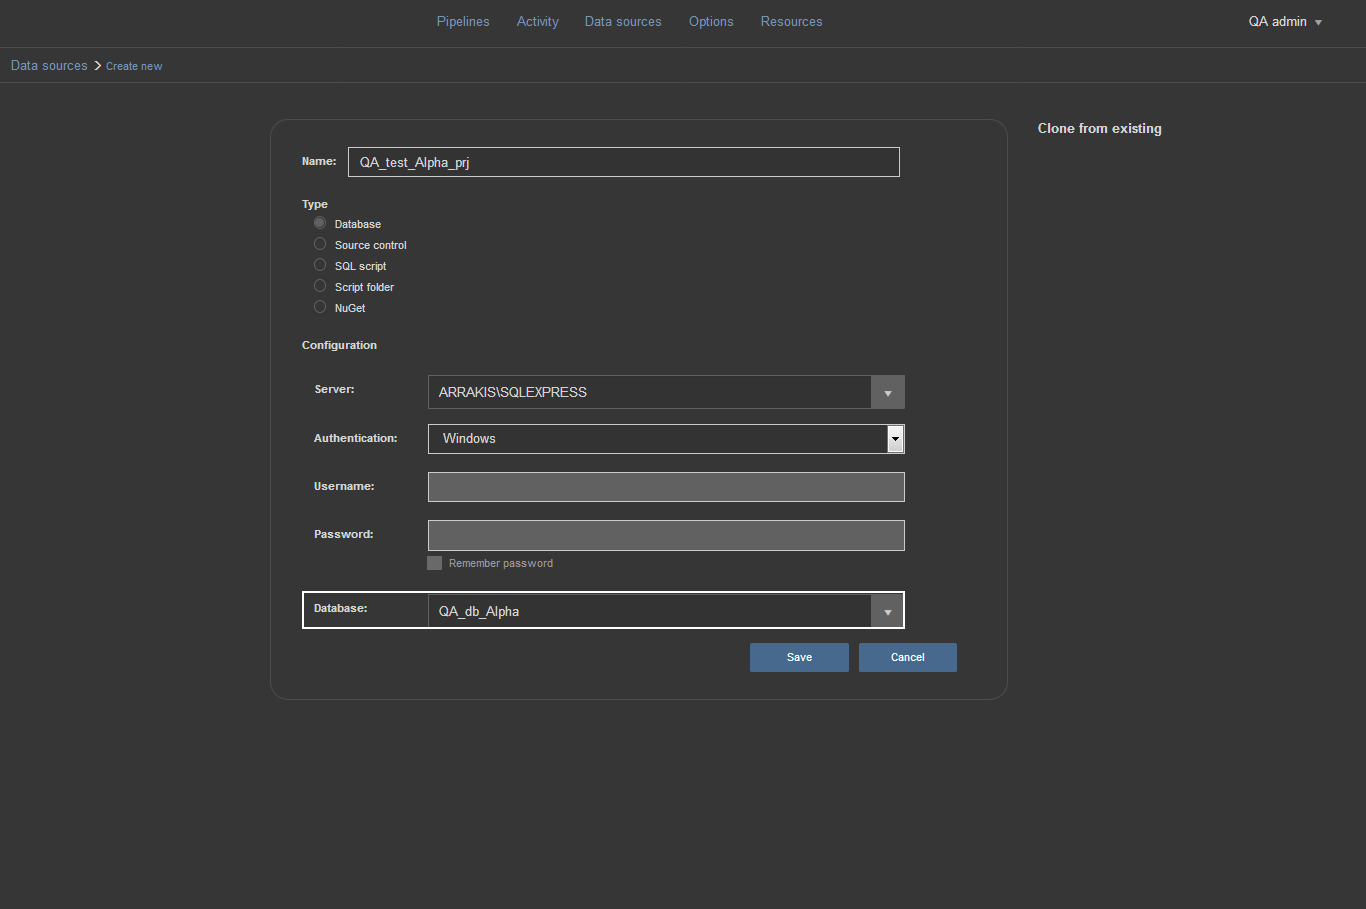
Next we’ll set up the data source for our test database. Again, we go from Data sources view and choose the Create new option. By default, the Database source type is selected so we’ll leave it that way and in the Name field enter the proper name to distinguish this data source from others.
Next we need to choose the SQL Server instance from the Server dropdown list. The Server dropdown list shows local SQL Server instances by default but in case that we need to use remote connection there is an option included to “Load network instances” at the bottom of the list which will load all discoverable SQL Server instances on the network. Also, in case the remote instance is not discoverable, the Server dropdown list allows typing in the target SQL Server. We’ll use a local SQL Server instance. This allows for the possibility to use Windows Authentication for logging on to SQL Server.
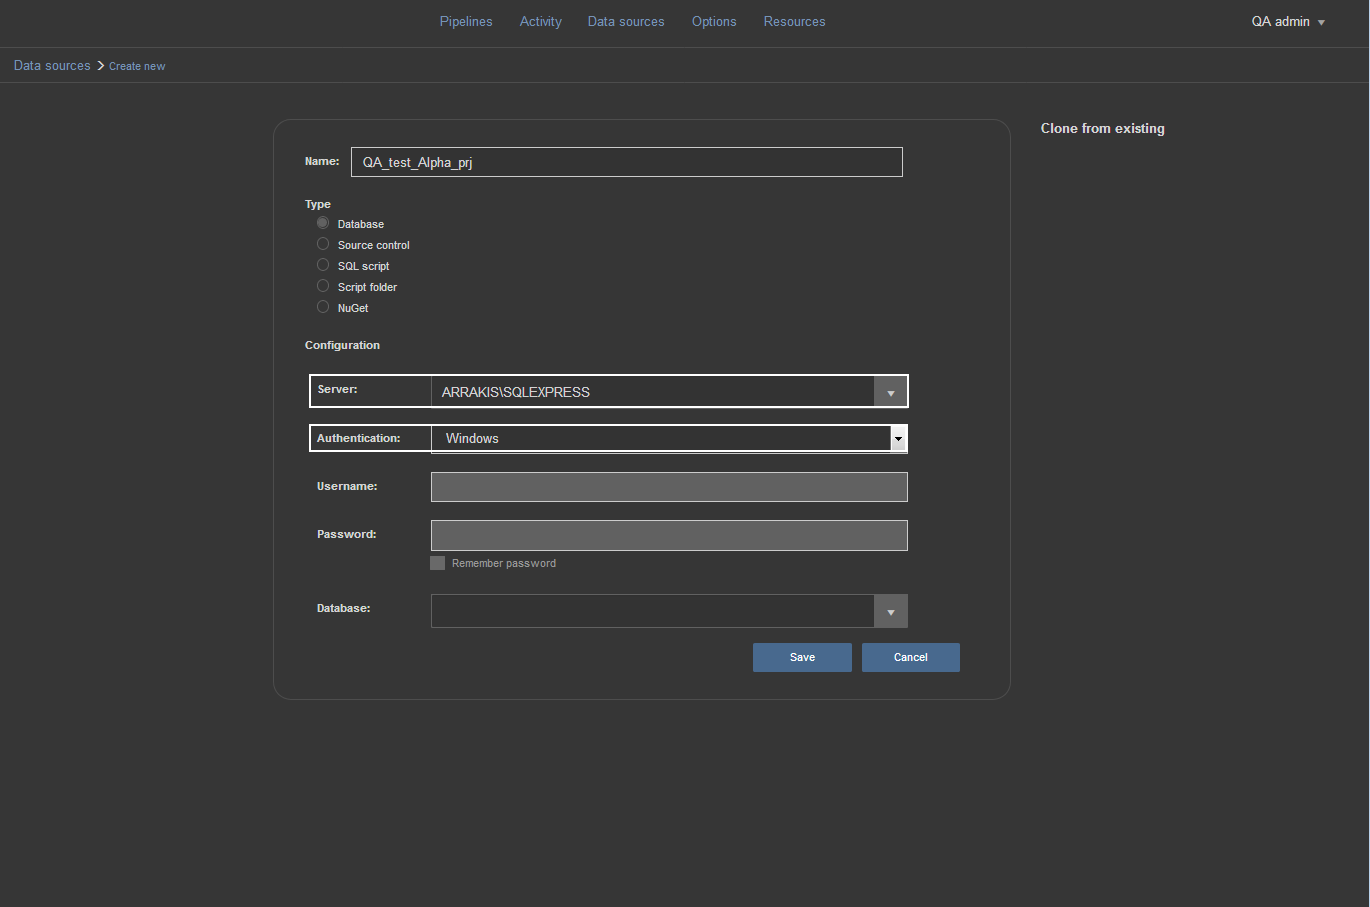
The final thing to set is the target database to use for testing of the committed changes and where the build from the source control will be performed. At the bottom of the data source configuration view there is the Database drop down list where we need to pick the target database. Since we didn’t previously create the target database, we ill just type in the name of the new database and after confirmation with Save button the database will be instantly created and ready to be uses as data source in the pipeline steps.
Creating the pipeline
Now that we have the dashboard configured and pre-requisites for our pipeline, and our required data sources, let’s go ahead and create the pipeline.
Here’s we’ll need to specify the name of our new pipeline, a brief description, build number format, build counter and pipeline triggers

The build number format specifies what each incremental build version will look like in reports and notifications. The counter determines how many numbers it is incremented for each build.
A pipeline can be triggered manually, on a schedule or on a new commit. We’ll set ours up to be triggered manually.
Once the new pipeline is created it will show up in the Pipeline view. Now we are ready to add steps.
Build step
The first step in our CI pipelines will be the build step. In this step we pull changes from our source control repository and use it to create a new test database. In our example, we are also going to include static data, and populate all of our static tables from source control.
There are a few key considerations in this step. We want to …
- Drop our test database entirely first. This ensures we have a clean build each time without having to worry about orphan objects and cleaning out data first
- We want to specify the configuration of the new database to match our desired settings
- We want to add schema objects in the correct order, to avoid referential integrity problems
- We want to add data to all static aka code tables
To set up a project to perform this step, we’ll use ApexSQL Build to …
- Point to the source control repository as the data source (Note: when the pipeline is run, it will use the datasource from the pipeline, if different than the project
- We will configure the new database including name and settings (Note: the datasource specified in the pipeline will be used, if different, but the configuration options from ApexSQL Build will be applied). Indicate that the database needs to be dropped and recreated
- ApexSQL Build will create objects in the correct order automatically
- We will configure ApexSQL Build to pull static data, for desired tables, from the repository
- We’ll specify various configuration options to dictate how ApexSQL Build will process the step
Note: Even though static data is configured in the ApexSQL Build project, it must still be configured on the pipeline step to be processed
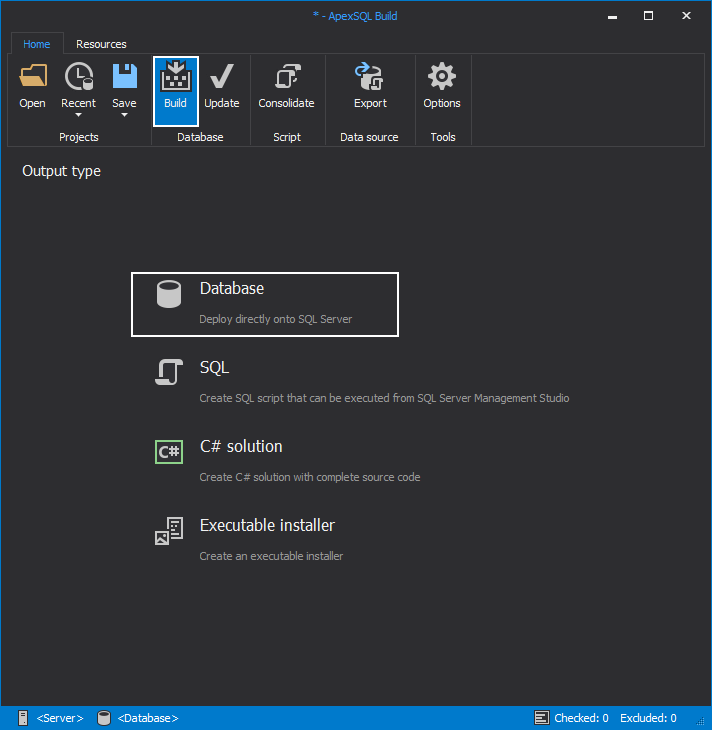
From the initial view of the ApexSQL Build application, use the Build option from the main ribbon menu and choose to build a Database from the selection of possible builds.
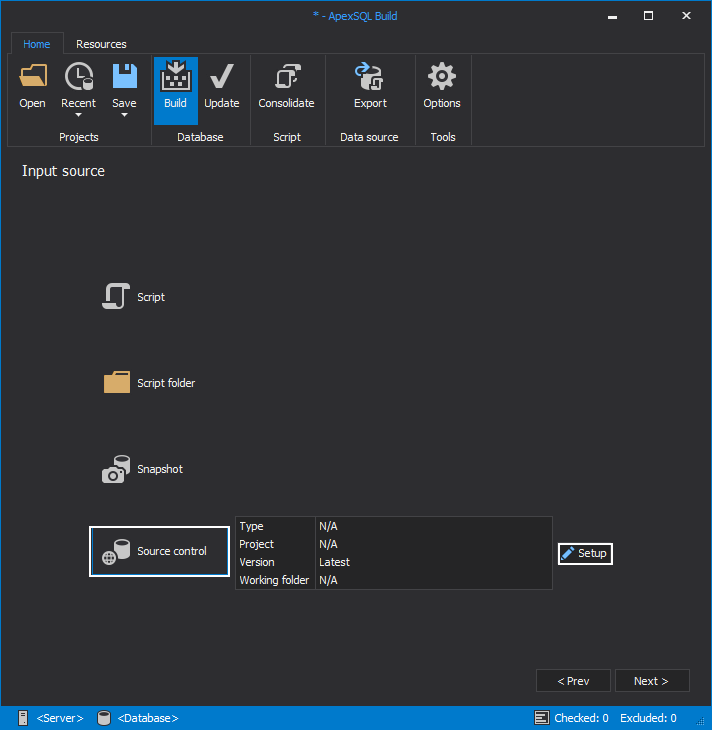
Next step is to choose the input source, which in our case will be from Source control. The Setup option will get us to the Source control configuration wizard.
In the first step we choose Git source control system.
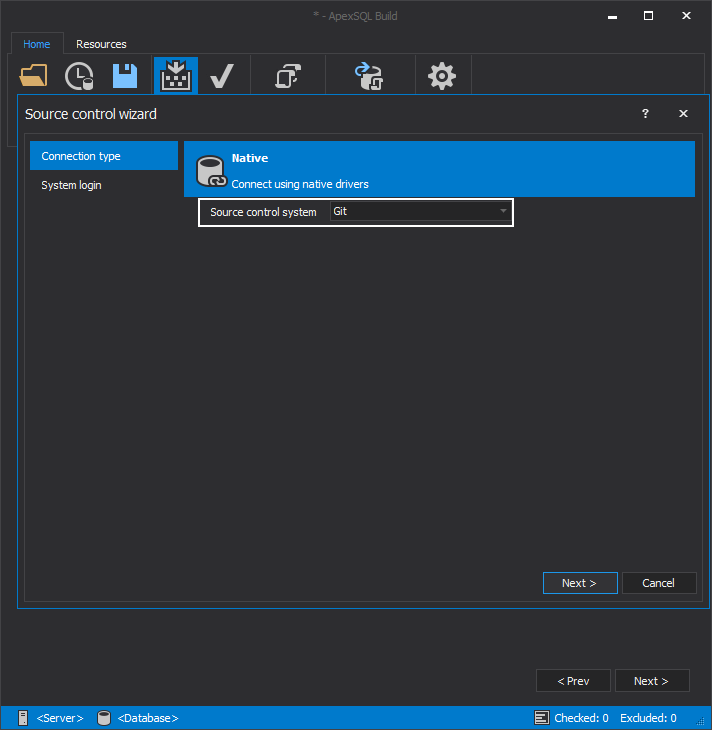
In the second step we configure the source control repository and login settings.
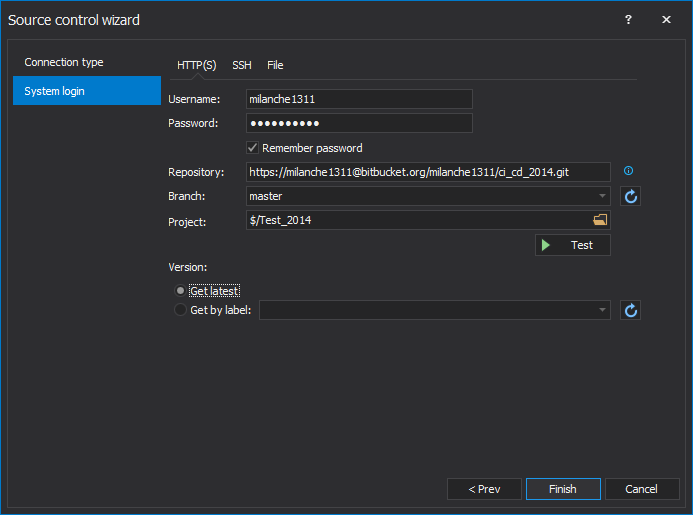
After confirmation the source control settings summary will be displayed in the Input source view.

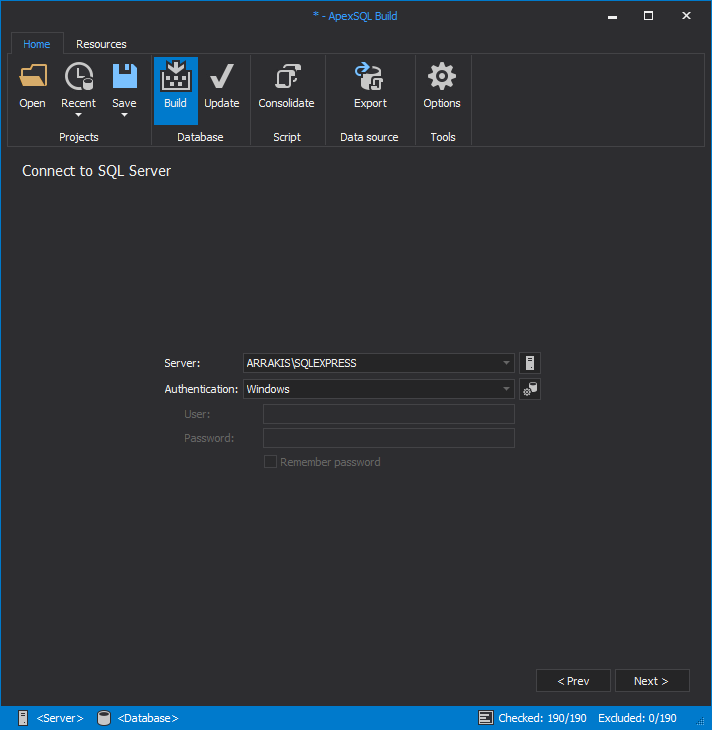
Next step is to set the SQL Server connection as the destination for the database build.
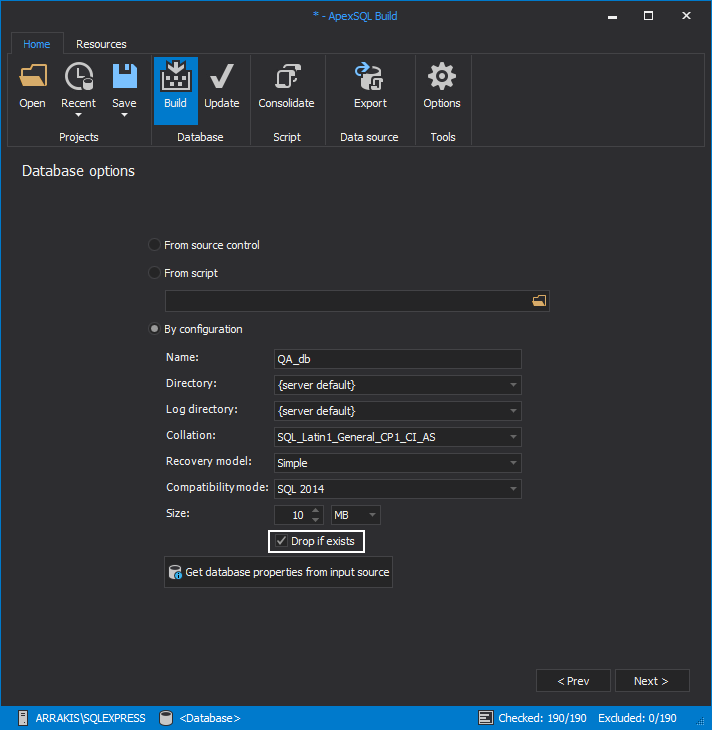
In the next step we define the target database name and basic properties. With these options we need to choose Drop if existing option to make sure if the database with the same name already exist it will be dropped so we can create fresh one from this build.
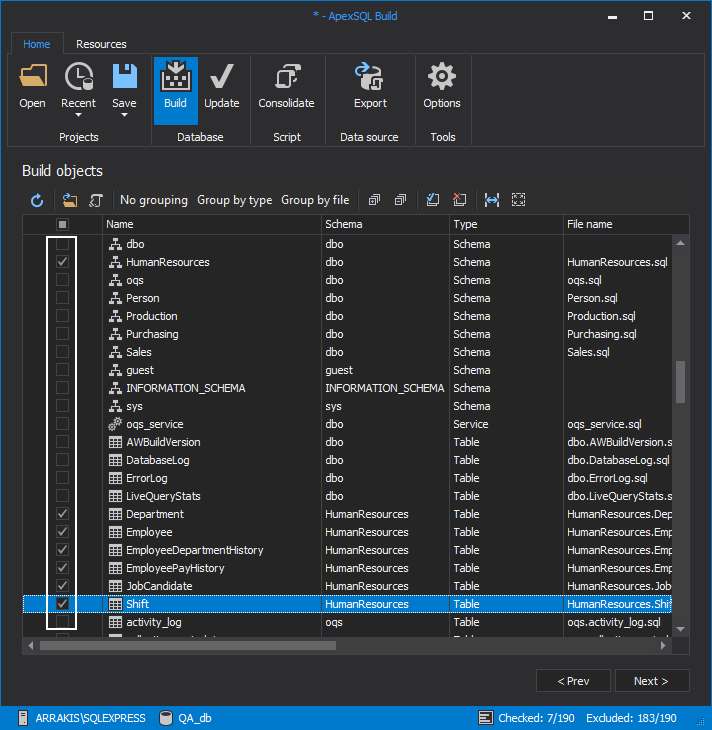
In the next step we need to make a selection of objects that will be included in the build.
The next step is the preview step where the object validation is performed. Here the application will check for dependencies and include dependent objects in the build. In case there are dependent objects missing in the repository the application will consider selected objects (those that are dependent on the missing objects) for build invalid and will fail the build process.

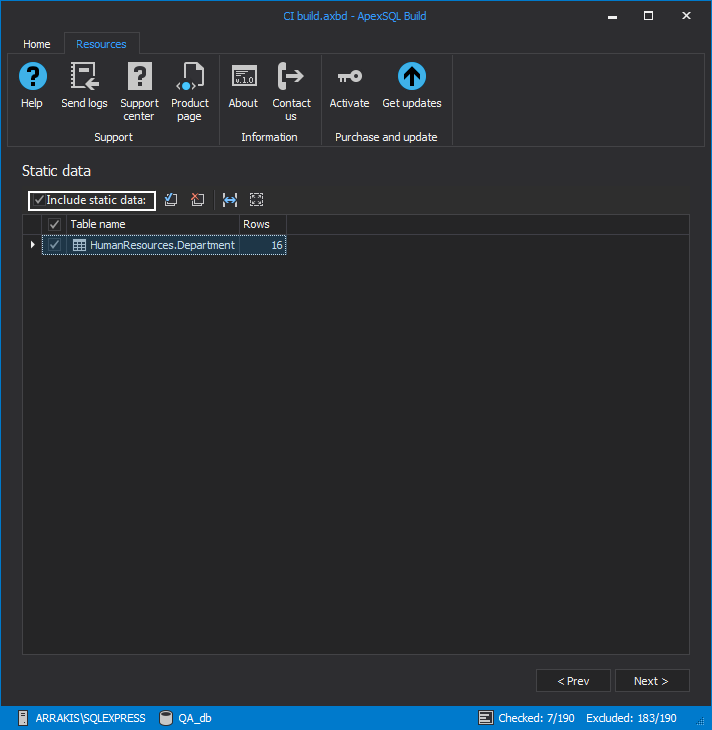
With the next step we need to choose if and what static data will be included in the build in case the static data are scripted in the repository.
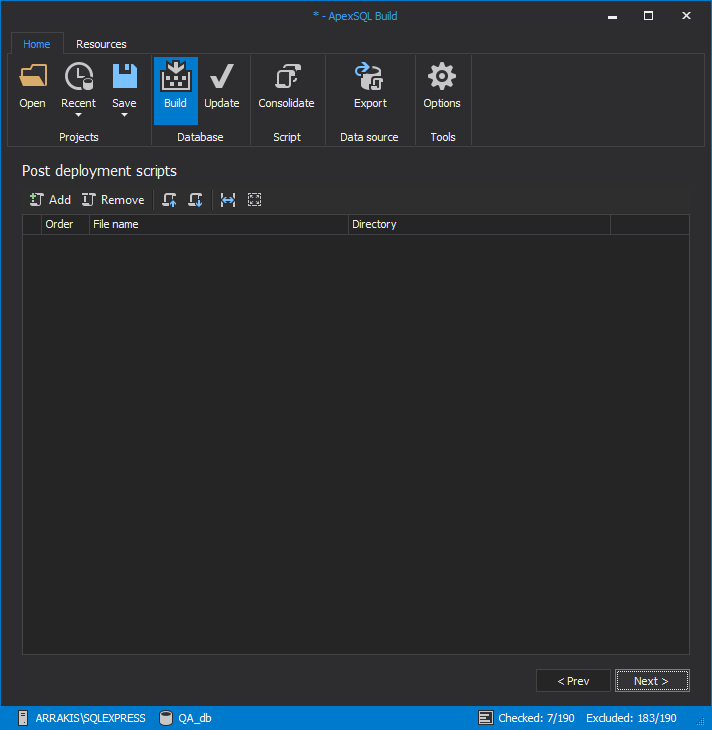
The following step will allow us to include some post deployment scripts to be executed automatically if provided.
In the final step we can optionally define the build SQL script which can be executed later at any time. The build SQL script is set as default output in CI Build step.
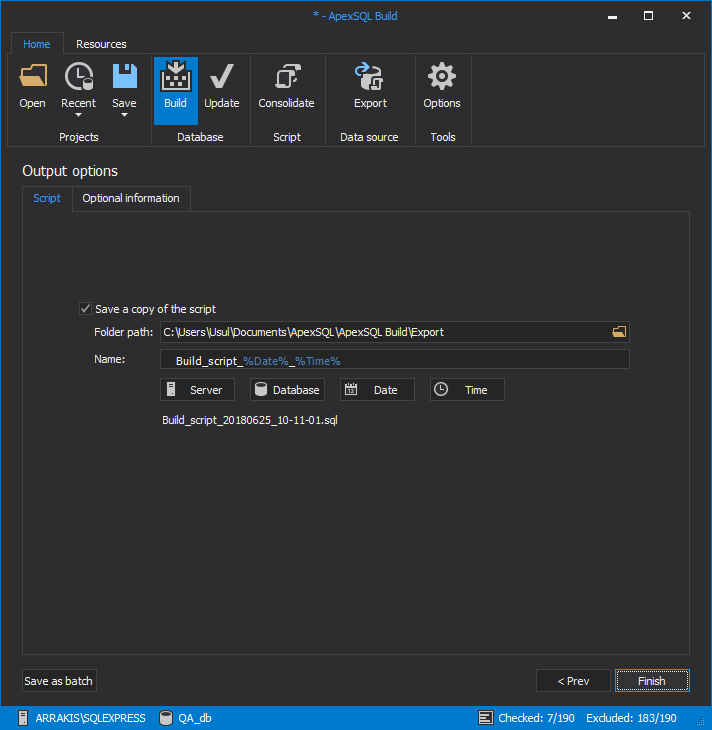
Now we can save all previous settings in the Web dashboard project folder as a project file and include them in the CI Build step.
The project can be configured to select specific objects to deploy via the GUI but generally in automated processing we want to include all objects.
Note: see How to automatically build a database from SQL Server source control on how to managed selected objects in automated processes
Tip: Project settings determine which static scripts are included in the build. If you add another static table and script to source control, you will need to update the project file.
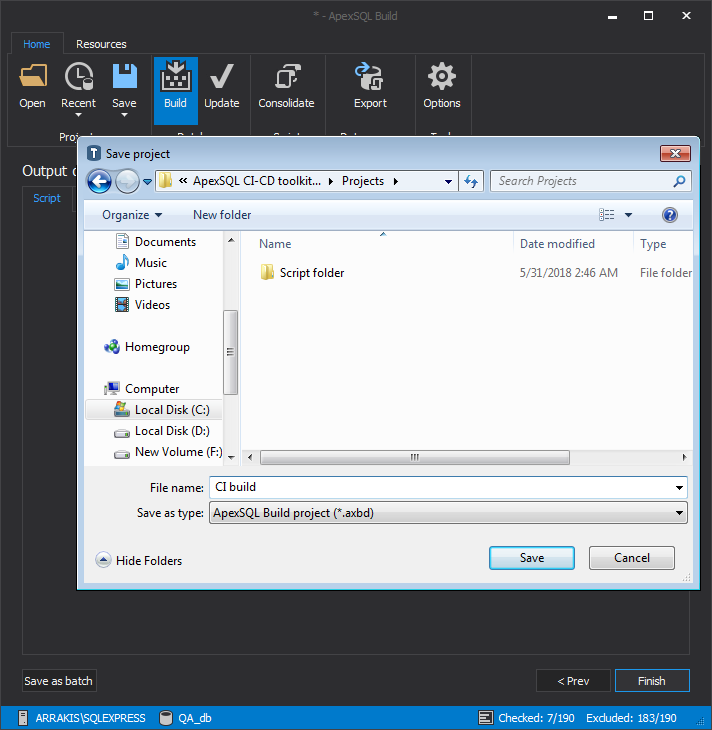
Once we have completed our project, let’s test it to see if it works. After running the project, we should have a newly created database populated with data for static tables. If everything is OK, let’s save the project file into the directory specified for project files in the ApexSQL DevOps toolkit. The default location is “C:\Users\username\Documents\ApexSQL\ApexSQL CI-CD toolkit dashboard\Projects” but it can be set to different path in the Web dashboard general Options section.
Note: For more details on how to set up the Build step see SQL Server database continuous integration workflow BUILD step – Building a SQL database from a source control repository
Now that we’ve created the project file and saved it to the necessary location, let’s update the Build step in the dashboard. We’ll need to
- Specify the data source for the source control repository. This will override the data source in the project, if different
- Indicate that we want to include static data
- Specify the data source for the test database. This will also override the data source in the project, if different
-
Specify package details
- A package is for storing the output files of the execution of every pipeline step, like SQL scripts, reports and summaries for later review and deployment.
- Output included in the package includes the build SQL script, SQL script for synthetic data insertion, SQL script for trigger implementation, database documentation, rule base review report, unit test report and post-test clean database script folder.
- Attach the ApexSQL Build project file
- Update project settings with additional parameters to include the author label

Once the step is completed, lets save it and it will now show up in the Step view for our pipeline. To see if it works let’s run it. Once completed, we can check to see if the new database exists with the correct objects and static data. We can also review the summary file of the SQL executed to see exactly what was processed and ensure it was dropped and recreated
Note: For detail information on available option switches for the Build step see the article ApexSQL Build Command Line Interface (CLI) switches
Populate step
Now that we have a test database created, along with all of the newest objects from source control and data for all of our static tables, we will want to populate all of our other tables with data. We’ll need high quality, realistic data to be able to effectively test the system but we don’t want to test with production data. So instead we’ll create synthetic test data to populate all of our remaining tables
To do this, we’ll follow a similar approach with the Build step. We’ll configure an ApexSQL tool, in this case ApexSQL Generate, and save the configuration as a project. This will be the digital instruction set of exactly how the test data plan is executed.
Let’s open up ApexSQL Generate and point to our Test database, or a suitable replica. We can make the test data plan as specific and detailed or as general as we want it to be. For our basic example, let’s provide the basic information required for a simple test data plan. Our simple goal will be to create test data for all empty tables.
When opened ApexSQL Generate will show new project window with database connection options where our test database will be chosen.
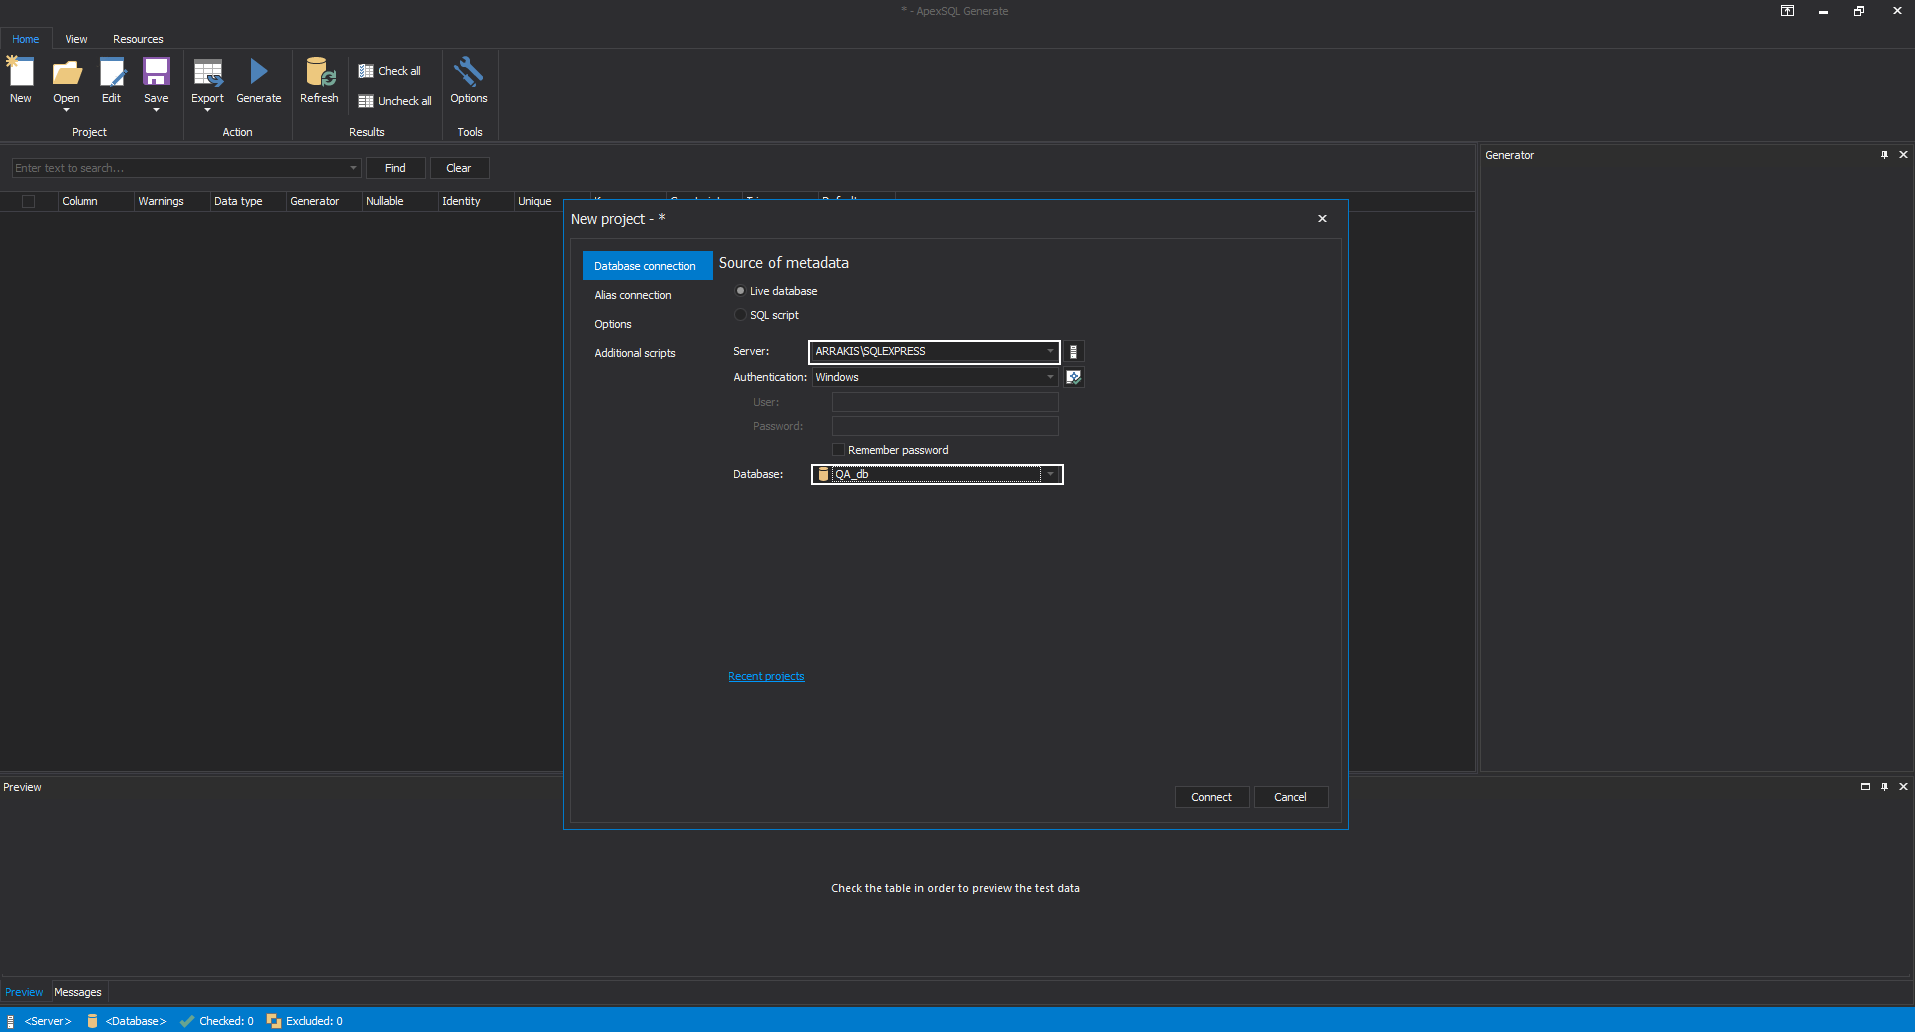
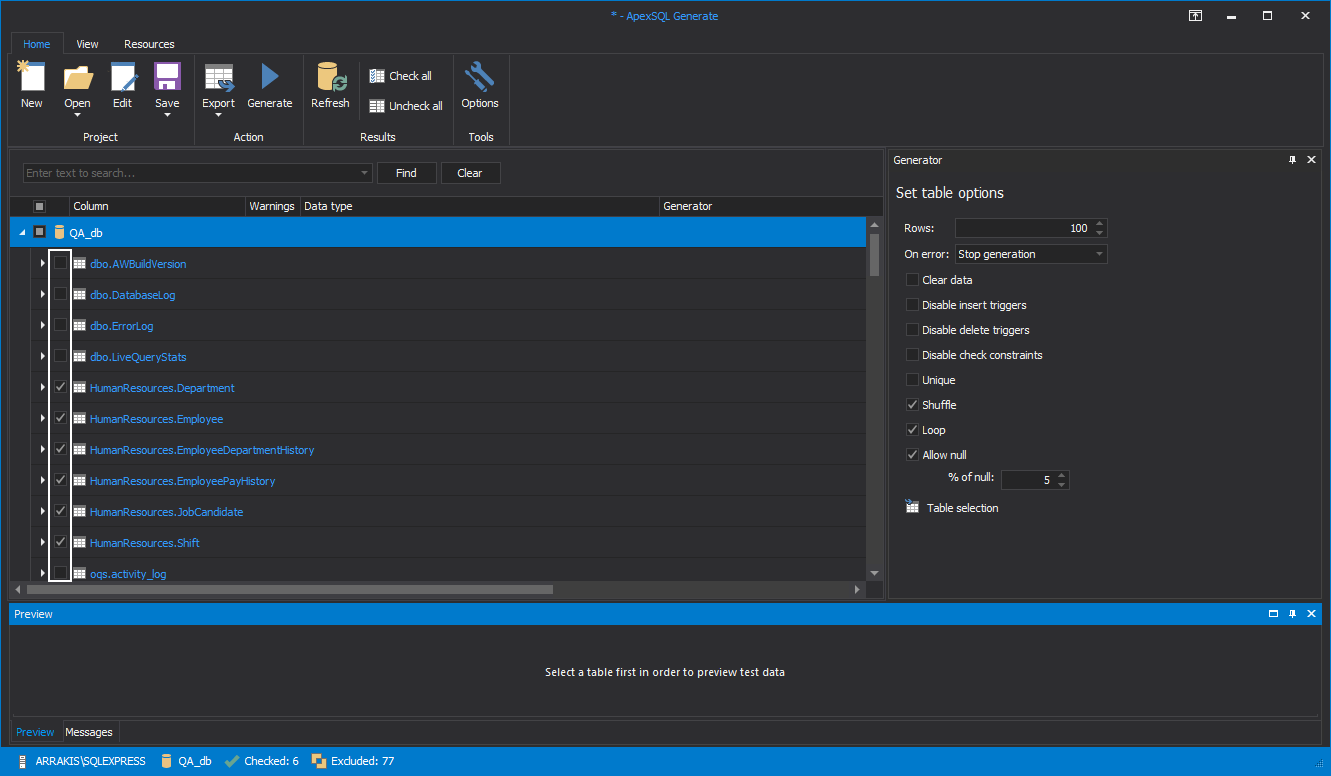
In the same window, under the options tab, there are some global options to set for data generation. Here we want to set that only empty tables will be filled with generated data and to use NULL values in up to 5% of the rows. The default number of rows is 100.

After clicking the Connect button we get the list of objects in the main view and the first thing we want to do is to exclude objects we do not need to fill with synthetic data.
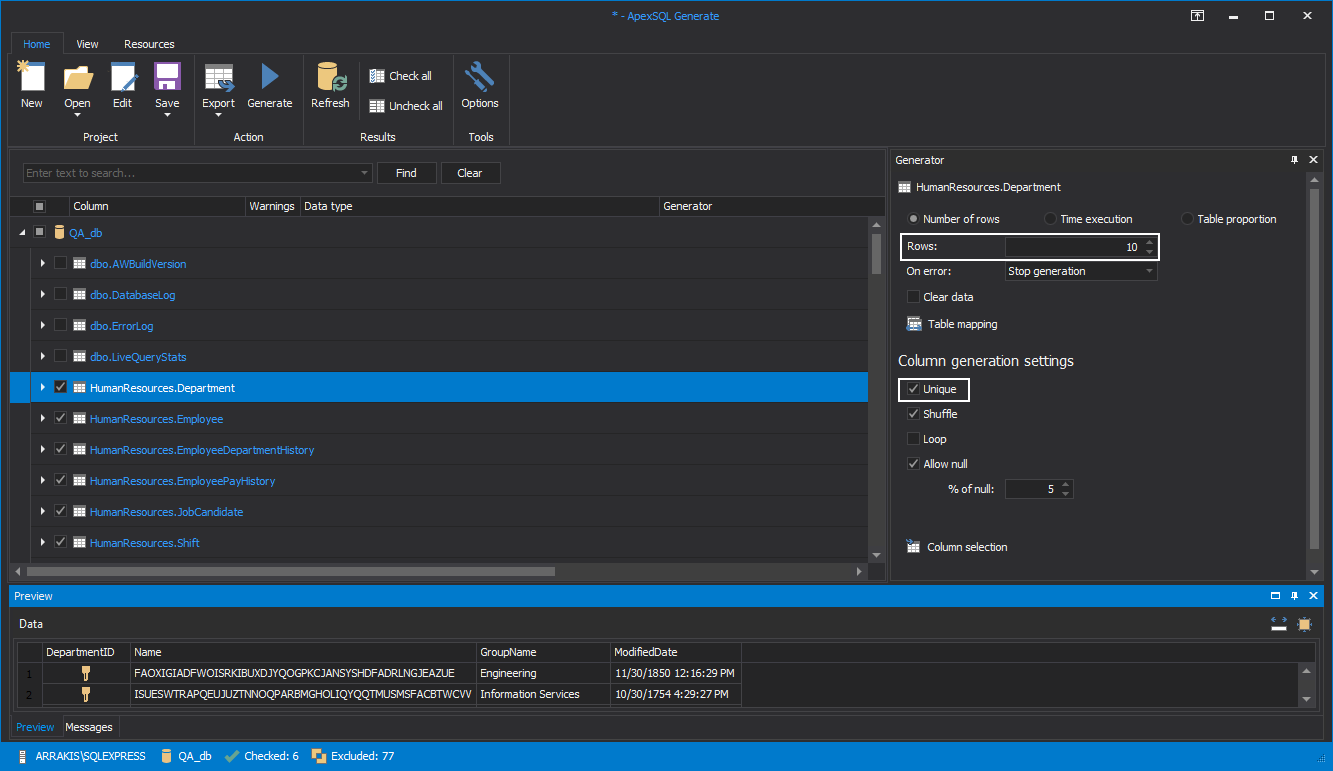
Finally, set the specific options for some tables. For example, one table has to have unique set of data and only 10 rows are needed for successful test.
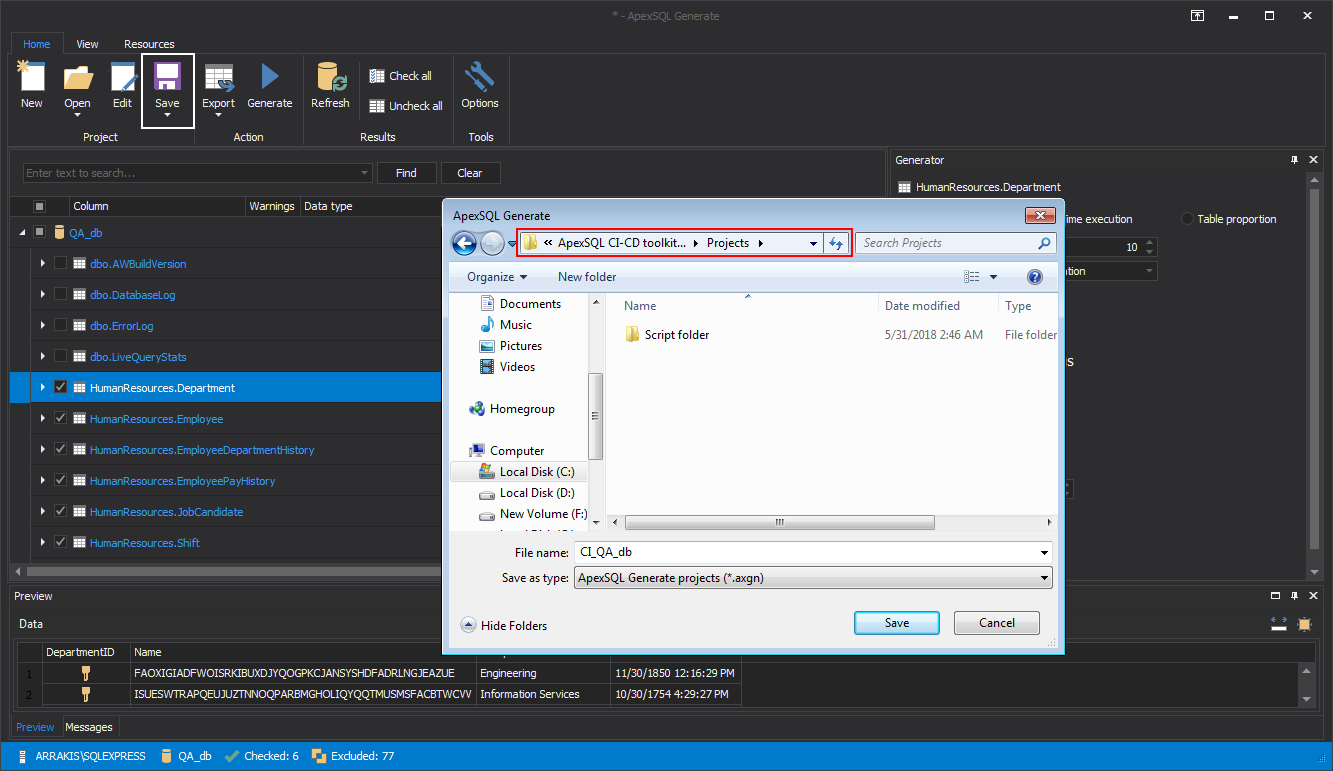
With all settings done they can be saved in the project file in the ApexSQL DevOps toolkit project folder.
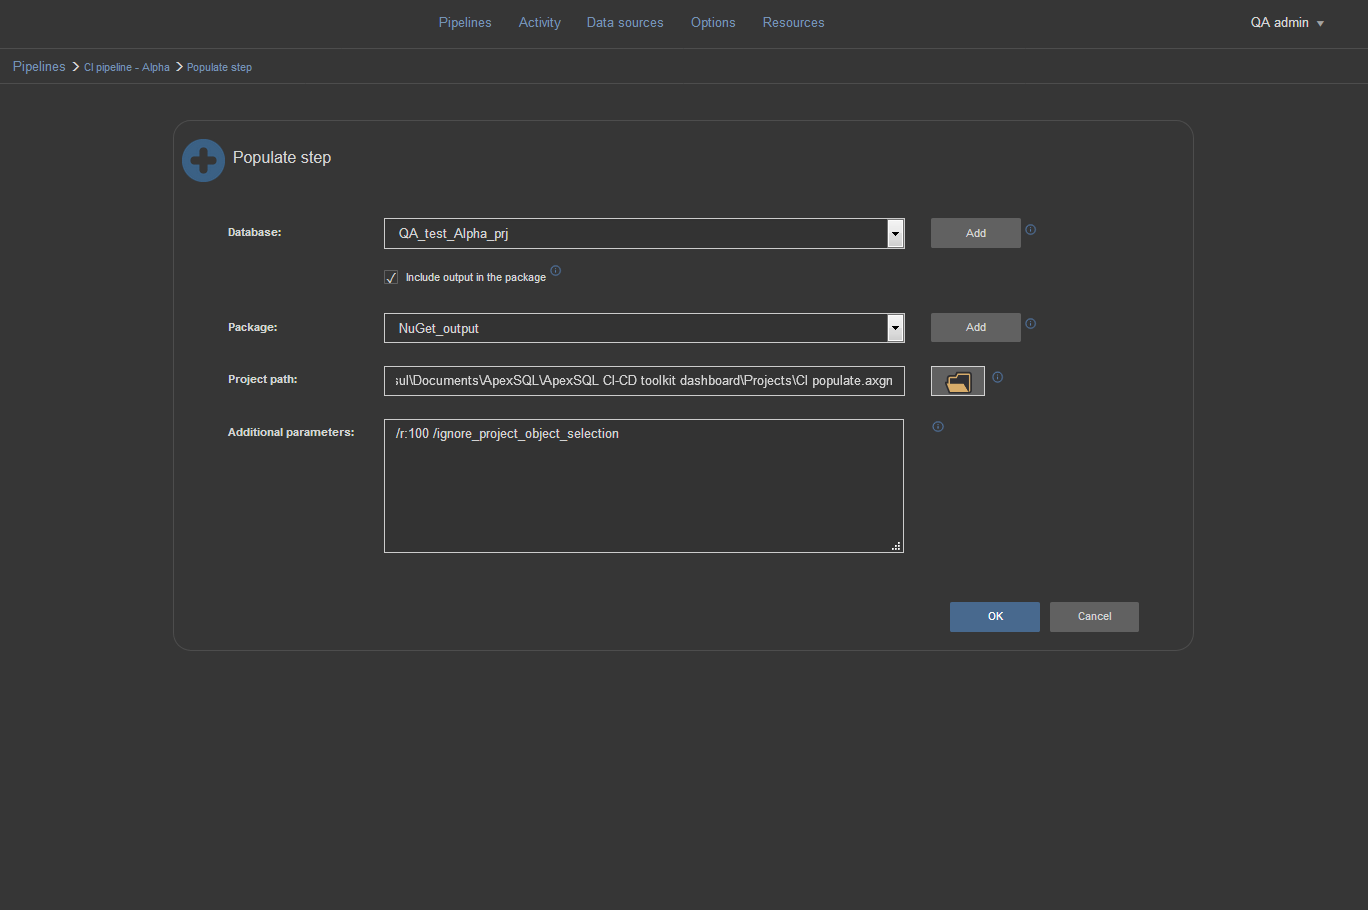
To create populate step in ApexSQL DevOps toolkit -Web dashboard we need to drag and drop the Populate icon in the pipeline steps list to open the Populate step configuration view. In the configuration view test database needs to be selected as data source. Also the option to include output in NuGet package should be selected and output pointed to the NuGet data source.
After that we will include our previously saved ApexSQL Generate project file with the objects selection and the row number settings
This time we want to ignore just the object selection from the project file and include all tables to fill them with generated data. To do that just insert the /ignore_project_object_selection switch in the Additional parameters field. Those selected objects in the project file will retain their specific settings but for the additionally included objects the global set of options we configured in the ApexSQL Generate will apply (100 rows, up to 5% of the NULL values, fill only empty tables).
Note: For detail information on available option switches for the Populate step see the article ApexSQL Generate Command Line Interface (CLI) switches
We may need to occasionally update our simple project file to set reasonable row counts for certain new tables. The tookit API will pick up these row level values from the project. Of course, for better test results using higher quality test data, each table should be configured explicitly to ensure that the test data is as realistic as possible.
Test step
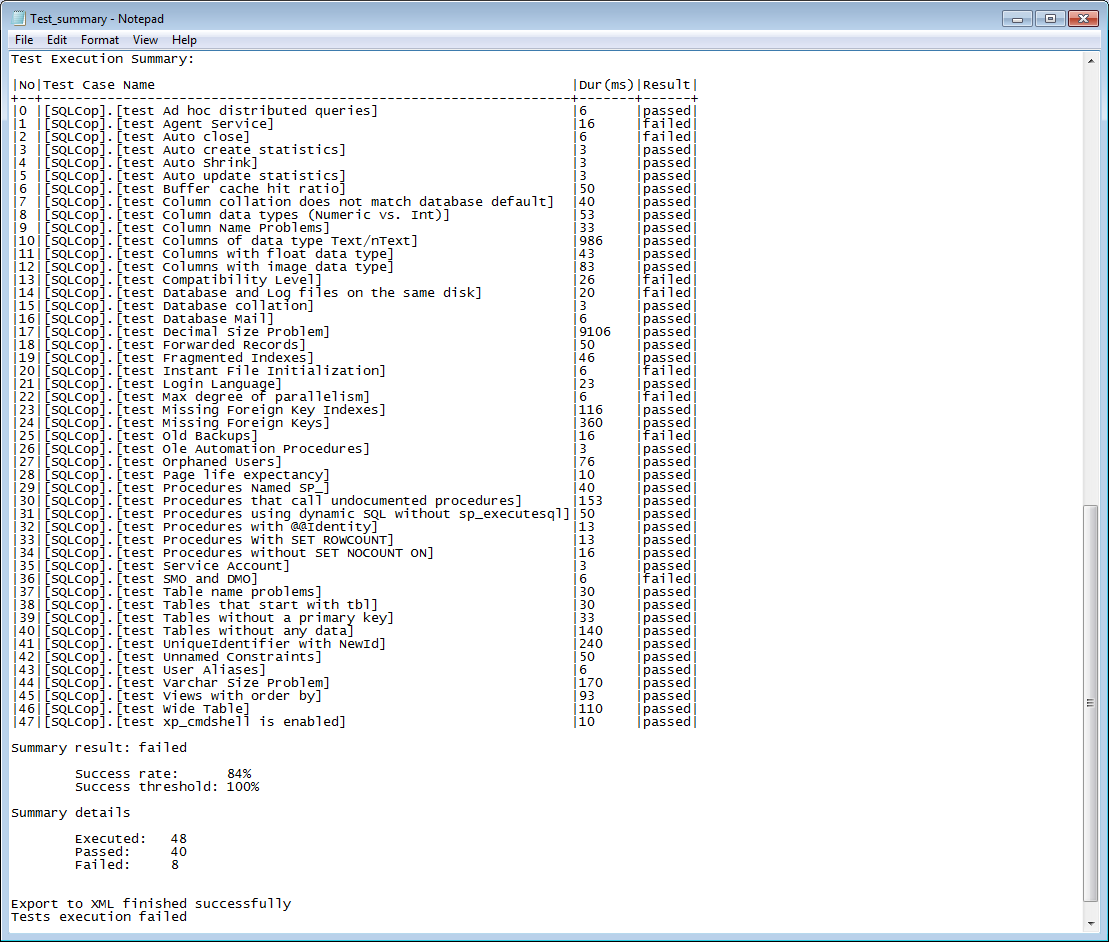
This step will install tSQLt framework on to test database selected from the Database selection menu. In case there are no previously created unit tests for the specific database the SQL Cop set of 48 predefined tests can be installed and run upon the step execution. In case we want to use a specific set of tests contained within the test class we previously created, we can simply type the name of the test class and those tests will be run against the QA database and generate the report.
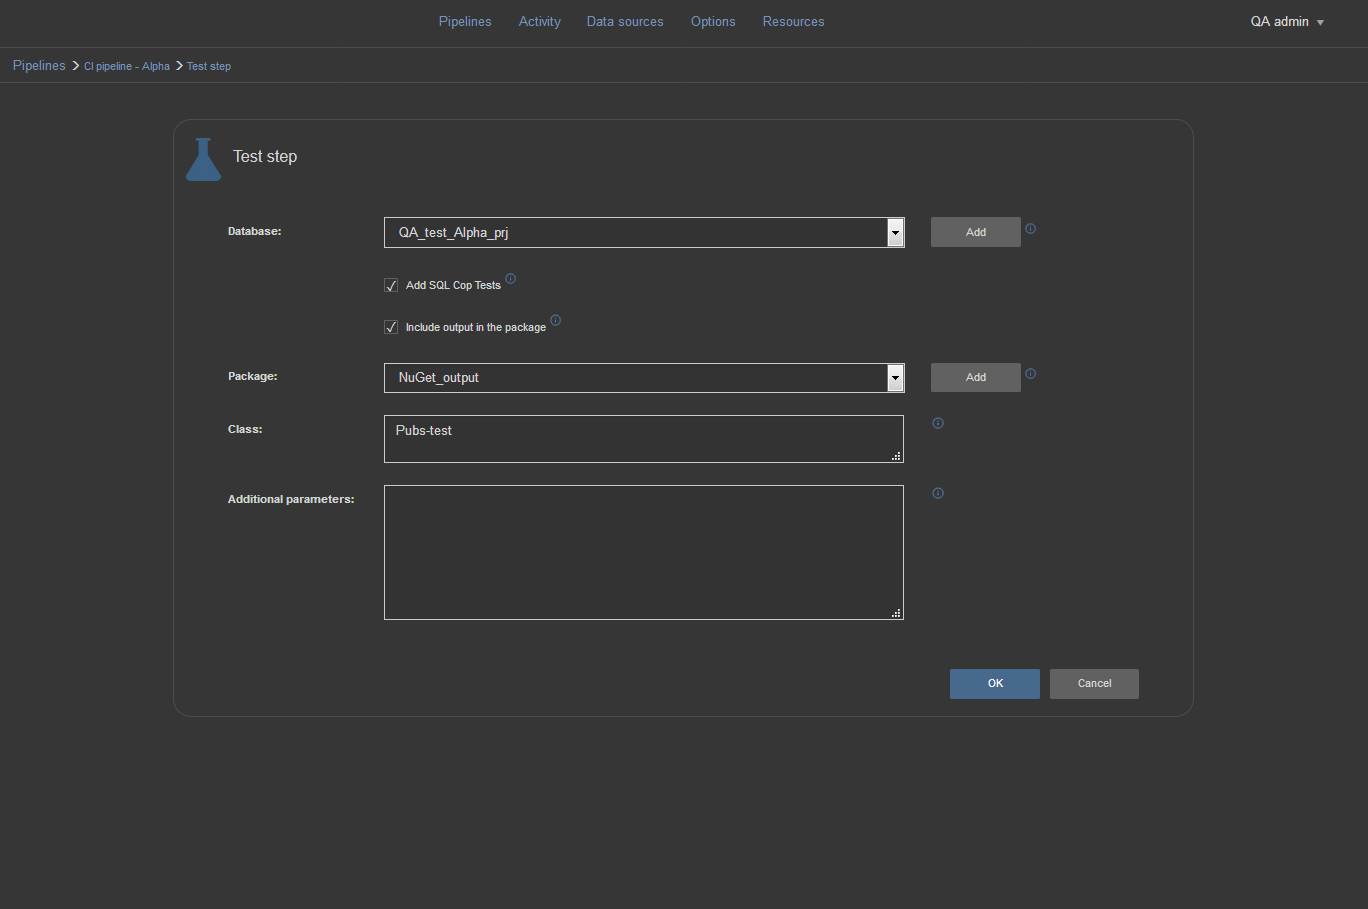
The report will show which tests have passed and which ones failed and will be included in the NuGet package if that option is selected.
Note: For more details on the Test step and Unit test see the article “SQL Server database continuous integration workflow TEST step – Running SQL unit tests against the changes”
Review step
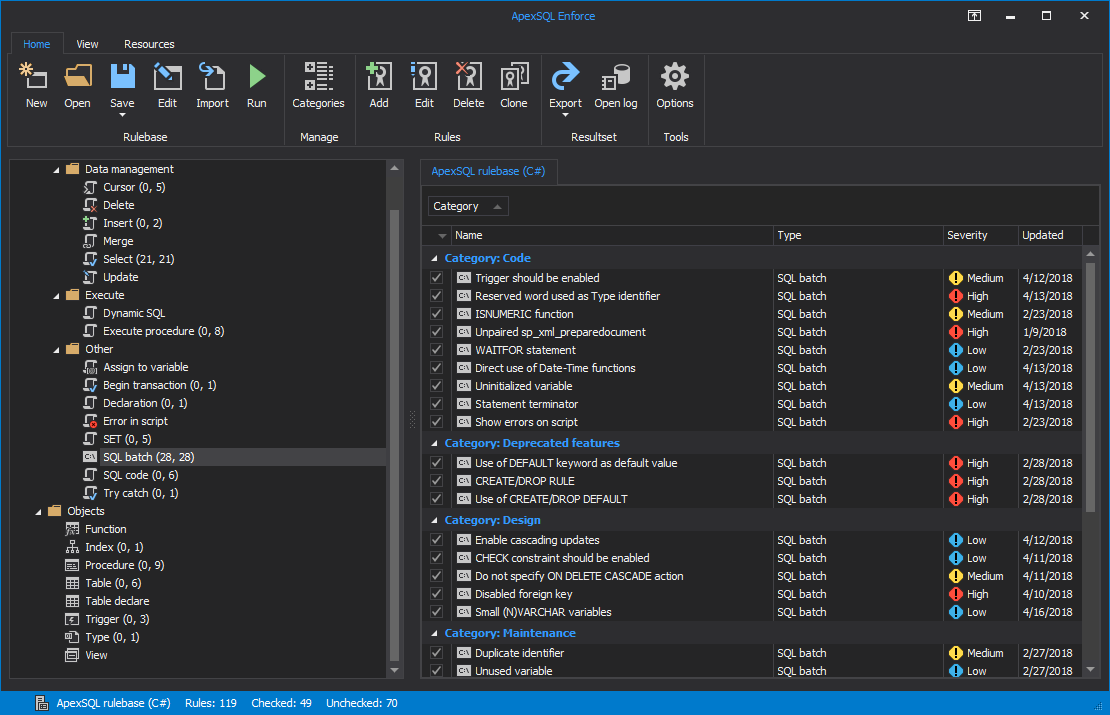
Review step is very useful step for the QA examination of the database changes. Through this step we can check if the changes follow the SQL code best practices. Before review we need to design set of rules using ApexSQL Enforce application and create the rulebase that will be applied in the review step.
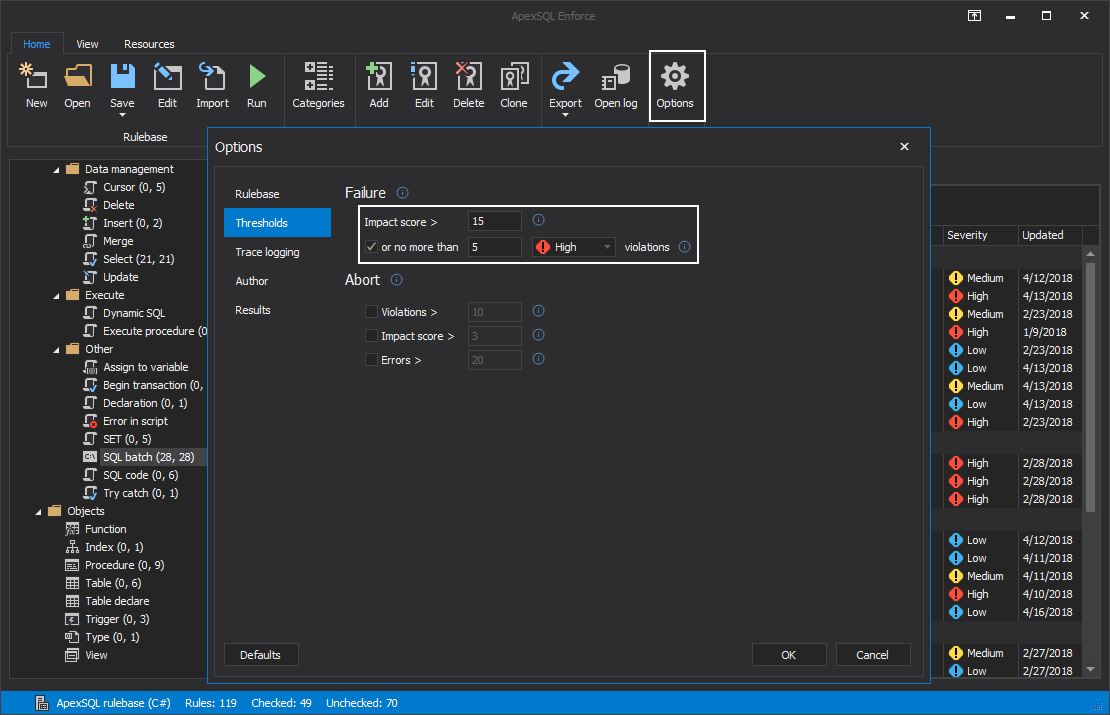
The review failure threshold can be customized with the rulebase. That means if to many rules are broken (total impact score exceeds the threshold) or if specific rule is broken (with high impact score, the Review step will result in failure and stop the pipeline further execution.
Note: see the article “How to fail at running rulebases” on customizing the impact score threshold levels
Note: for more details on how to select the set of rules to form a custom rulebase see the article “How to enforce best practices rules against your database”
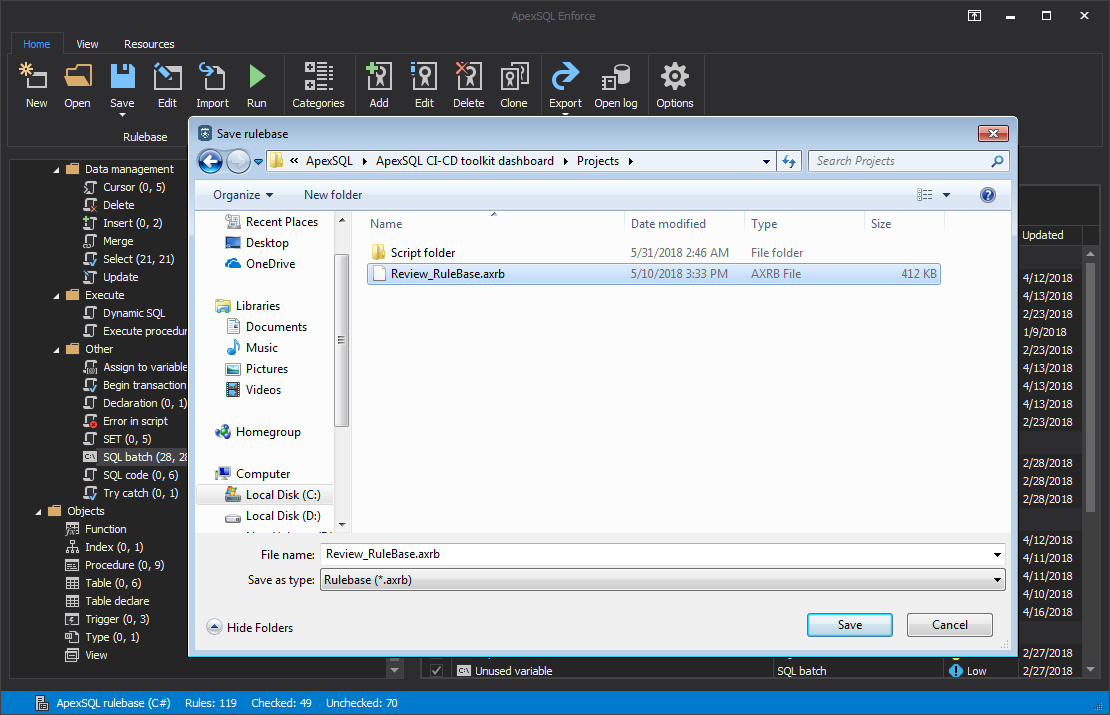
When customization of the rulebase is completed, we need to save the rulebase file in the Web dashboard project folder to be able to be consumed by the Review step.
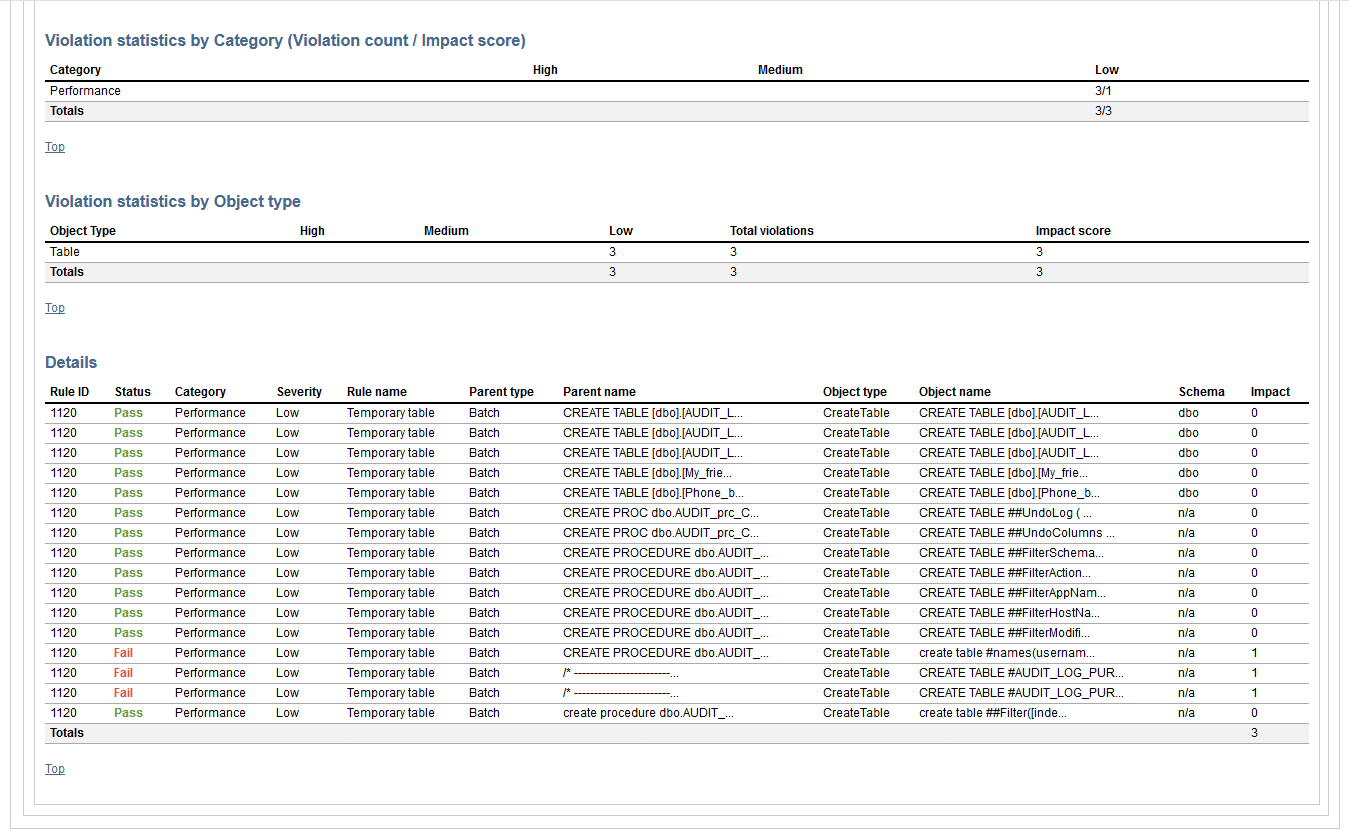
That’s where the generated review report becomes handy. The report will contain the complete list of defined rules, list of objects that specific rule apply to, and the success status for every object. That way the developer can easily correct the issues and commit the corrections to the continuous integration pipeline and expect for review step to be successful.
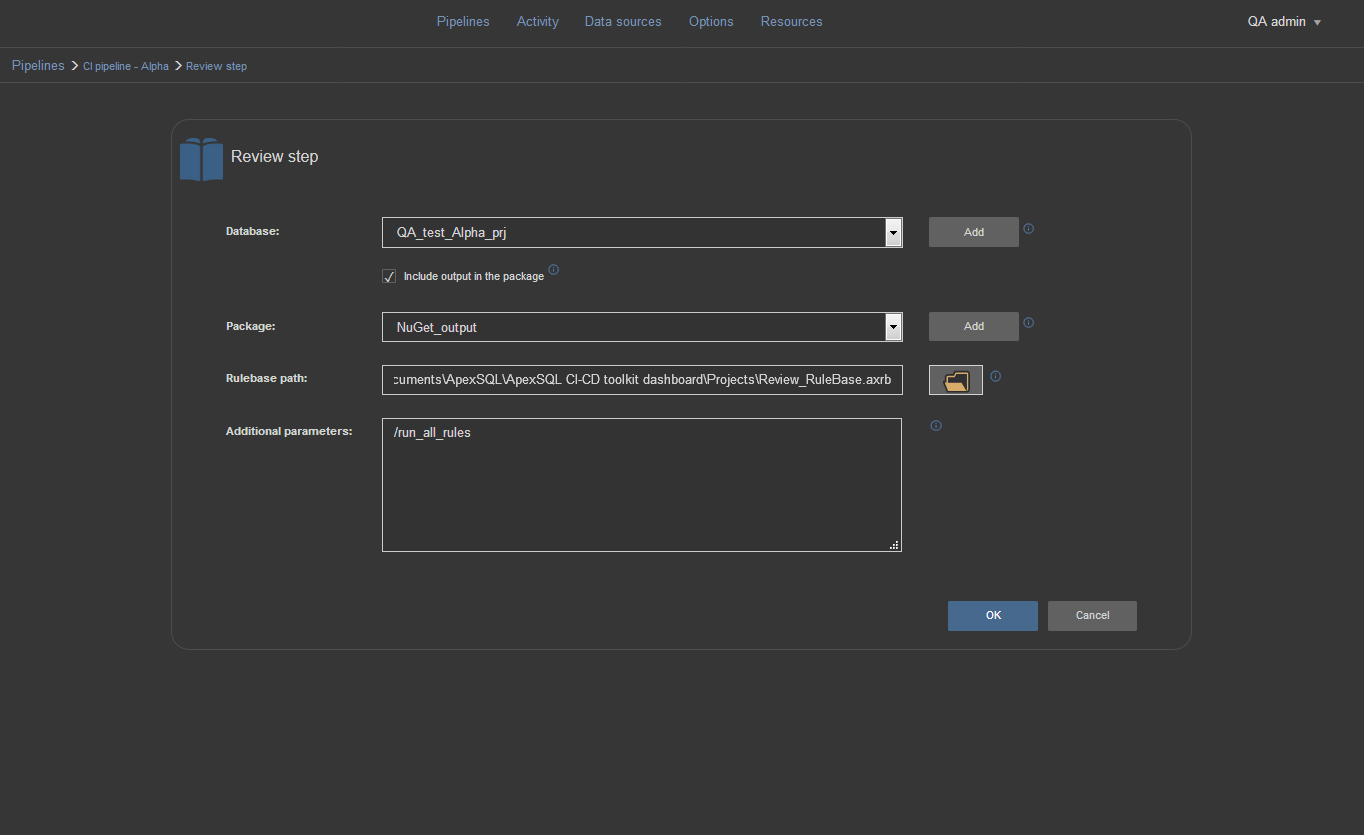
To configure the Review step, choose the proper test database from the Database selection menu. Check the “Include output in package” option to store the report in the NuGet package picked from the Package selection menu. We can now enter the path for the rulebase file in the Rulebase path field which will be used for review. Optionally, in the Additional parameters field we can enter /run_all_rules switch to ignore the selection of rules saved in the rulebase file and check all available rules.
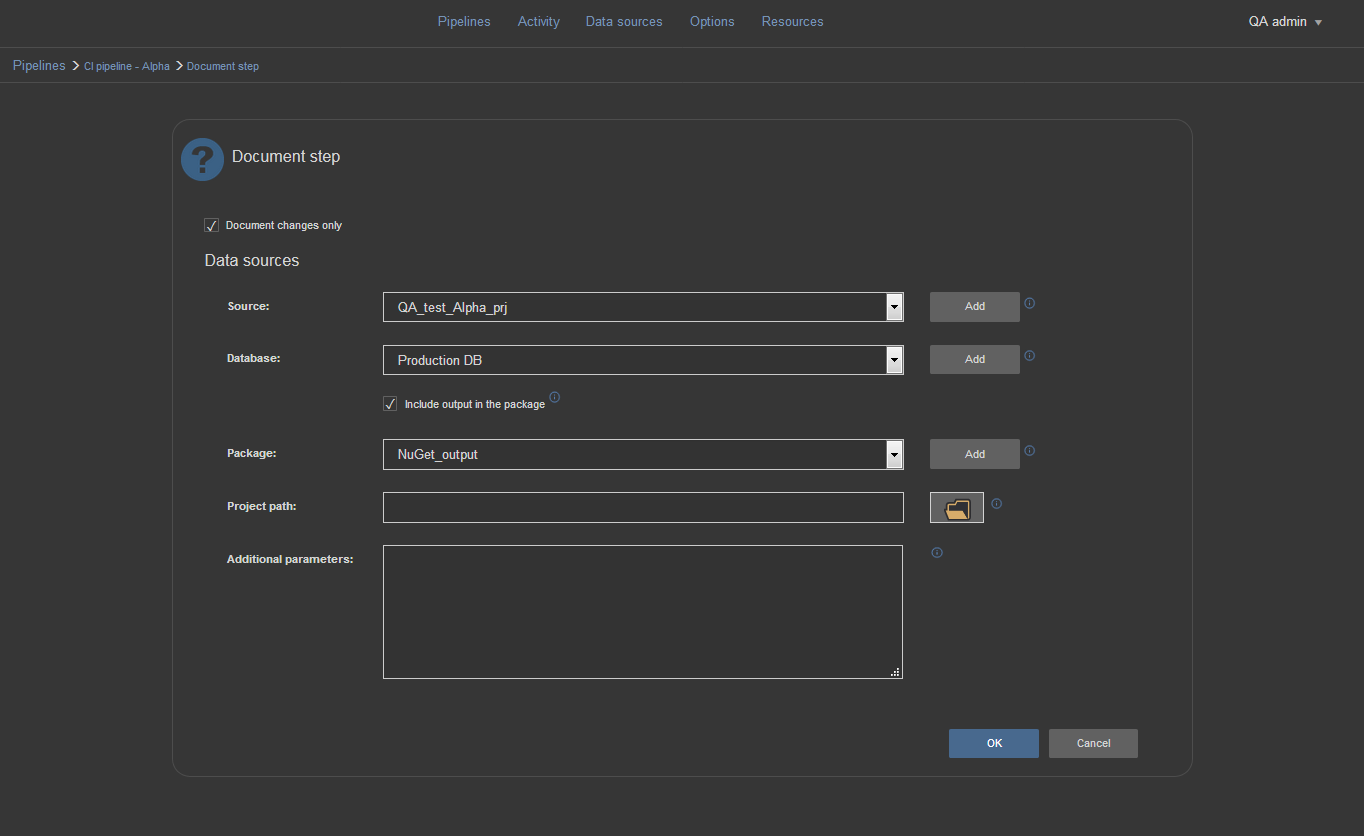
Document step
The Document step will create database documentation. Used with the option for differential documentation the step will compare our test database that contains changes against the production database that awaits updates. The result will be documentation that contains only objects that will be updated and what is changed in them. In this form, the documentation is more suitable for later examination.
Note: for more details on differential documentation of databases see the article “Documenting individual build changes (vs an entire database) in a SQL Server continuous integration pipeline”
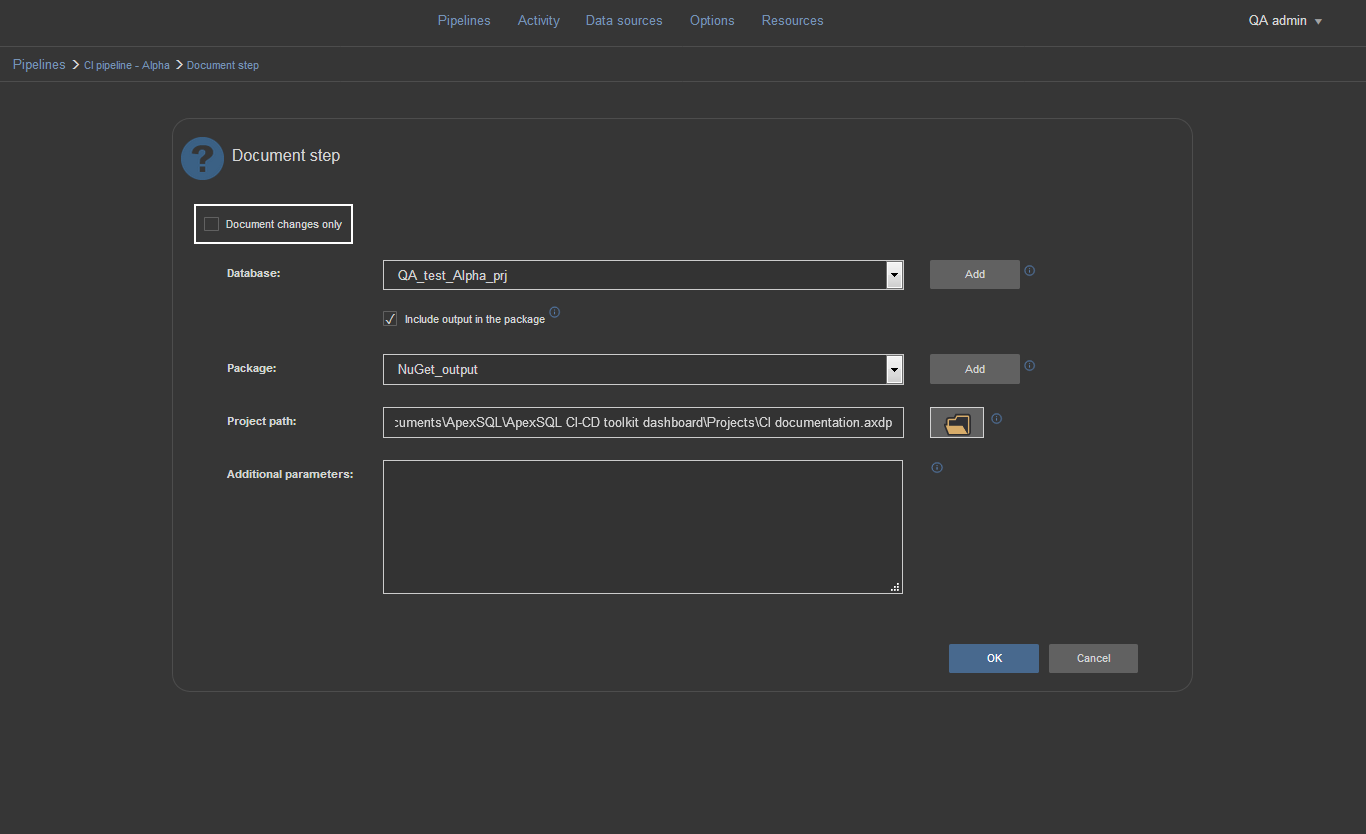
To configure the Document step for full documentation you would need to leave the “Document changes only” option unchecked. Then choose the database to document from the Database selection menu and include the documentation output in the package. Finally, we can include project file to exclude some objects and properties from documentation.
To customize the documentation, we will use ApexSQL Doc application. First we connect to SQL Server with Add database option from the main ribbon menu and choose the SQL Server instance in the opened dialogue window.

Then, from the database list in the Database engine view we choose the database to document it.

Next, we open the Database objects tab, which can be found in the menu located on the left side of the application window. In this tab, there is the list of objects
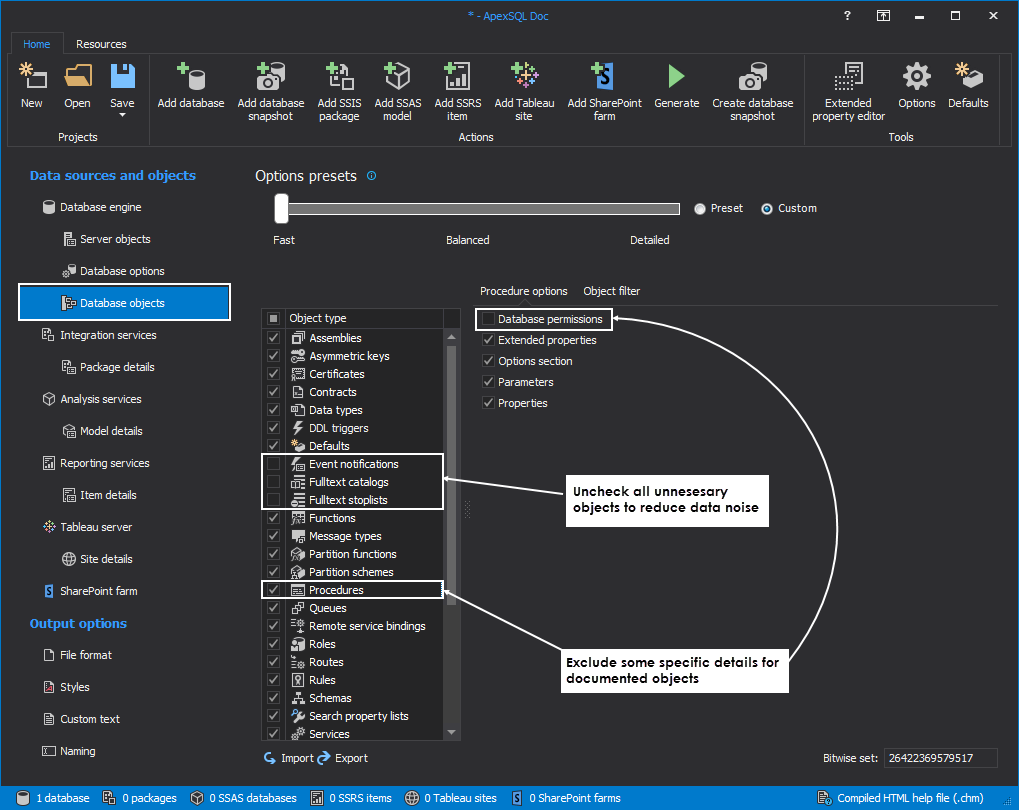
Finally, we will save the project file to the Web dashboard project folder.

We can always later ignore the selection of objects by adding /include:26422370103805 switch with full bitwise set which means that all objects will be included in documentation.
Now, for the differential documentation, we actually don’t need the project file. It is enough to check the “Document changes only” option and now two fields for data sources will appear. From the Source selection menu we need to choose the QA database and in the Database selection menu we need to point to the production database.
The output file will document what is going to be updated in the production after the synchronization.
Note: see How to use bitwise set in ApexSQL CLI on how to configure additional include/exclude parameters;
Note:See ApexSQL Doc Command Line Interface (CLI) switches on available options for additional parameters
Running the pipeline
Now that all of the steps are configured, we are ready for our new pipeline to take flight. Let’s trigger it manually and see the results.

We can see that each of the steps executed successfully but to verify let’s check out our email notification.
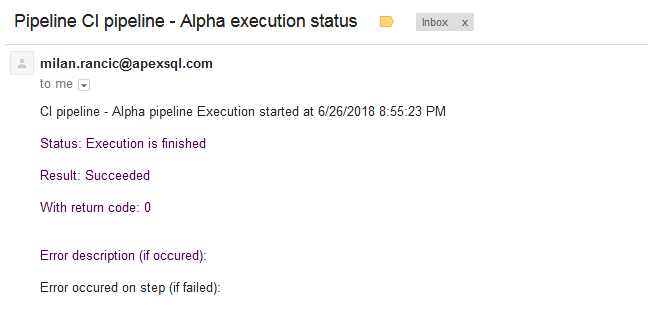
To double-check let’s look in the folder location for all ApexSQL DevOps toolkit outputs files, and then let’s open and review each of the summary files from each of our steps including Build, Populate, Test, Review and Document to note the return codes. All return codes should indicate Success.
Finally, let’s review the reports and documentation to see a high level summary of the pipeline. The default folder path for all outputs is “C:\Users\Username\AppData\Local\ApexSQL\ApexSQL CI-CD toolkit dashboard\UsersData\” which can easily be changed in the general options view. At the given path we will find the NuGet package if we chose to include outputs in the package.
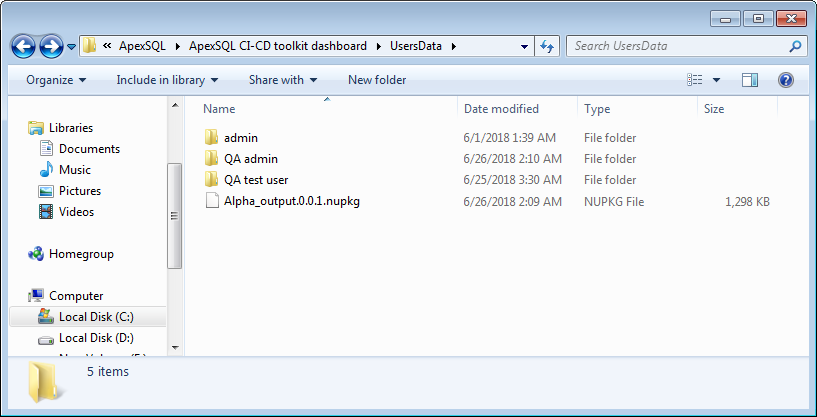
The rest of the folder content will be Web dashboard user folders each containing the corresponding user’s pipeline output files
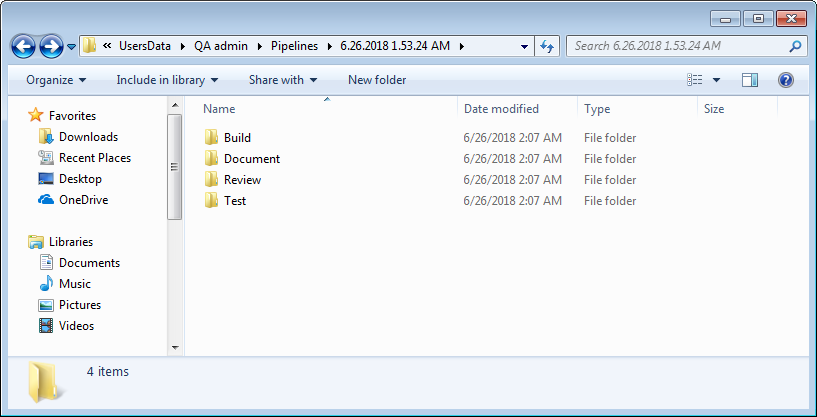
From here we can review the changes through generated reports.
From the Test step:
From the Review step:
And from the Document step:

Conclusion
We’ve shown how to configure a pipeline, build and save project files to determine the behavior of individual pipeline steps, create the steps themselves and finally how to execute the pipeline and review the results.


