


Introduction
The ApexSQL DevOps toolkit is a database continuous integration and continuous delivery workflow designer. It consists of customizable steps which allow creating pipelines for building a database from source control repository, test and review database project changes and deploy them to update a target/production database. The steps represent basic elements of the workflow design and use a set of SQL Developer tools for the workflow execution.
ApexSQL DevOps toolkit has the capability to integrate pipeline steps into Azure DevOps Server (TFS) / Azure DevOps Services environments and use that environment for database CI and CD workflow automation. With the ApexSQL Developer tools installed on the premise where the build agent is hosted it will provide for most of the needs of a database lifecycle infrastructure.
The plugin functionalities are identical in Azure DevOps Server (TFS) and recently available Azure DevOps Services but for the sake of the easier illustration the environment will be referred as Azure DevOps Server (TFS) in further explanation.
Installing the plugin
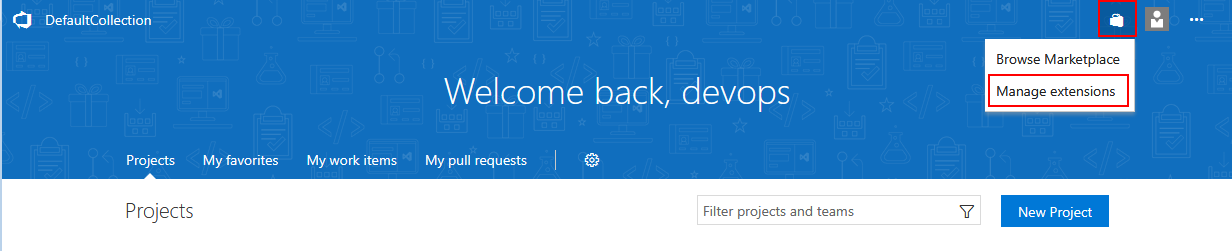
Installation of the plugin is done in a usual manner through Azure DevOps Server (TFS) extension manager. From the home page find the extensions icon and select the Manage extensions option.
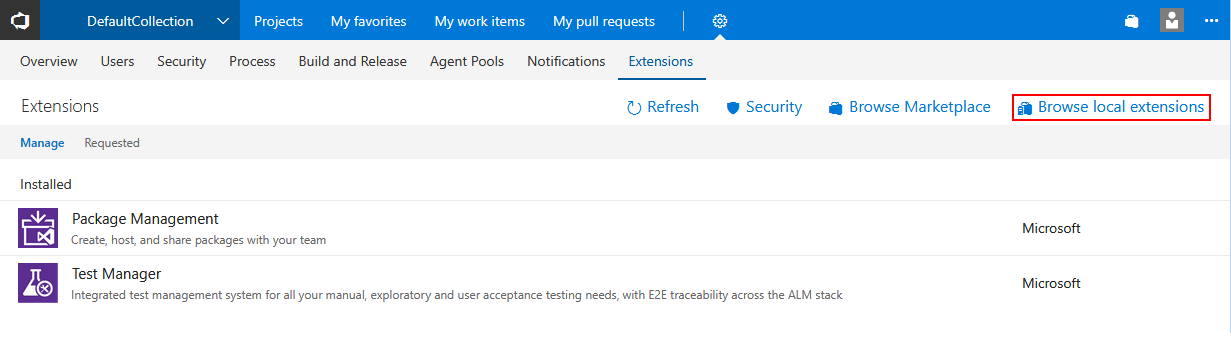
Then go to Browse local extensions page.
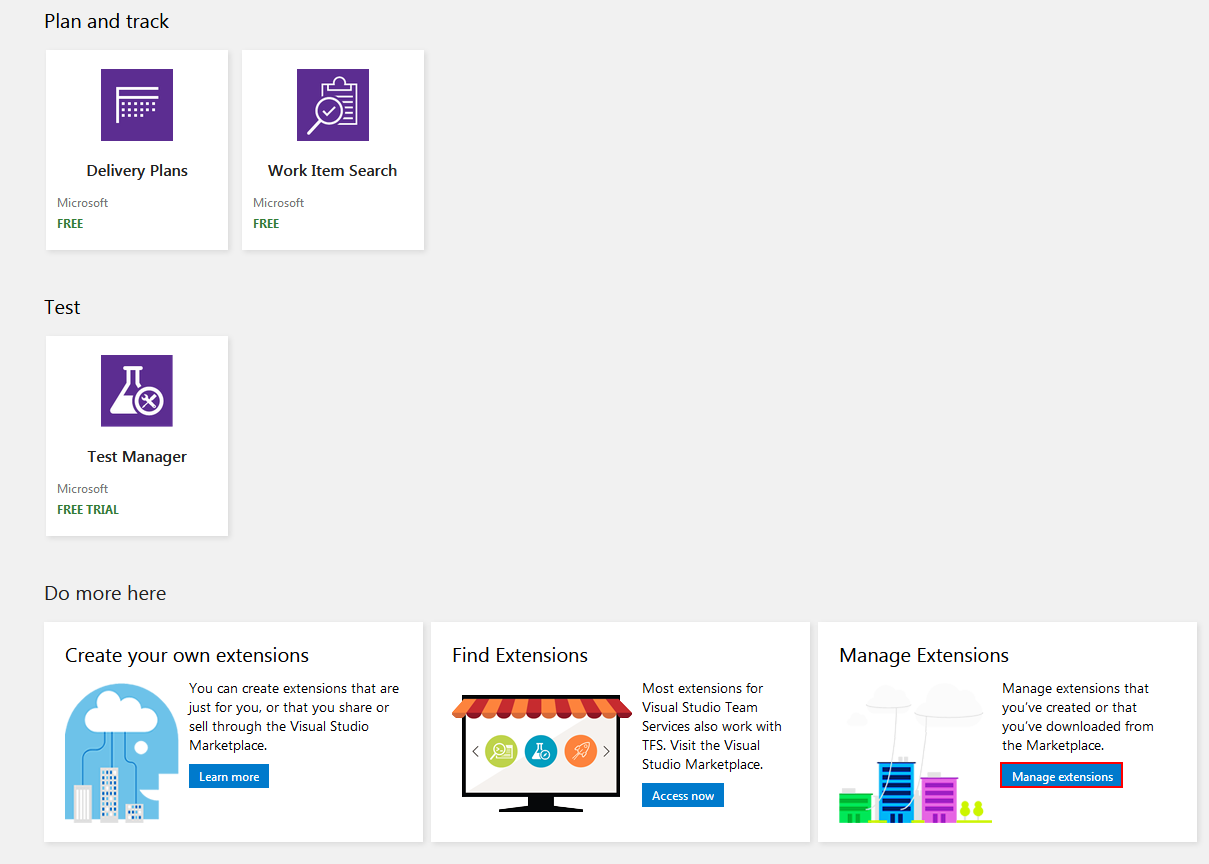
Scroll to the bottom of the opened page and find the Manage extensions button.
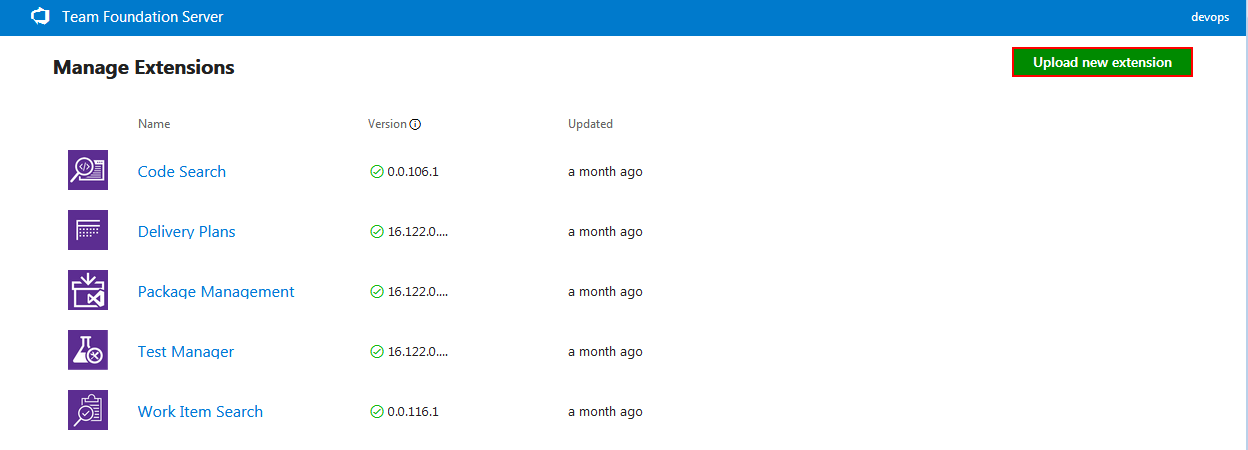
This will open the host TFS extension manager where Upload new extension button should be selected
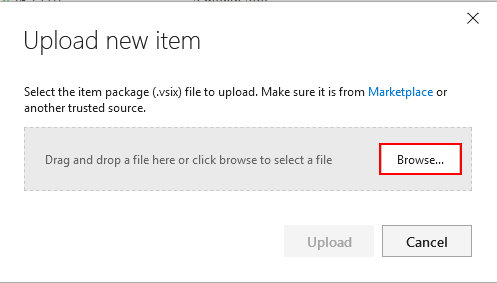
This action will display small popup window where previously downloaded plugin file should be imported by drag-and-drop or through a folder browser
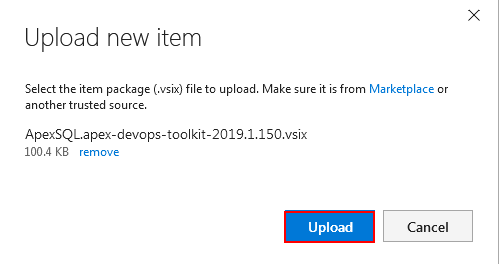
Find the plugin file and confirm with the Upload button
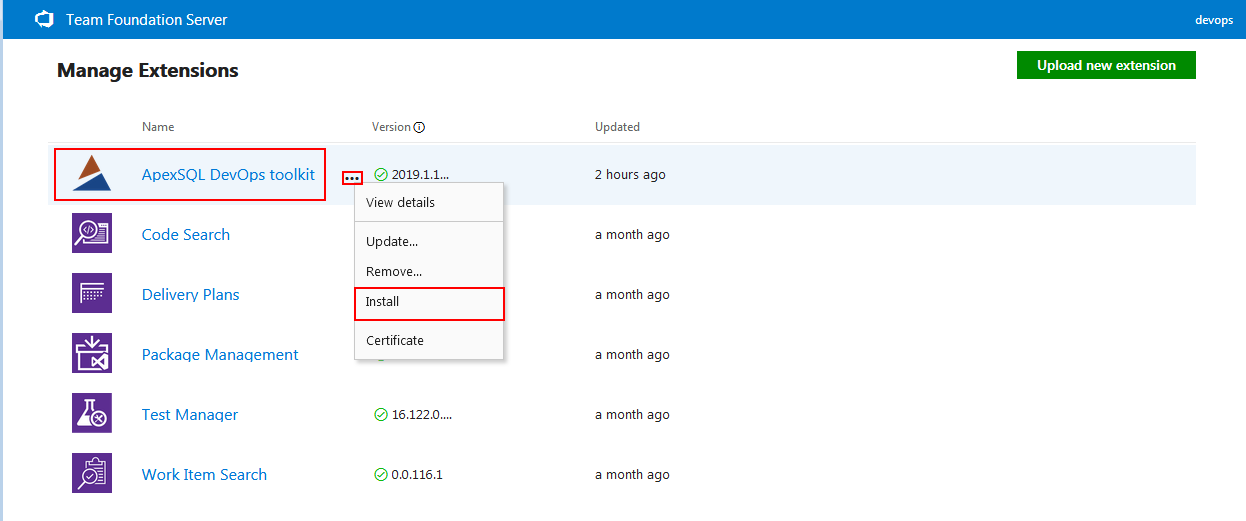
Now the ApexSQL DevOps toolkit will be listed in the TFS extension library where from the context menu Install option has to be selected.
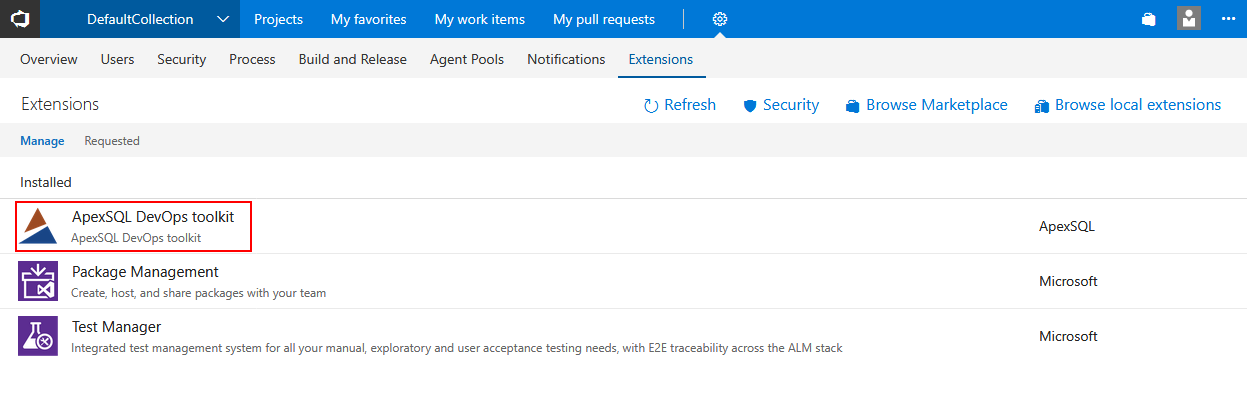
Switching back to the hosted Azure DevOps Server (TFS) will also display new extension installed
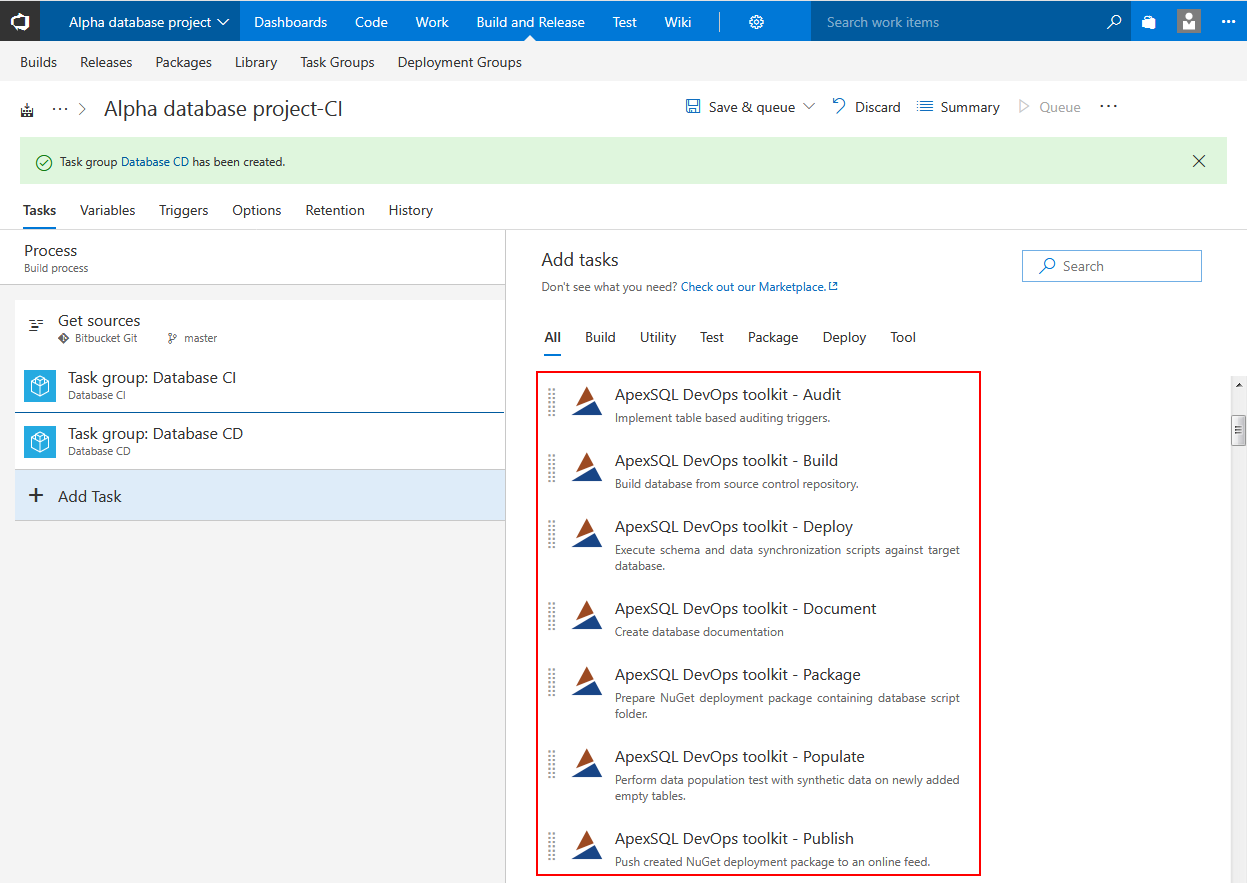
With the successful installation the ApexSQL DevOps toolkit named tasks will be available in task library to be used as pipeline steps.
Starting new database continuous integration project
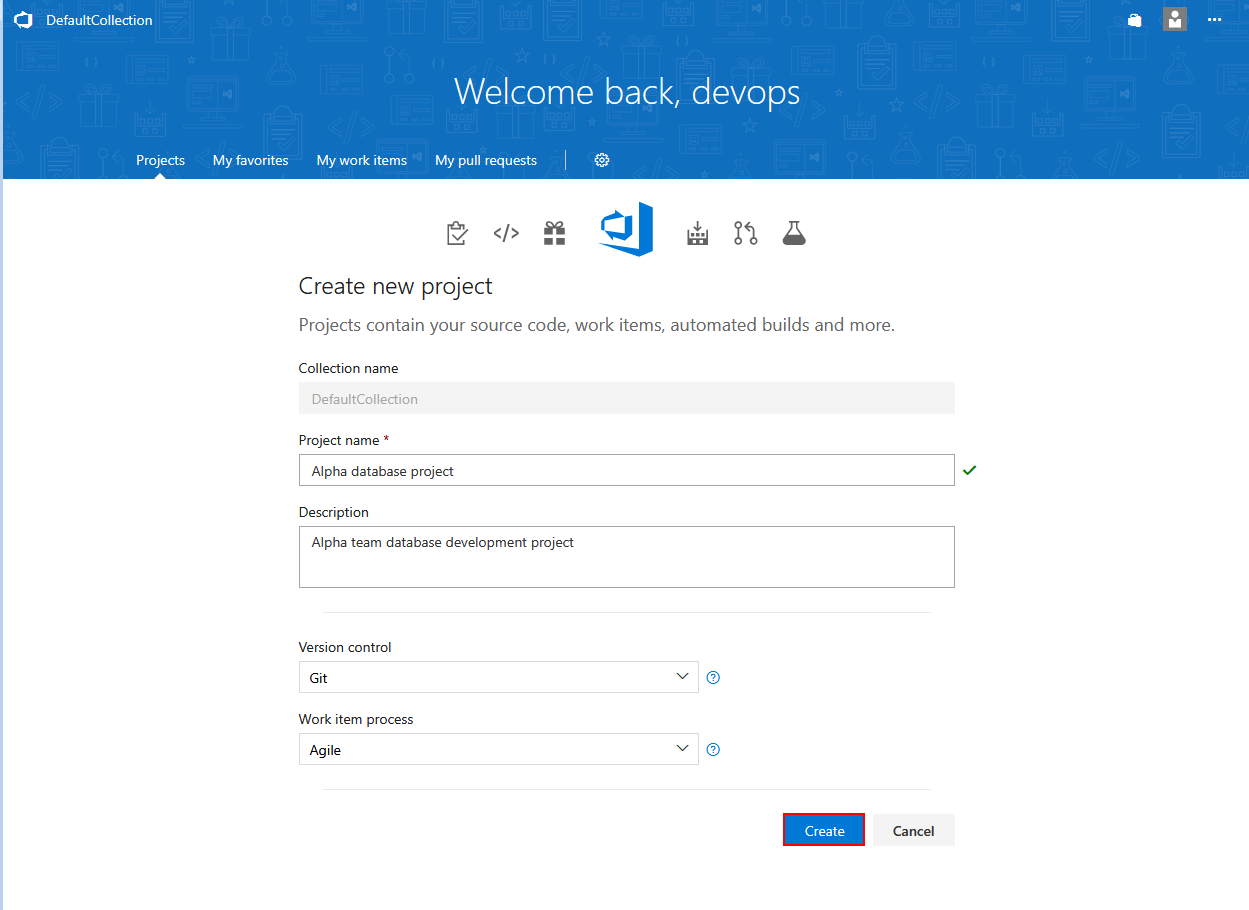
To start configuring new project, from the Azure DevOps Server (TFS) home page use the New Project button.

This will lead to the page to set general project attributes like project name and description or integrated source control type which should be confirmed with Create button.
The project start page where the project source control repository integration should be set.
The Plugin will work seamlessly with locally hosted repository but in order to demonstrate the versatility of the build possibilities an external repository will be used as example.
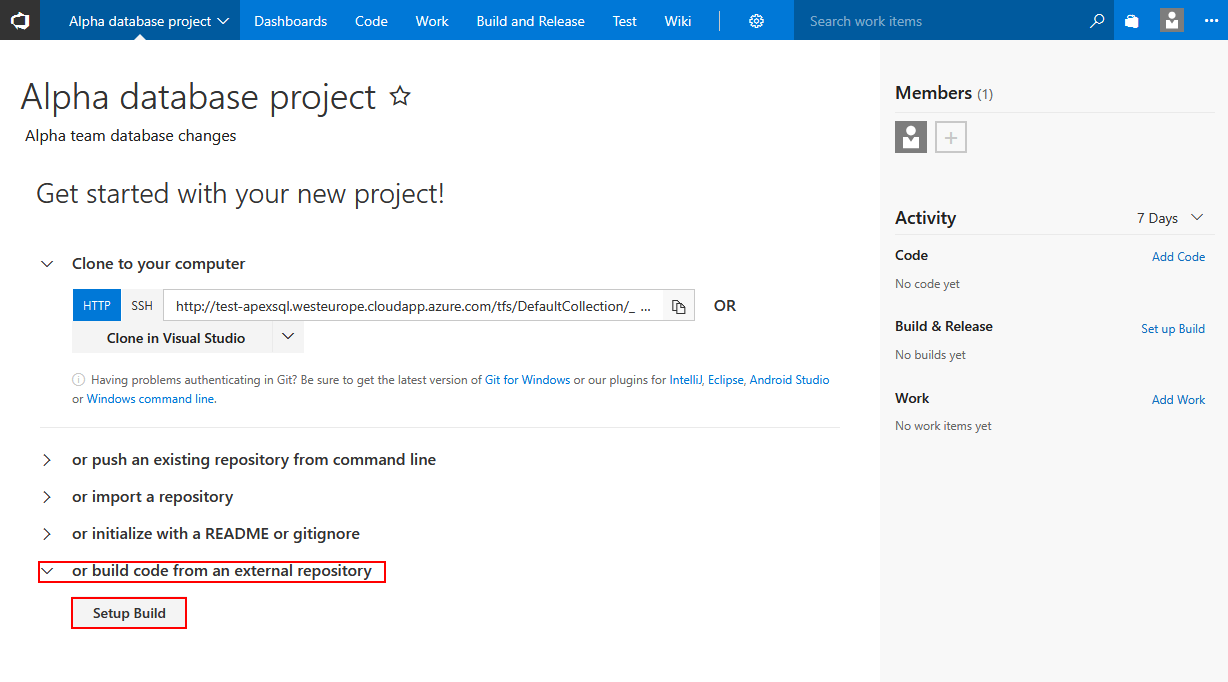
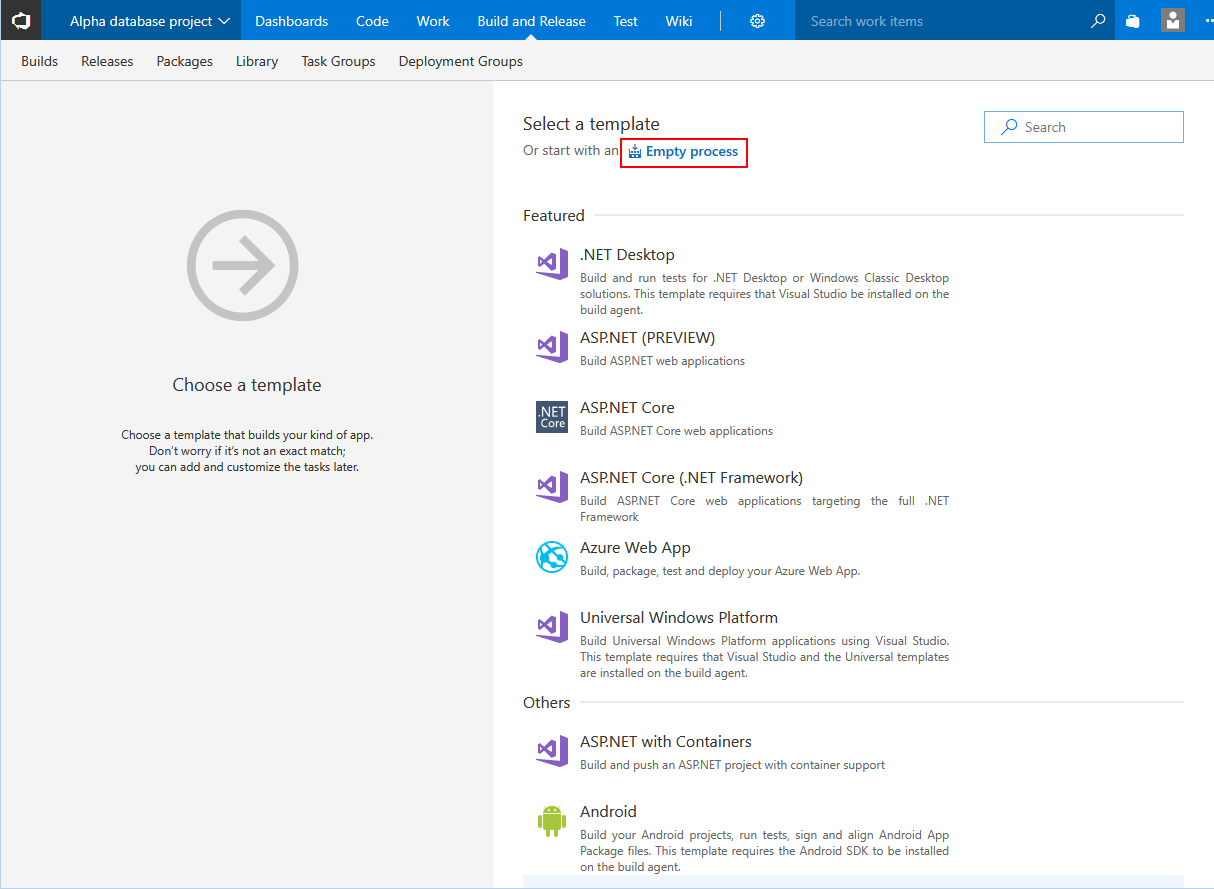
Moving on to creating the New definition for the build.
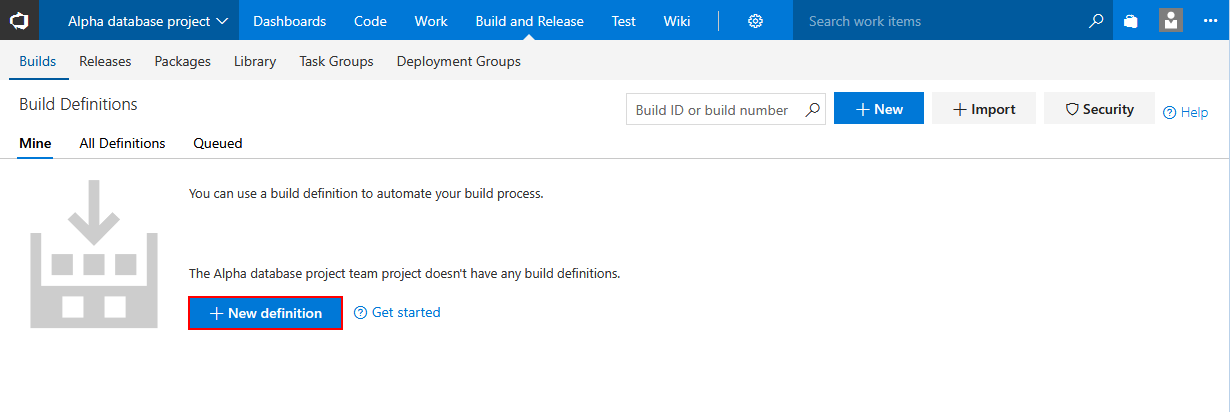
No existing template is needed so starting with Empty process will be the proper choice.
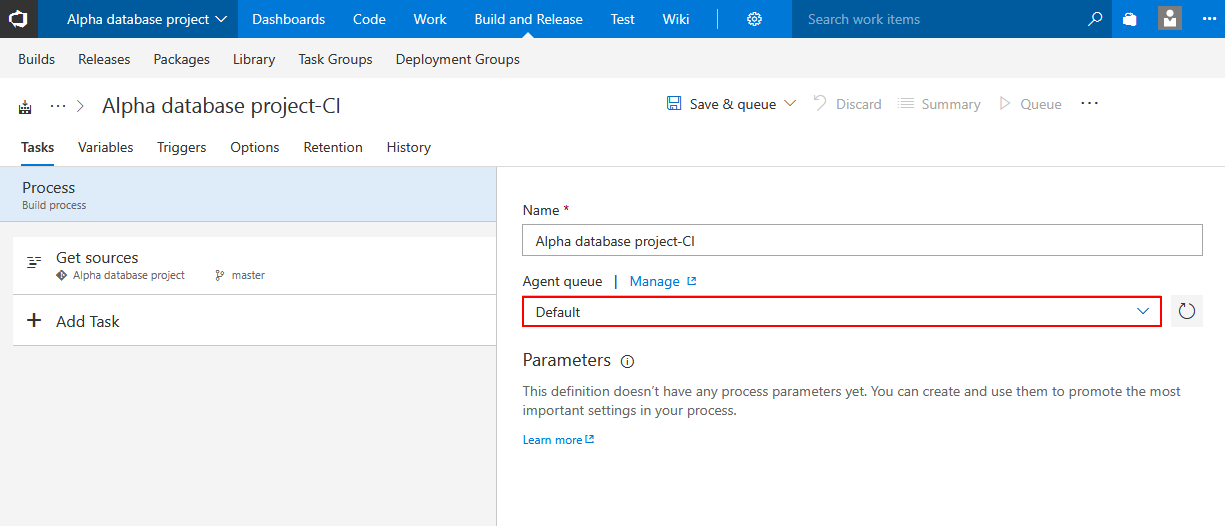
The first step in configuring the build definition is to associate build agent from the agent pool. This agent should be located on the same machine where applications from
ApexSQL developer bundle are installed so it can execute them according to saved build definition design with ApexSQL DevOps toolkit steps.
Switch to Get sources task, which is initial task present in the build definition by default. Select the Remote repo option and if connection parameters were already saved in some other build definition for this Azure DevOps Server (TFS) project there should be a list of repositories present to choose from. If that is not the case, create new repository connection with Add connection button.

Enter the connection parameters to desired repository and confirm.

After this the database project source is ready and adding ApexSQL DevOps toolkit steps can begin.
Configuring continuous integration steps
Build step
This is mandatory step in case deployment package with database changes is needed to be prepared. Execution of the step starts ApexSQL Build in the background through CLI with the string of arguments defined in the options through UI. The step will build a database from the code found on chosen source control repository. This action will validate the code by checking the object dependencies and test the buildability of new database version. With the created database various tests can be performed using other ApexSQL DevOps toolkit steps in the build definition design.
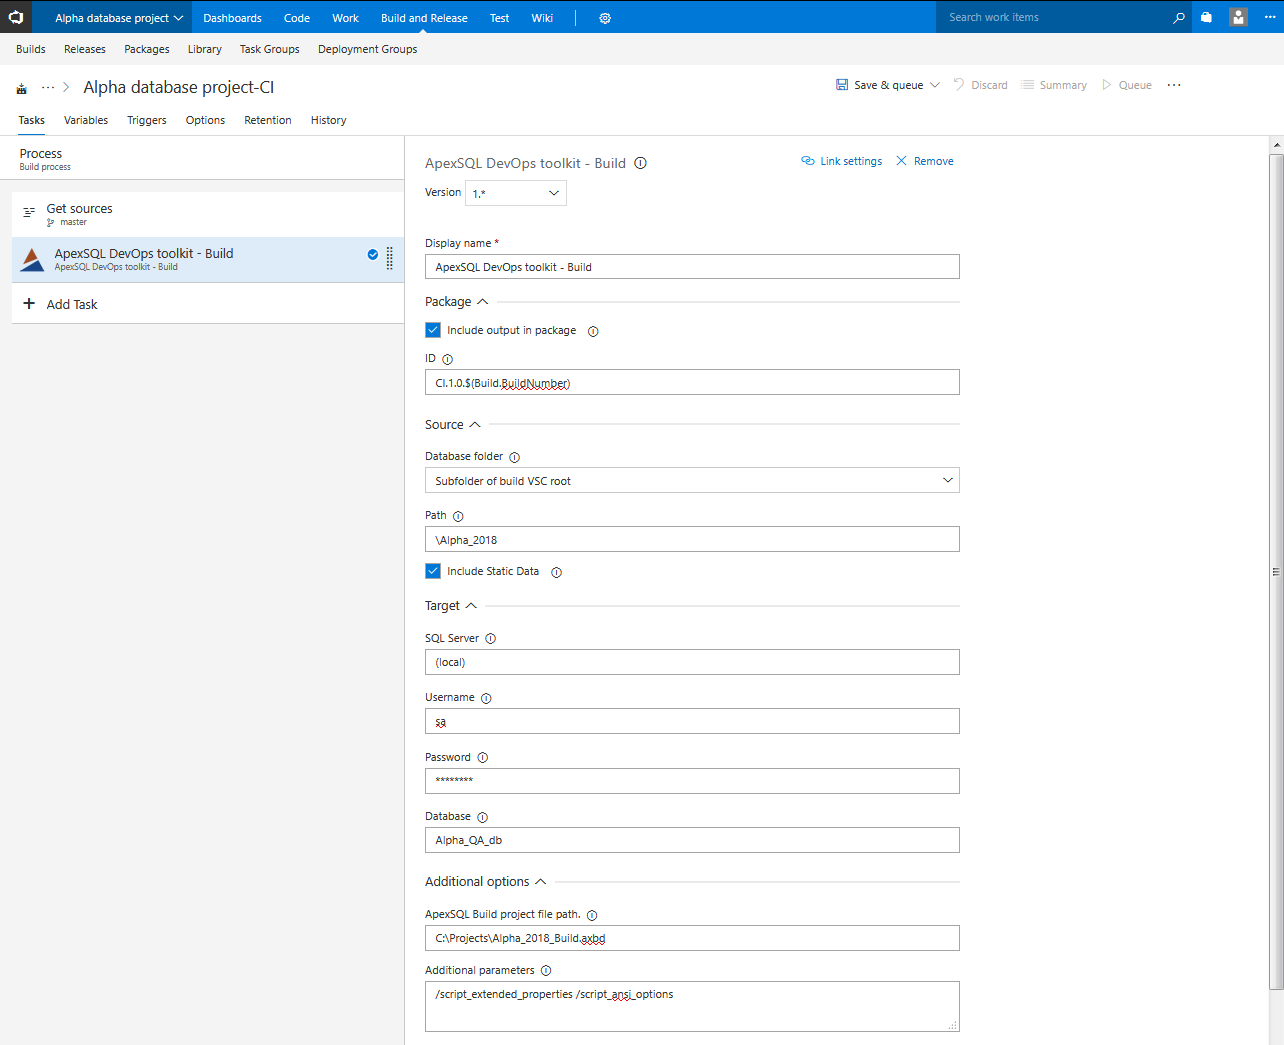
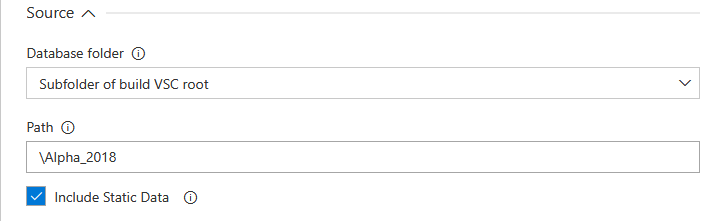
Build step configuration starts with the source location option. There are two possible scenarios, one is that database structure is located on the source control root and in that case Build VCS root should be selected as source. In other case database structure is located on some custom subfolder path so Subfolder of build VCS root will have to be selected and then the path to database folder in the repository typed in. This will also ensure that correct database project will be used as source in case there are more in the same repository.
In case there is static data scripted in the repository that needs to be built and later deployed the Include static data option should be checked.
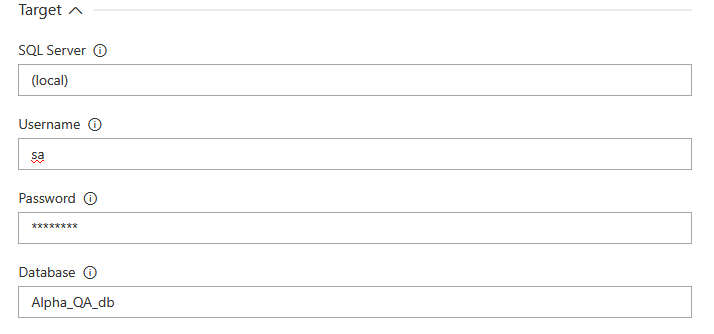
The next set of options will define the location where database is going to be built. For that there are fields in the Target section where SQL Server connection parameters should be entered. For the SQL Server parameter the plugin offers the (local) value by default. Leaving this value implies that the local default instance will be used, and by local, it means that it is present on same machine as Azure DevOps Server (TFS) agent and ApexSQL tools.
Username and Password fields should be filled if SQL authentication method is used for connection to target SQL Server. Leaving the fields blank will assume that Windows authentication method is used.
In the end a Database name should be entered. The database named here will be used for testing purposes in subsequent steps and finally as source to create a deployment package with the Package step. In case a database with exact given name already exists it will be automatically dropped which saves some time if there is a need to execute several consecutive build, otherwise new database with given name will be created.
The options explained so far will create a database as is from source control repository without any user customization.
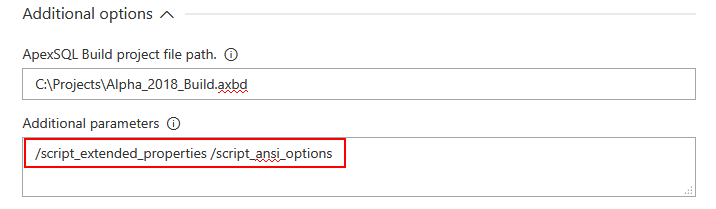
To customize the database build an ApexSQL Build project file can be used and imported in the ApexSQL Build project file path field of the Advanced options section.

The project file can save a template of options created with ApexSQL Build and used instead of the tool defaults (best way to check what are tool defaults is from the tool GUI where all default options can be seen as pre-selected).
With project files multiple use case can be covered. It is possible to create object filters which will specify which objects should be used for the build, for example, only stored procedures, tables, and views can be selected and additionally only specific objects of the mentioned object types. It is also possible to set some global database options like collation and SQL version compatibility. And finally some fine tuning options like ANSI options, object level permissions or index names can be included in the build.
Within the project file a SQL Server and database connection and creation details will also be saved. This means that omitting SQL connection parameters in the designated step fields will result in using those parameters from within project file but including those parameters will override the ones in the project file.
Besides the project file, the Advanced options section contains the field for Additional parameters. This field can be populated with ApexSQL Build related CLI option switches. Those switches represent the same options that can be found in the tool GUI and saved in project file and will take precedence if used in combination with a project file. This means that set of option switches can be used instead of project file or, in more practical use, to change specific option that is already included in the project file without the need to update it from the tool.
-
For more information about ApexSQL Build CLI usage see: ApexSQL Build Command Line Interface (CLI) switches
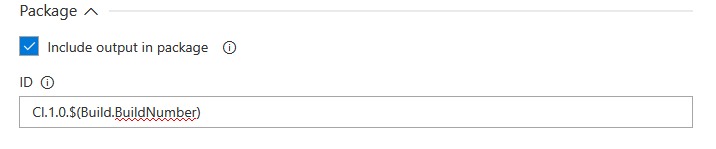
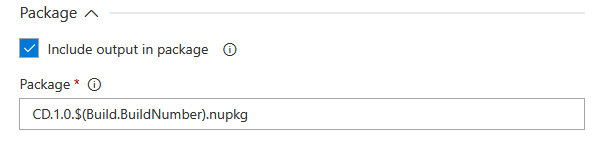
The Include output in package option that was left for the end can be found in all available steps and with this option checked the package name will be required. This will be the name of the NuGet package which will contain step outputs. In the example of the Build step this would be the database build summary which can be reviewed later for control or troubleshooting.
SQL Server connection setting and Advanced options work the same way in the rest of available steps with only difference that project file and CLI options correspond the tool that is used for the step execution.
Populate step
When the database from the repository is built, it can be used for series of testing tasks. The first of these steps is data population. Populate step will find all empty tables in freshly built database and fill them with synthetic test data. Synthetic data will be filled with auto assigned generators based on the column name and data type recognition. In order to complete this task ApexSQL Generate will be used.
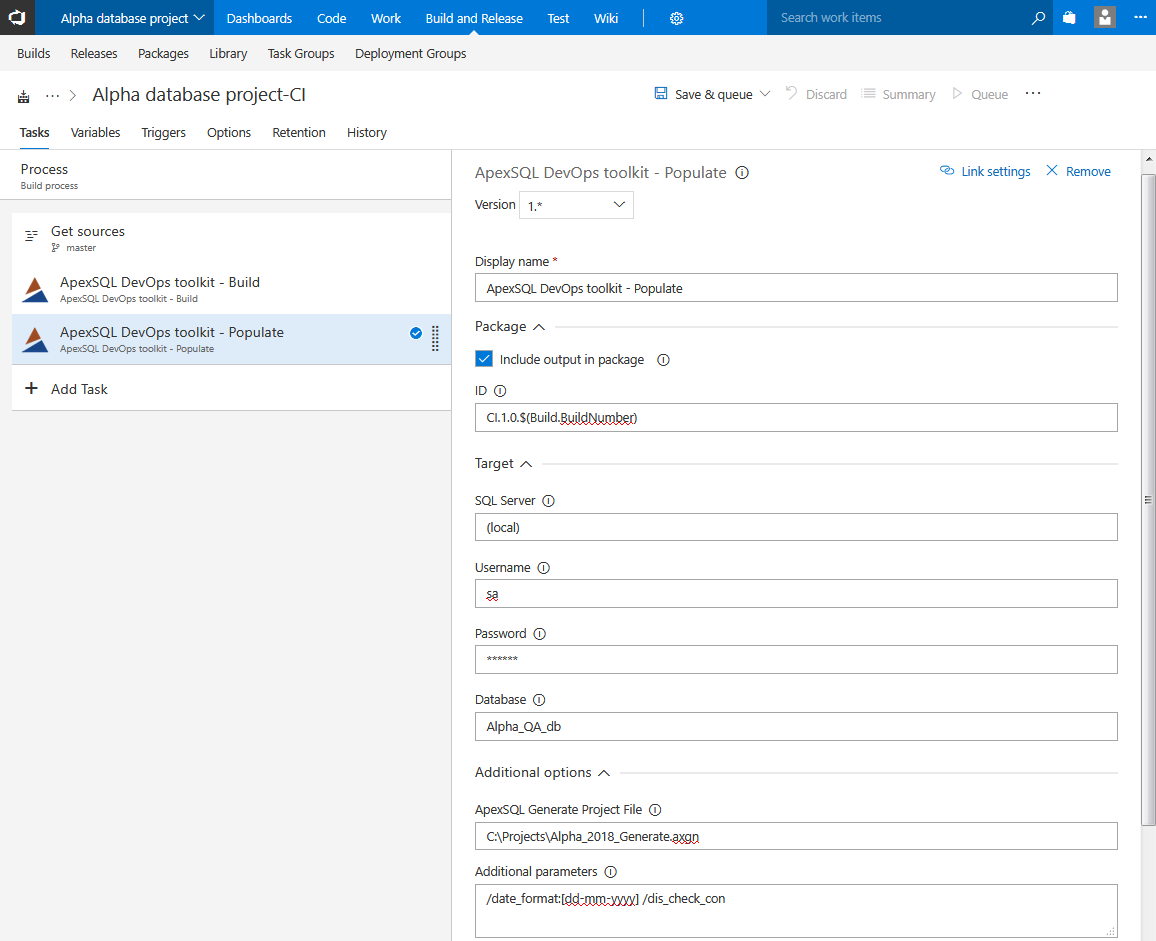
Customizing the test data can be done by importing ApexSQL Generate project file or CLI switches where object selection, generator type, number of rows to generate, etc. can be set.
The utput summary will show execution details like names of the tables which are populated, with how many rows and more and will be saved in a package file if Include in the package option is checked.
-
For more ApexSQL Generate customization possibilities and how to use them see:
Audit step
In case there are tables with important, transactional data, it might require auditing triggers to track changes to them. Auditing trigger implementation can be done through continuous integration pipelines using this step.
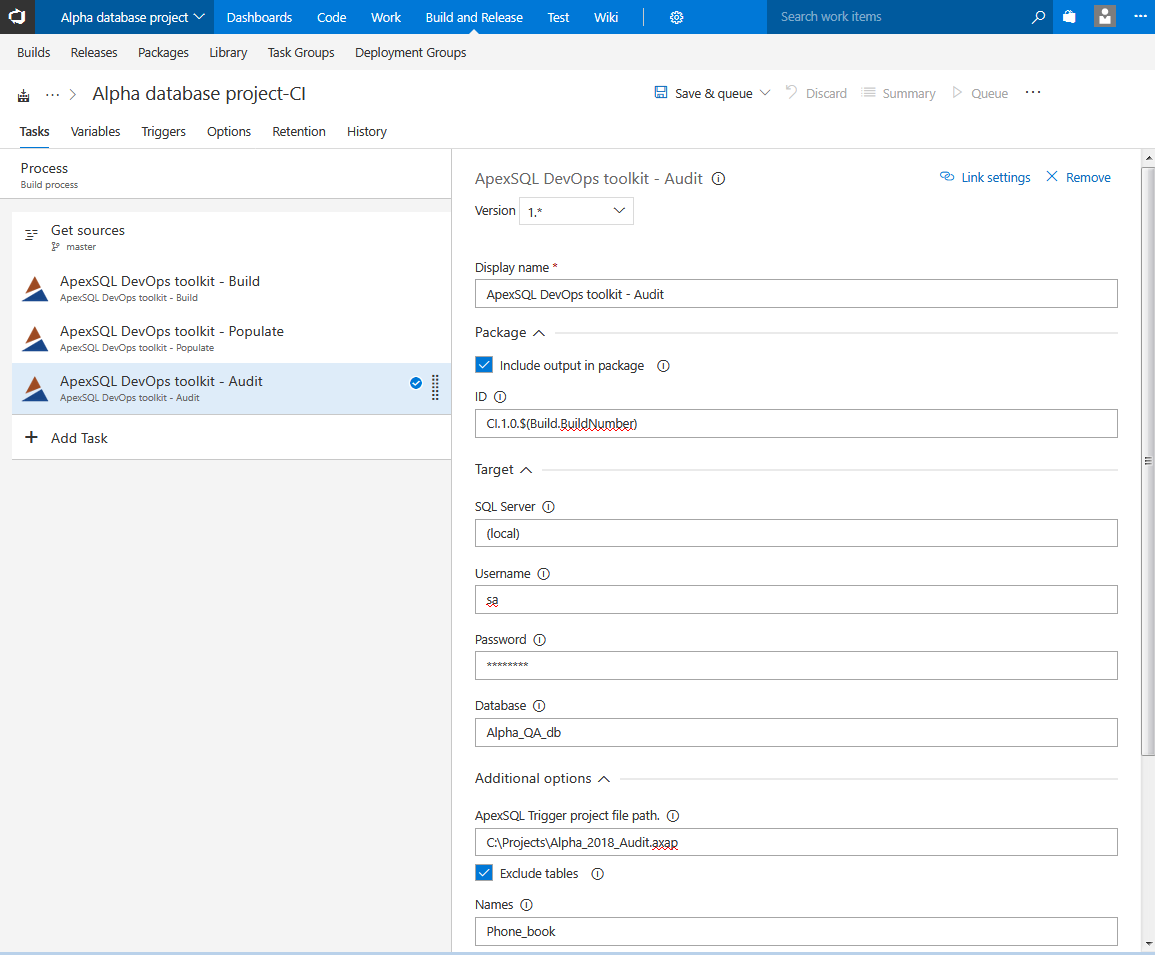
This step will require as input an ApexSQL Trigger project file as it will contain the information about current auditing architecture along the other tool options. It is worth noting that the project file template should be created based on a database that is in production or a model that is identical to production so the correct auditing architecture information can be stored in the project file.
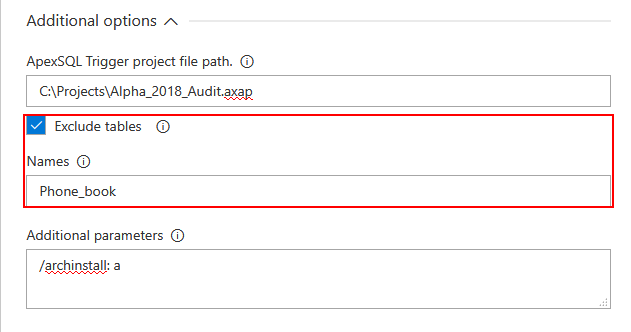
It is also important to create a list of existing database tables that already have or will not have triggers installed at any time and save it in the project so the step execution will not affect those tables. As for the new tables that come from development there is the Exclude tables option and a field to type in tables that will be excluded from trigger implementation.
In summary, the step configuration will look like this for example:
- there are ten tables in production database and two of them have triggers installed
- create project file with that information and import it in step
- there are three new tables from development and one needs triggers installed
- exclude other two tables by entering their names
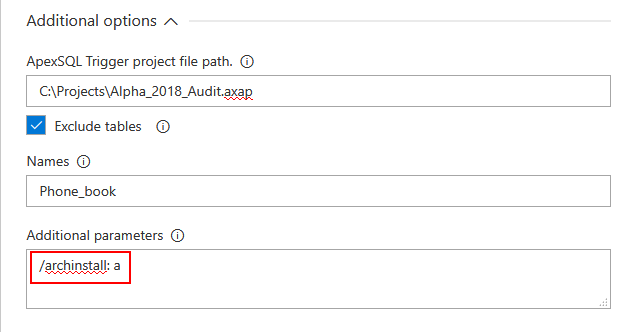
In addition, in case there is no auditing architecture present at all, it can be installed using the Additional parameters by adding the option switch “/archinstall”, with the argument ‘a’ to install entire architecture (correct usage: /archinstall: a).
-
For more ApexSQL Trigger customization possibilities and how to use them see:
Test step
This step is used to run unit tests against the test database that contains changes before pushing them to production and it requires ApexSQL Unit Test for execution. The step execution will first install tSQLt framework and then run test that are created as test class and imported by entering class name in designated field.
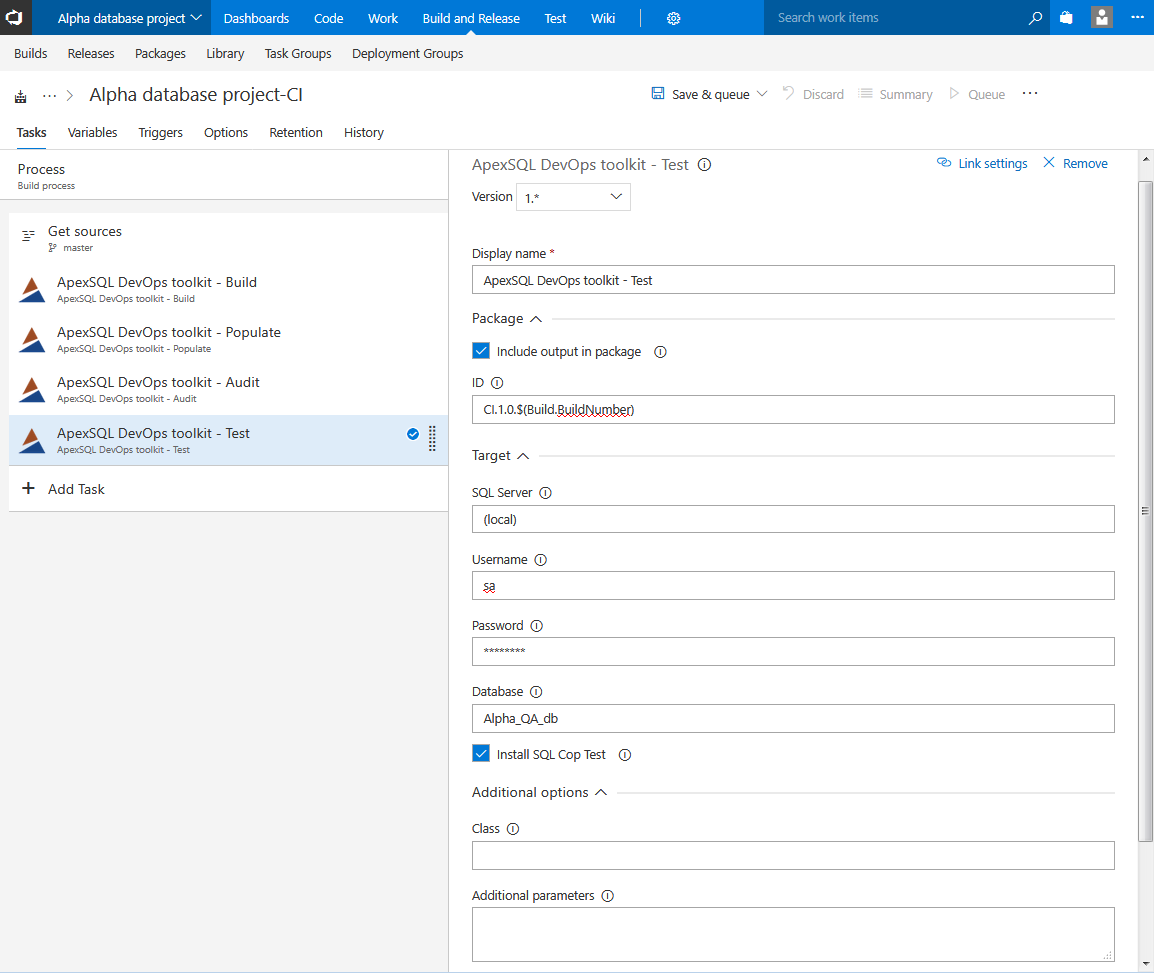
There is also a built-in set of SQLCop tests which can be installed and run with the step execution.

The step will generate a report with listed tests and their results and will be stored in output package for later review.
-
For more ApexSQL Unit Test customization possibilities and how to use them see:
Review step
This step can be used to ensure SQL code quality by enforcing database best practices against a customizable rulebase. Importing a rulebase file will perform database object check against the set of rules defined with ApexSQL Enforce. The tool comes with a rulebase template example which can be further customized.
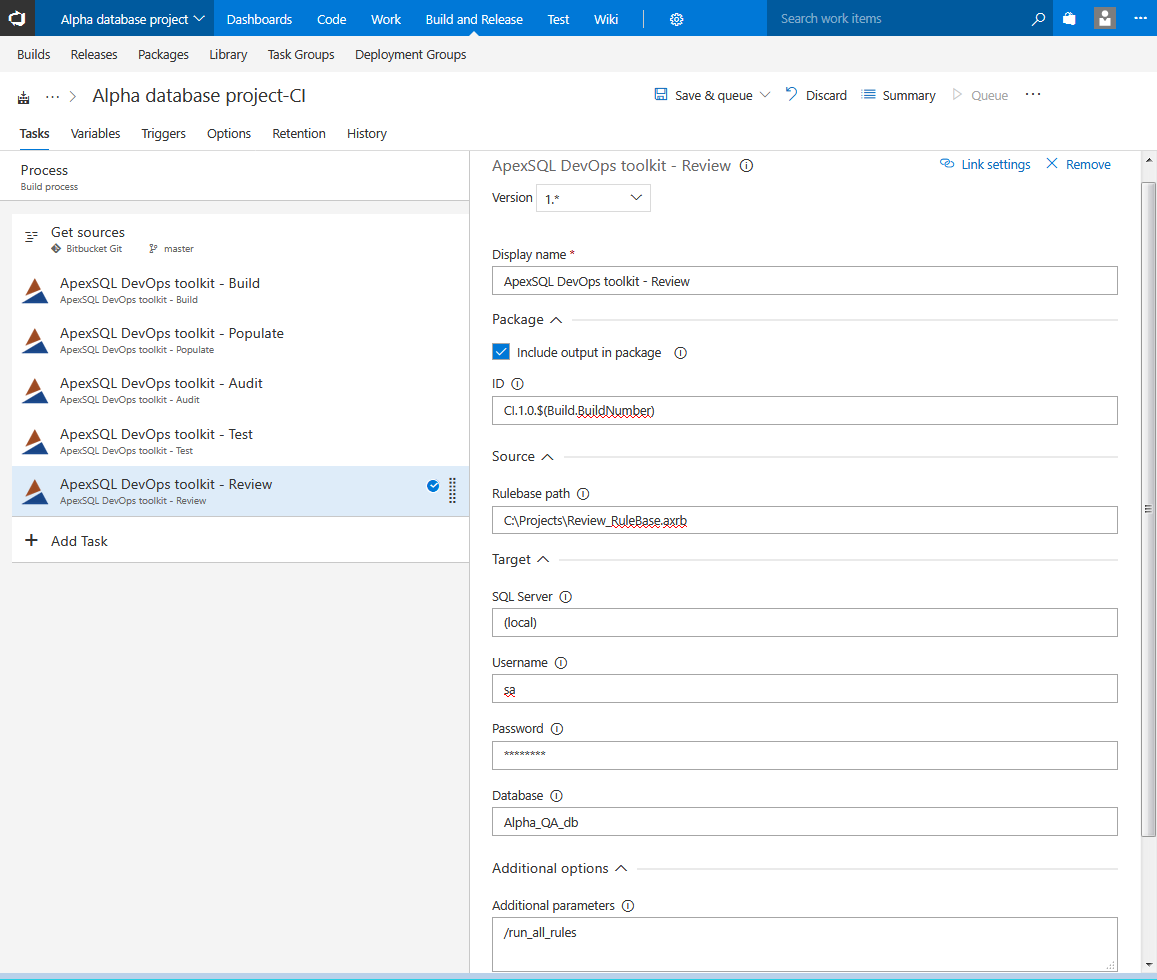

By including “/run_all_rules” option switch in additional parameters field a use case where all written rules will be applied without.

The Review step with a set of defined rules and impact thresholds can be used as auto-approval of code quality. The step will fail and the pipeline will stop in case too many rules are not followed in development.
The step execution will create a comprehensive report with the total impact score, and the exact location with the type of issues found which can be easily reviewed and the project can be returned to development with exact instructions what needs to be fixed.
-
For more ApexSQL Enforce customization possibilities and how to use them see:
Package step
This is an essential step for continuous integration pipelines in conjunction with the Build step. The Package step will prepare a deployment package which can be used later for synchronization of changes. The step will store into a NuGet package a database script folder with all objects from source control project that were included in the build with static data if that option was selected from the beginning.
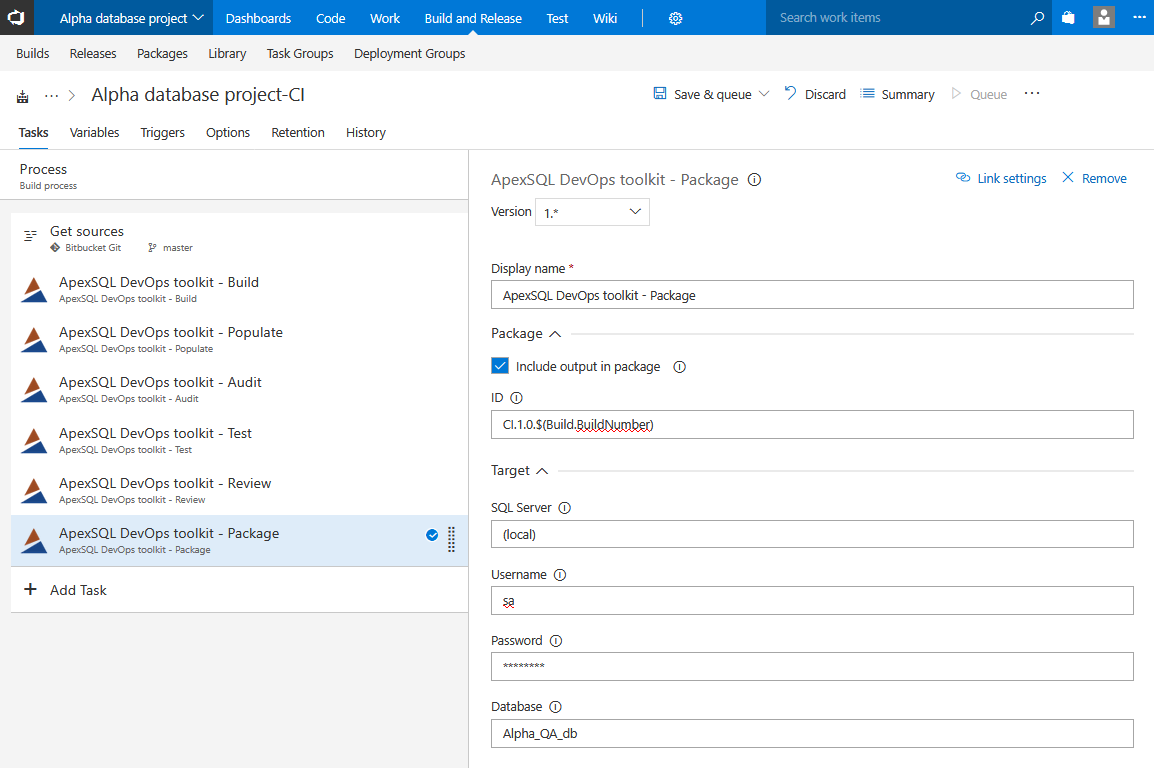
The database script folder will be cleaned out of any synthetic and test data and will include triggers if the Audit step was used in the executed pipeline. The database will be packed with the rest of the outputs in a form of folder structure based on object types where every object will be scripted in separate SQL file. It is done this was so that the code can be easily manually reviewed, object by object, if that is required by release management, with other reports and summaries before deployment.
Publish step
This is optional step and can be used in cases where deployment infrastructure requires sourcing packages from an online feed.
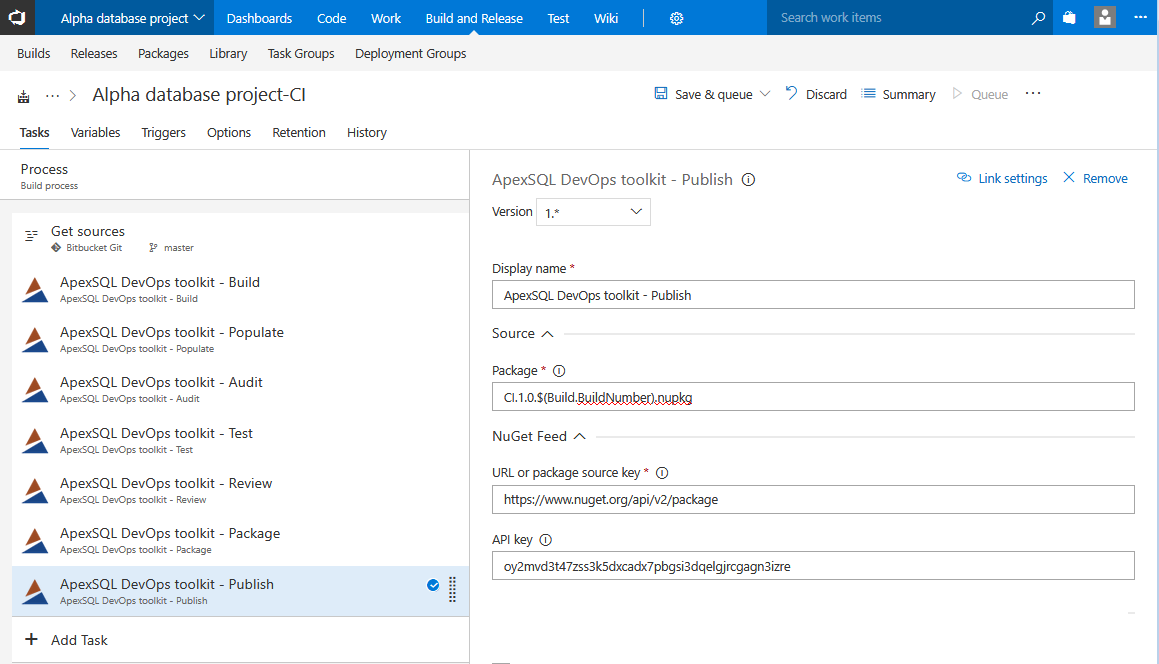
The step requires URL location where the NuGet package should be stored and the API key to authorize the publish of the package.
Configuring continuous delivery steps
Following instructions for continuous integration steps, a database deployment package was created in a form of a NuGet file with its version number and was stored locally in the Azure DevOps Server (TFS) Agent’s working folder or in an online feed.
After the review of changes and approval for deployment it can be used as source for database update.
Sync step
This step uses ApexSQL Diff to compare database schema versions and create a synchronization script which can update target database.
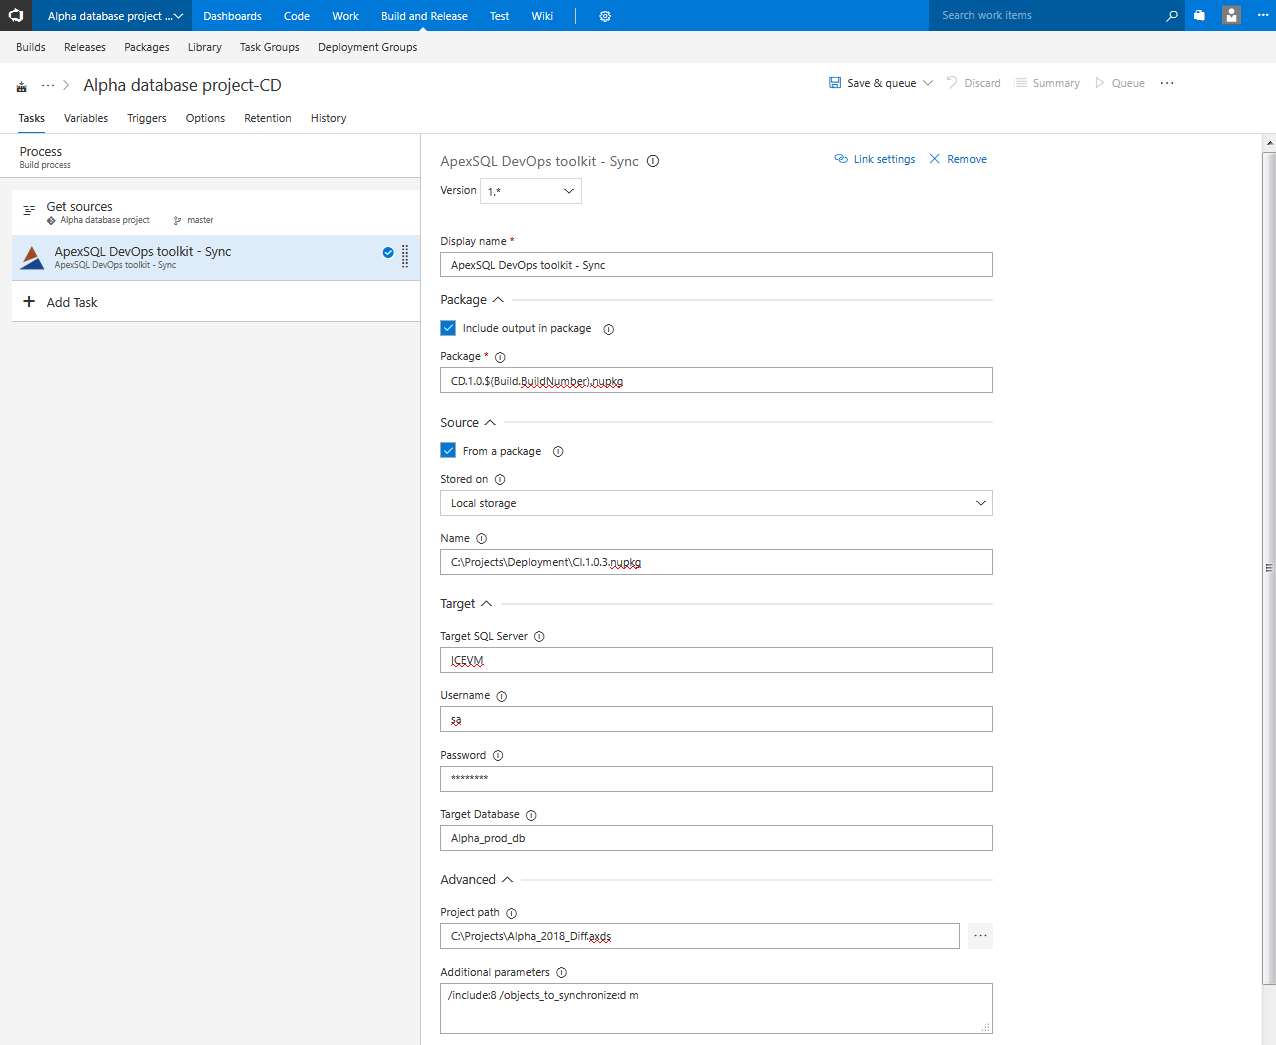
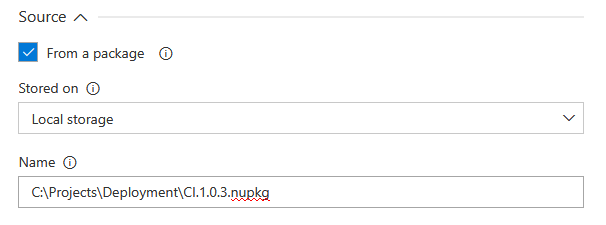
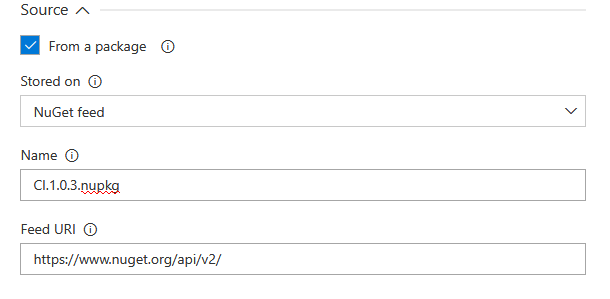
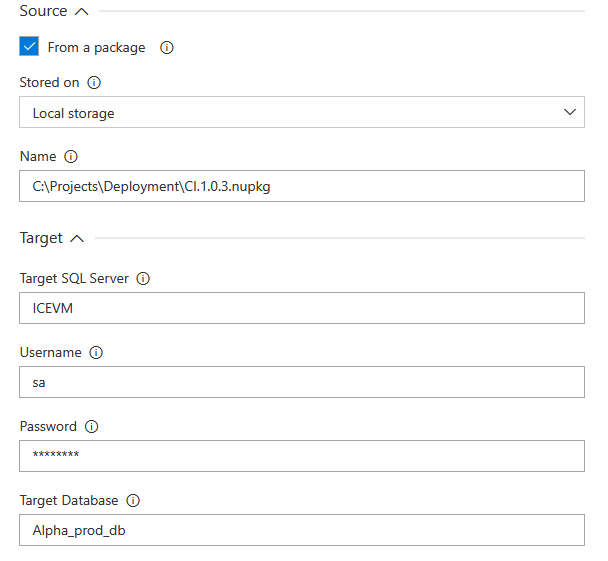
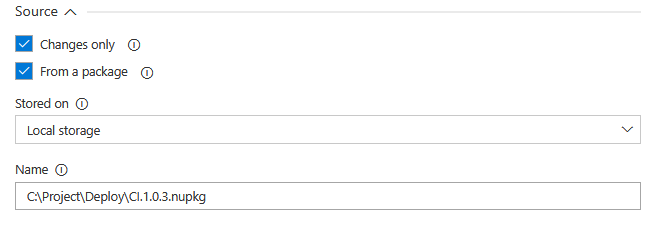
In the Source section there is the option to use a database From a package. This is the package previously created in the Package step of the continuous integration pipeline. When this option is checked the location of the package is expected to be typed in. The package can be stored locally where full folder path with a package file name is required
or stored online where URL for the feed and package name should be entered instead.
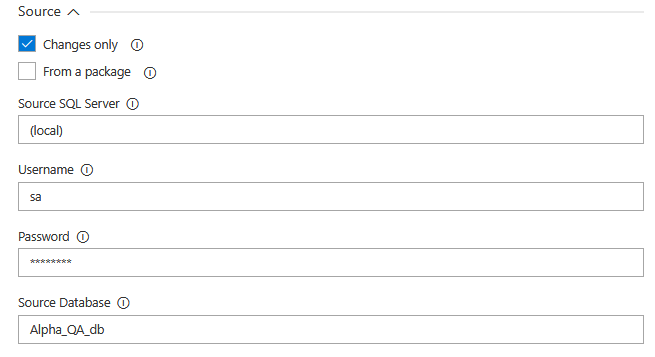
The step covers another use case where direct database to database synchronization can be used. For that scenario the From a package option should be unchecked and connection parameters for the source database populated.
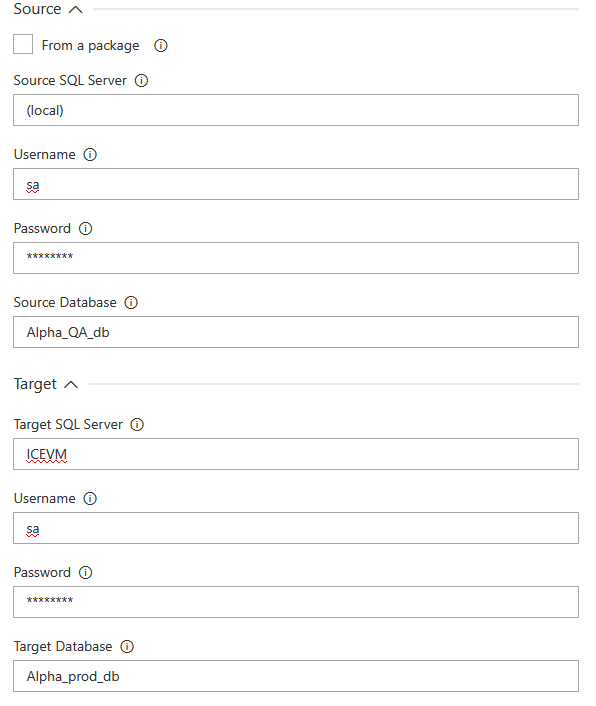
The Target section requires connection parameters for the database that needs to be updated.
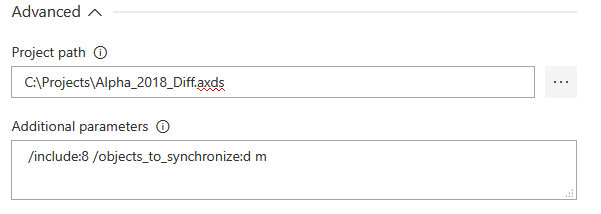
Special attention to database comparison and synchronization customization is recommended for this step. A selection of differences to be ignored during comparison should be reviewed, selected based on a use case and saved in ApexSQL Diff project file. Also, advanced filtering can be used in the tool to filter out objects in groups by object type or schema affiliation or individually by their name.
With Additional parameters it is possible to roughly define which group of objects should be synchronized by adding switch “/objects_to_synchronize” with its parameters “d m” to specify that only different and missing objects are going to be synchronized (correct usage: /objects_to_synchronize:d m).
The output of the executed step will be the schema synchronization script and a report on found differences between compared objects.
Include output in package option can be used here to create new package file that will can be used as synchronization script source for deployment.
-
For more ApexSQL Diff customization possibilities and how to use them see:
Sync data step
This step should be included in the pipeline in case there are some static data changes for the new database version (the Include static data option was used in the Build step). The step uses ApexSQL Data Diff to perform data comparison between source and target tables and create data synchronization script for updates.
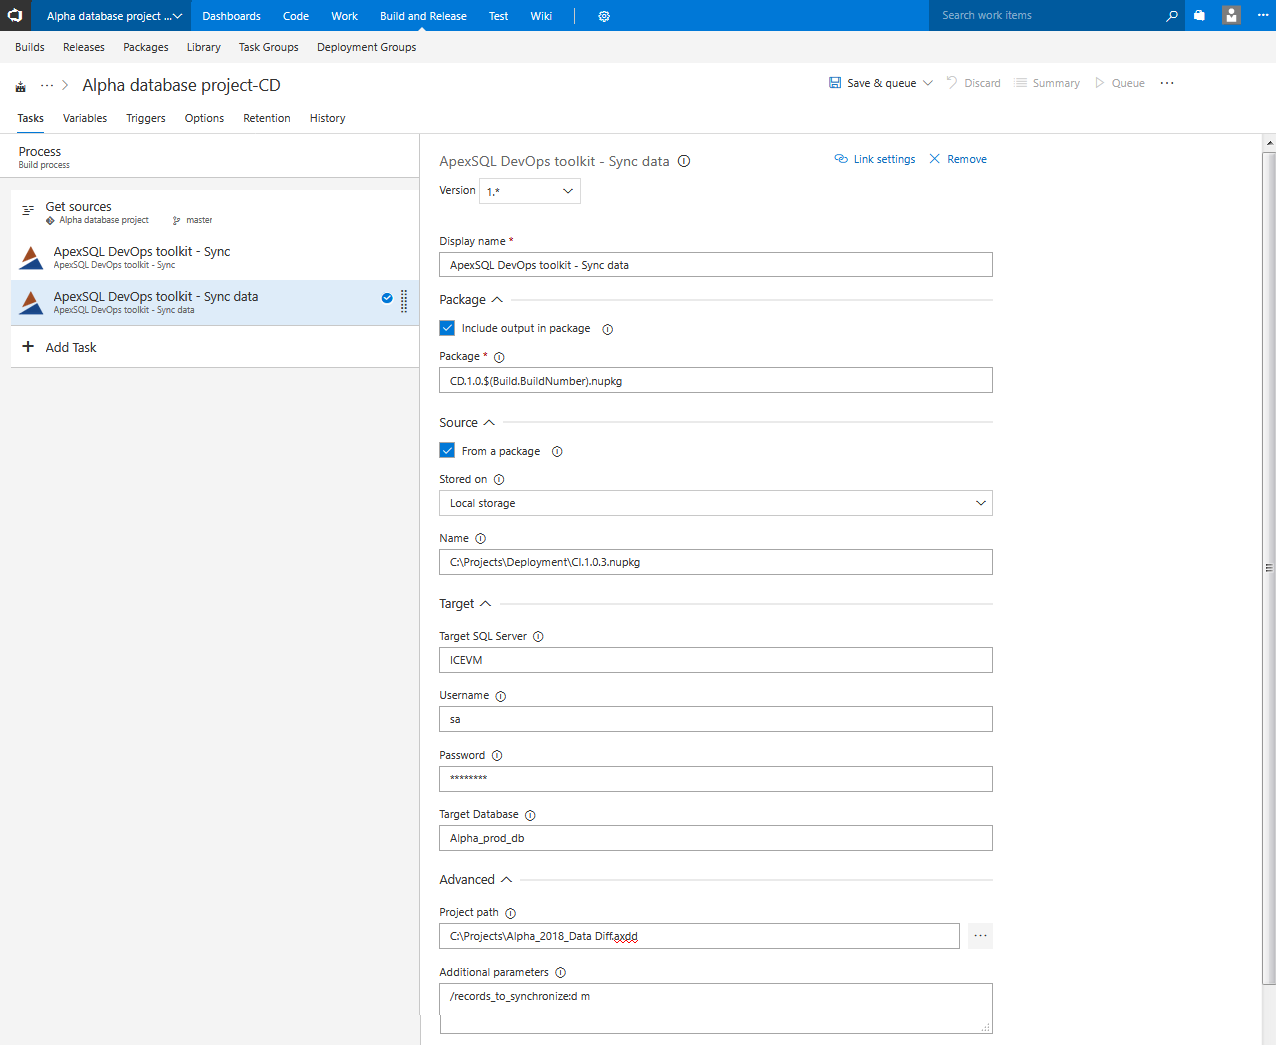
The usage of Source and Target option sections is identical as explained for the Sync step.
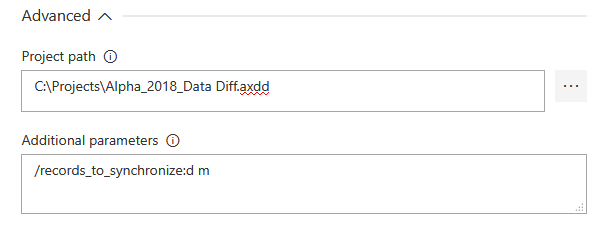
Customization through ApexSQL Data Diff project file is with similar principle to schema compare setup. There are options to ignore certain data differences and to filter out specific tables grouped by their schema affiliation or by name. Some data compare specific possibilities include the ability to customize comparison column keys (the parameter that will be used to pair rows in source and target tables, Primary Key is default) or to filter out set of rows by inserting WHERE clause.
As usual, most of the options can be set with option switches and as it was situation explained for the Sync step it is recommended to control if target records were to be deleted or not by using “/records_to_synchronize” switch that uses same arguments as previously explained (m – missing, d – different, a – additional).
Output of this step will be data synchronization script and data comparison summary with details about number of rows compared and found as different and it can be included in the package along with schema synchronization script.
-
For more ApexSQL Data Diff customization possibilities and how to use them see:
Deploy step
This is the final continuous delivery step where created synchronization scripts will be executed against a target database.
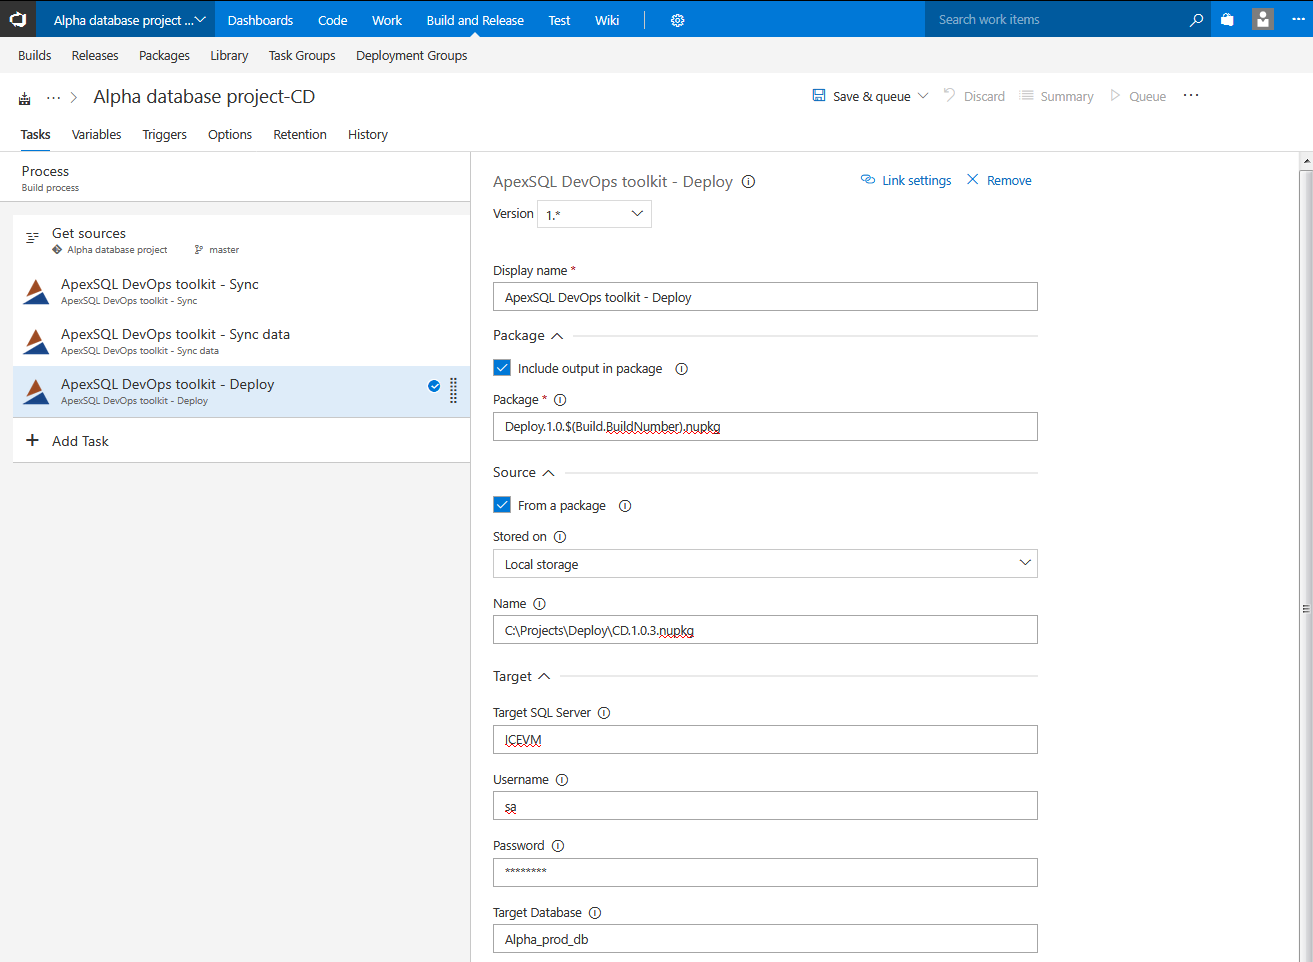
The synchronization scripts can be imported through package, if From a package is chosen
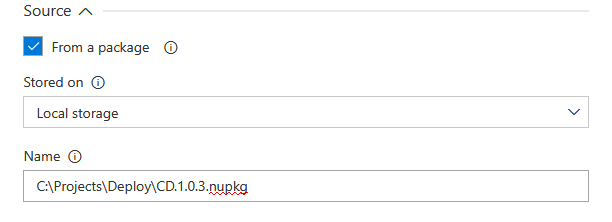
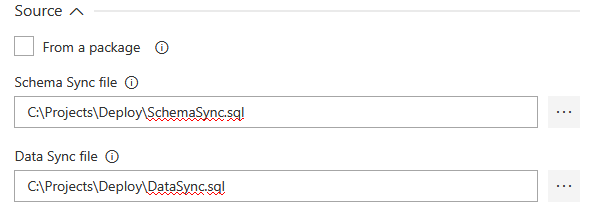
Or by directly entering the path to schema and data synchronization scripts respectively.
Target section requires connection parameters a database that the sync scripts will be executed against.
The output of this step execution will be summary of native SQL messages generated during SQL synchronization script execution.
Document step
This step should be explained separately as its usage is arbitrary, it can be used conjoined with continuous integration or continuous delivery steps. The step’s function is to create database documentation using ApexSQL Doc.

There are several cases that this step can cover depending on its configuration. When the goal is to create full database documentation the parameters in the Target section will set which database is going to be documented, it can be test database, a production database, etc.
The Source section initially contains Changes only option. This option can be used to create differential documentation i.e. delta between two databases.

When Changes only option is checked the source parameters fields will be displayed. This is where definition for a database that will be compared with target database should be sourced from in order to create differential documentation.
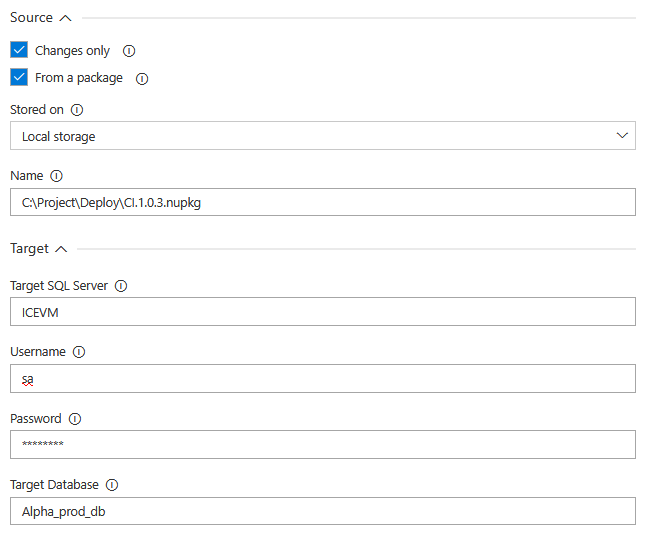
There are two ways to source a database. If From a package option is selected the source database is expected to be stored in the NuGet package that is located in the provided folder path. This will be the database version that comes from development and was packed during the continuous integration process with the Package step. That means that the proper usage for this option would be within a continuous delivery pipeline or in some separated dedicated pipeline for this task.
If From a package is not checked SQL Server connection parameters are expected for a database that needs to be compared with the defined target database.
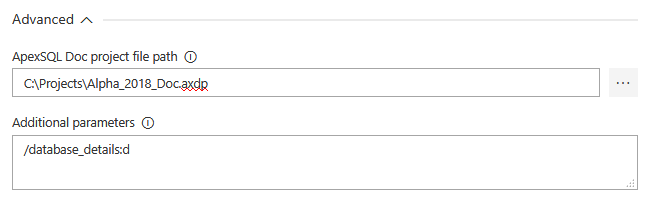
As with other steps, the documentation can be customized through ApexSQL Doc project file. Through options template saved in a project file it is possible to select which objects or object types should be documented and which object or database parameters.
Further customization for different use cases can be achieved with Additional parameters.
Created documentation can be stored in a package with the rest of the outputs if Include output in package is selected.
-
For more ApexSQL Doc customization possibilities and how to use them see:


