


Applies to
All ApexSQL console applications with Command line interfaces (CLI)
Summary
This article describes how to schedule ApexSQL tool tasks to run unattended, overnight, etc., using a SQL Server Job and a PowerShell script (.ps1 file) that automates ApexSQL Data Diff, via the Command Line Interface.
Description
In the following example, ApexSQL Data Diff will be used to schedule data synchronization, using a project file, and create a time stamped Excel export and finally output the application execution results to a text file, to be run each night at 2:00 AM:
-
Open a text editor and enter the following ApexSQL Data Diff CLI switches (learn more about ApexSQL Data Diff CLI switches from here), into the PowerShell script:
$datadiffLocation   = "ApexSQLDataDiff"
$today  = (Get-Date -Format "MMddyyyy_HHmmss")
$parameters = "/pr:""MyProject.axdd"" /ot:excel /on:""D:\DataSync\Export_$today.xml"" /out:""D:\DataSync\Output_$today.txt"" /sync /v"

(Invoke-Expression ("& `"" + $datadiffLocation +"`" " +$parameters))

"ApexSQL Data Diff return error code is $LASTEXITCODE" >> "Output_$today.txt"
Explanation of the above PowerShell script:
$diffLocation = “ApexSQLDataDiff” # specifies variable for path to the CLI executable file of ApexSQL Data Diff $today= (Get-Date -Format “MMddyyyy_HHmmss”) # specifies variable for current date and time that will be used as time stamp for Excel export and output file $parameters = # specifies variable for ApexSQL Data Diff’s CLI switches “/pr:””MyProject.axds”” # the path of the application project file /ot:excel # specifies Excel output type /on:””Export_$today.html”” # the path of the Excel export, along with the time stamp variable /out:””Output_$today.txt”” # the path of the output file for application execution, along with the time stamp variable /sync # executes the synchronization script /v” # prints all messages in console (Invoke-Expression (“& `”” + $datadiffLocation +”`” ” +$parameters)) # runs all specified variables “ApexSQL Data Diff return error code is $LASTEXITCODE” >> “Output_$today.txt” # return error code upon finished synchronization process is added to the application’s output file Save the above code as a PowerShell script (*.ps1) file.
Windows authentication was used for a database login in the ApexSQL Data Diff’s project file. If SQL Server authentication is used, the login password will be encrypted in the saved project file. Additionally, check out other ways of handling login credentials in the article on this link.
Find out more about using Command Line Interface (CLI) switches in ApexSQL tools from here.
-
Run SQL Server Management Studio
-
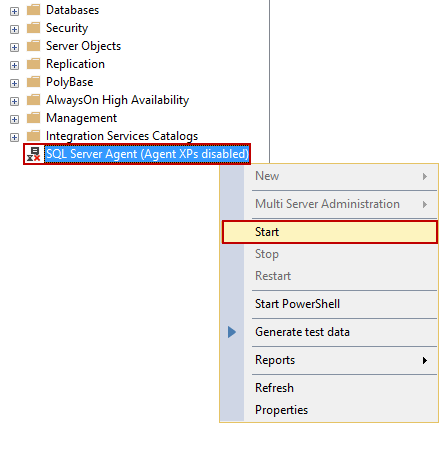
In the Object Explorer, check if SQL Server Agent is running and if not right-click it and choose the Start option:
-
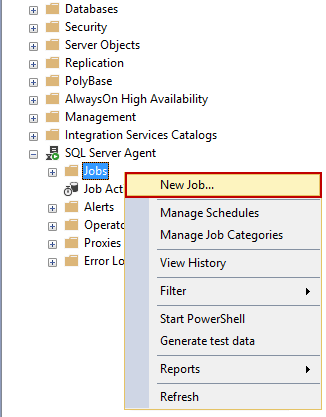
Once it’s started, expand its node, right-click the Jobs folder, and choose the New Job option:
-
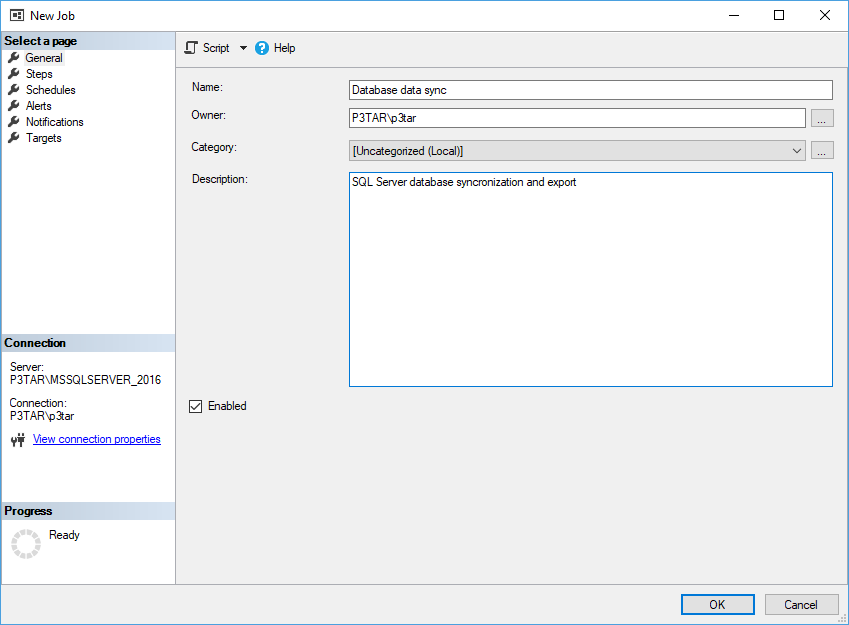
The New Job window will be opened and in the General tab provide the name and description for the job (leave the Category as is):
-
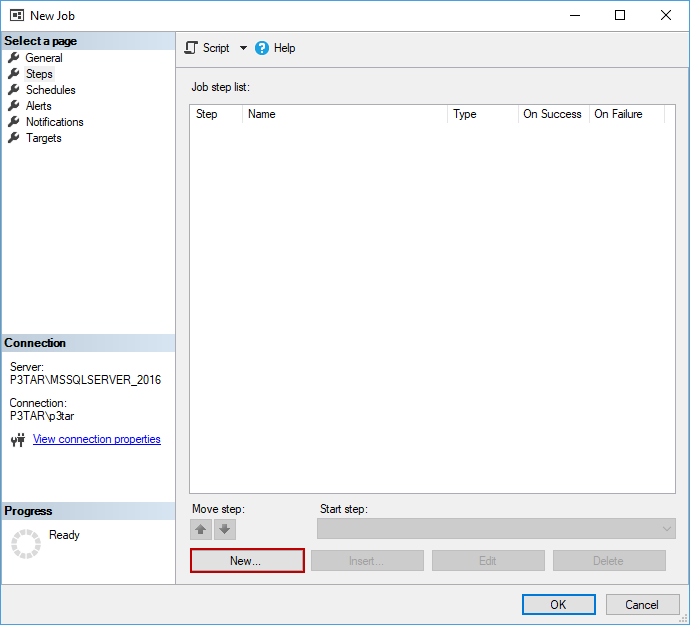
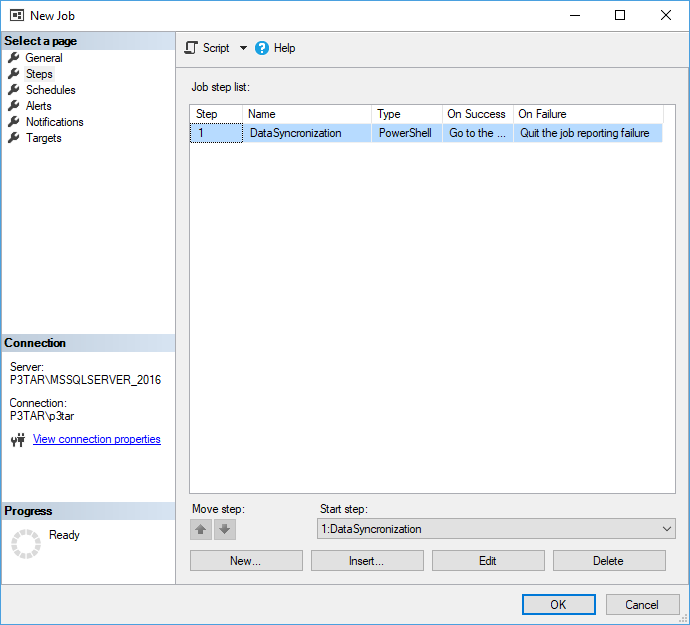
Select the Steps tab and click the New button to initiate the creation of the new step:
-
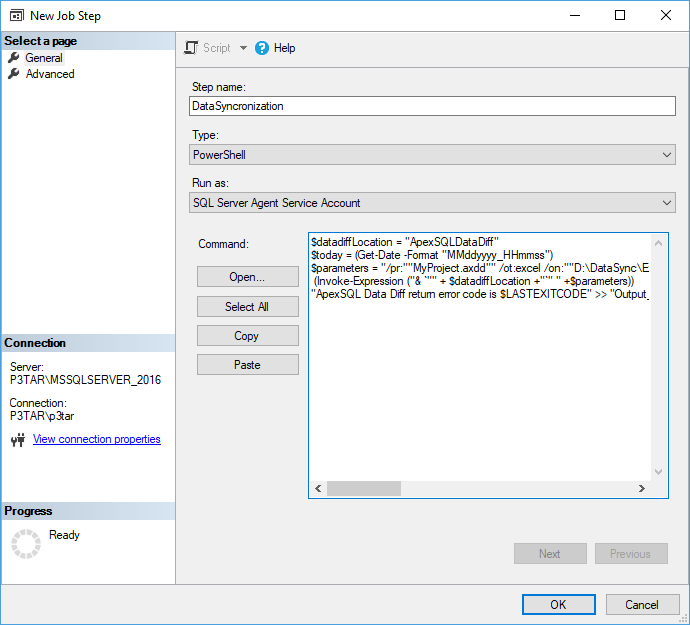
In the New Job Step window, set the following:
-
Enter the step name
-
Choose PowerShell from the Type drop-down list
-
Choose SQL Server Agent Service Account from the Run as drop-down list
-
Click the Open button for the Command field and navigate to the location of the previously created PowerShell project
-
-
Click the OK button to close the New Job Step window and load it in the previous window (New Job):

Quick tip:
Additional steps can be added for one job. For example, another ApexSQL tool can be specified to run after the application in the first step is executed
-
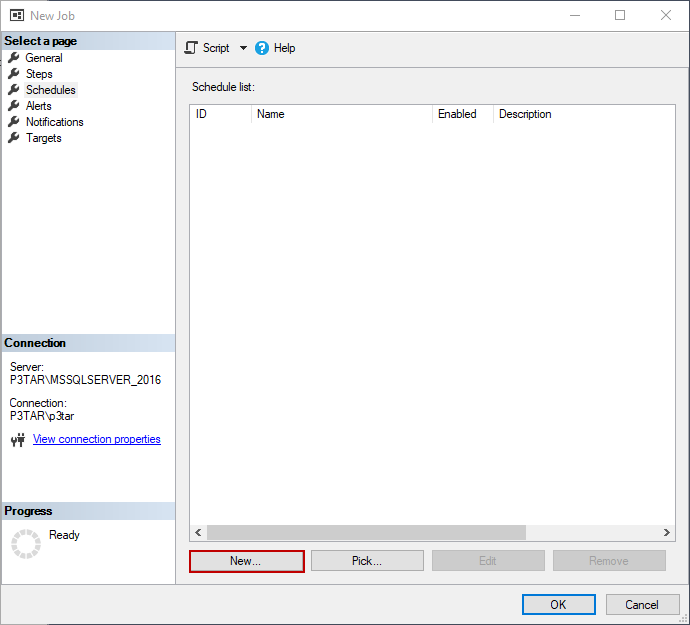
Select the Schedules tab and click the New button to initiate the creation of the new job schedule:
-
In the New Job Schedule window, set the following:
Enter a name for scheduled job
-
Set the scheduled type to: Recurring
-
Set the frequency to: Daily and Recurs every 1 day
-
Set the daily frequency to occur once at: 2 AM
-
Depending on if it’s needed to be ended on specific date enter the end date under the Duration section
Click the OK button to close the New Job Schedule window and load it in previously selected tab (Schedules tab):
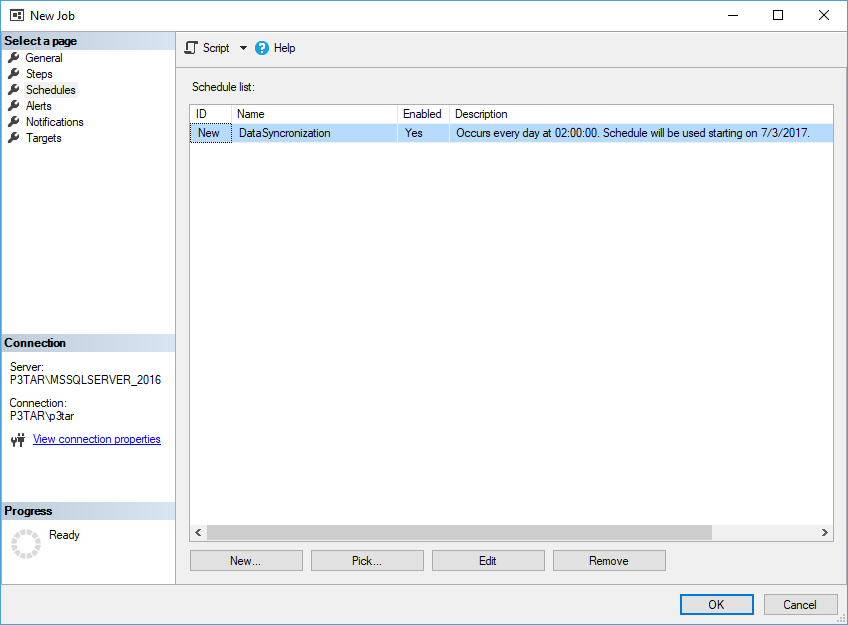
Click the OK button in bottom-right corner of the New Job window to finalize the creating of new job
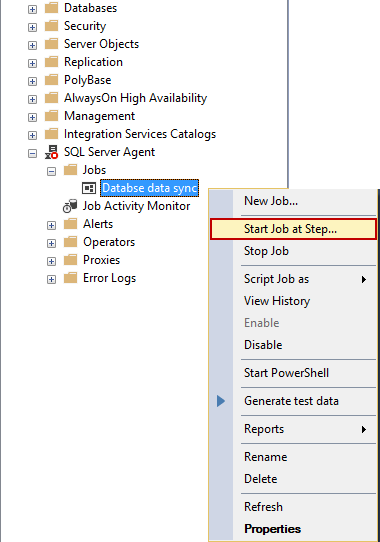
To test if the job was properly created and if it will run successfully, expand the Jobs node, select the created job, right-click it, and chose the Start Job at Step option:
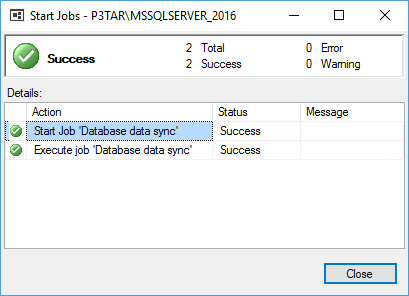
Once the job execution is finished the following window will be shown:
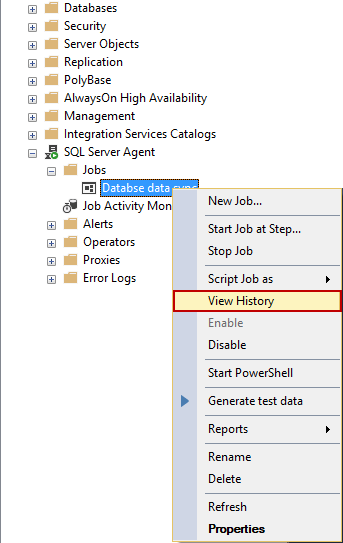
If for any reason the job execution fails, just right-click the failed job and choose the View History option:
The Log File Viewer window will open, showing the log files summary, where a specific log file (with date and time) can be chosen and reviewed:
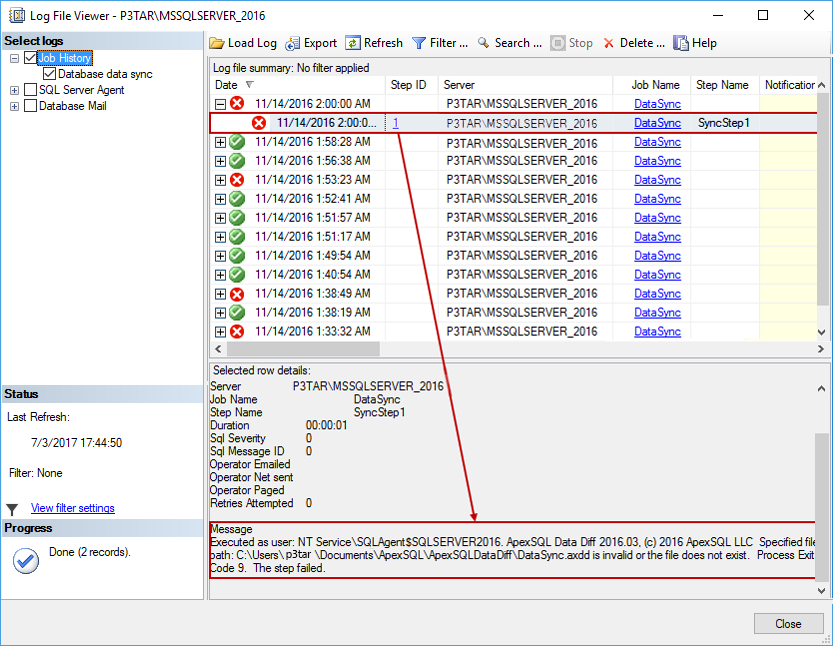
In the above example, the following message for the failed job is provided:
Executed as user: NT Service\SQLAgent$SQLSERVER2016. Switch ‘syn’ is not recognized. Process Exit Code 2. The step failed.
For more information on error codes check the article on the following link under the Common return error codes section. In this case the return error code is 2 – Invalid switch. It means that /syn switch does not exist and if ApexSQL Data Diff CLI switches are carefully reviewed in this article, the correct alias for the /synchronization switch is /sync.


