


Summary
This article explains how to integrate ApexSQL DevOps toolkit PowerShell solution with VSTS server for continuous integration (CI) and continuous delivery (CD) workflows.
Description
VSTS (Visual Studio Team Services) can be used as a continuous integration and continuous delivery server, which can be used to build and test software projects continuously, and to continuously deliver software by providing many ways for defining pipelines and integrating with various testing and deployment technologies.
ApexSQL DevOps toolkit PowerShell module along with the example scripts allow easy customization and execution of pipelines for Continuous integration and Continuous delivery of the database changes.
Although this solution works as standalone, it can be easily integrated into popular VSTS build environment for the workflow execution.
Pre-requisites
Before creating a new build project in VSTS, there is a short list of prerequisites which needs to be fulfilled for running a successful continuous integration process:
- Download and install all ApexSQL tools per the user’s needs
- Link the desired database to the source control
- Download and install ApexSQL DevOps PowerShell cmdlets
- Download and install the VSTS build agent
To use ApexSQL DevOps toolkit PowerShell solution with VSTS there are three setup phases to be performed:
- Install PowerShell module onto designated build server and configure PowerShell CI and CD scripts
- Set up the VSTS build agent
- Configure the build project with VSTS Web console
Installing the PowerShell module
In this phase the basic prerequisites on the build machine should be set up to utilize ApexSQL tools required for CI and CD pipeline steps. Within this phase the CI and CD pipelines should be configured in the PowerShell one-click scripts to set up desired pipeline steps. Also, basic parameters like build source, e.g. Source control repository that contains database changes and target databases for testing should be defined.
The details for PowerShell module installation and scripts configuration can be found in the articles:
How to download and install ApexSQL DevOps PowerShell cmdlets
ApexSQL DevOps toolkit PowerShell scripts initial setup and configuration
How to initially configure the ApexSQL DevOps toolkit PowerShell one-click scripts
How to configure the ApexSQL DevOps toolkit PowerShell scripts for Continuous integration (CI)
VSTS build agent setup
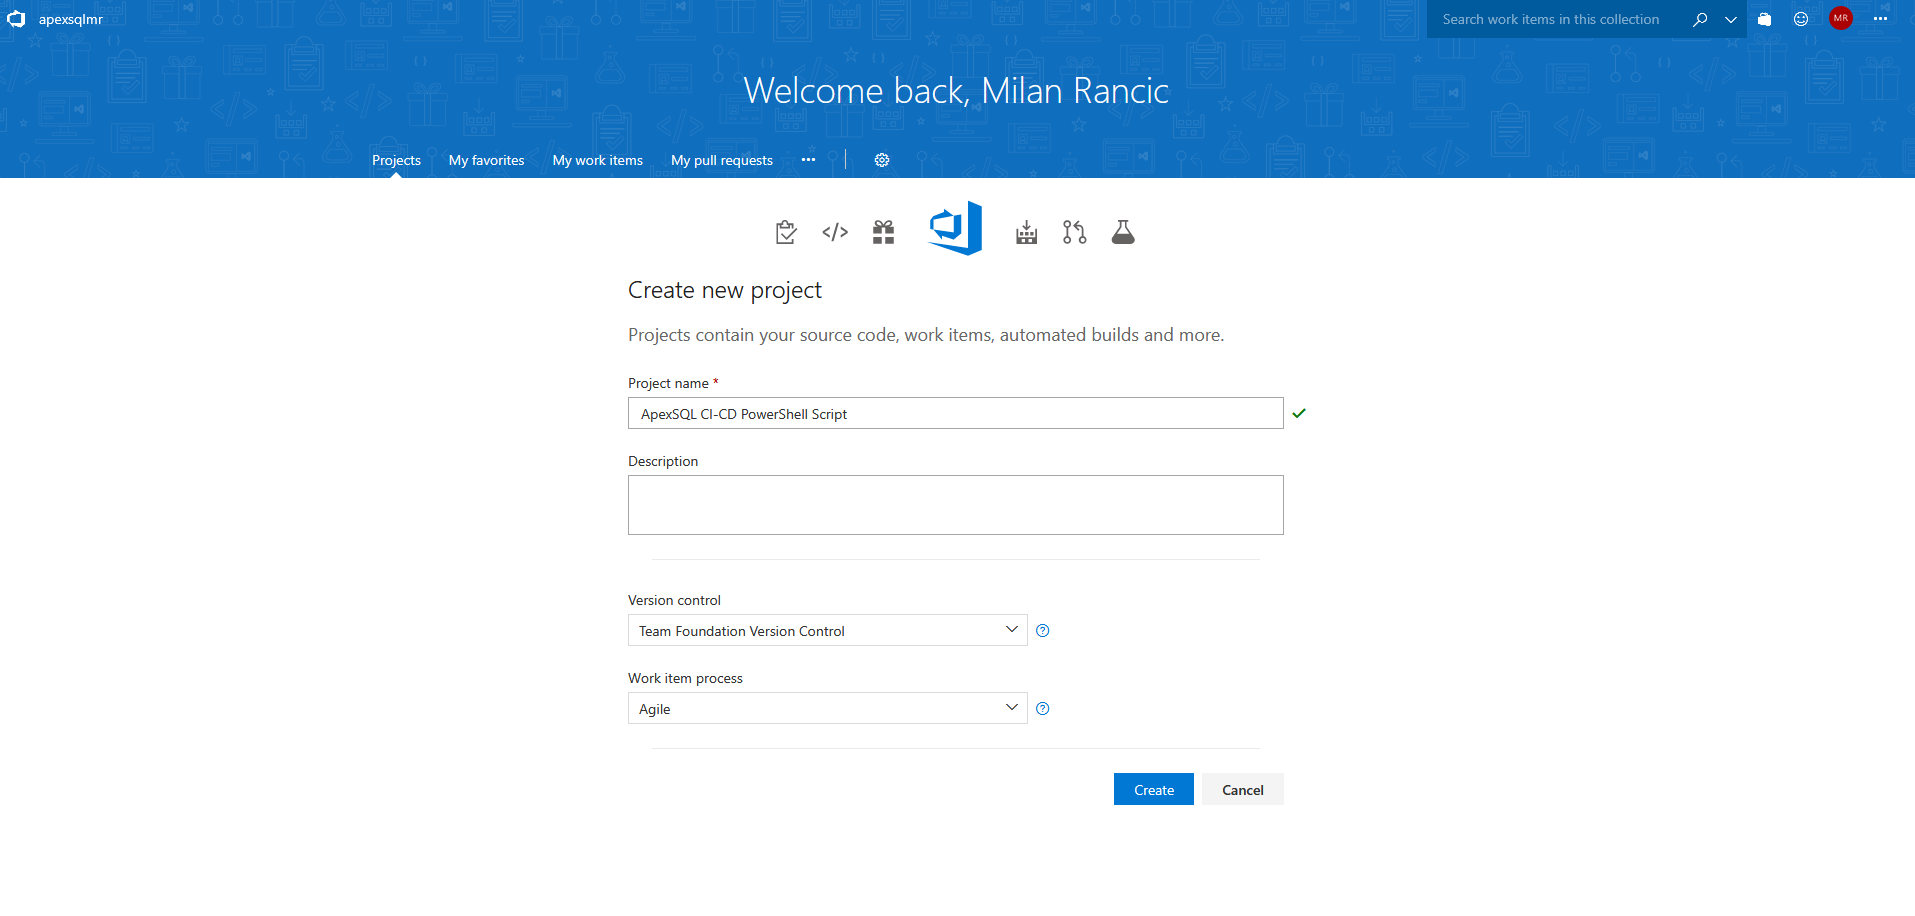
To begin with the VSTS preparation, start VSTS web client and create new build project with its name and description. For the project initial setup choose the Version control type and Work item process type. Note that the choice will setup the initial project environment but will not have any influence on PowerShell one-click scripts execution because they work as separate engine inside the VSTS.
After confirming the project creation, the initial project screen will show. From here go to main settings menu to choose Project agent pools option from the dropdown list. The agent pool, as its name states, contains the list of available agents for build executions.

When the Project agent pools opens click on the Download agent button to download VSTS build agent that needs to be set up on to designated build machine.

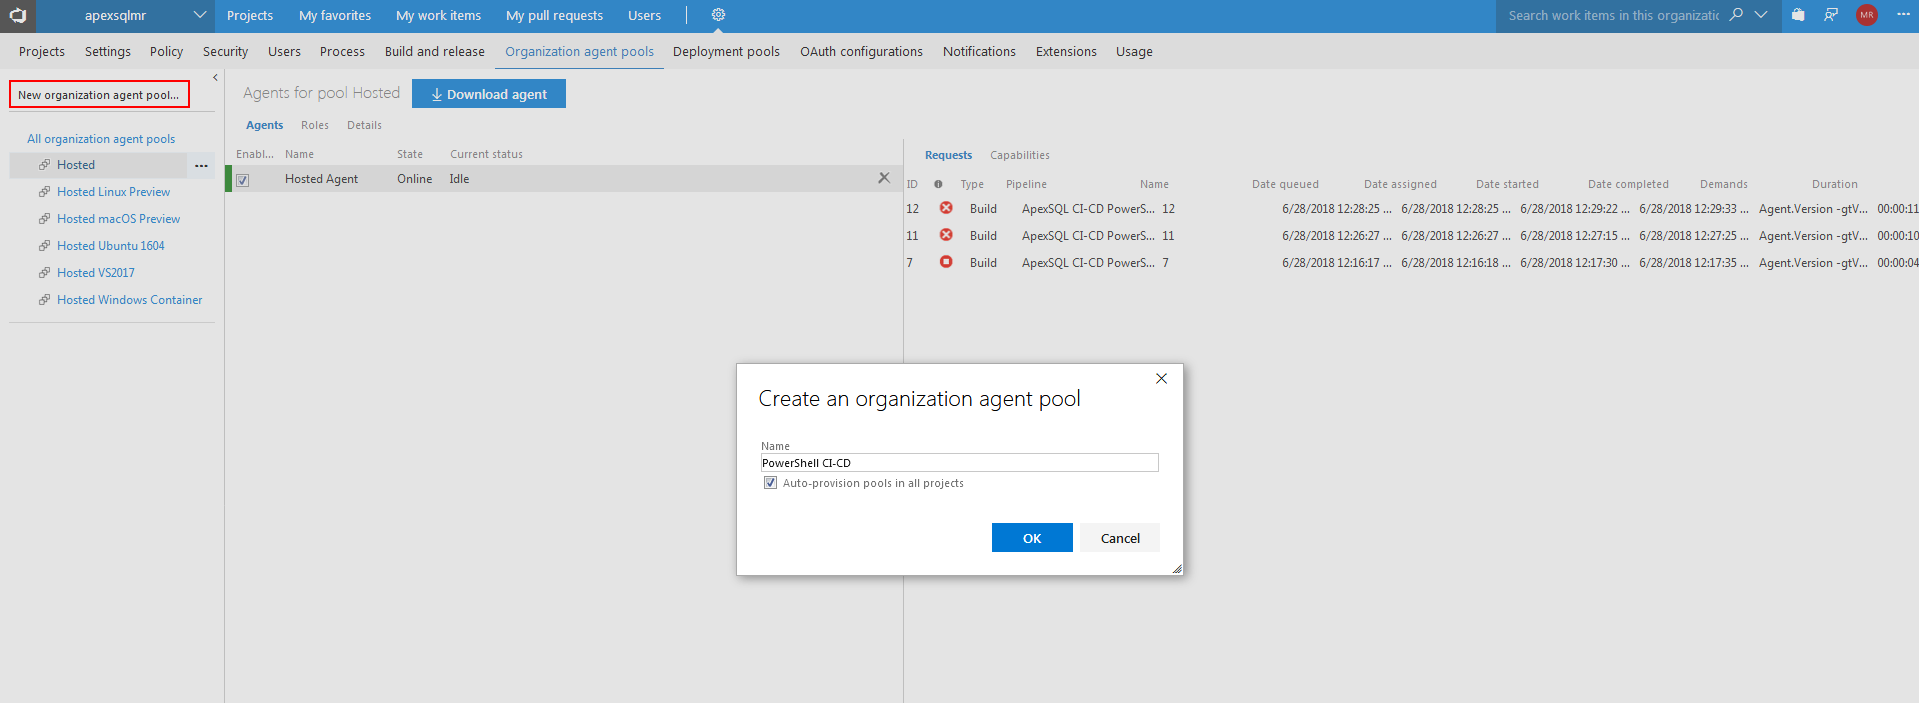
The VSTS comes with the set of hosted agents but to avoid any potential issues with agent concurrency and/or running the ApexSQL tools dedicated to CI and CD steps in the PowerShell one-click scripts, it is recommended to set up one dedicated build agent on the machine that is going to be used as build server. Before that let’s create separate agent pool where new build agent will be nested. Click on the New organization agent pool… and in the opened dialogue enter the pool name and confirm.
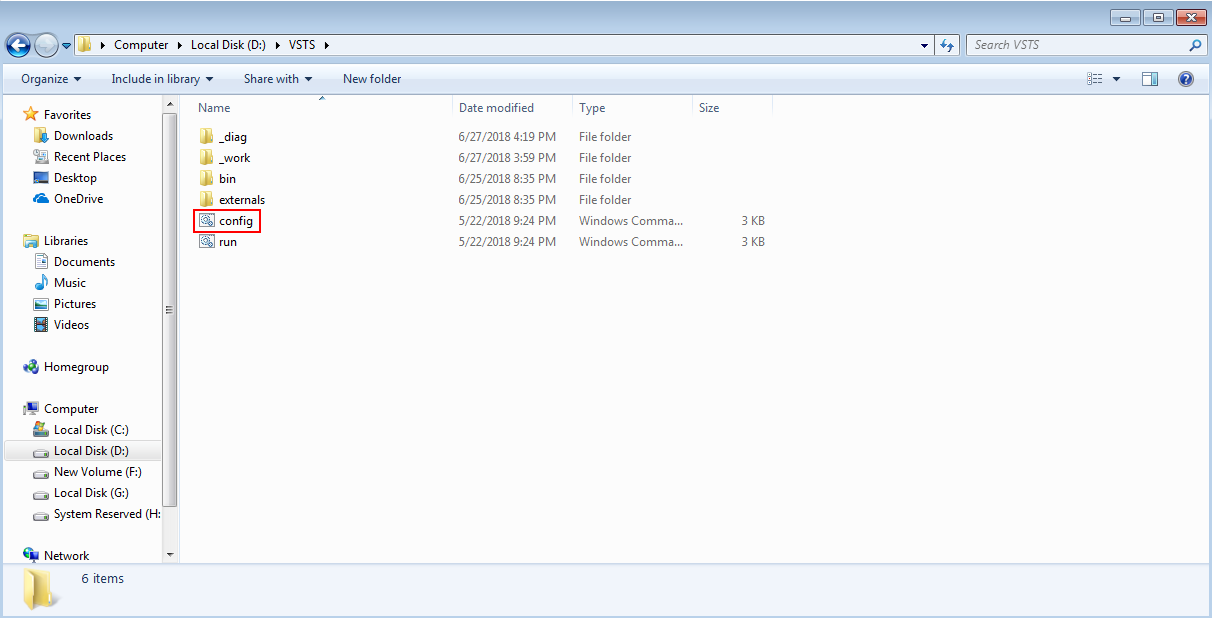
Unpack the VSTS build agent on the same machine where DevOps PowerShell one-click scripts are which is going to work as build server and start configuration of the agent by starting the config.cmd found in the location where the agent is unpacked.
For the proper configuration follow instructions for every step marked on the screenshot:
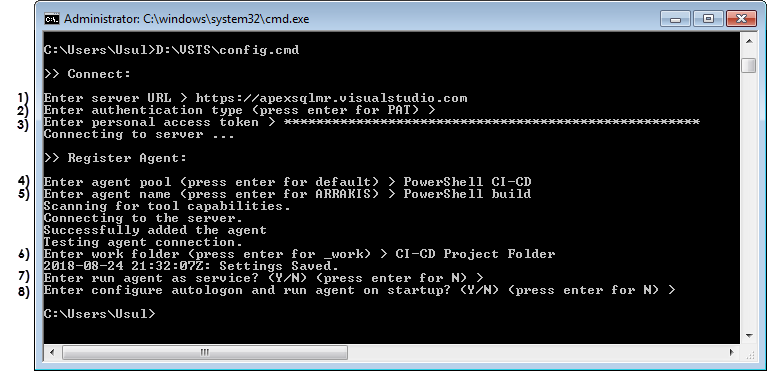
- URL of VSTS server where the user logs as client (on the screenshot above the same URL as the one used to start creating the VSTS project)
- Confirm with Enter to use the Personal Access Token for security check
- Enter the security token. To obtain the token follow next steps:
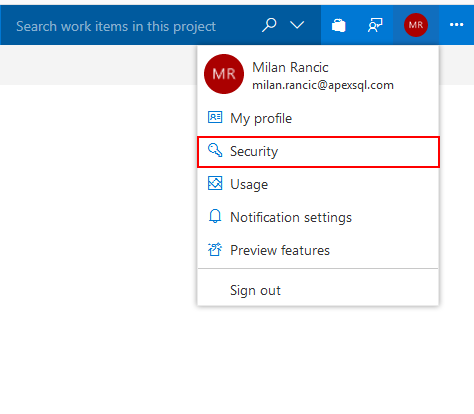
- From the Account menu of the VSTS client console choose the Security option
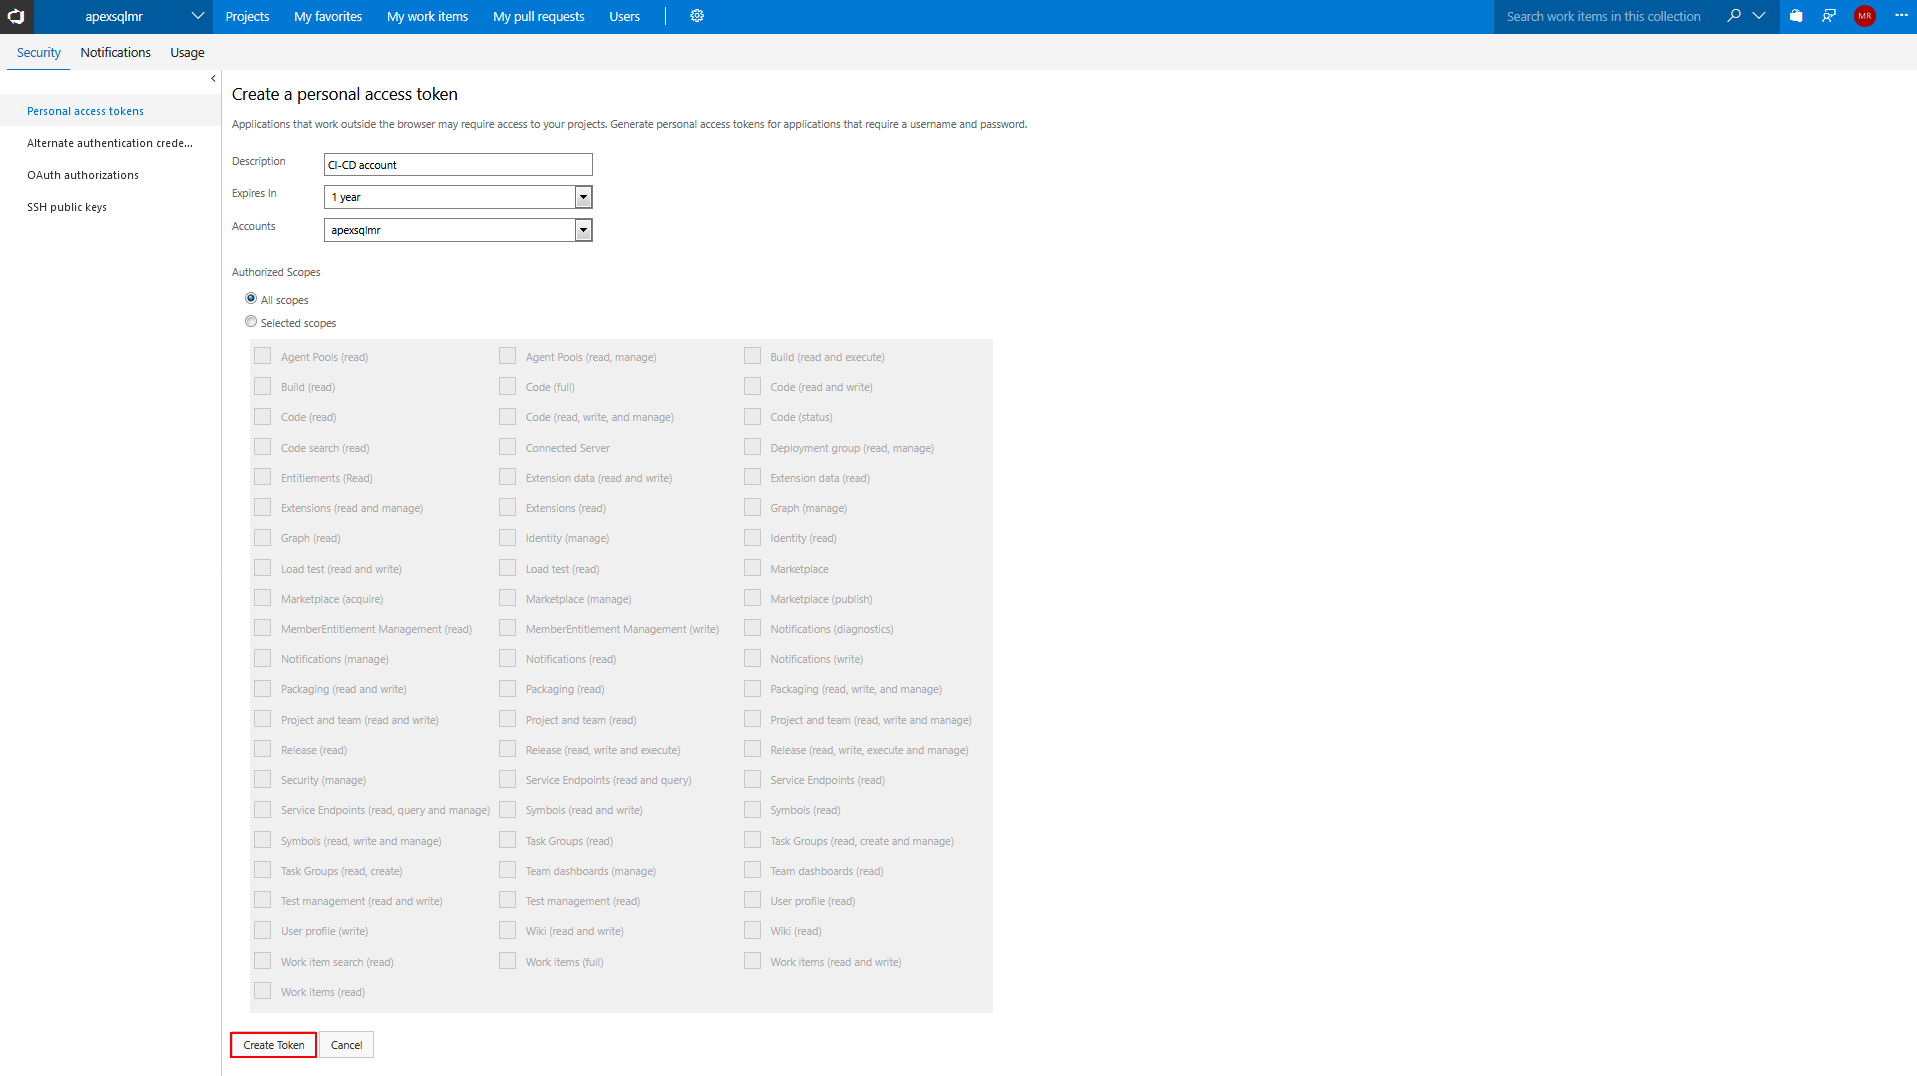
- Fill in the required fields for the description, the token expiration time and the VSTS login user that this token will be assigned to. Optionally customize the scope of features where the token will provide access to. Then the Create Token button will be enabled and its creation can be confirmed.
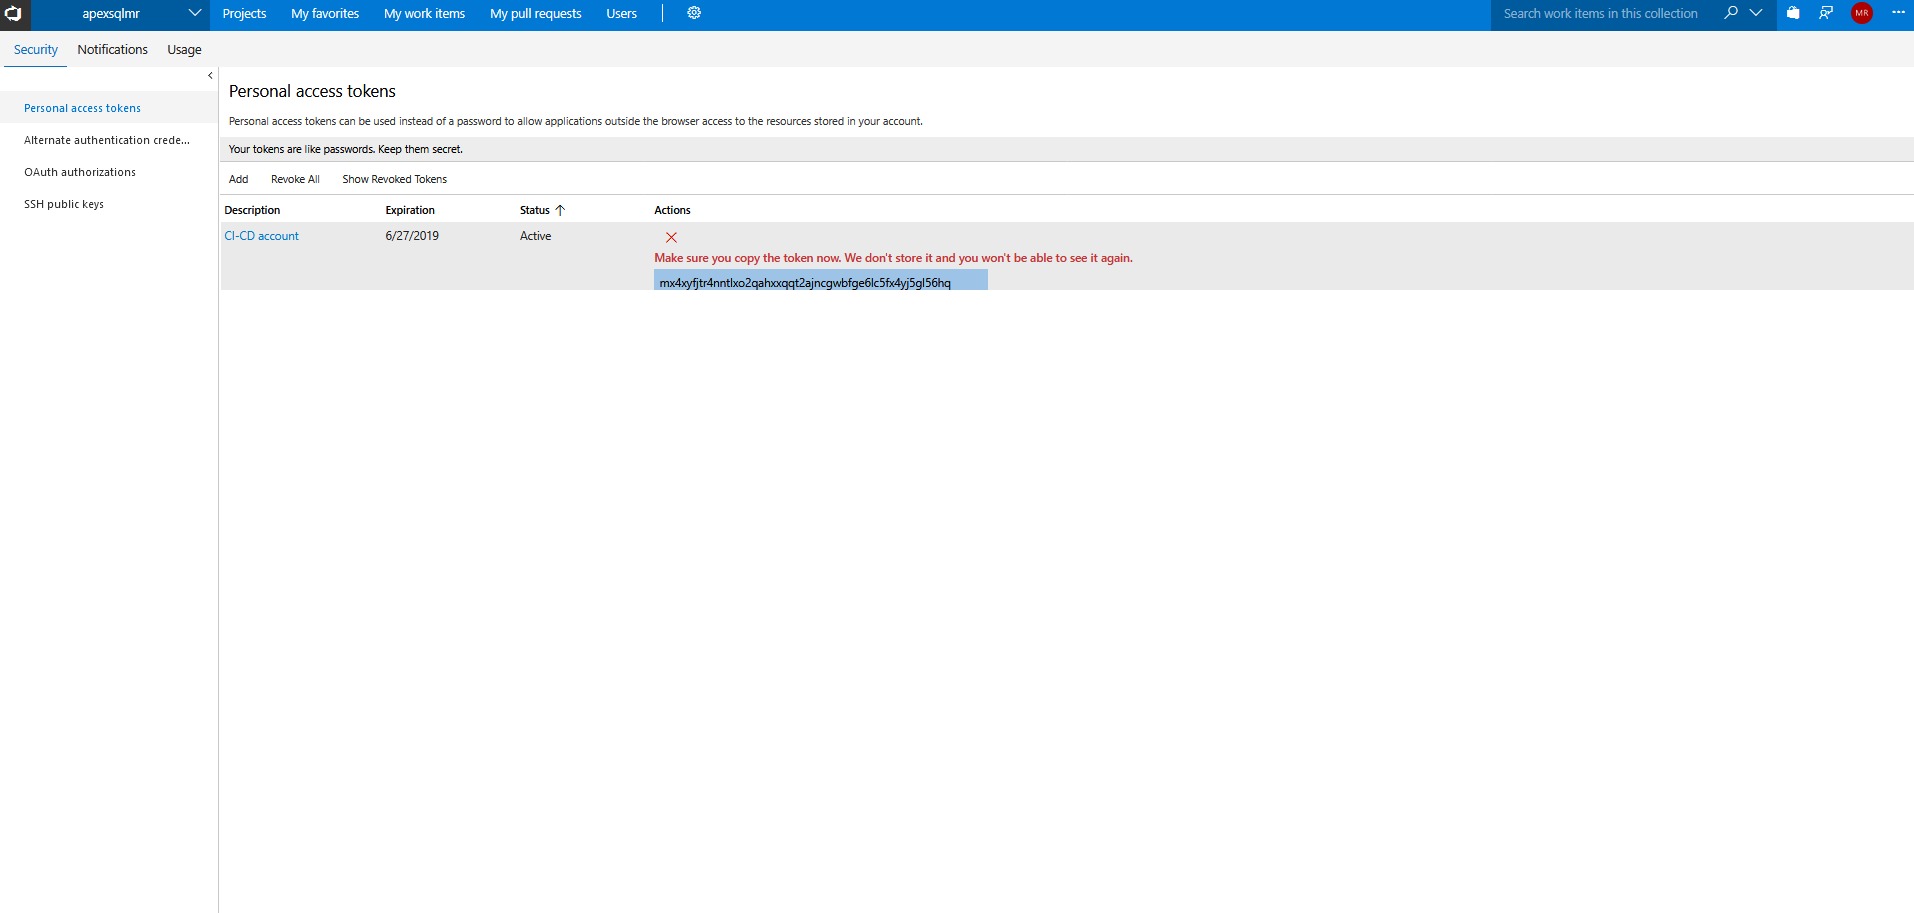
- Copy the generated token (consider saving it in a txt file because it might be used again if the VSTS agent needs reconfiguration but mind the security issues)
- Enter the token in VSTS configuration console
- Enter the agent pool where the new agent will be placed. From the previous example above the agent pool named “PowerShell CI-CD” will be used.
- Enter the build agent name; when entered the agent with that name will appear in the agent pool previously chosen.
- This is the designated folder where the configuration of the build tasks and used Source control repository will be locally stored.
- Choose if the agent will be set as Windows service
- If the build agent is set to work as service choose if the service will automatically start on machine startup
In case in step 7) build agent was not set to run as service start it manually with the run.cmd

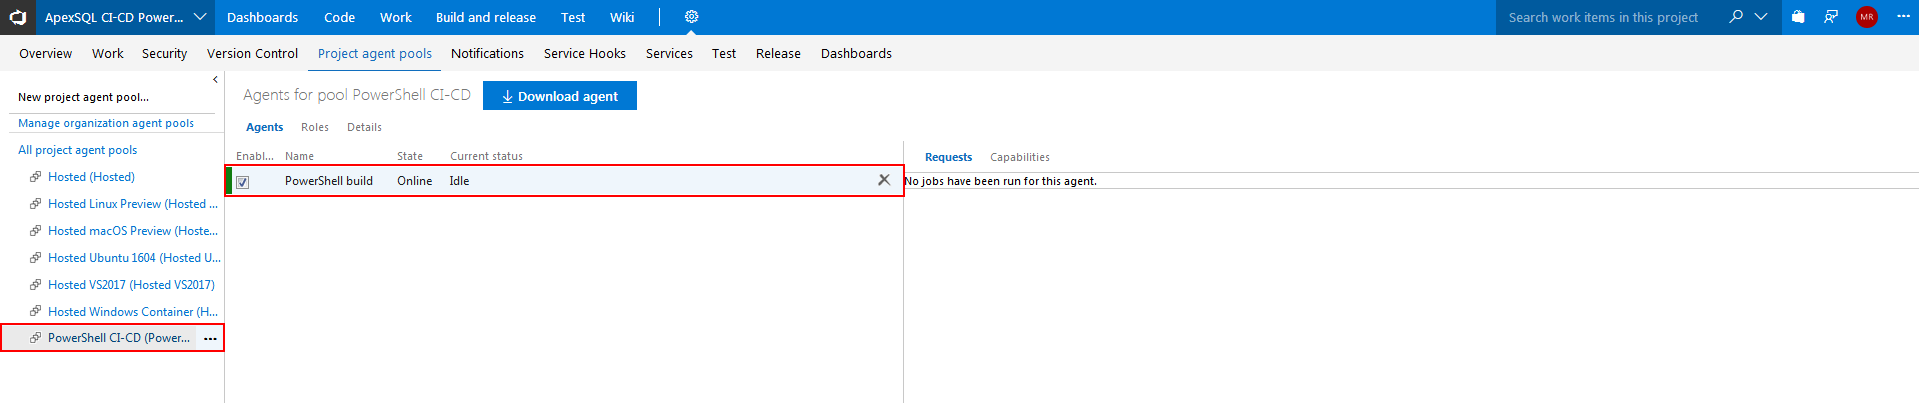
After the build agent activation, go back to the Project agent pools view of the VSTS project and check if the agent is seen as active in its designated pool.
Configuring the build job for ApexSQL DevOps toolkit PowerShell one-click scripts
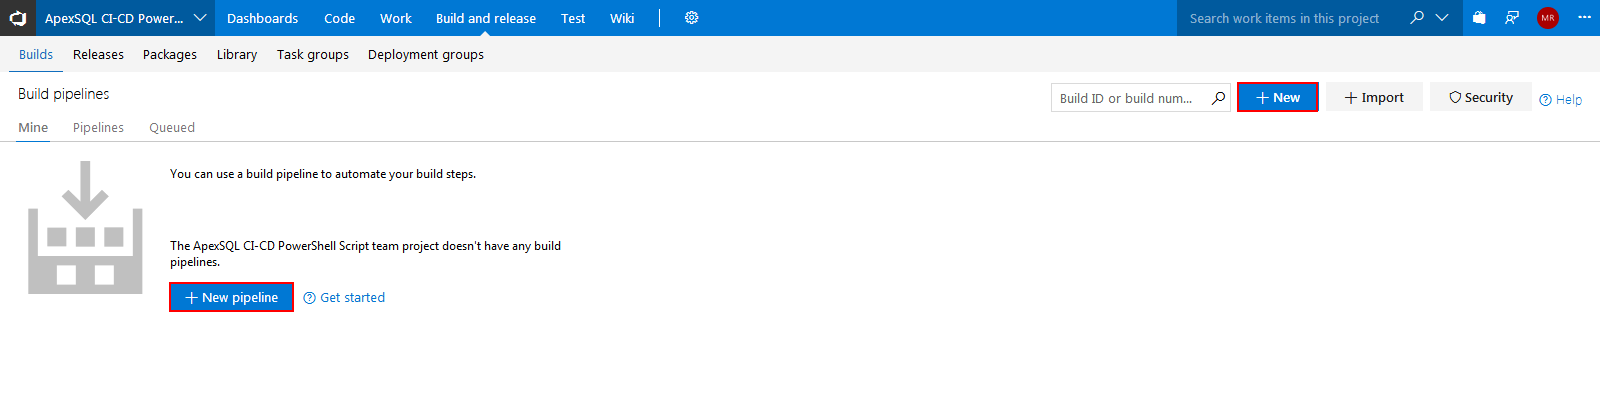
From the current position go to the Build and Release panel where the Builds view should be shown. In this view existing build definitions for the active project will be listed and new one can be created with the click on the New button. In case there are no previously created builds the New pipeline button will be placed instead of them with the same function to create new build.
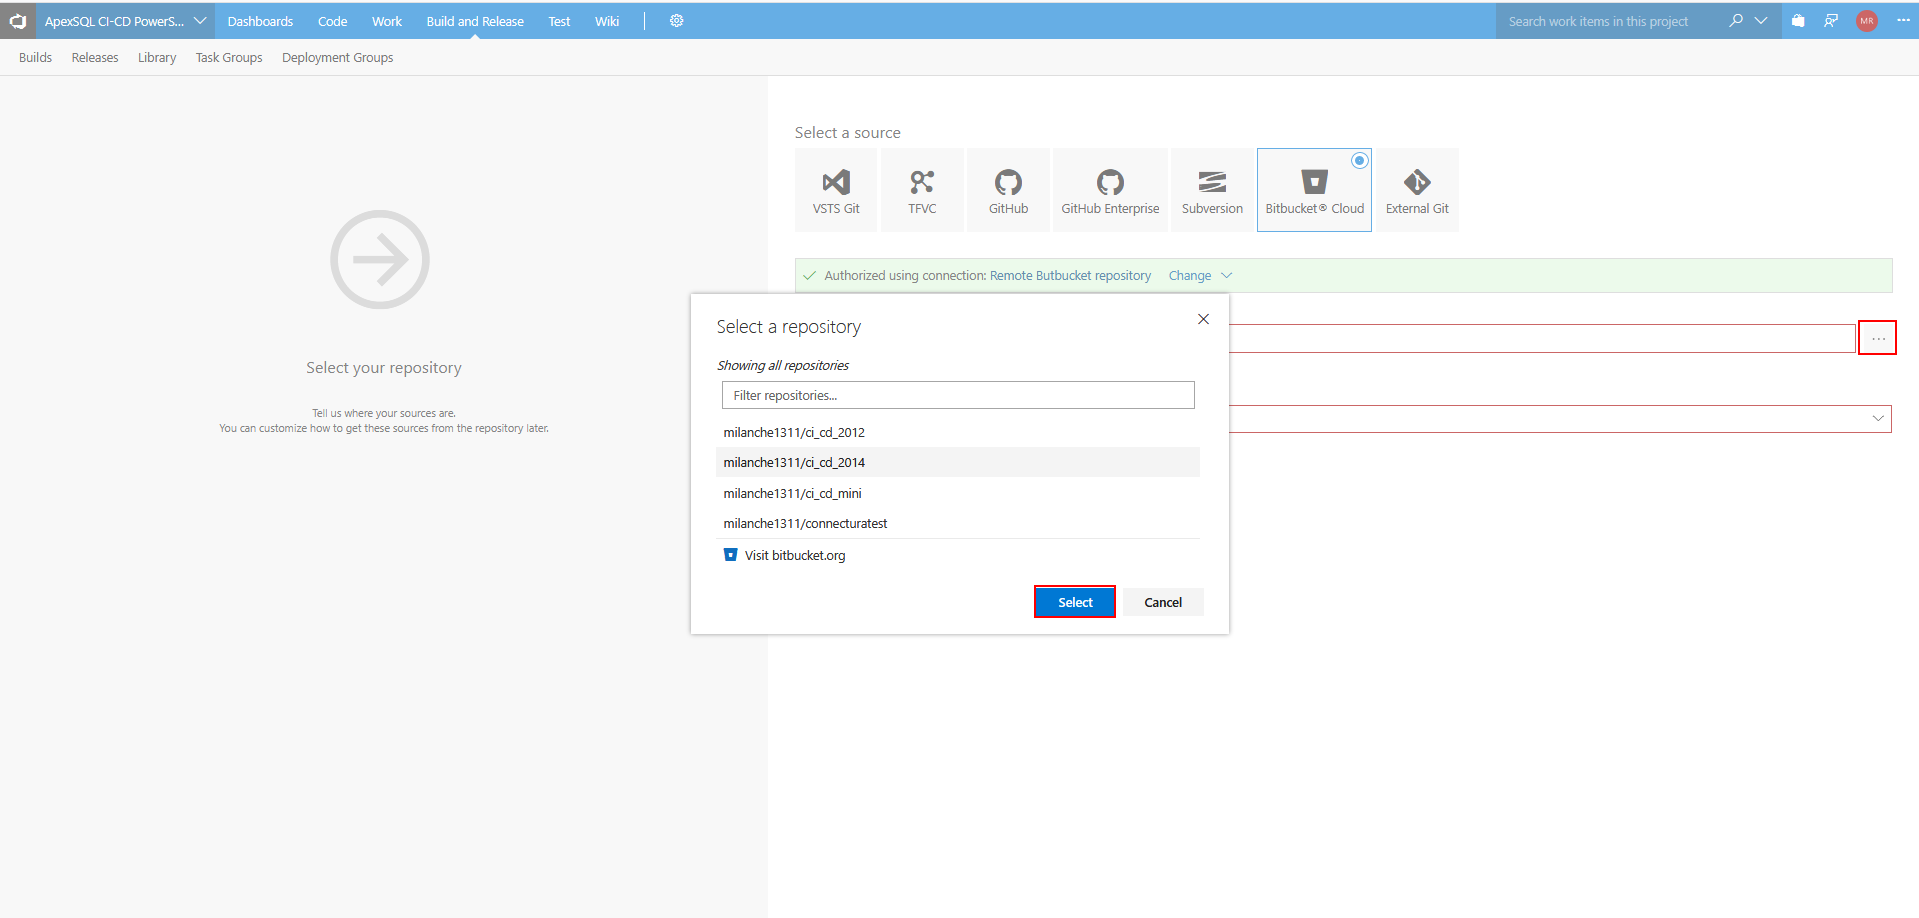
With the new build definition first step will ask for the designated Source control repository. This step is required to be configured in order to move to next one but any kind of settings will be acceptable because ApexSQL DevOps toolkit PowerShell solution uses connection to the Source control repository within the PowerShell script itself so it will use its own Source control definition and will ignore the one configured within the VSTS. Alternately, the proper setting is required if the local working folder is preferred as the source for the PowerShell CI execution.
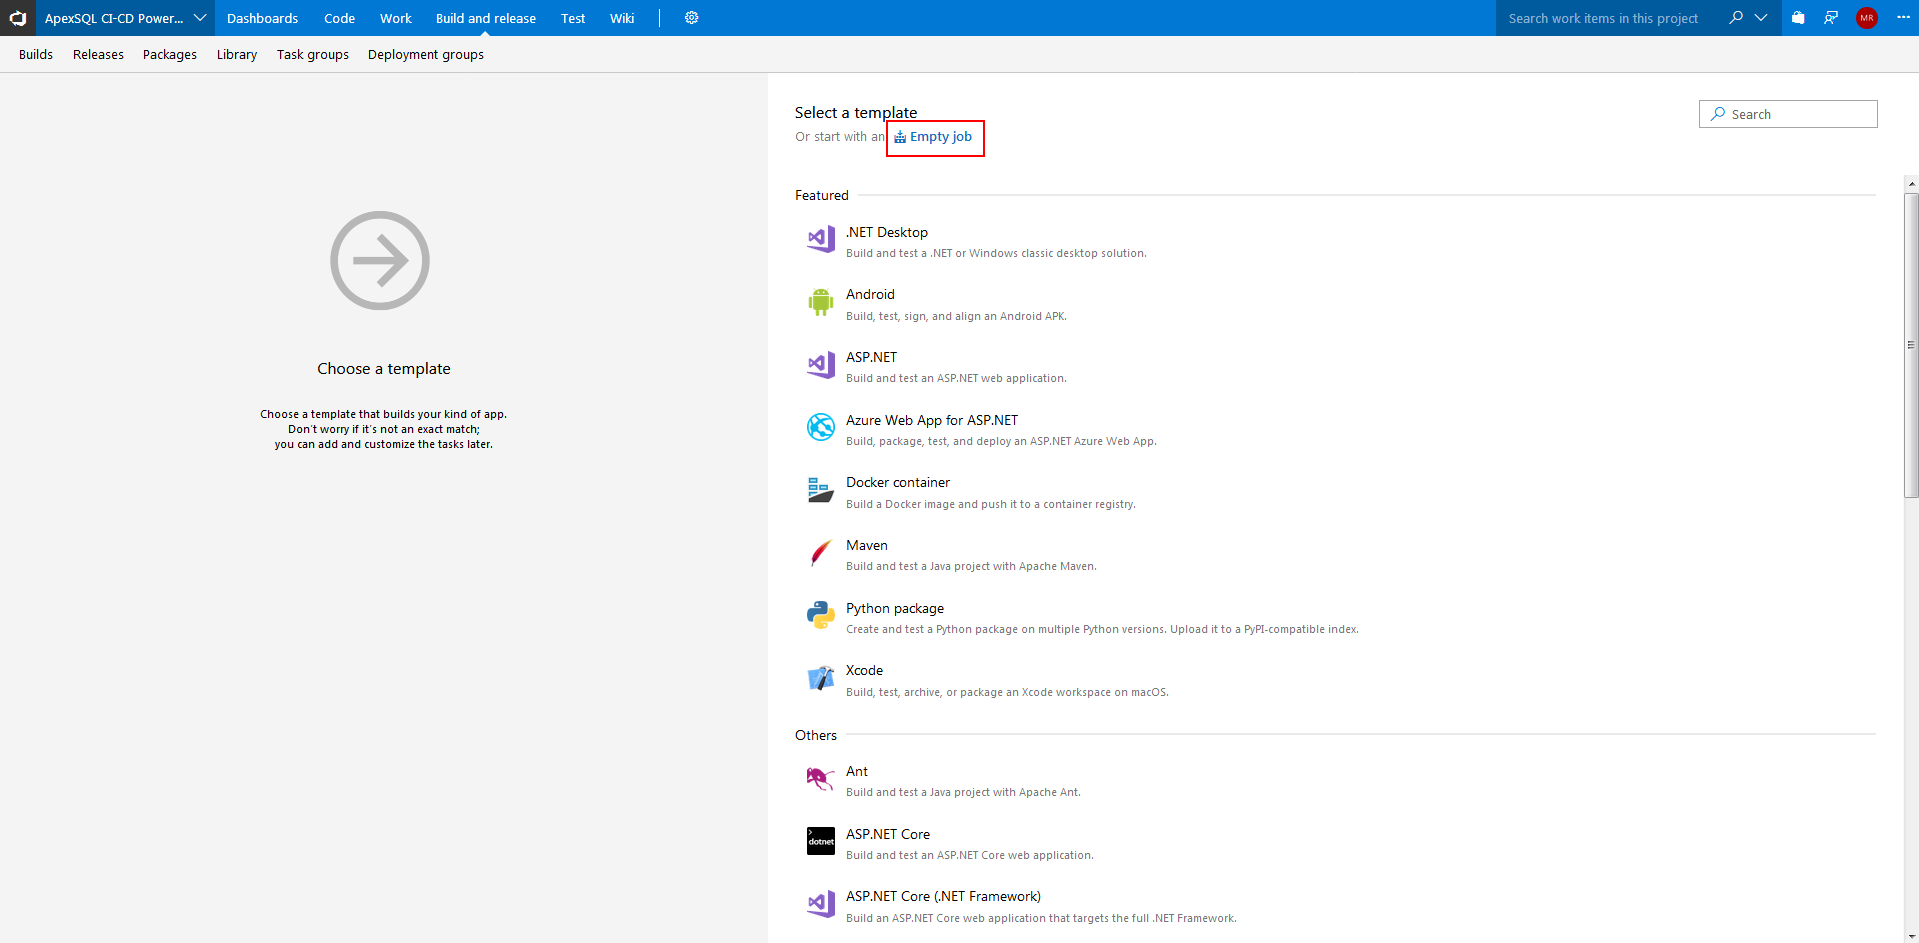
Next step will offer to choose a template for the build. Since no template is needed go with the Empty job option and the view will change to the Agent phase view.
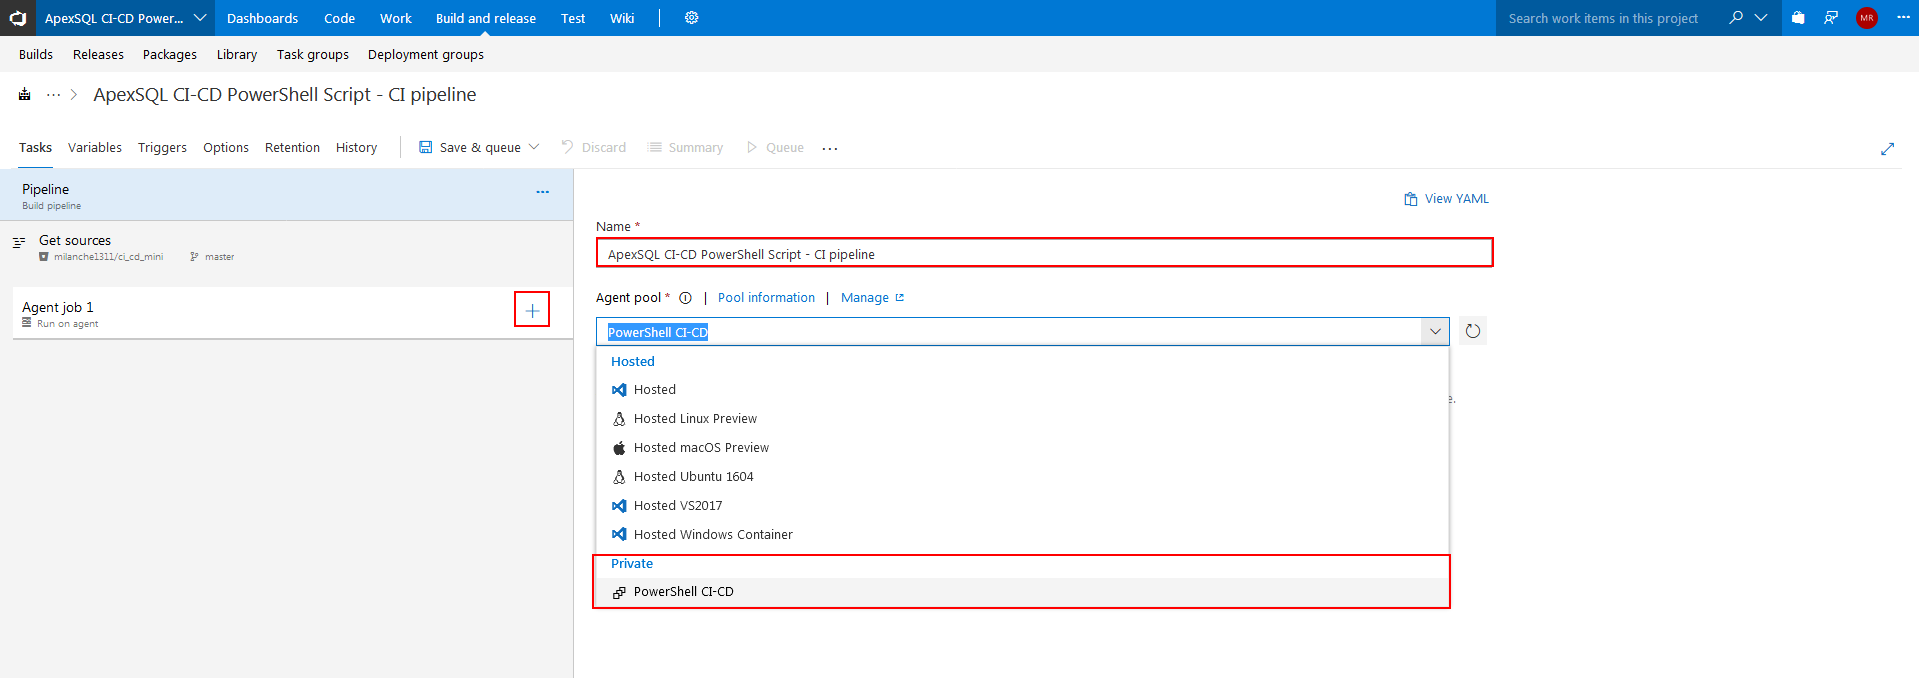
Fill in the pipeline Name and choose the Agent pool that was previously created from the list of available pools. All the agents from the chosen pool will be available to pick the tasks from the execution queue. Then it’s time to add the build agent job. To do that, click on the + shaped symbol in the currently empty task list of the build pipeline.
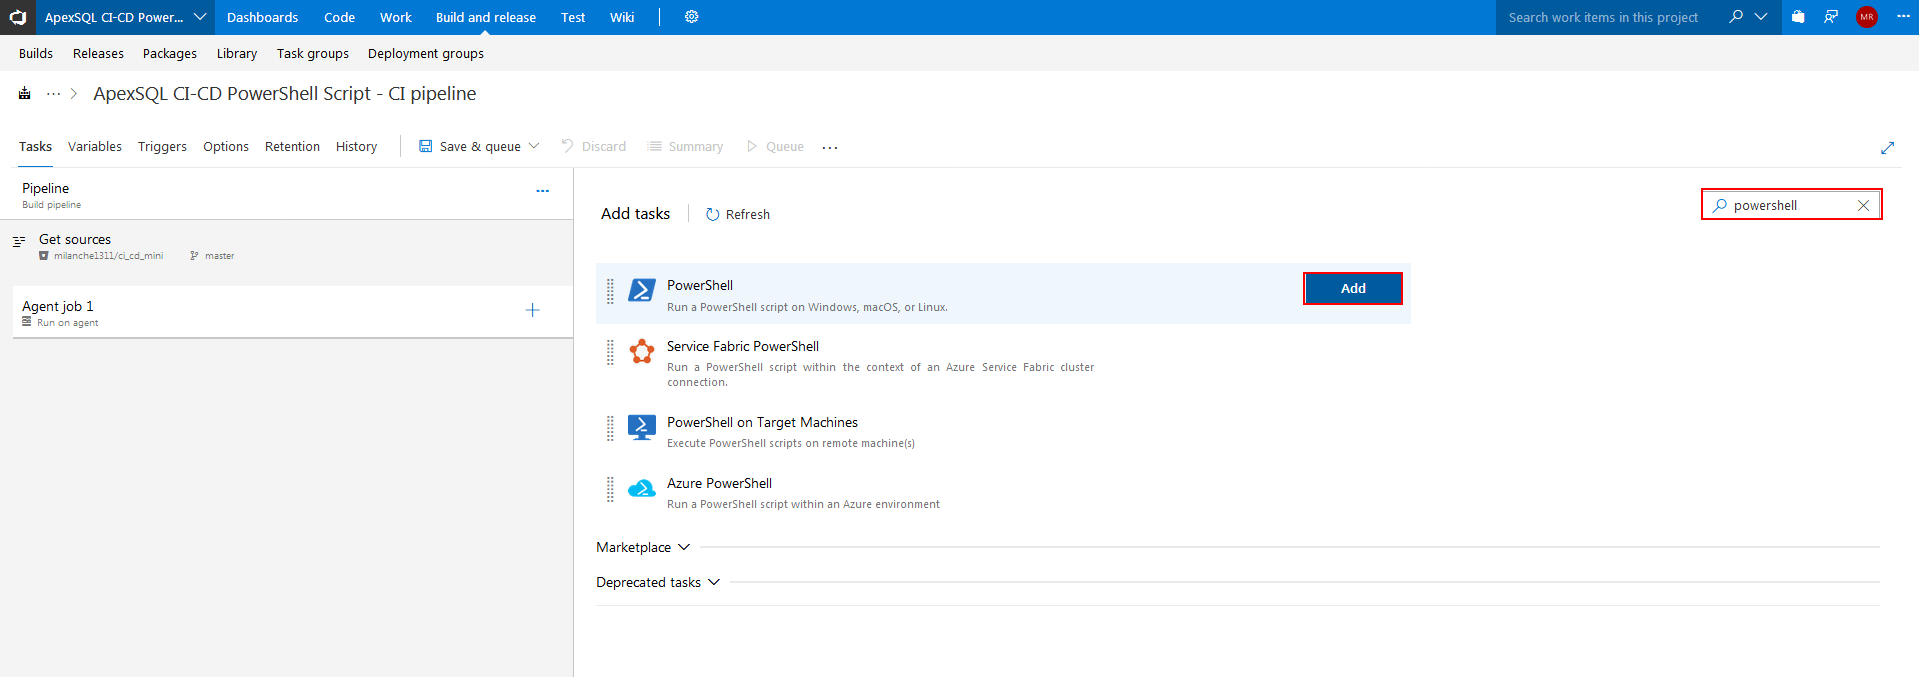
The Agent phase view will change to the view with the list of available tasks to choose from. The task needed is named “PowerShell” so use the search box to find it easier and then use the Add button to insert the PowerShell task.
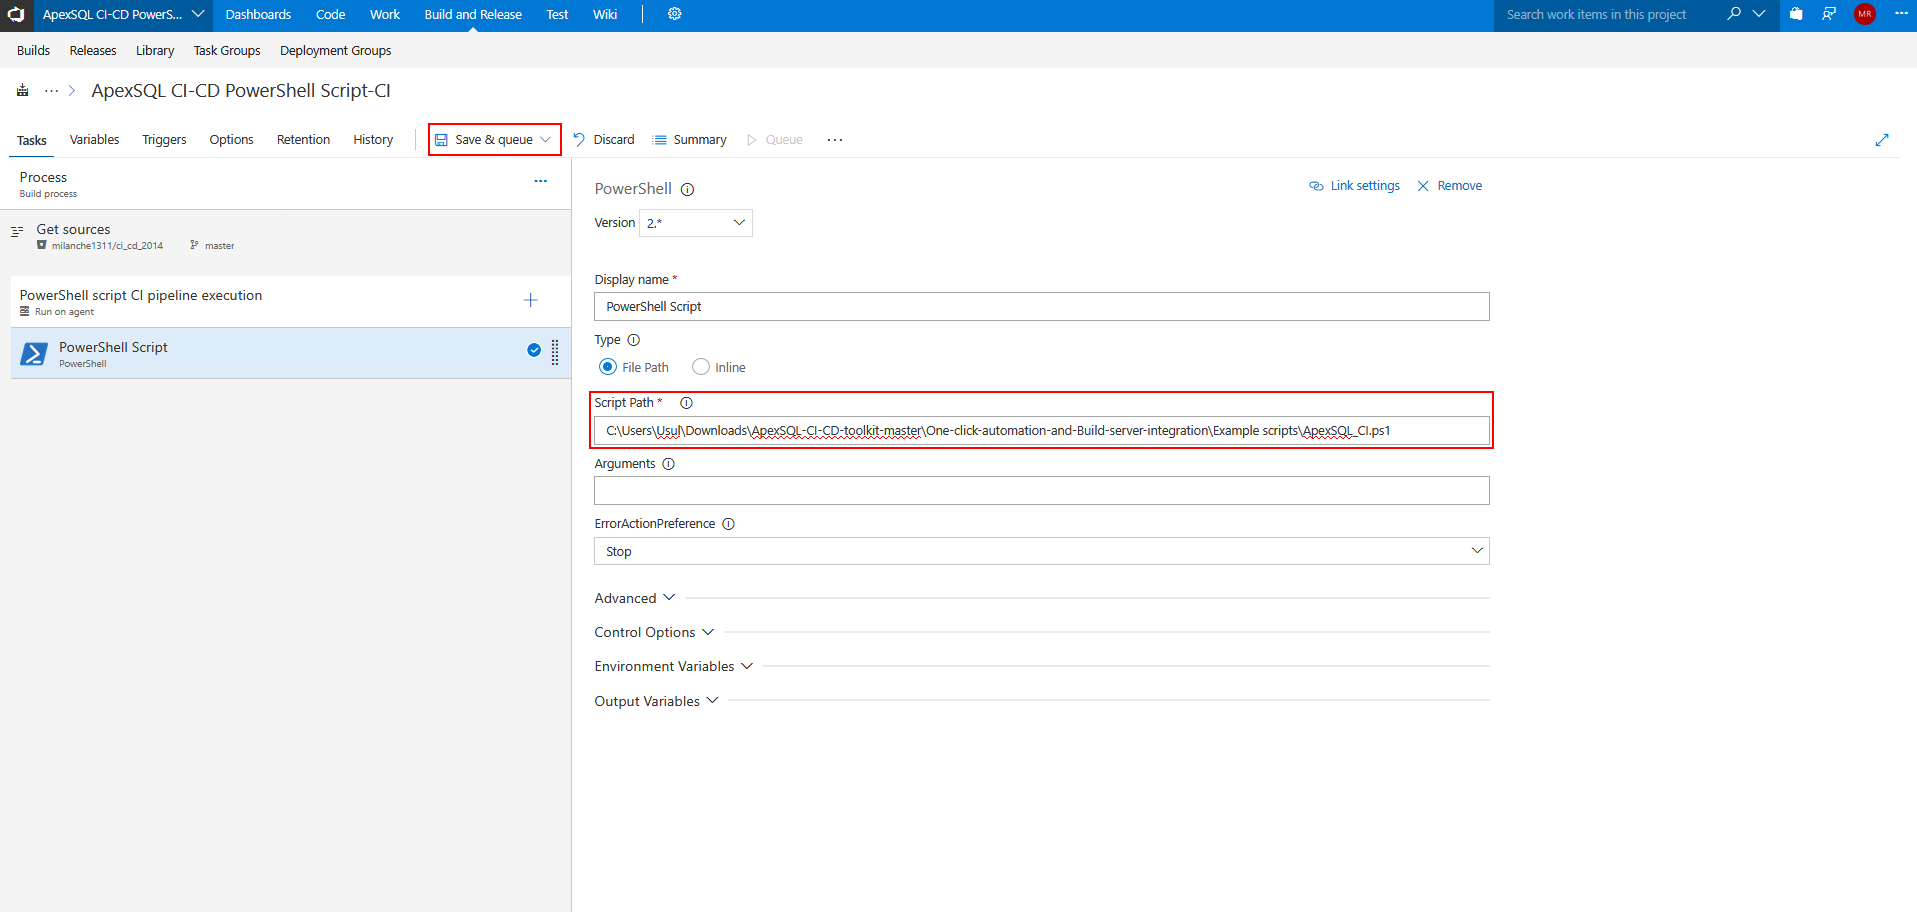
Only thing left do now is to fill in the path to the location and the name of preconfigured ApexSQL PowerShell one-click CI script. Then confirm the settings with save and start the queue.
VSTS server will ask to confirm if the right build agent is chosen:

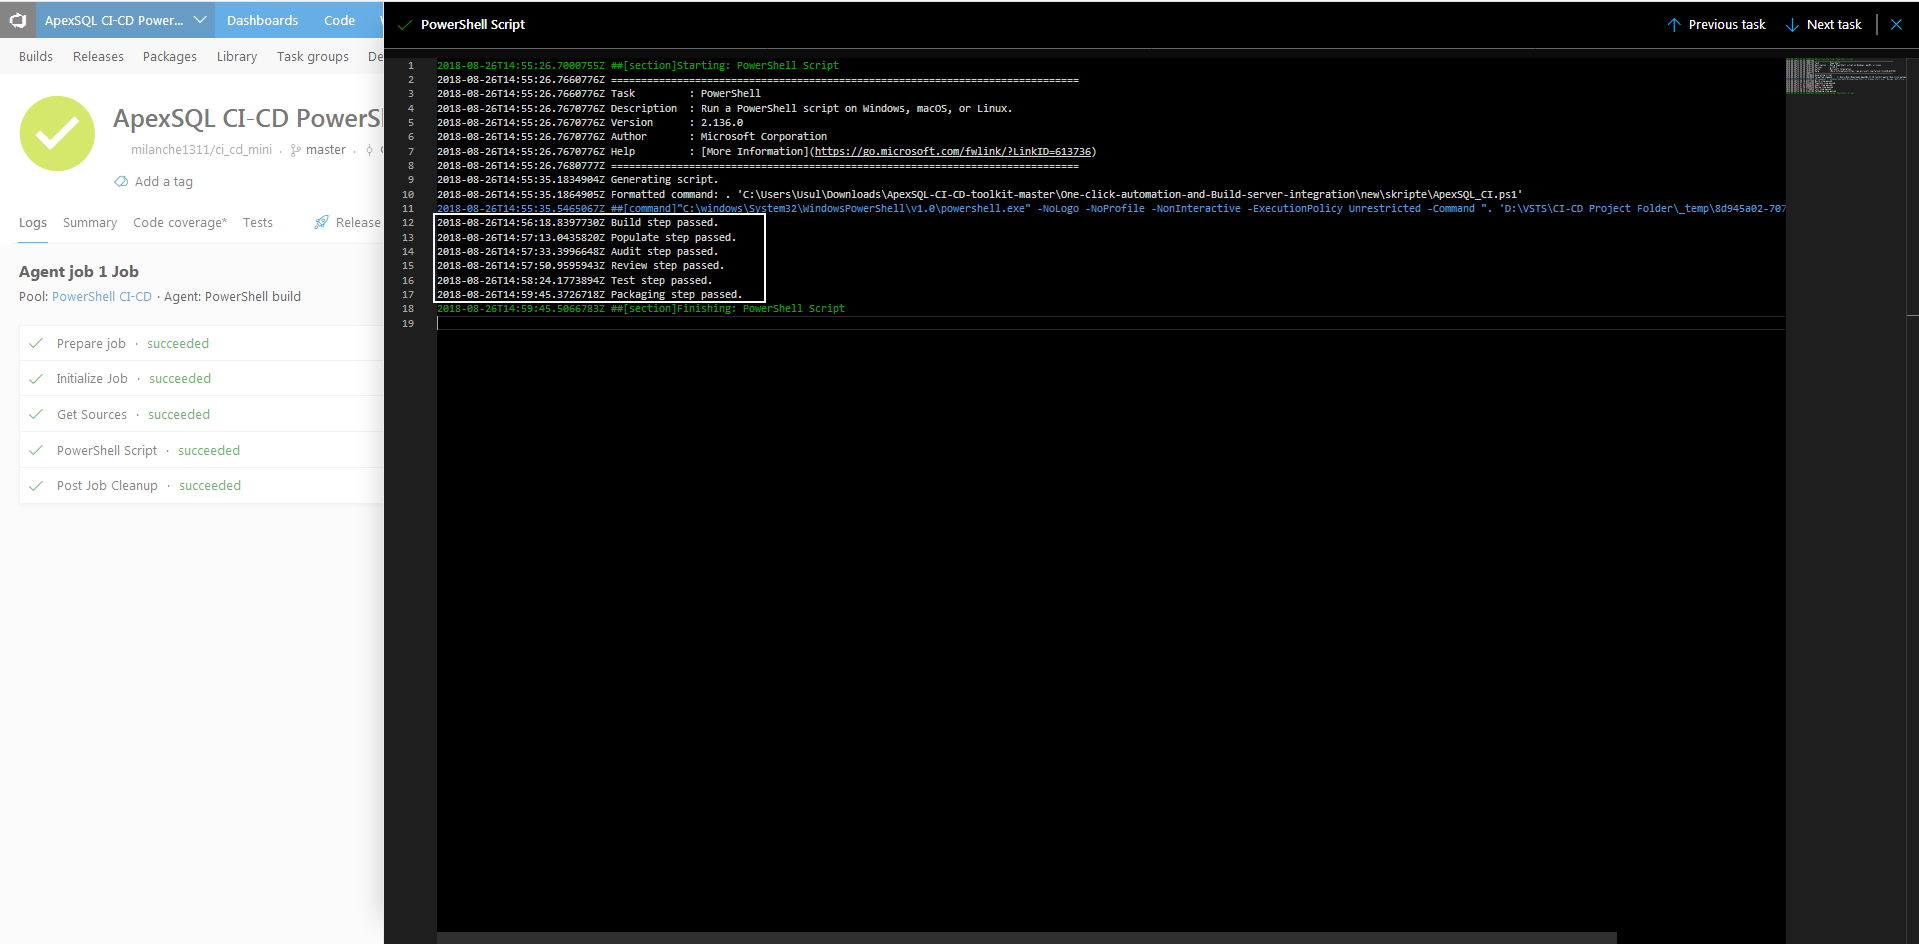
To begin monitoring the execution via PowerShell console go to the build number link shown in the upper left corner of the task view:

And the console will show the output of the execution progress:
After the job is finished database is built from the repository scripts and output files from the pipeline steps will be stored in the folder where the DevOps PowerShell scripts are located on the build machine:

Q: Can one computer run multiple agents?
A: Yes, it is possible to run multiple agents in a single build machine. Make two directories say Agent1 and Agent2, extract the agent in each one of them and configure them with different names against your VSTS/TFS account.
Q: What does use of multiple agents mean?
A: It means multiple PowerShell tasks can be created and executed in parallel, which means that multiple continuous integration and continuous delivery projects can be configured with ApexSQL DevOps toolkit PowerShell one-click scripts and run concurrently.
Q: Will PowerShell script work with all Source control systems that VSTS works with?
A: Generally, yes, the PowerShell scripts can be configured to use VSTS working folder copy of the source control repository and all of the source control systems that VSTS works with are supported. But within the PowerShell scripts it is possible to choose from even wider range of Source control systems than VSTS has to offer.
Q: If I save changes to the PowerShell one-click script do I have to reload the script file into VSTS?
A: No, the VSTS server does not load the script file, it executes it from its current location so if the changes are saved in the script, the script will be executed as is.


