


Applies to
ApexSQL Source Control
Summary
This article describes how to utilize branching and merging when Subversion is used as a source control system.
Similar to Team Foundation Server, branching in Subversion means creating a new folder for each new branch. The content from a source branch is copied to a new branch, so the original branch is not affected by any changes committed to a new branch.
We’ll review the process of linking a database to a Subversion repository that has the default folder structure.
|
Quick tip: The default folder structure in Subversion means a single-project repository exists with top level folders: trunk, branches and tags. The trunk folder is a main line that should contain only tested changes that are ready to be promoted to other environments. The branches folder will keep all the branches created along the way while the tags folder contains all tags aka labels created. |
Next, we’ll create a new branch from trunk. In order to make a new branch active and to be able to commit changes, a database must be re-linked.
As the final part, we’ll merge changes committed to a new branch with the main branch.
We’ll use a Subversion repository hosted locally by Visual SVN Server but all the entire workflow goes the same way regardless of the used Subversion repository.
Description
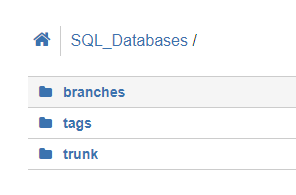
To find out how to link a database to a Subversion repository, check the article: How to link a SQL Server database to a Subversion repository. It is important to mention that for the purpose of this article, we’ll use a Subversion repository that has the following structure:
Linking a database to a main branch
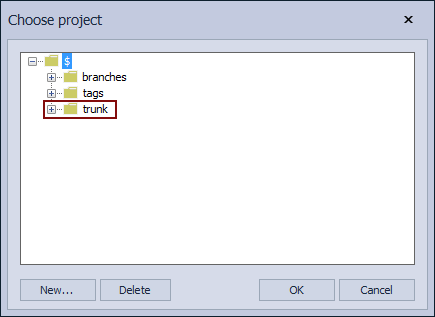
We’ll link a database to a Subversion repository, specifically to the trunk folder. In order to do so, the trunk folder will be set as a project in the last step of the Source control wizard:
After a database is linked, let’s initially commit all objects to the previously selected trunk project:

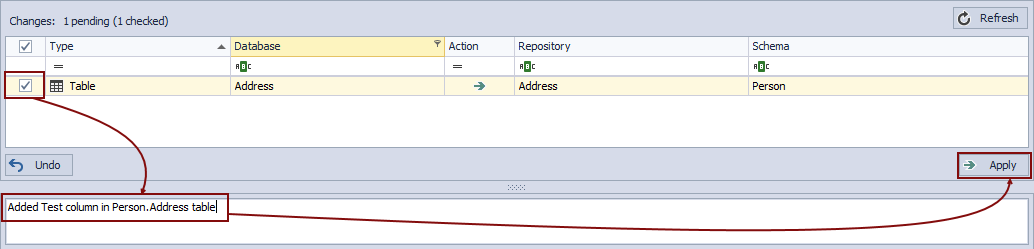
We’ll made additional change that will be committed to the trunk project before creating a new branch. The following script is used to make a change:
USE AdventureWorks2014
GO
ALTER TABLE Person.Address
ADD test int null;
We’ll commit this to the trunk project:
Creating a new branch
Assuming that after committing a change related to the Address table a database reached a point where it can be promoted to other environments, we do not want to break this by commit each and every new change to the trunk project. Instead, let’s create a new branch where all additional changes will be committed.
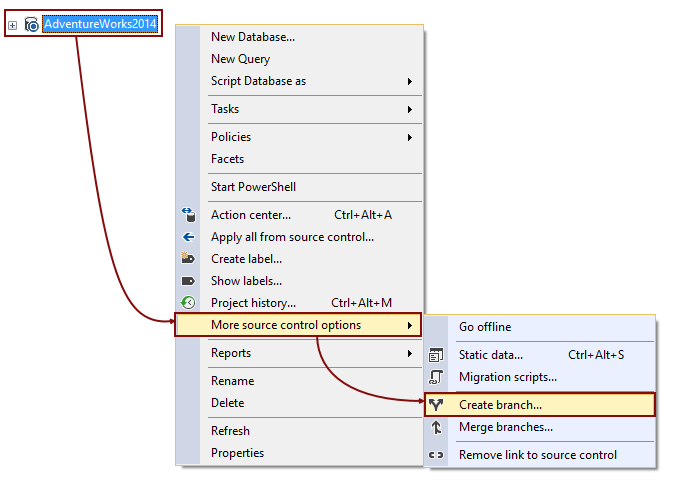
In order to create a new branch, right click a database and choose the Create branch option from the More source control option context menu:
This initiates the Create branch dialog. As shown in the image below, the Source filed contains the current active project which is the trunk project. This cannot be changed since the currently active project is pre-defined as a source branch:
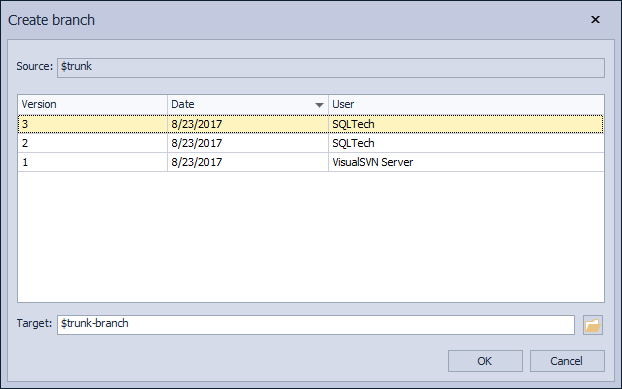
Below the Source field is a list of changesets committed to the trunk branch. The bottom one, “VisualSVN Server” is a generic changeset, created by VisualSVN application when the repository is initiated. The middle one, “SQLTech”, represents the initial commit and the one on top, “SQLTech”, represents the most recent change that is committed, related to the Address table.
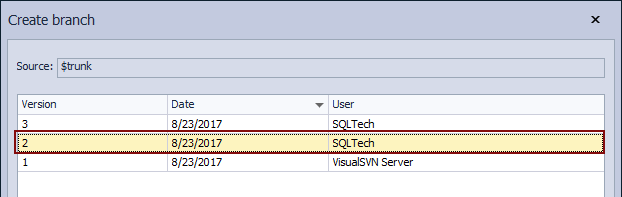
By selecting any of the changesets from the list, changes committed in the selected changeset along with changes committed in any previous changeset will be included. That means changes from changesets committed after the selected changeset will not be included in a new branch.
For instance, let’s assume that we do not need the most recent change, where the Test column is added to the Address table, in a new branch. We’ll select the middle changeset that represents the initial commit without any additional changes:
The Target field is where we need to specify a new branch. By default, a name of a new branch is a combination of the source branch followed by the word “branch”. This can be changed to anything else.
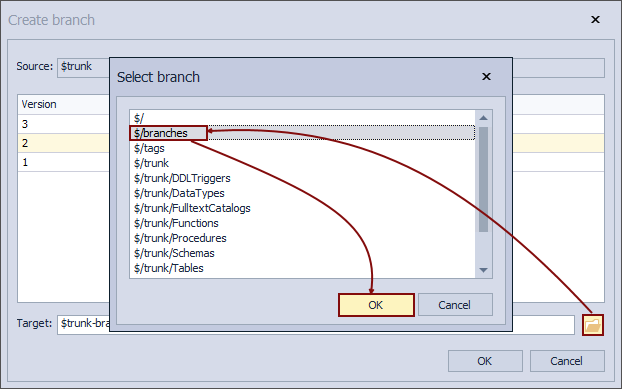
Since we have a separate folder inside the repository that will hold only branches, let’s use the Browse button to navigate to the Branches folder:
We’ll specify Feature1 as a name of a new branch.
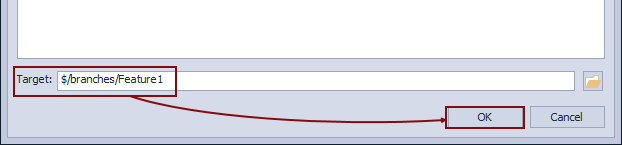
Once we have everything set, clicking the OK button will create the specified branch. When the process is finished, a validation message appears:
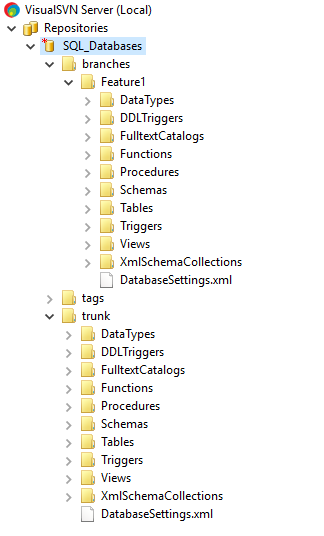
Let’s explore the repository directly, to check the newly created branch. As shown in the image below, the same structure that exists in the trunk project is copied to the Feature1 folder, under the Branches folder:
Switching between branches
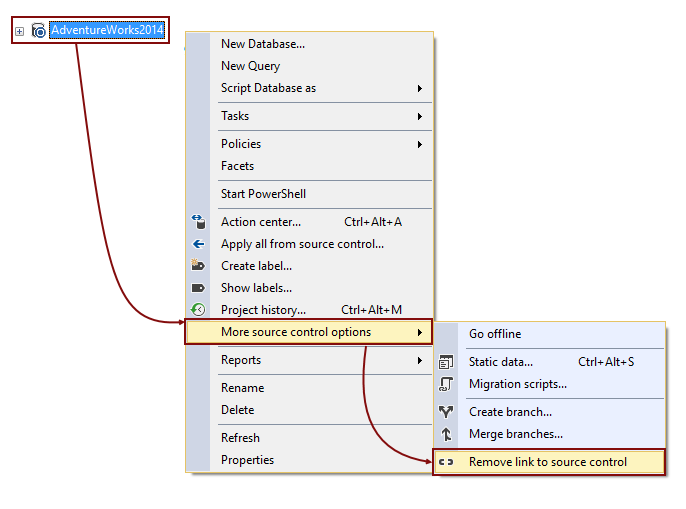
In order to switch to the newly created branch, we’ll need to unlink a database from the current branch and to link it to a new one. To unlink, right click a database and from the More source control options menu, selected the Remove link to source control option:
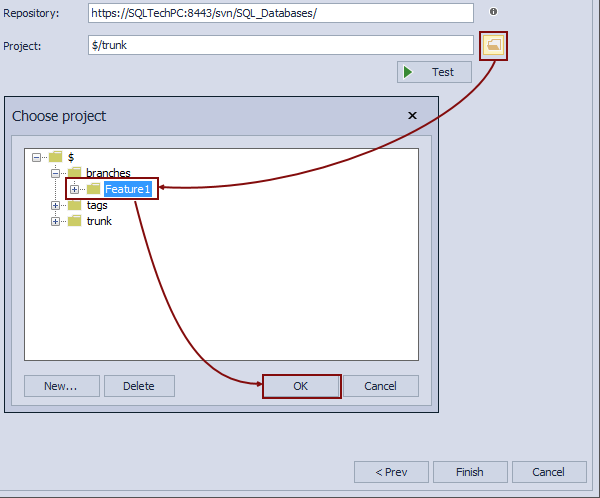
Repeat the linking process in the same way as for the initial linking. In the final step of the Source control wizard, it is important to switch to the newly created folder, Feature1 under the Branches folder:
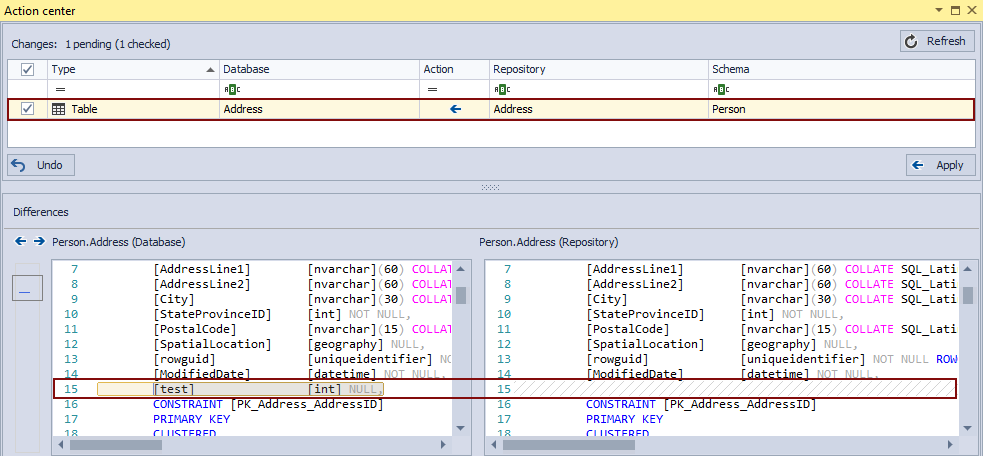
If the Feature1 branch is correctly created, there should be a difference shown in the Action center tab, related to the Test column that is added to the Address table, and that is not included in a new branch. After linking a database to the Feature1 branch and initiating the Action center tab, right side shows that the Test column is missing. This is expected, since it is not included when a branch is created. On other side, left part of the Action center tab shows that the Test column exists.
Let’s create an additional change in a database that will be committed to the Feature1 branch. The following script is used:
ALTER TABLE Person.AddressType
ADD Test1 nchar(10) NULL;
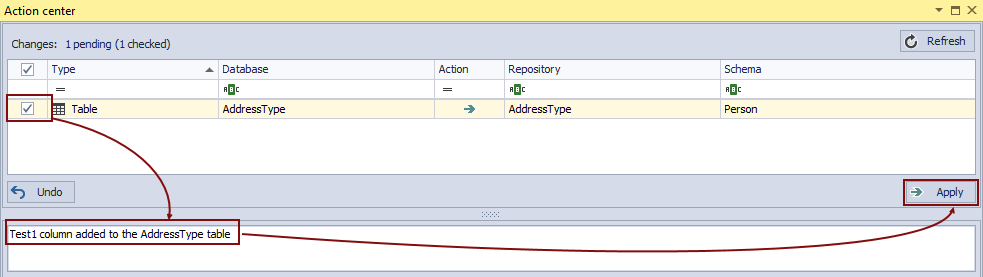
We’ll provide the commit message and click the Apply button to commit this to the Feature1 branch:
Now that we have a change committed to the Feature1 branch and that does not exist in trunk, let’s merge these branches.
Merging branches
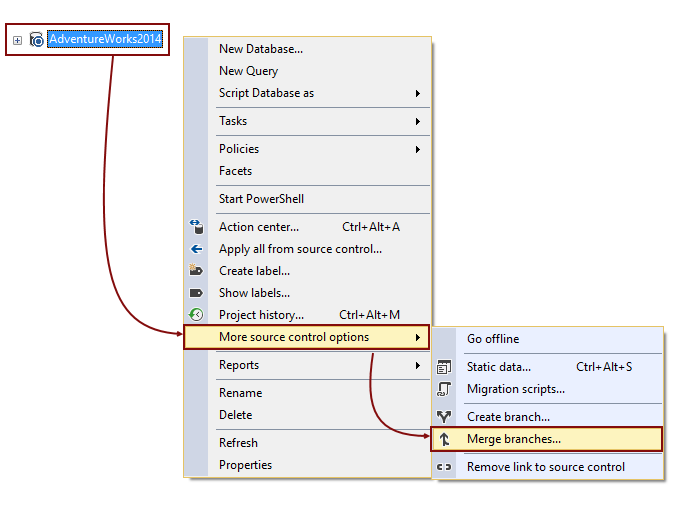
In order to merge changes committed to one branch with other branch, right click a database and select the Merge branches option from the More source control options menu:
This initiates the Merge branches dialog. Unlike creating branches where a source branch cannot be changed, when merging branches, the active branch is irrelevant. A source branch can be any existing branch on a repository. We’ll merge a change committed to the Feature1 branch, which is set as a source branch with trunk that is set as a target branch:
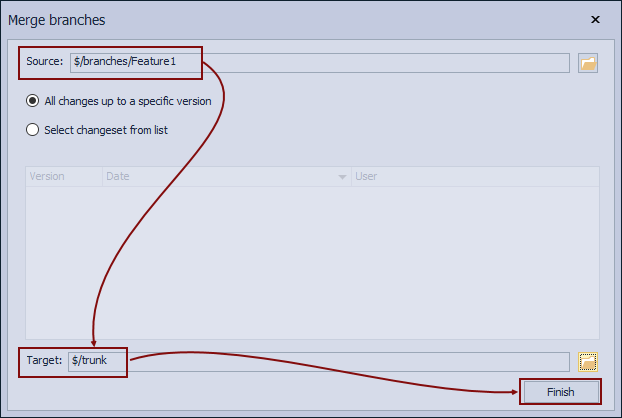
We’ll leave the All changes up to a specific version option checked as we want all changes from the Feature1 branch to be merged. Similar to the process of creating branches, specific changesets can be selected to be the last one that will be merged along with all the previous changesets with a target branch.
Clicking the Finish button will merge selected branches.
As a result, we should have a database synced with source control regardless of the selected branch. Let’s check this while the feature1 is the currently active branch:

After relinking a database to trunk and initiating the Action center tab, the following is shown:
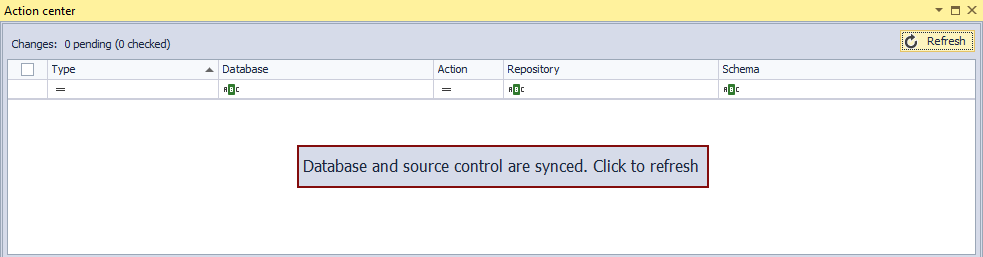
Since no differences are detected, we can confirm that the merging process was successful.
Be sure to review all of our frequently asked questions about branching and merging, in the separate KB, Branching and merging FAQs


