


Applies to
ApexSQL Source Control
Summary
This article describes how to utilize the Branching feature when Team Foundation Server is selected as a source control system.
Since branching in Team Foundation Server means creating a new folder (project) for a new branch and copying all the content from the initial folder to a new one, we’ll cover the process of linking a database to a folder (Team Foundation Server project) that will be treated as the main branch.
After that, we’ll create a new branch from the initial one. In order to access the new branch and to commit changes to the new branch, a database must be re-linked. We’ll shown how that works, as well.
At the end, we’ll merge changes from two branches and verify that everything is merged successfully by comparing a database with branches that were previously merged.
We’ll use a Team Foundation Server repository hosted online on visualstudio.com but the complete workflow is identical when using Team Foundation Server on premise.
Description
To find out how to link a database to a Team Foundation Server repository, as well as what permissions are required on a repository side, check the article: How to link a SQL Server database to a Team Foundation Server repository.
By creating a branch, the user creates a folder (project) inside the repository that contains all the content from the initial branch that is used as a source.
|
Quick tip: It is mandatory to store a new branch outside the folder that is initially used to link a database. |
Let’s check how to organize the folder (project) structure on a repository. If a repository is empty, we can create a folder in the root called Databases. In order to do that, browse the repository in the final step of the Source control wizard and choose to create a new project:

|
Quick tip: If a repository is not empty, it is recommended to have a separate folder where databases will be linked, and to have a separate folder for each linked database. |
Once a new project is created let’s create another one inside the Databases project that will be specifically used for a sample database used in this article. To create a sub-project, highlight the Databases project in the Choose project dialog and click the New button:

Now that we have a separate folder for a database we want to version control, one folder that can be used as a main branch, and another folder where we’ll keep all branches. We’ll name the first one Main_Line and the second one will be the Branches folder. We’ll repeat the process of creating a new project in order to achieve this:

|
Quick tip: The above presented structure that requires a separate folder for branches is not mandatory, but recommended for a better overview and easier navigation through branches. |
For the purpose of this article, we’ll treat the Main_Line project as a main branch, while other branches will be created in the Branches project. With that being said, let’s link a database to the Main_Line project:

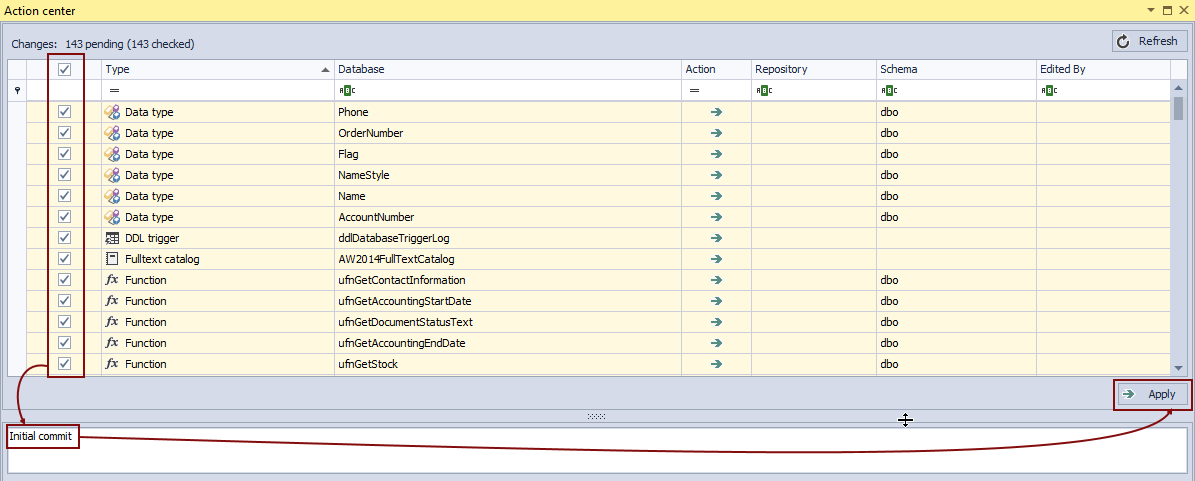
After a database is linked, let’s initially commit all objects to the Main_Line project:
Create a new branch
Now that we have a database initially committed, let’s create a new branch where new changes will be committed. This way we’ll simulate the workflow of having a mainline that is tested and that is in a working state. Therefore, we do not want to simply commit each and every change to a main line. For that reason, we’ll create a new branch that will contain the exact same objects that exist in the main line as well. However, we can commit as many changes as needed to another branch without affecting the mainline. Later, when changes from any other branch are tested and verified, we can merge them with the mainline.
In order to create a new branch, we’ll right click a database and choose the Create branch option from the More source control options sub-menu:

This initiates the Create branch dialog. The Main_Line project will be set by default in the Source field and this cannot be changed. Besides the Source field, a list of changesets committed to the Main_Line project will be shown. In this specific case, lower changeset represents a generic entry created along with a project creation. A changeset on top represents the initial commit of all objects:

When creating a new branch, any changeset can be selected from the list. By selecting a specific changeset, a new branch will have all changesets before the selected one, including the selected changeset. Any changes committed after the selected changeset won’t be included in a new branch.
The “Target” branch represents a new branch that will be created. By default, a new branch will have a name of the Source branch followed by the word “branch” (in this case it is Main_Line-branch). This can be changed to any other name that describes the purpose of creating a new branch.
Creating a new branch means creating additional project. Knowing that we have already created a separate folder called Branches to keep all new branches, we’ll specify that in the Target field and in the Branches folder we’ll create another one that represents a new branch called Feature01:

By doing so, we’ll have everything from the Main_Line branch copied to the Feature01 branch. When this is set, clicking the OK button will create the specified branch. As a result, a confirmation message appears:

|
Quick tip: Leaving a default branch name in the Target field, a new branch will be created on the same level as the Main_Line project. |
To verify that a new branch is created, let’s switch to a repository directly and to look for what is stored in the Branches folder:

As shown in the image above, a new branch called Feature01 is created and the entire content is copied from the Main_Line branch (all the folders with subsequent files). In order to verify that all the content is copied, we’ll need to switch to the Feature01 branch. If the Action center tab shows no changes, it will be a confirmation that a new branch is successfully created.
|
Quick tip: If the most recent commit is not selected when creating a new branch, the Action center tab should show each change committed after the selected changeset as a difference after switching to a new branch. |
Switching between branches
To switch to a new branch, a database must be unlinked from source control (unlinked from the current branch), and re-linked to a new project (folder) that represents a newly created branch. This is a mandatory step when switching between branches when using Team Foundation Server.
To unlink a database, right click on it from the Object Explorer pane and choose the Remove link to source control option from the More source control options sub-menu:

After that, link a database again, but in the last step of the Source control wizard, choose a new branch (folder) to link a database to. In this case, we’ll find the Feature01 project, inside the Branches folder:

Now that we have the correct project set, we’ll link a database. After the Action center tab is loaded, it shows no differences:

Merge branches
Let’s make a sample change and commit it to the Feature01 branch. We’ll use the following script:
ALTER TABLE Person.Address
ADD Test int NULL;
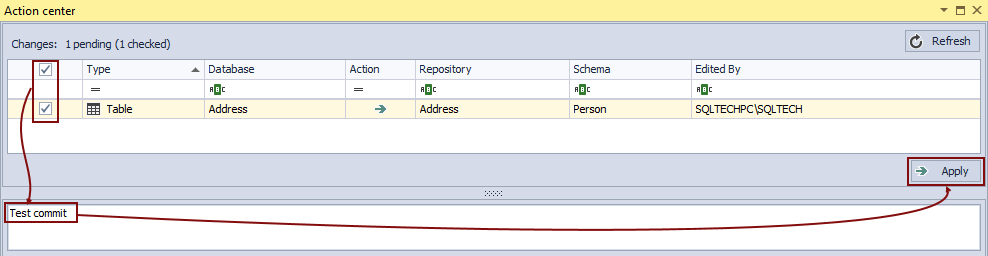
We’ll commit that to the Feature01 branch:
When a change is committed to the Feature01 branch, let’s merge that change with the Main_Line branch. In order to merge branches, right click a database in the Object Explorer pane and from the More source control options sub-menu, select the Merge branches option:

This initiates the Merge branches dialog:

Browsing through a repository, source and target branches can be set. We’ll use the Browse button to select a source branch first. This is a branch which changes will be merged (copied) to a branch selected as a target. In this case, we will use the Feature01 branch as a source:

Similar to the process of creating a new branch, choosing a source branch gives a list of committed changesets to the selected branch. Since we want to merge all changes, the All changes up to a specific version option will be checked:

As a target branch we’ll choose the Main_Line branch. This is a branch where all changes will be copied from the Main_Line branch:

By clicking the Finish button, specified branches will be merged.
To confirm that the merging process was finished successfully, let’s re-link a database to the Main_Line branch. After re-linking and initiating the Action center tab, no differences are shown:
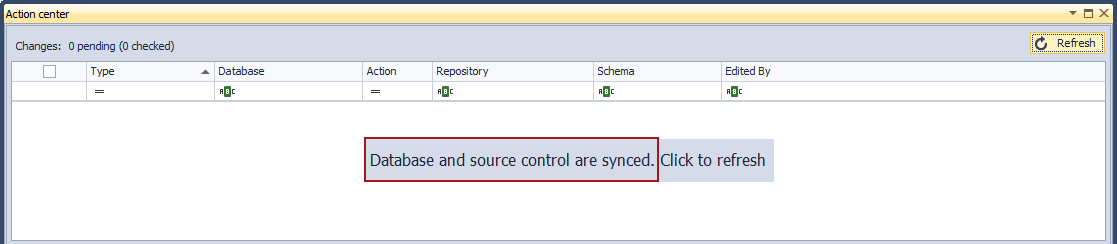
This means that whatever was committed to the Feature01 branch now exists in the Main_Line branch.
Be sure to review all of our frequently asked questions about branching and merging, in the separate KB, Branching and merging FAQs


