


Applies to
ApexSQL Source Control
Summary
This article describes how to utilize the branching feature when a SQL Server database is linked to a Git repository.
Branching means to diverge from the main development line for any of the following reasons (working on a new feature, fixing a bug, etc.). Working in an additional branch instead in the main branch allows the user to work in isolation and to make changes as much as needed, without affecting the main branch. Once the changes are tested and verified, the new branch where changes are made can be merged with the main branch. The goal of this article is to show how a database can be linked to any existing branch and how a new branch can be created later when a database is already linked.
Description
Linking a database to the specific branch
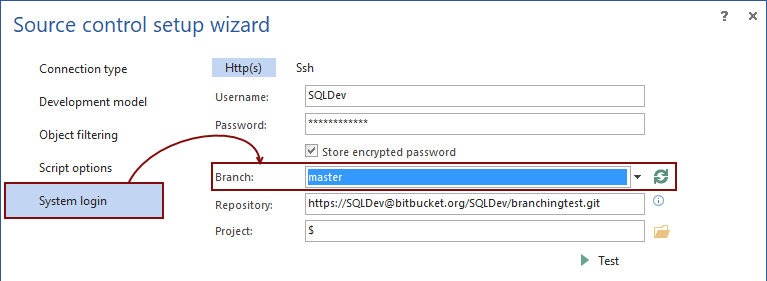
When linking a database to a Git repository, by default a master branch is selected in the final step of the Source control wizard:
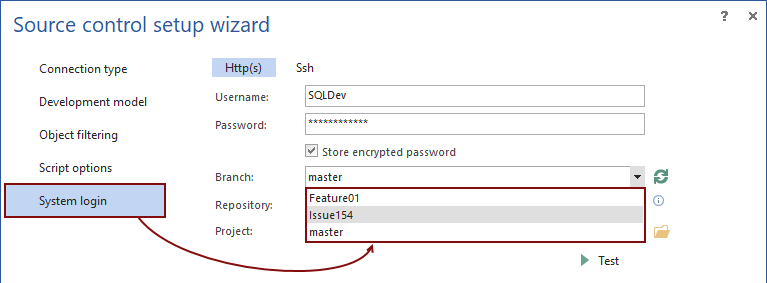
If additional branches exist on the repository other than the main one (often called the master branch), a database can be linked to any of these, just by picking the right one from the Branch drop-down list:
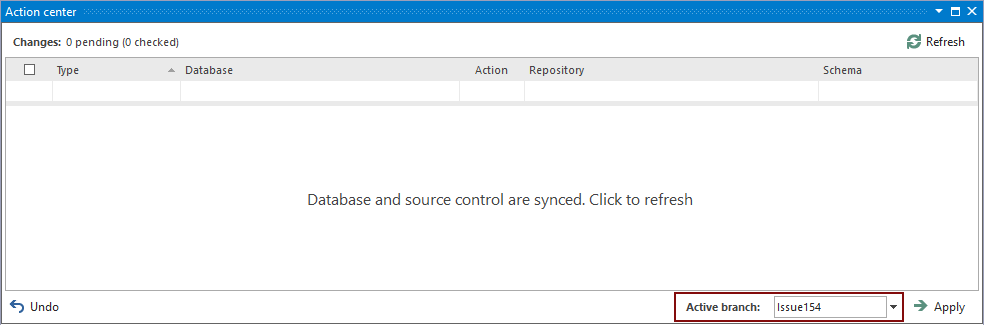
After a database is linked to the selected branch and the Action center tab is initiated, the Active branch value shows the current branch:
Switching between the existing branches
In order to change the current branch, initiate the Action center tab and select any of the available branches from the Active branch drop-down list:

After selecting a branch from the drop-down list, the Action center tab will be refreshed thus comparing the selected branch with the current state of a database.
Creating a new branch
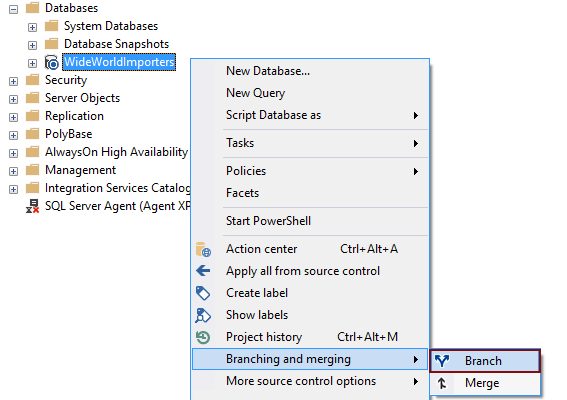
To create a new branch, right click on a database in the Object Explorer pane, navigate to the Branching and merging menu item and click the Branch option from the sub-menu:
This initiates the Create branch dialog:
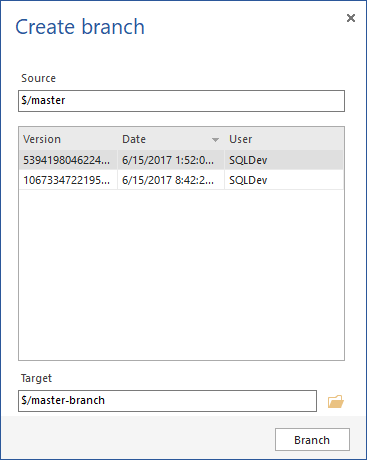
In the Create branch dialog, the Source field will be pre-defined with the active branch:

In the Target field, a name of the new branch should be specified.
For any branch that is set as active and as such appears as a source branch in the Create branch dialog, the list of committed changesets is shown (sorted by date in descending order):

This means that the user can choose any changeset from the list that will be the last included in a new branch, while any changeset committed after the selected one will not be included.
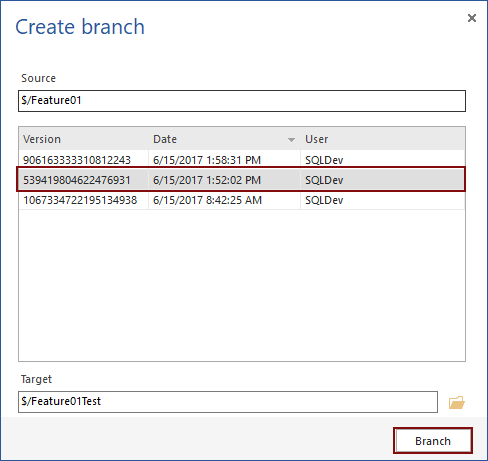
To illustrate this, let’s assume we are using the branch called Feature01 (specified in the Source field from the above image) that contains three changesets. Assuming that the most recent changeset (the one from the top of the list) contains SQL database changes (let’s say a column is added to one of the tables) that should not be included in a new branch.
To create a branch that will not include the most recent changeset, we can choose the second changeset from the list, provide a name for the new branch and click the Branch button:
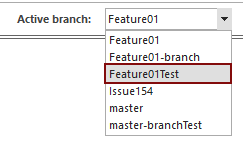
To confirm that a new branch called Feature01Test does not contain the most recent change made against a database, let’s set it as active, using the Active branch drop-down list from the Action center tab:
Once the Action center tab is refreshed, the add-in shows a difference between a database and the Feature01Test branch:
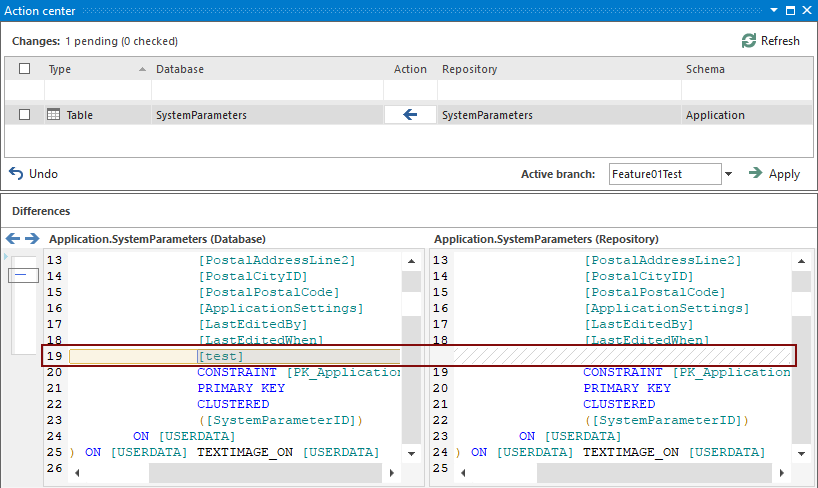
Since this change (test column added to the SystemParameters table) is made against a database and committed to the Feature01 branch, it is shown as a difference when the Feature01Test is set as active branch.
Similar to this, any other changeset from the list can be selected as the last one to be included in a new branch.
Be sure to review all of our frequently asked questions about branching and merging, in the separate KB, Branching and merging FAQs


