Applies to:
Summary
This article describes how to configure and run before-after auditing, reporting and alerting in ApexSQL Audit.
Description
Before-after is database auditing solution designed to track information on who and when made the change, what objects were affected, what application and host are used, and most importantly what was the original (before) and after value upon data change.
This feature leverages SQL triggers to capture data changes for DML transactions in SQL databases. It is an essential tool to track information for Inserts, Updates, and Deletes against database objects and sensitive data.
Before-After auditing configuration
To configure Before-after auditing feature in ApexSQL Audit, follow these steps:
-
Run the application interface and go to Before-after tab in the main ribbon

-
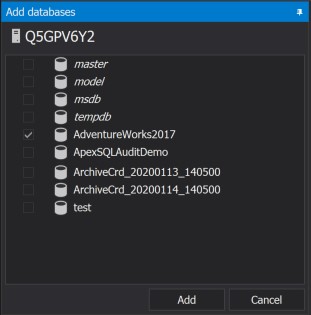
Add database for auditing in this step
-
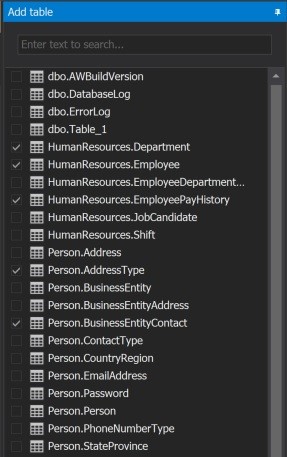
Continue by adding database tables from the Add table pane
-
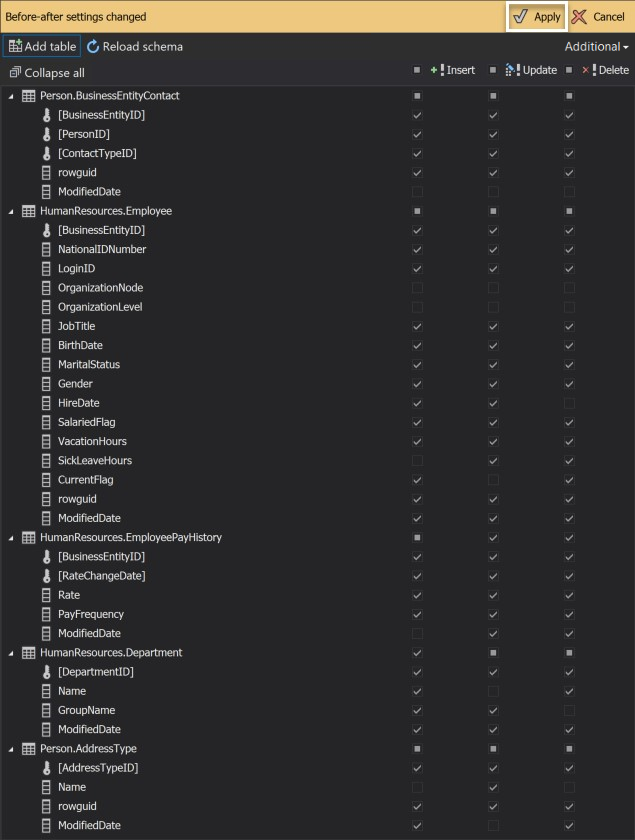
Check the columns and DML operations that will be audited across the selected tables and hit the Apply button to finish
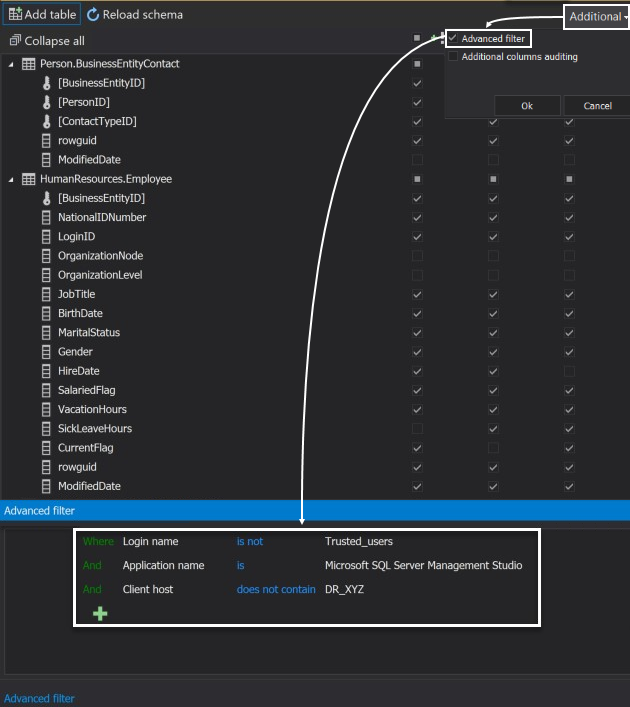
The auditing criteria can be also further polished via advanced filters to achieve greater precision via logical conditions that specify exact cases on which before-after auditing will be triggered.
To specify conditions, advanced filters have to be enabled before adding and combining the logical expressions. Use the Additional drop-down menu and tick the Advanced filter option to show the Advanced filter panel and start entering expressions in it:
Additional columns
Once the configuration is applied, the set of database triggers is created upon selected tables to collect the data on DML activities and fill the auditing trail, the next section will explain how to run reports and configure alerts.
Reporting
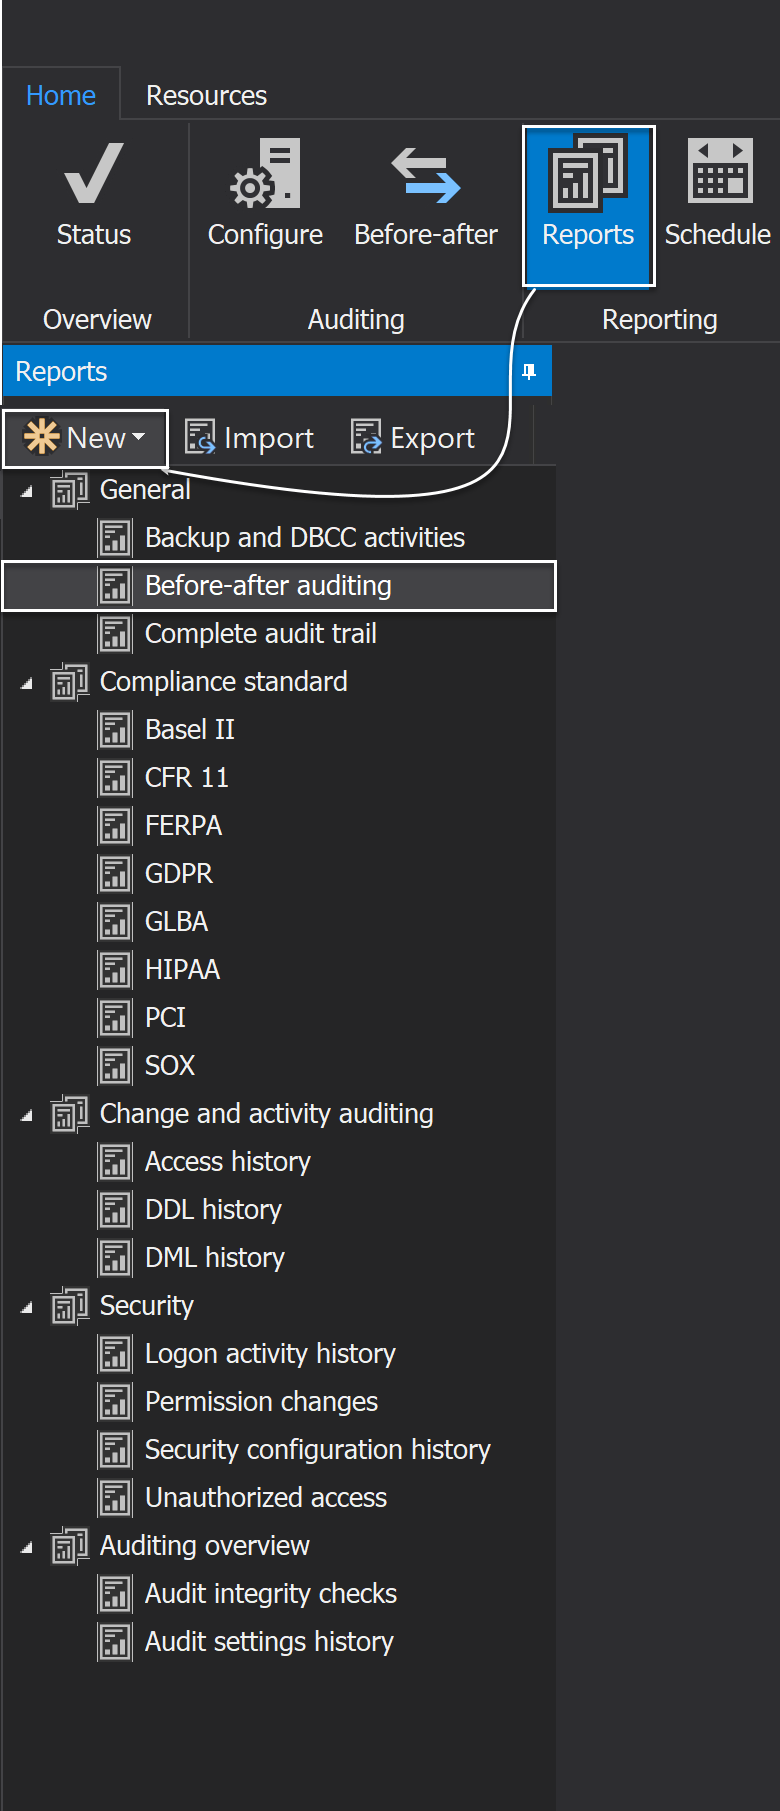
The easiest way to review before-after database auditing data is by using the pre-determined reporting template Before-after auditing that is available when clicked on the New button in the Reports tab:
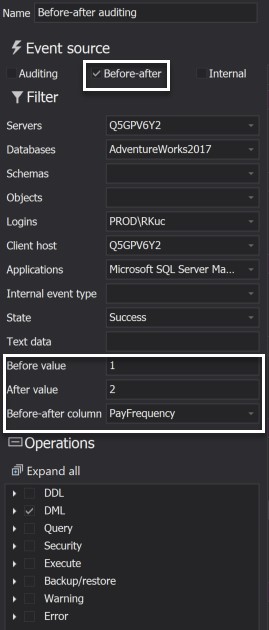
Additionally, we can use multiple filters to enhance the precision of the report by specifying servers, databases, logins, application and many more such as before and after values, also as before-after columns that will allow one to precisely create a report upon specific data:
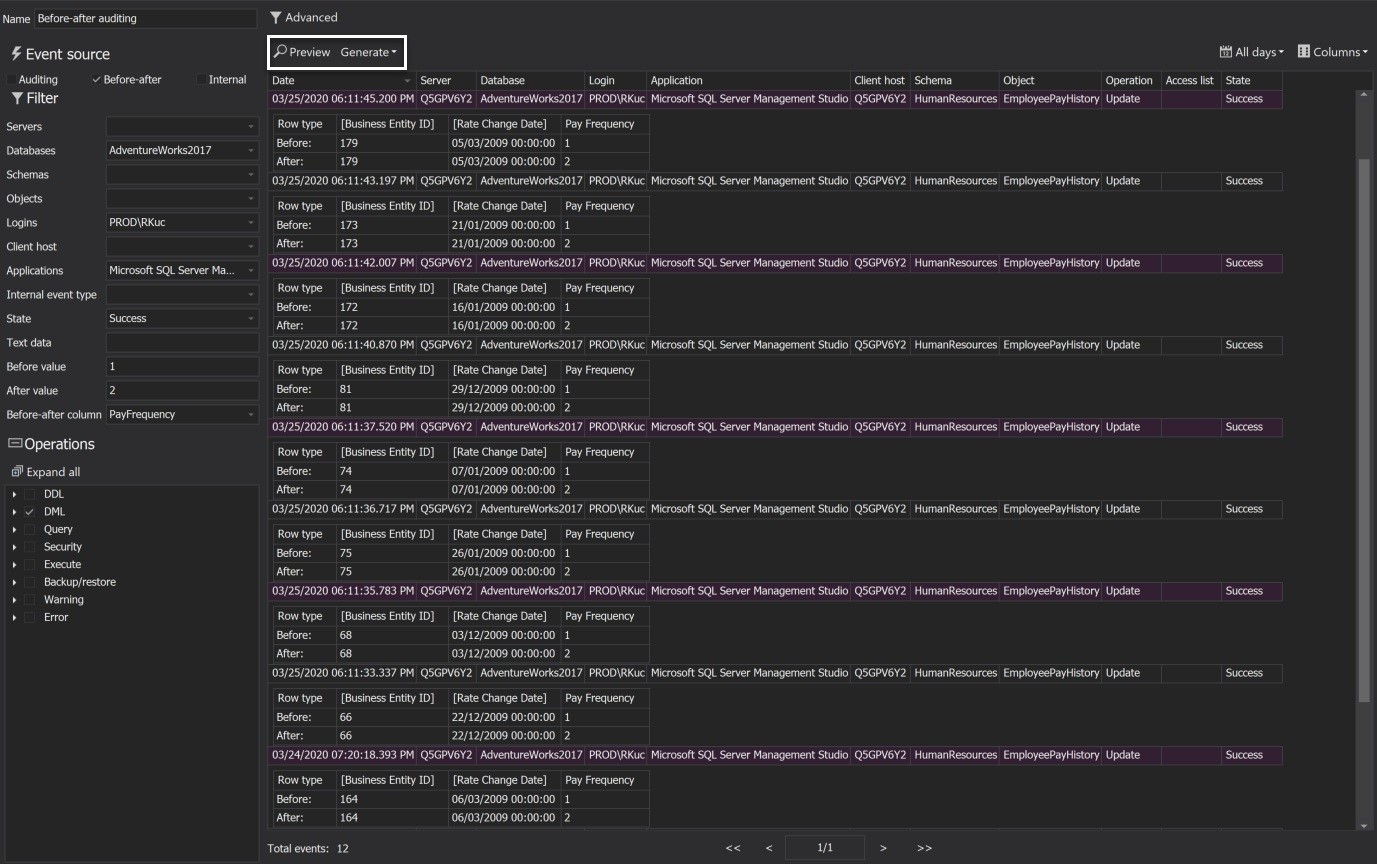
To run the audit report, click the Preview button which will extract data directly into the application interface, or Generate to export the data in available output formats:
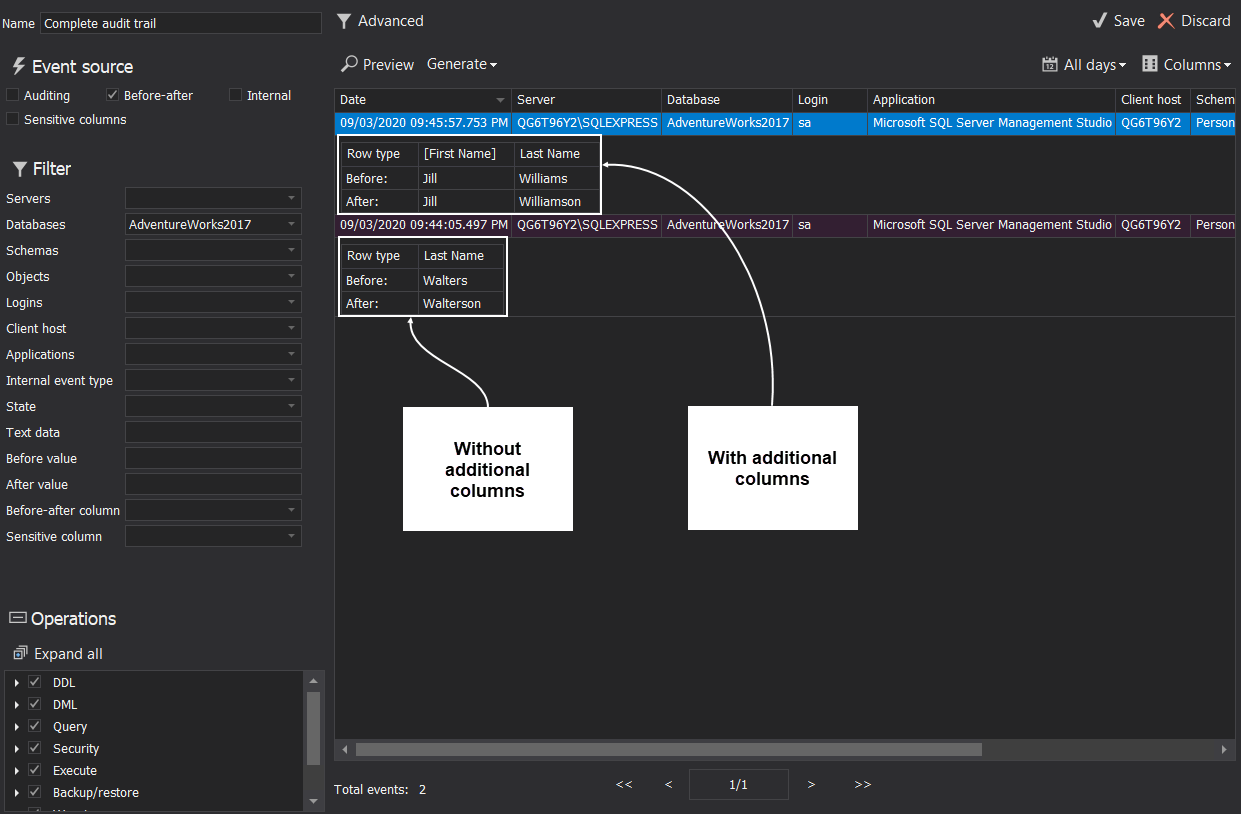
Additional columns
By default, the report will show only columns with the before-after auditing enabled and their changes if such event occurs. Sometimes it can be practical to track some additional columns along with changed ones, in case we need to verify value association between them or some similar scenario. There is the Additional columns option that will enable custom selection of columns for every table, not to be audited but to be shown next to the audited column.
To enable this function, switch back to the Before-after tab in the main menu and within the Advanced drop down menu tick the Additional columns option. This will show another checkbox column next to the Insert, Update and Delete checkbox columns. Now any necessary column can be set with the additional column status.
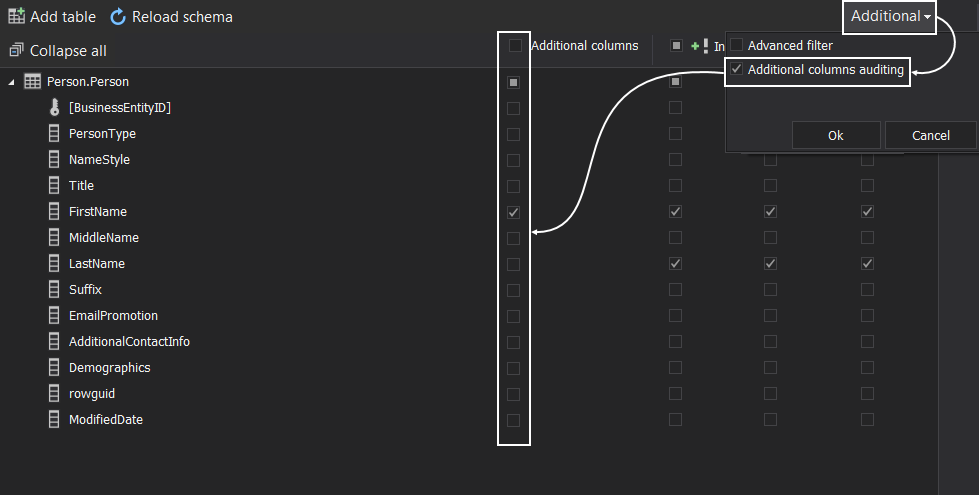
This column, whether it is audited or not, will be displayed in a report next to a column in a table that experienced before-after event
For more details about the audit report management, visit this ApexSQL Audit reporting feature overview page and learn how to create, run and schedule custom reports.
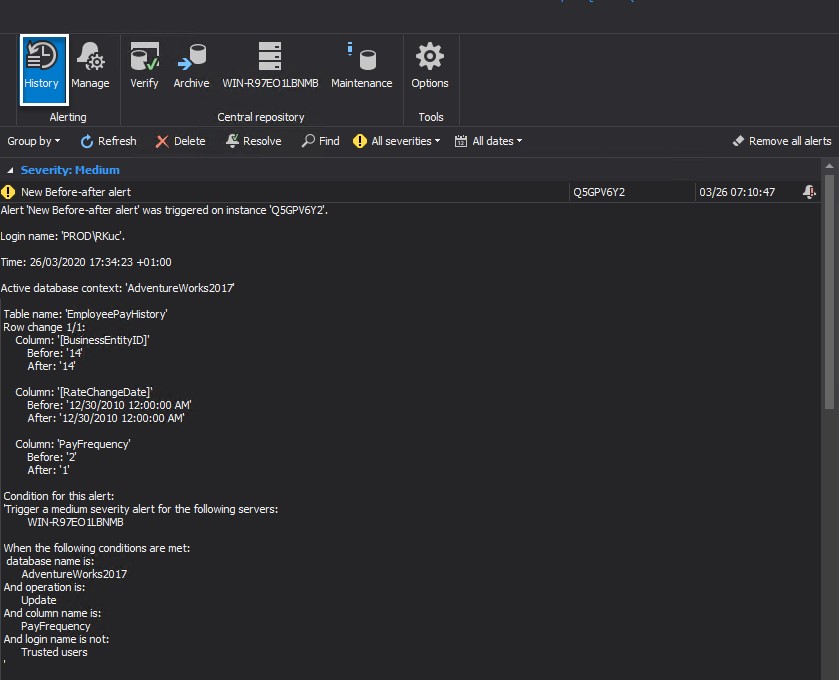
Alerting
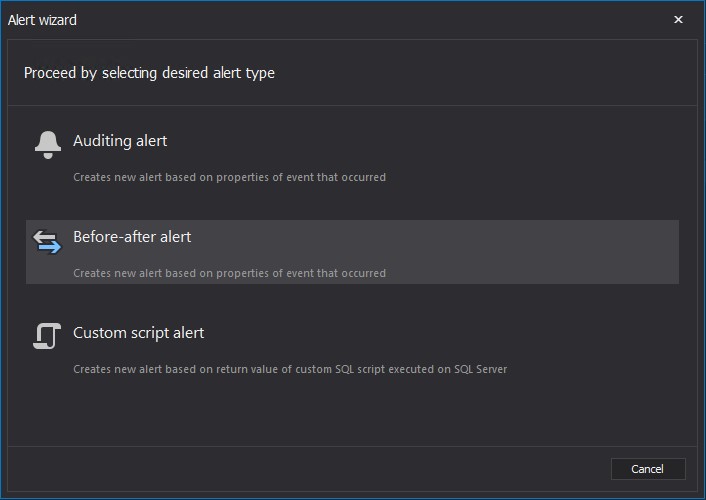
Apart from reporting, it is also very easy to create an alert to trigger whenever a specific case on data change occurs, which helps to identify any potential unwanted DML changes. The quick alert configuration wizard allows utilizing on the before-after alert type and set up the conditions on which an alerting notification is being sent:
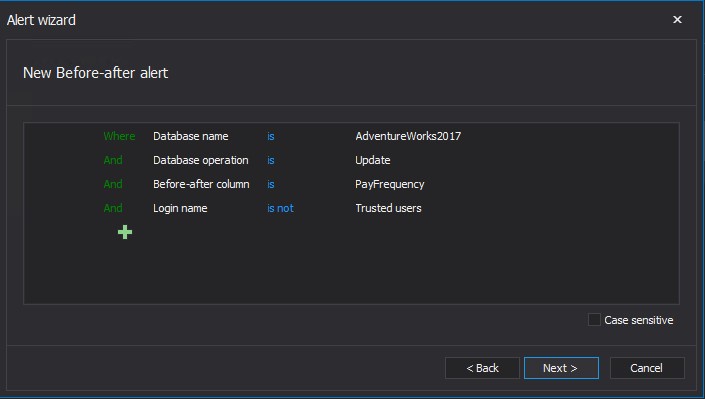
Moving forward through the wizard, the key step is to configure alert conditions upon which will alert raise a notification:
Historical alert notification data is available in the History alert tab, while real-time notifications can be also delivered via e-mail and identify any alerting activity fast enough.
To learn more on how to configure it, consult this How to create a custom alert with an email notification guide: