


Applies to
Summary
This article describes how to create and run a scheduled SQL Server audit report in ApexSQL Audit.
Description
There is nothing more important than having your audit data up-to-date and easily accessible at any given time. ApexSQL Audit is a go-to solution that enables the proactive delivery of SQL Server auditing reports through easy-to-use feature management to create and automate audited data reporting by the covet schedule.
ApexSQL Audit scheduled reporting can engirdle many types of different reports depending on the regulatory or compliance needs and requirements. To define one scheduled audit report rule, the first step is to configure and save the report filter criteria beforehand. To learn more on the topic of sketching the filter conditions, consult the SQL Server auditing tool reporting feature overview article, which provides a plethora of information and guidance on different aspects of report creation in ApexSQL Audit.
For the purposes of this article, we are going to create and schedule a monthly GDPR audit report.
Creating and saving report configuration
As aforementioned, the first step is to create the custom audit report inside the Reports tab by choosing New in the Reports pane:
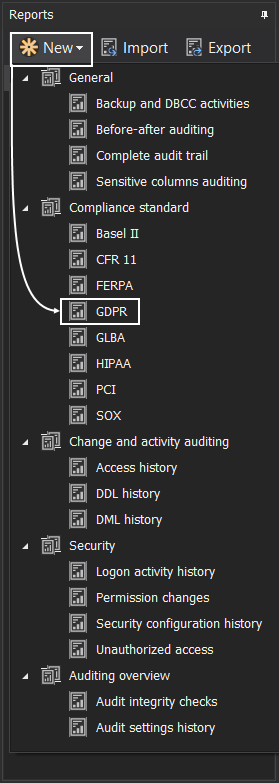
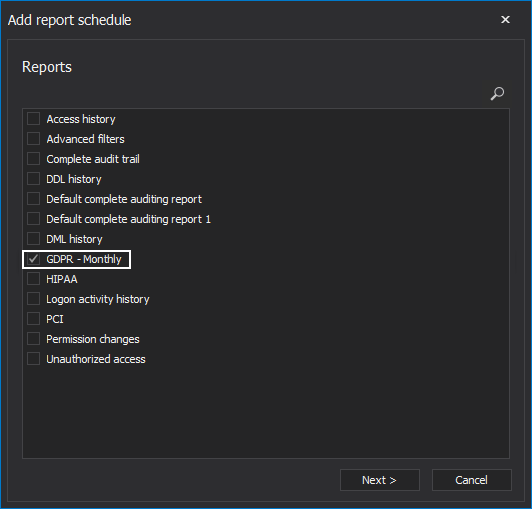
Next, select a pre-determined template from the built-in reports list (GDPR in our case), which will be the foundation of our report.
The next step is to decide on customization filters to define the reporting output:
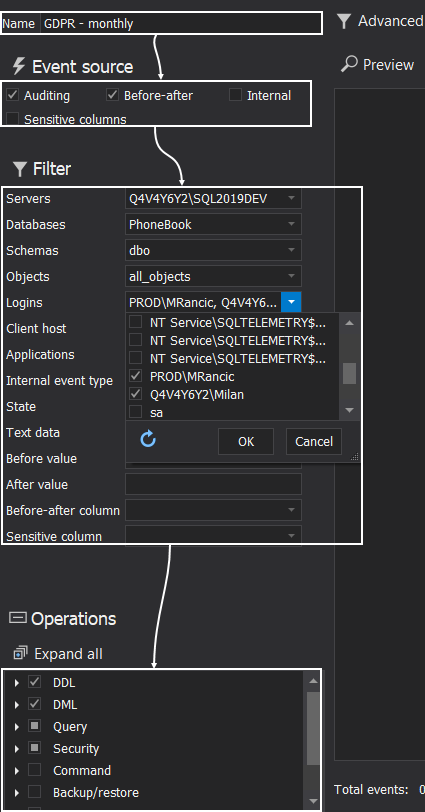
This can be described with following steps:
- Define the audit report name
- Select Event sources to be considered
- Provide various filters including server, database, login, objects and more
- Choose which exact operations will be included in the report
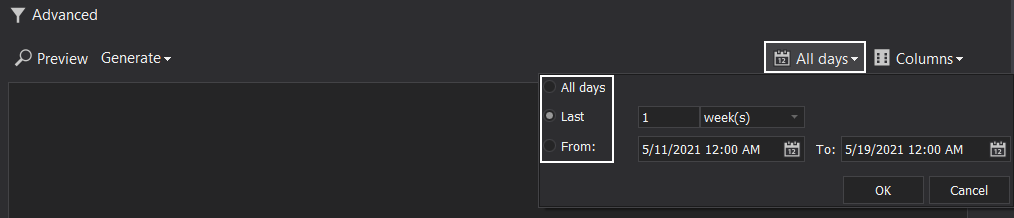
With this, the customization is completed and we have a clear configuration that determines what data will be included. The last step of report customization is to define the time range criteria, which is an essential step in order to meet the desired frequency to make a schedule to trigger report creation every month and retrieve the audited data for the specific period – the past month in this example. The definition is done three different styles:
- All days – retrieves the data ever since auditing was put to motion
-
Relative time filter – robust filter to retrieve data for the Last “x”:
- Minute(s)
- Day(s)
- Month(s)
- Year(s)
- Specific time range “from” – “to” filter:
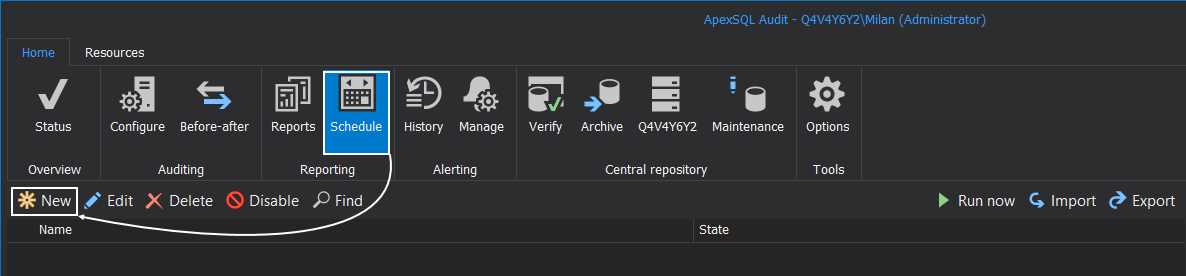
Creating new schedule
The next step in the process is to create schedule rule by navigating into the Schedule tab in the main application ribbon and opting New button:
The schedule rule is defined within a quick configuration wizard, and as a first step is to choose reporting template to be automated:
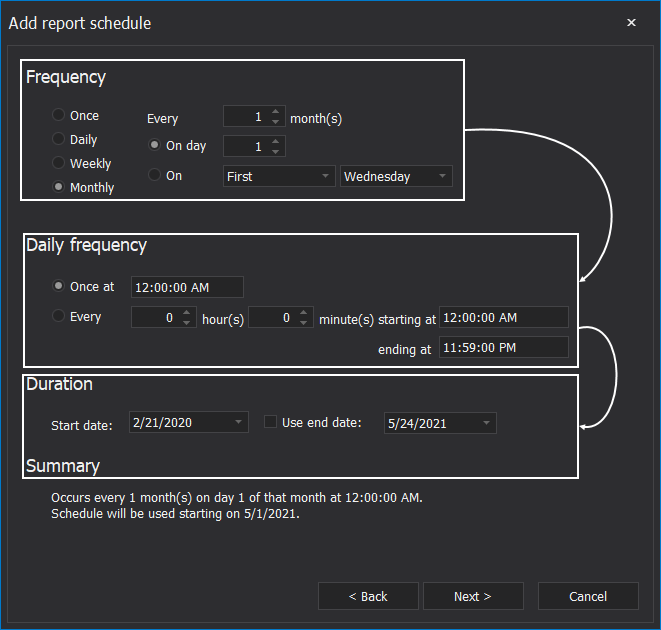
Moving forward, the wizard introduces the decisive step to define rule frequency through three configuration blocks:
- Frequency – enables choices between one-time, daily, weekly and monthly incidence
- Daily frequency – a control to define a specific time when the audit report is being extracted
- Duration – a lifetime of the schedule rule
Proceeding to the next step, it comes down to defining the output format that extracts the report in four viable file formats such as PDF, Word, Excel, and CSV. The output files can be stored anywhere inside the file system and also forwarded through an e-mail notification with the attached files:
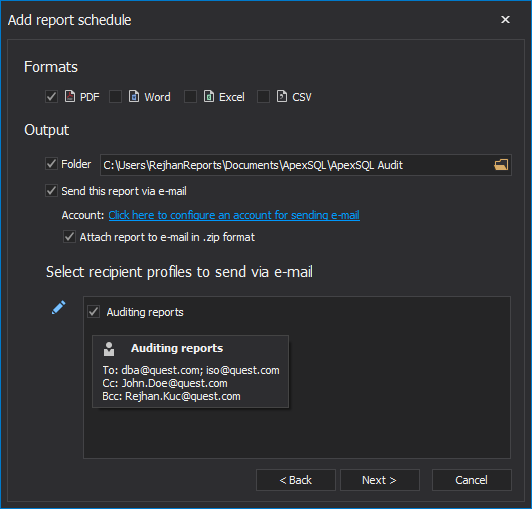
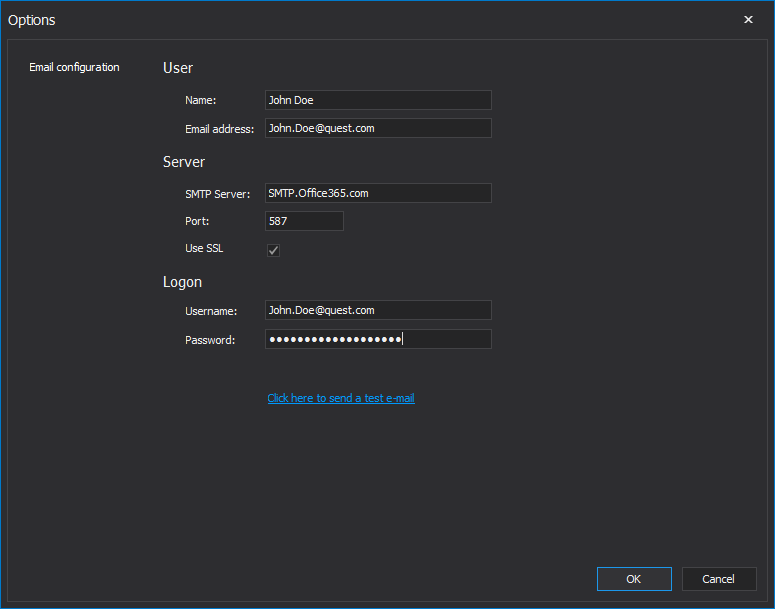
The e-mails are being forwarded via SMTP configuration settings that are defined either through the Options | Email configuration or by clicking on the link to configure account for sending e-mail in this step:
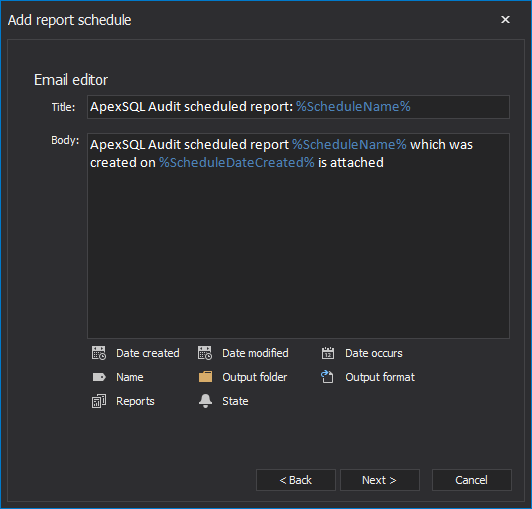
The next step brings in the customization of the e-mail title and body to structure the delivery in a specific and desiring way and also allows the user to beautify it via available attributes that relate to a specific scheduled rule:
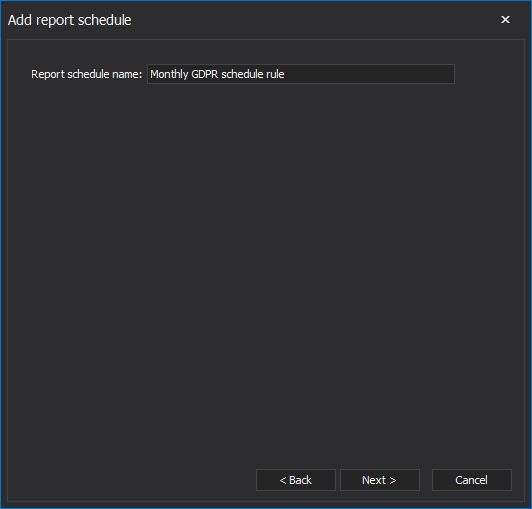
Afterwards, the custom name is assigned for the schedule:
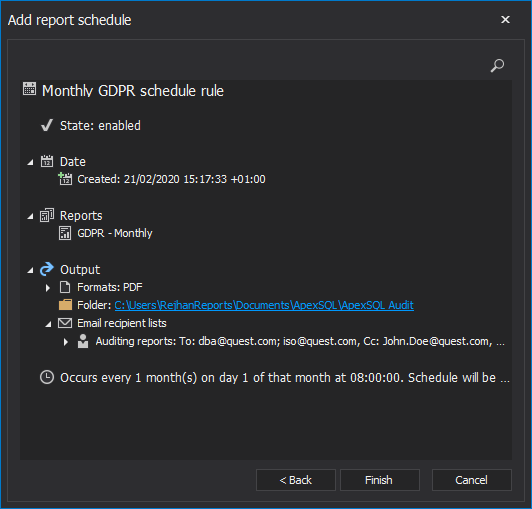
The last step presents the quick summary overview of this custom schedule:
Schedule tasks management for additional rule editing, updating, manual triggering and history overview is attainable inside the Schedule tab in the main application ribbon:
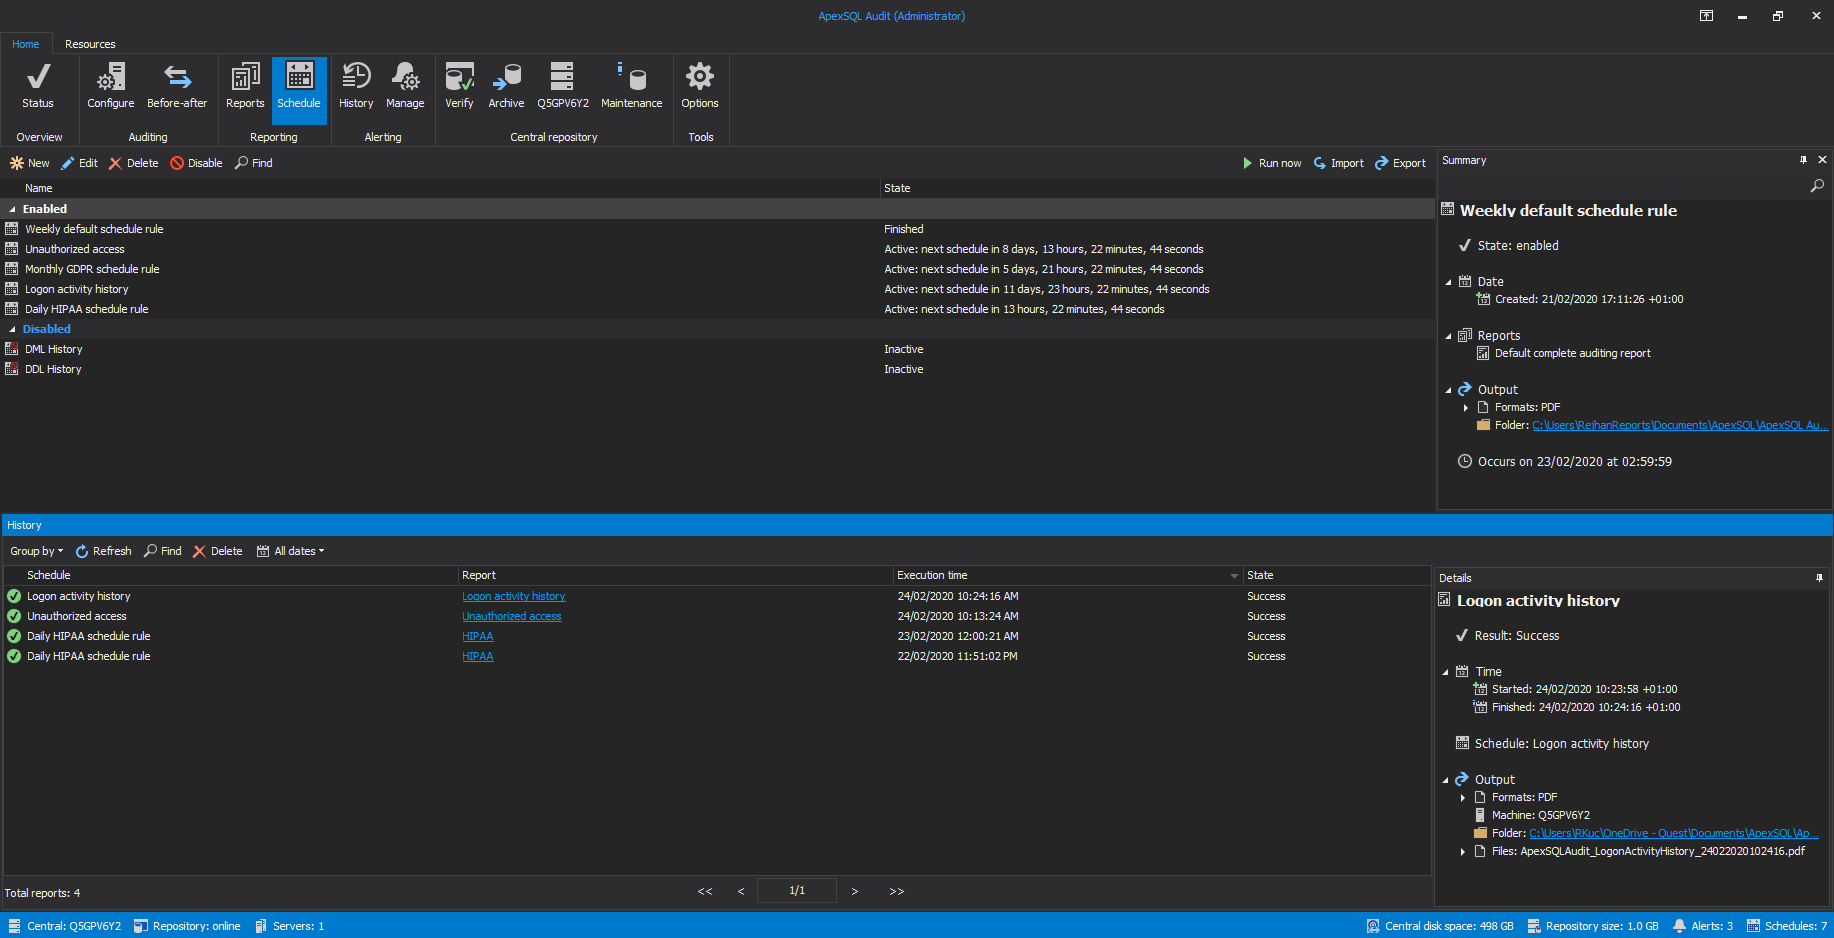
Enabling SQL Server audit report scheduling will automate repetitive tasks and exclude a middleman for report distribution to persons of interest.


