


Applies to
Summary
This article shows how to achieve SQL audit automation by activating automatic SQL Server detection through the ApexSQL Manage application.
Description
The idea of active work time optimization and unmanaged information gathering for every DBA operative in SQL audit processing can be supported with automatic SQL Server detection. The ApexSQL Audit in conjunction with ApexSQL Manage can be configured to provide a centralized scanning method for new SQL Server instances, their detection, and automatically relaying the information to an audit manager. This could remove the lag usual for the exchange of information between operatives and provide the means for fast response when a new instance should be configured for SQL auditing.
Prerequisites
Since ApexSQL Manage is the all-around tool for detecting and managing SQL Server instances, it will be utilized for SQL audit automation purposes. This means that on the machine where ApexSQL Audit is installed, ApexSQL Manage should also be present so the communication can be established.
This concept works in a simple manner where, for the automated SQL audit process, the ApexSQL Manage tool can be invoked directly from the ApexSQL Audit with the required layout immediately in focus to input desired settings. ApexSQL Manage will then work as a background process to detect newly installed SQL Server instances and upon detection will send an email notification to a database audit administrator requesting some action. Configuration details will be explained further in this article.
Automatic SQL Server detection
As mentioned previously, to enable and configure automatic SQL Server detection, the ApexSQL Manage will have to be installed and started. This can be done directly from the ApexSQL Audit tool.
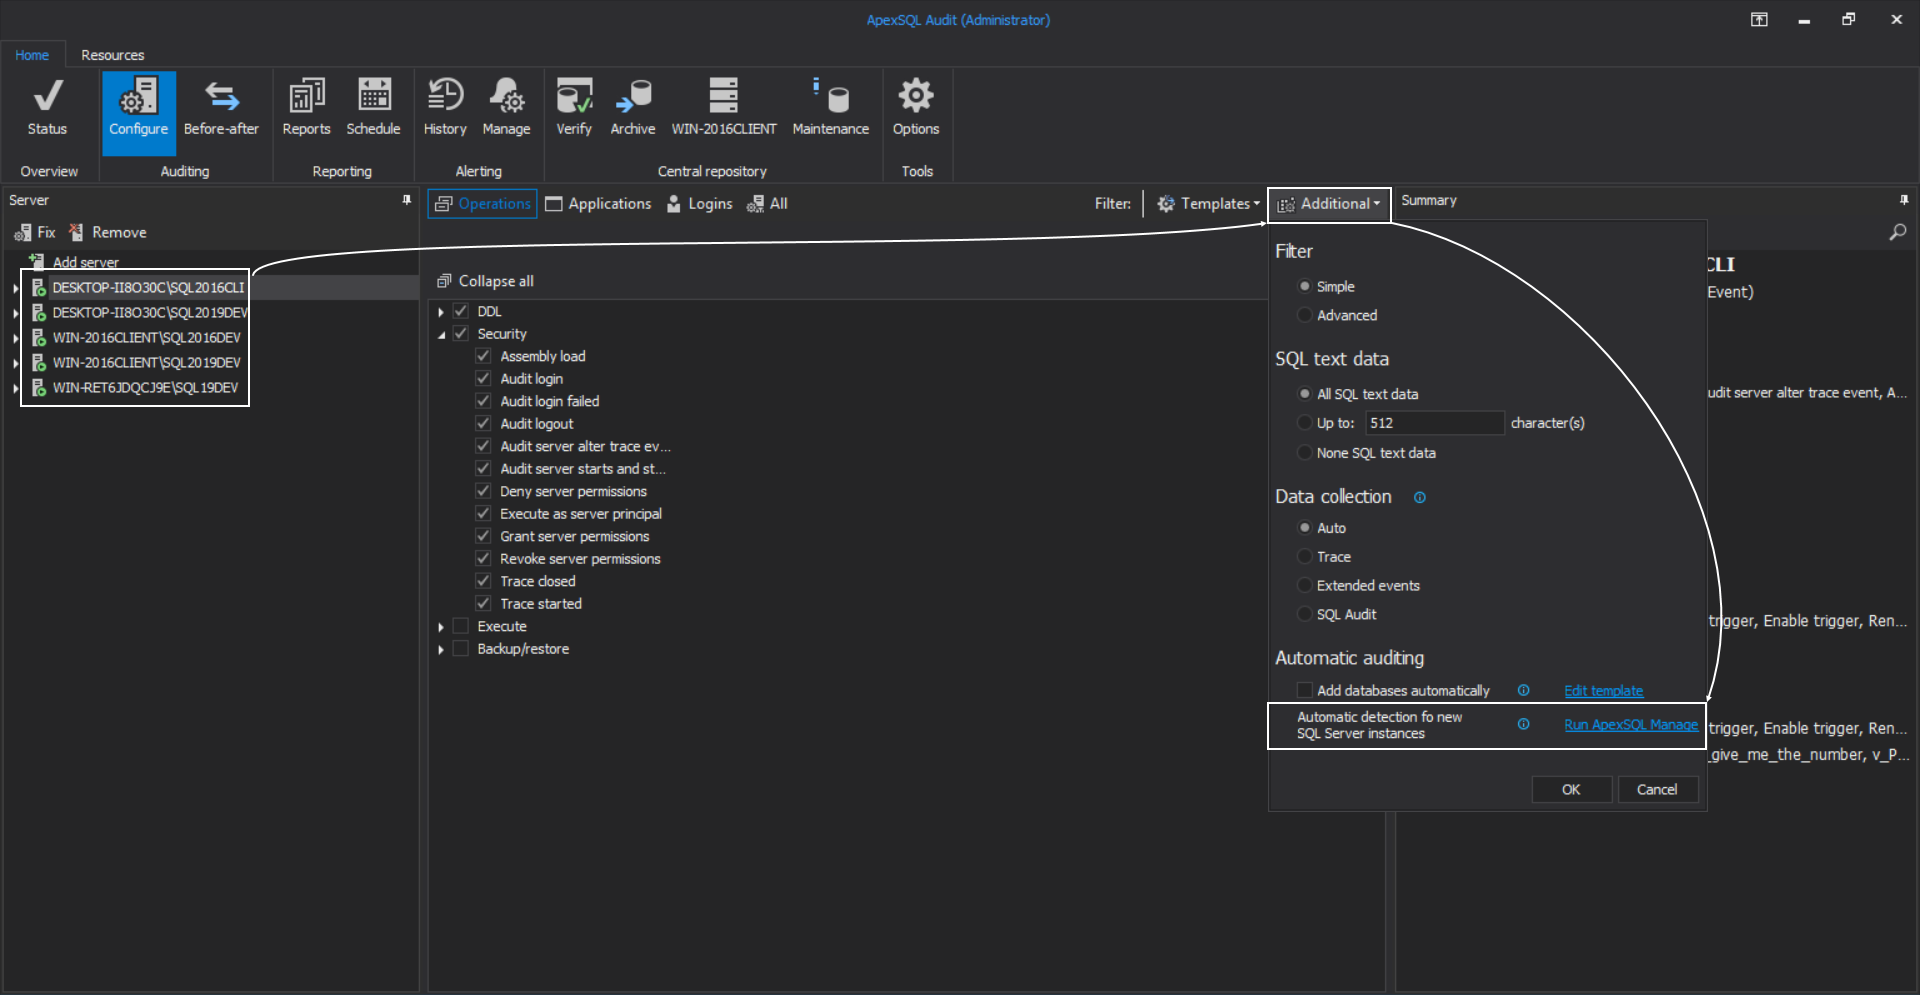
From the Home tab of the main ribbon menu, open the Configure view. From this view, select any currently audited SQL server instance from the server tree, go to the Additional drop-down button and at the bottom, the Automatic detection of new SQL Server instances control item can be found. Next to this label, the Run ApexSQL Manage link can be found and when clicked the process of invoking the ApexSQL manage tool and setting SQL audit automation can begin:
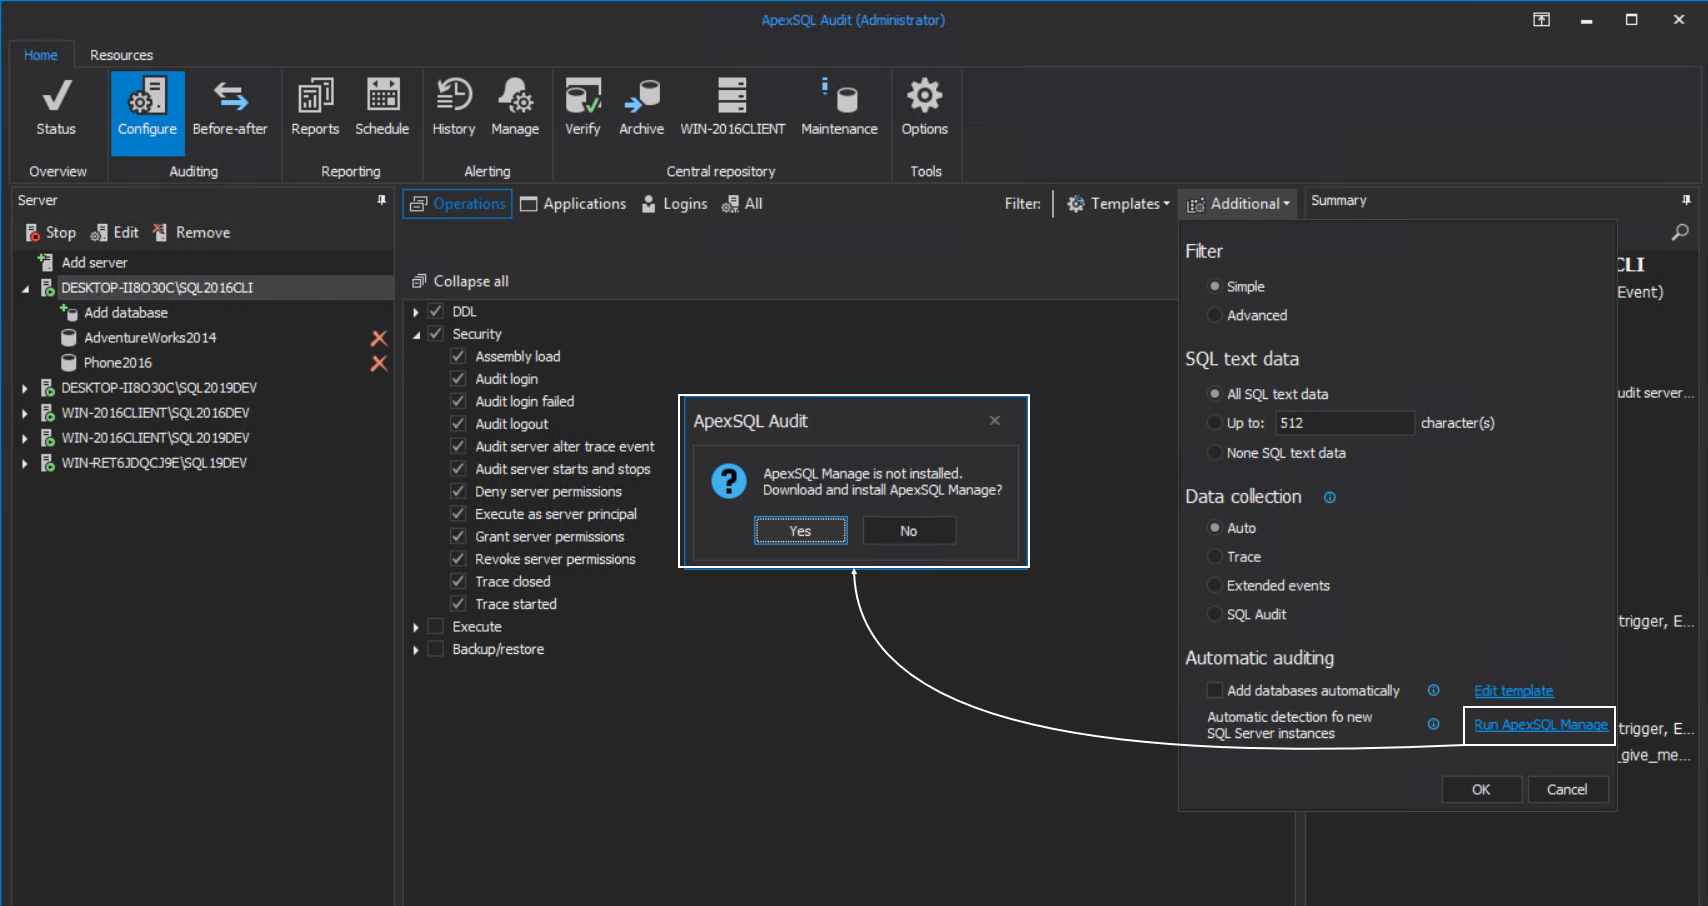
In case there is no ApexSQL Manage application present, clicking on the Run ApexSQL Manage link will report that the application is missing and offer to download and install the tool:
When confirmed, the option will open the default browser and the page with the download registration form:
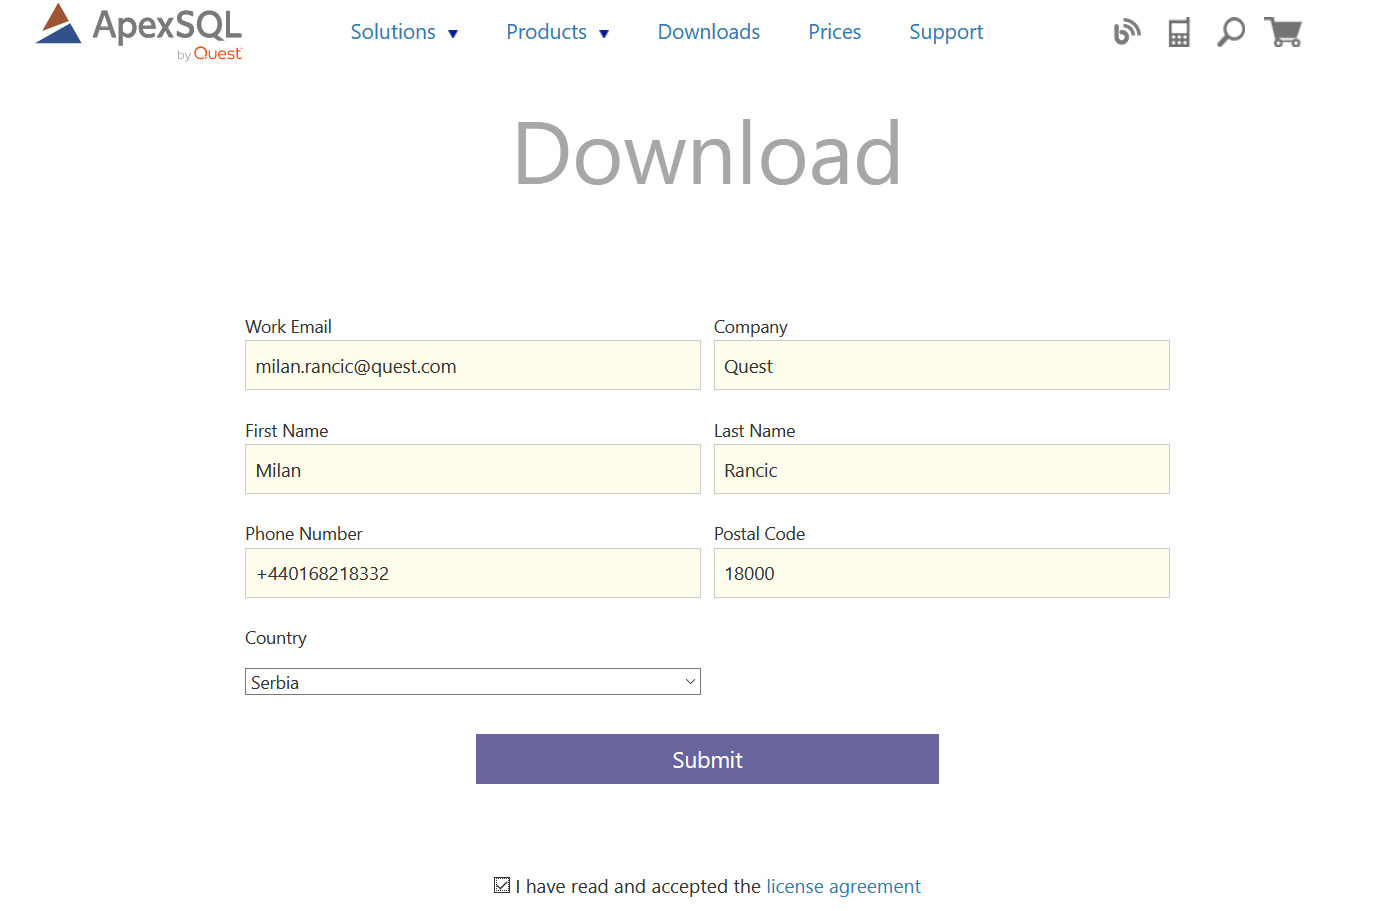
From here, the Single installer for all ApexSQL DBA tools can be downloaded and ApexSQL Manage installed after that. This implies that the machine hosting the ApexSQL Audit will have to be connected to the internet. If that is not the case, the installer can be downloaded using another computer from the Downloads page at the ApexSQL web site.
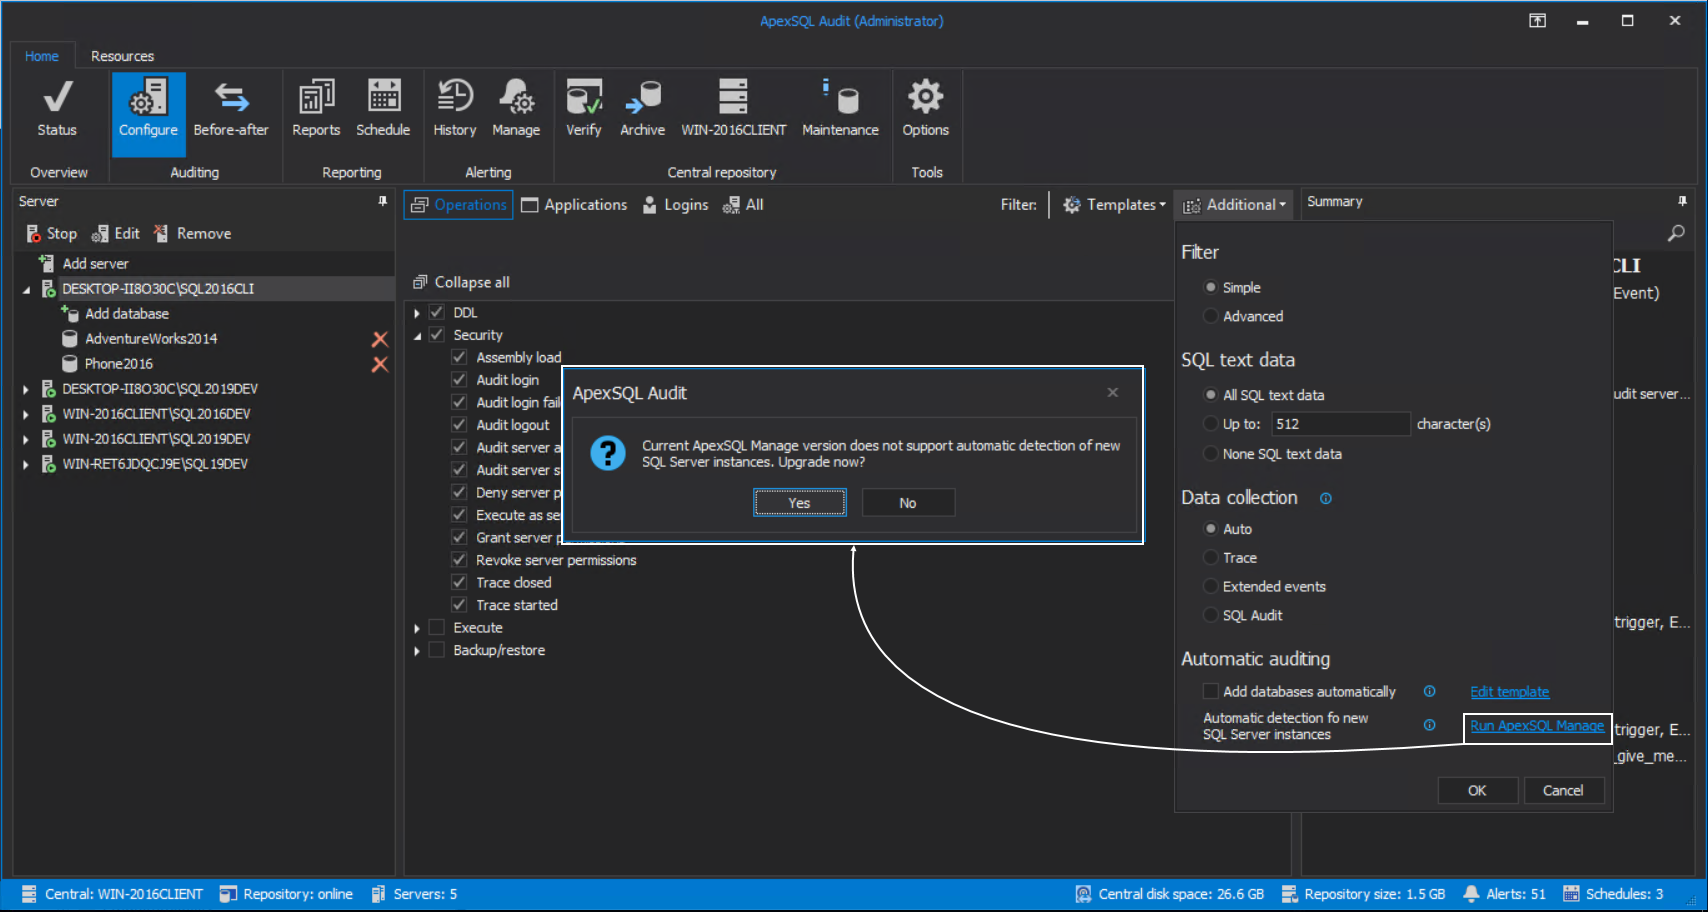
Alternatively, it is possible that there is already ApexSQL Manage tool installed on-premise but it could be an older version that doesn’t support automatic SQL Server detection. In that case, the Run ApexSQL Manage link will recognize that and offer to upgrade:
On confirmation, the rest of the procedure will be exactly the same as with the previously explained clean install procedure.
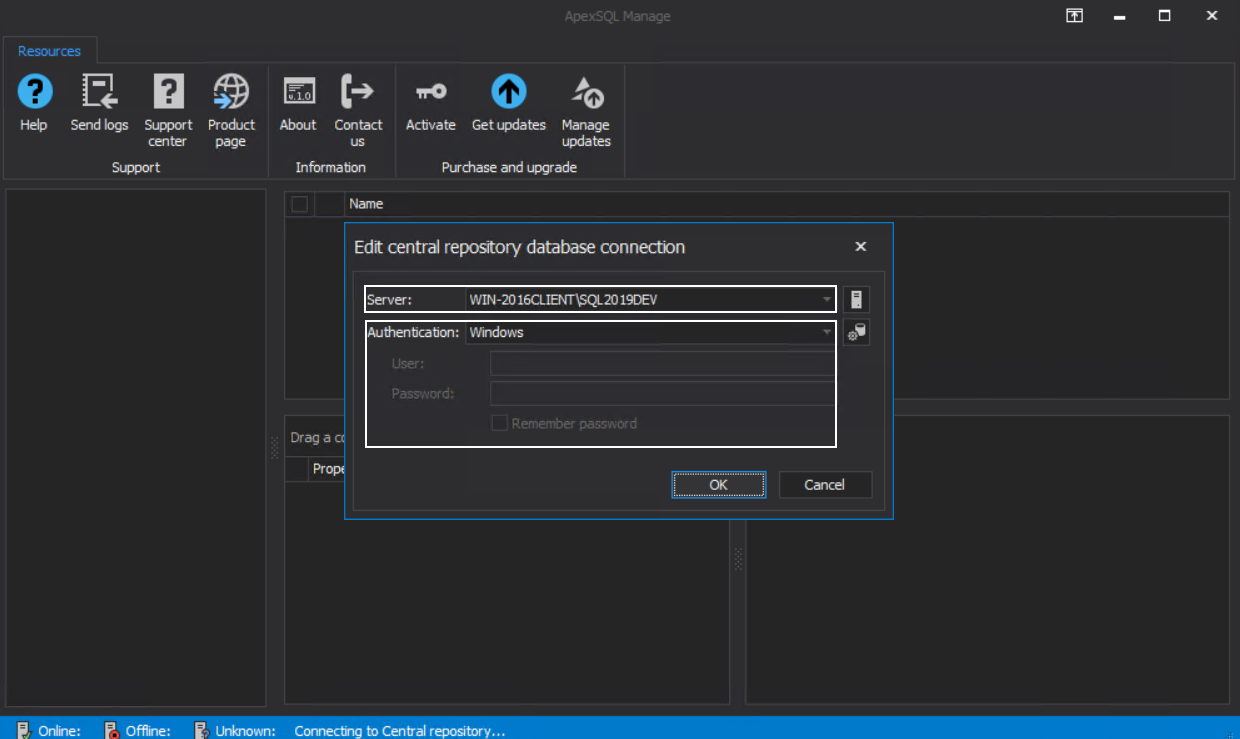
The initial startup of the ApexSQL Manage tool will prompt for parameters to set the repository database where the tool’s working information will be stored. In the shown dialogue the host SQL Server instance will have to be chosen and connection parameters provided for that instance:
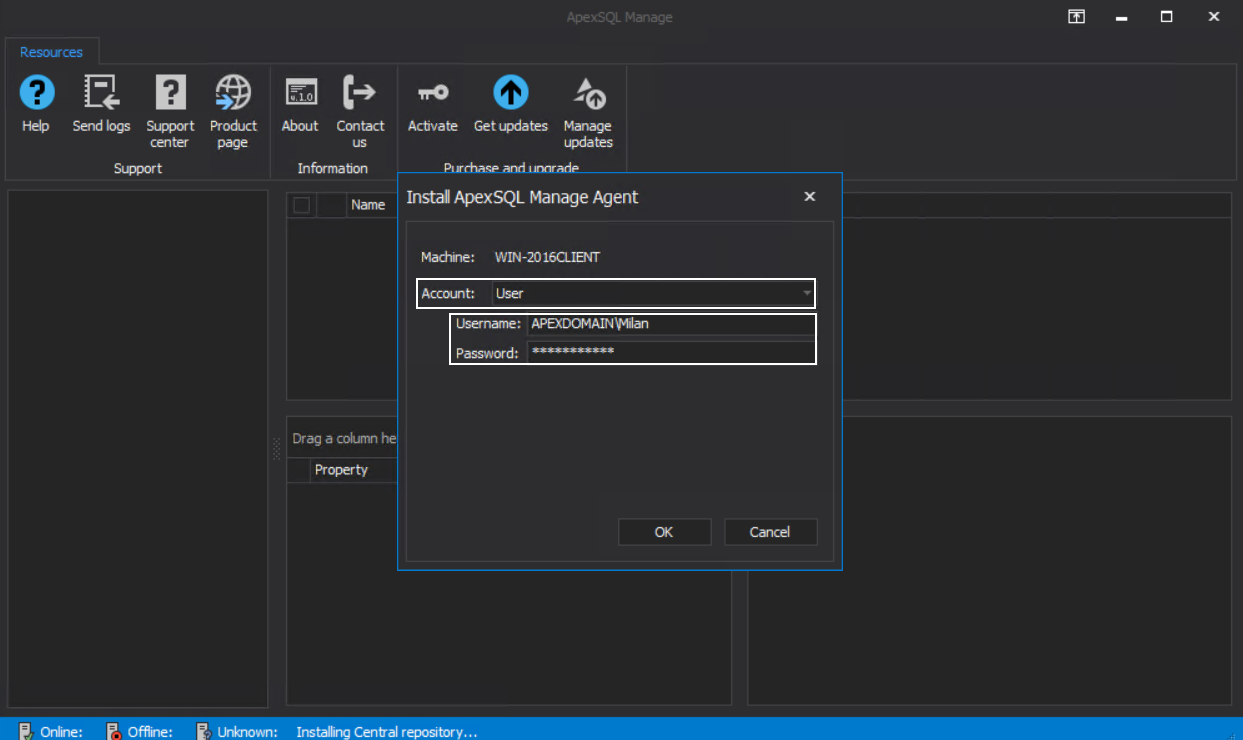
The final step in ApexSQL Manage initialization is the background agent installation, which will require choosing the account for the service Log On and credentials if required:
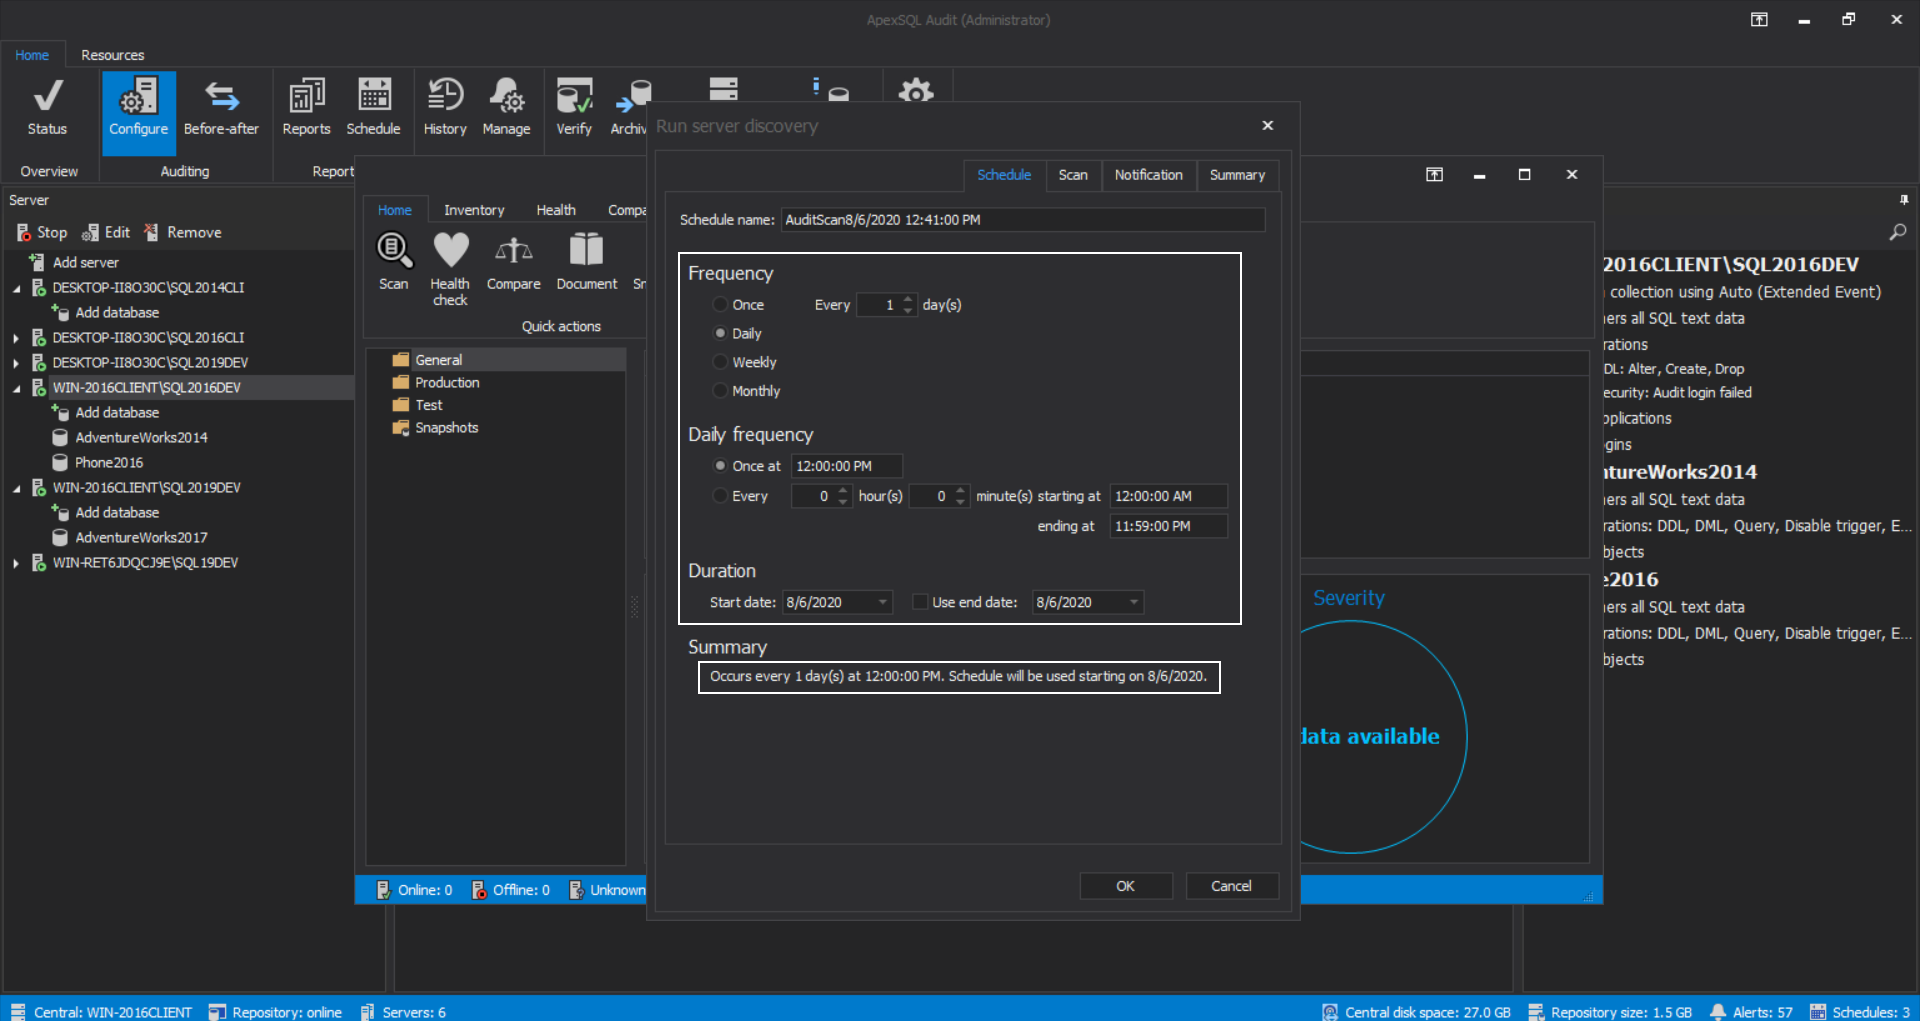
When appropriate ApexSQL Manage version is installed and initialized on-premise, the Run ApexSQL Manage link, when clicked, will start the tool and immediately show the Run server discovery window for the SQL Server scanning and discovery settings.
The first page of this window is the Schedule page. Here is where the scanning intervals should be set. It will be prepopulated with recommended default values and all settings can be seen at the bottom as the Summary which will be updated on any change:
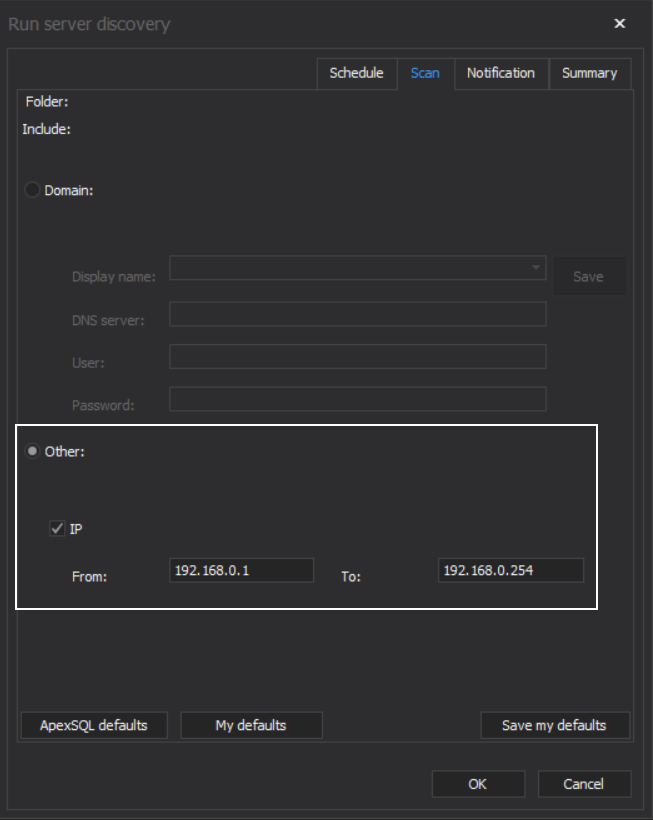
The next page, the Scan page, will have options for domain settings. This is where a domain’s DNS should be chosen to scan through and detect new SQL Server instances. With the DNS IP address, the credentials for a domain administrator should be entered in order to access the DNS for the list of machines to scan for SQL Servers:
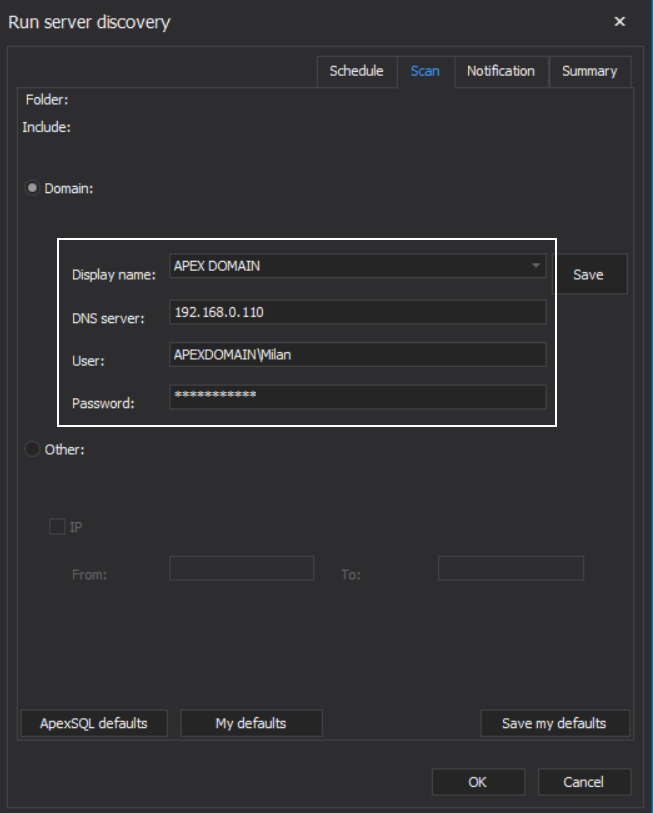
The second option is to set an IP range so all machines in the defined range will be scanned:
The notification page is where a type of email notifications should be set along with the list of recipients. Let’s choose the Success option for the New server(s) found event and add an email address using the Add button. If SMTP settings for sender email were not set, which is a probable scenario in case ApexSQL Manage was just installed, the application will first prompt for those parameters:
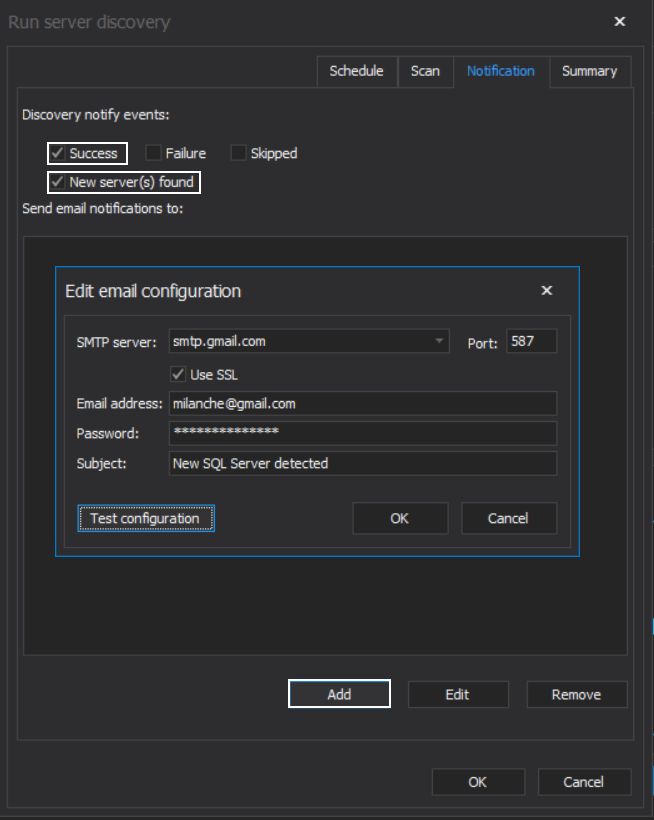
After confirming the SMTP settings, the prompt for a recipient email address will appear. This is where an audit administrator’s mail should be entered:

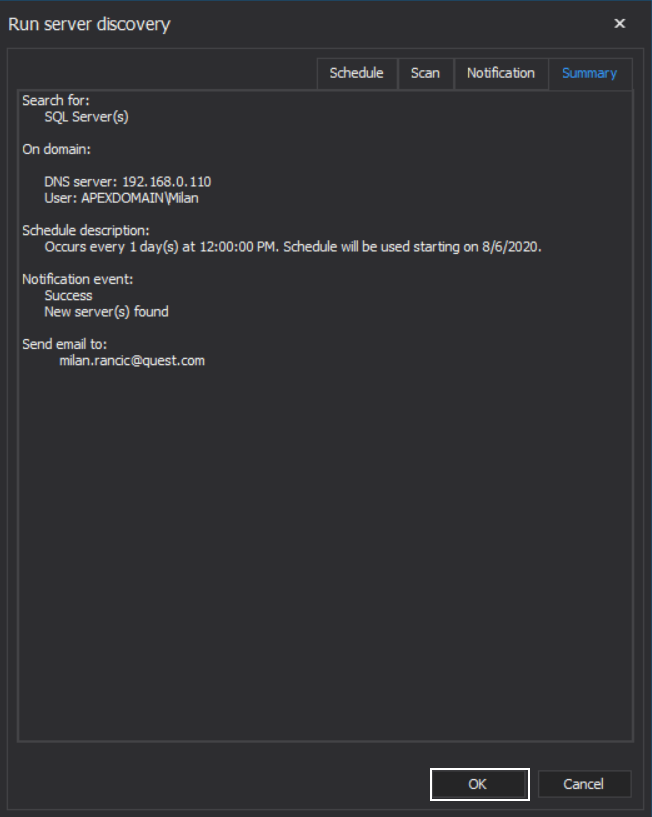
In the final Summary page, the SQL Server discovery settings can be reviewed before applying them with the OK button:
Apply SQL audit to new instances
Now, since the scheduler was created via ApexSQL Audit application, when triggered, it will recognize what SQL Servers are already in the ApexSQL Audit inventory and report only newly found servers. When new SQL Servers are detected, the audit manager or administrator will receive an email with the information about the names of those instances:
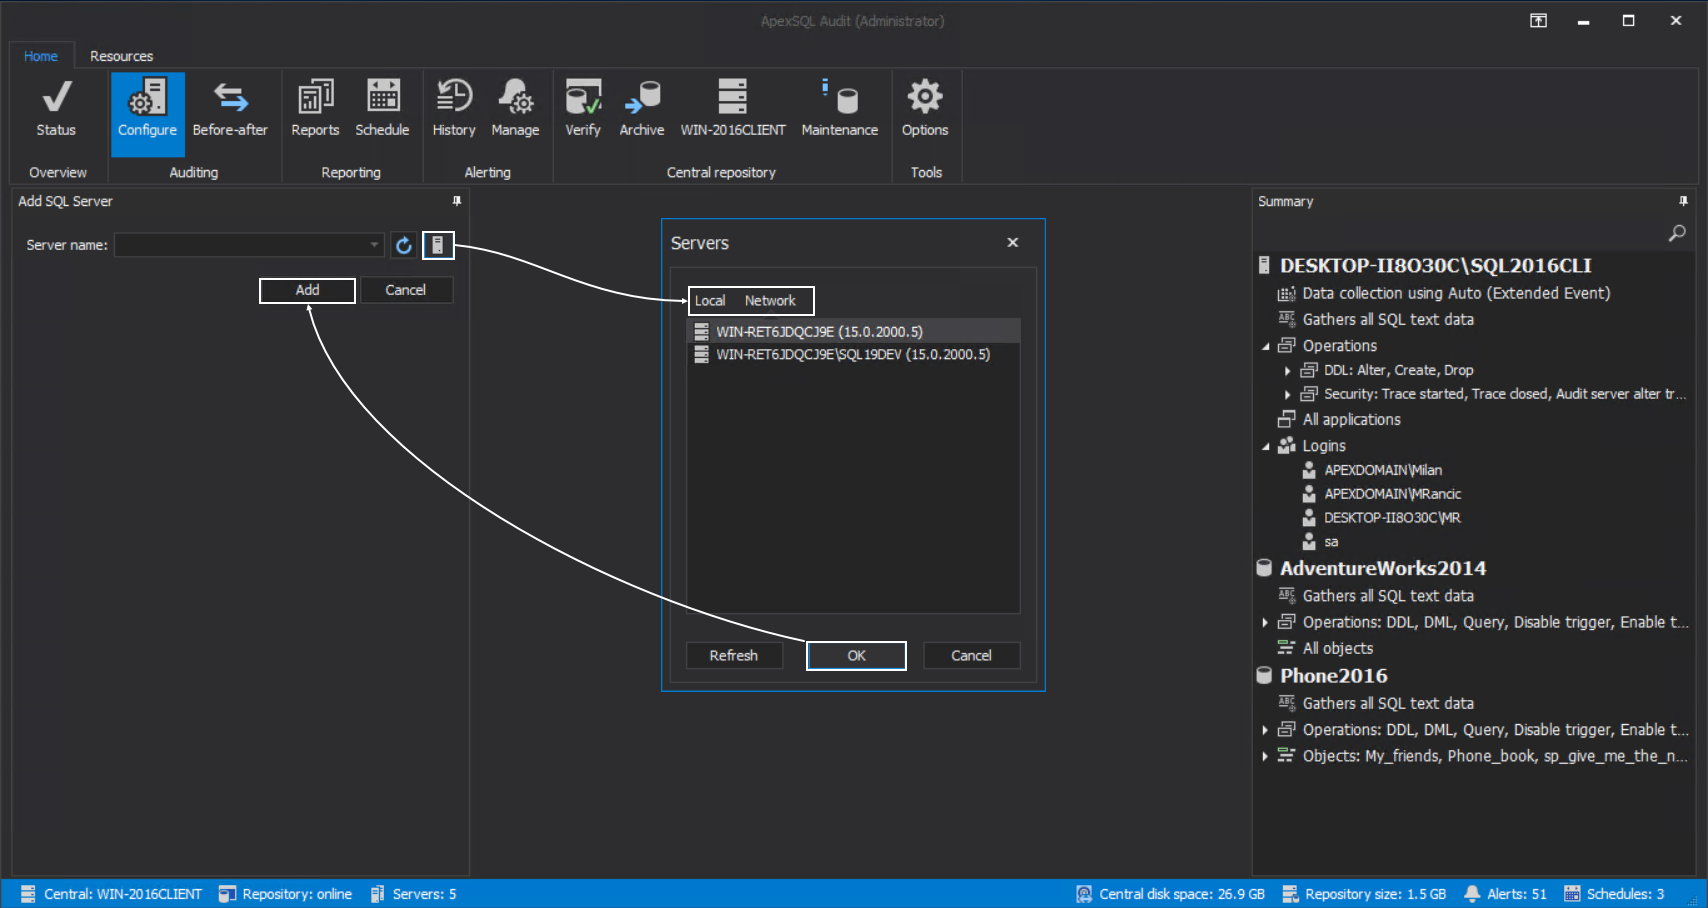
What is left then is for the audit administrator to start the ApexSQL Audit GUI and from the Configure tab to click on the Add server button in the server tree in the left panel:
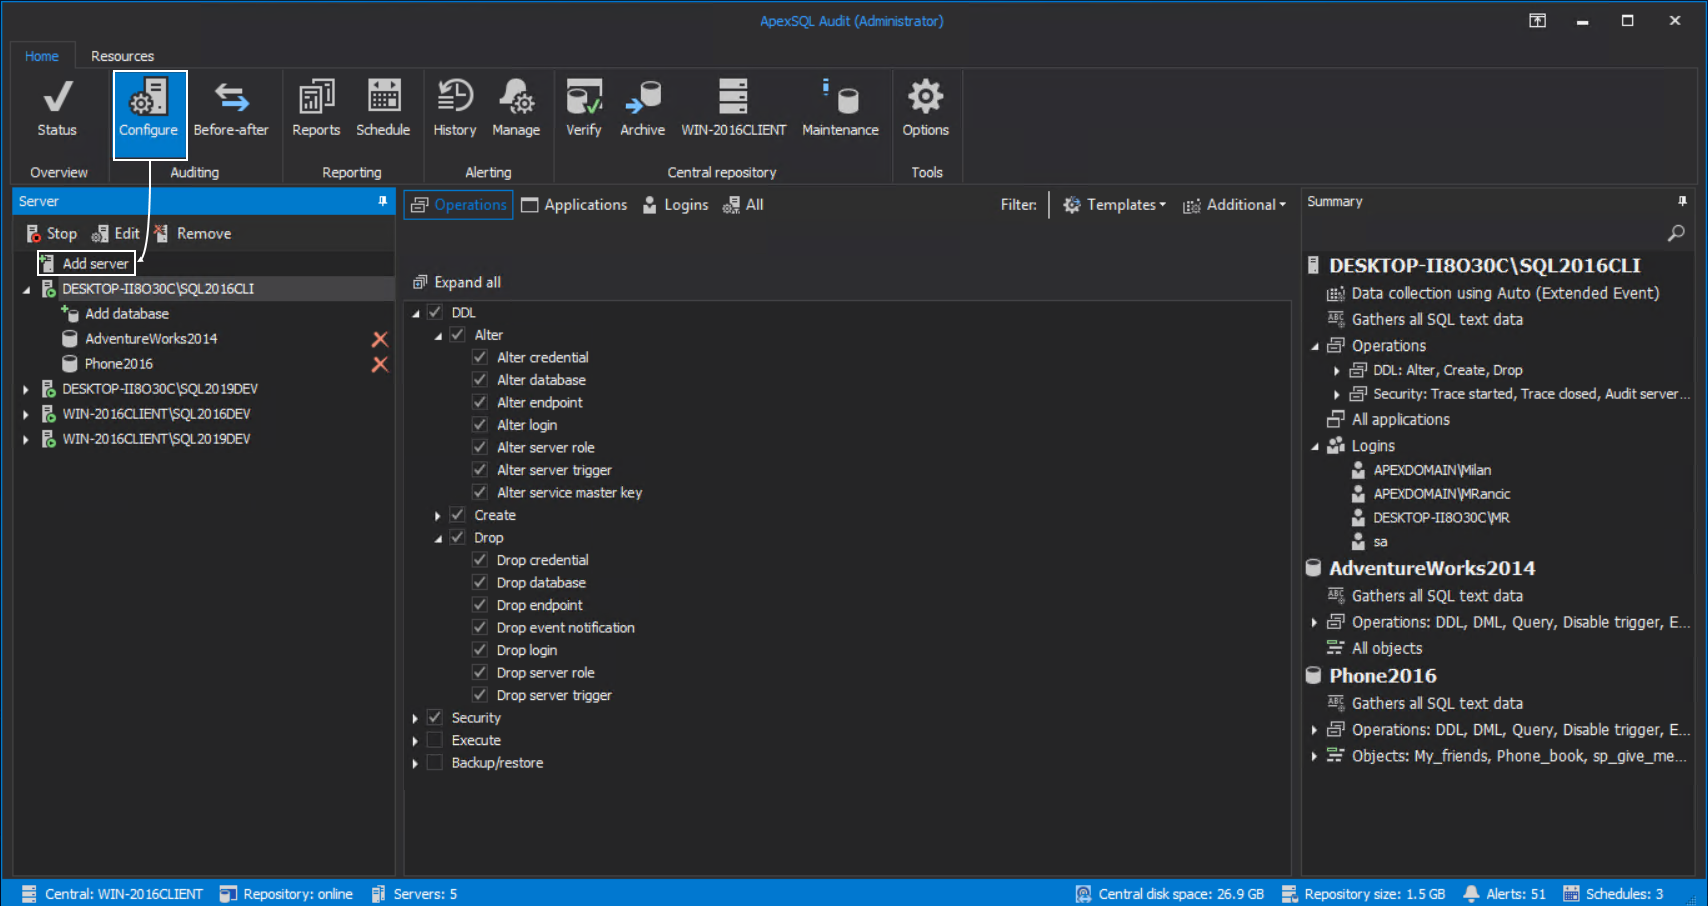
The Add SQL Server panel will show up and replace the server tree. From here, click on the server browser button, and in the shown dialogue find the new SQL Server instance by its name in either Local or Network tab, depending on where the instance is located. Click on the instance to select it, click the OK button and finish with the Add button in the Add SQL Server panel to close it and add the server to the server tree:
Now applying the audit configuration can begin:
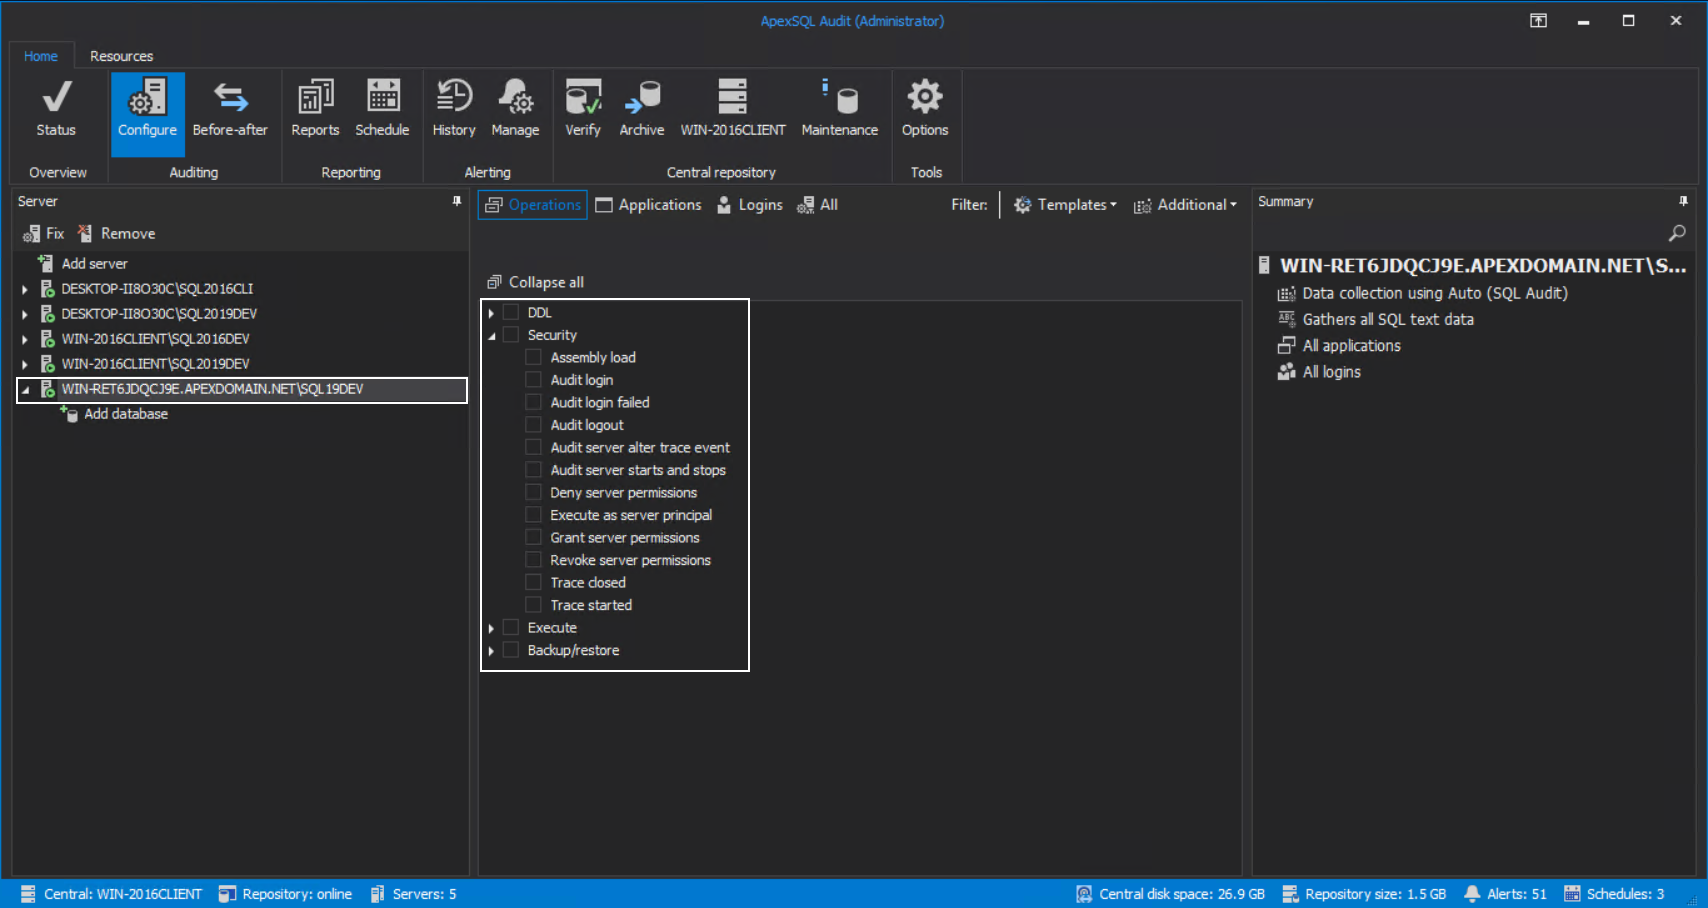
Note: More information about applying SQL audit configuration against new SQL Server instances can be found in the Auditing SQL Server databases – initial configuration article.
Using automatic detection of SQL Server instances can be convenient in cases where applying SQL audit to instances should be performed in a large and dynamic environment and human oversights are possible due to the said dynamic.


