


Applies to
Summary
This article provides information about how to configure SQL Server auditing with ApexSQL Audit.
Description
To setup ApexSQL Audit to meet appropriate auditing requirements, the tool and its components for local or remote auditing need to be installed on appropriate machines. To get some help when opting for the most appropriate approach for the specific environments, check the ApexSQL Audit installation guides article which provides key information and links as well as detailed descriptions of all important installation guides which include detailed step-by-step and how-to guides.
Once ApexSQL Audit has been installed into the auditing environment, the SQL Server auditing does not start immediately – the tool must be first configured to audit specific SQL Server events per any local or compliance standard requirements
-
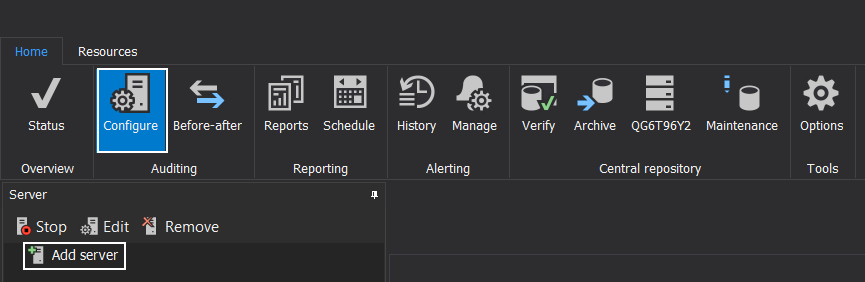
To start, first, we need to add SQL Server for auditing, so start ApexSQL Audit, click on the Configure button and the main ribbon, and then click on the Add server button
-
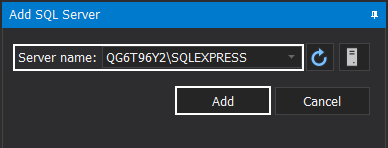
Next, choose a SQL Server instance from the drop menu (or manually type server name) and click Add
-
Next, provide username and password with appropriate administrative permissions, tune additional options (if needed), and click OK
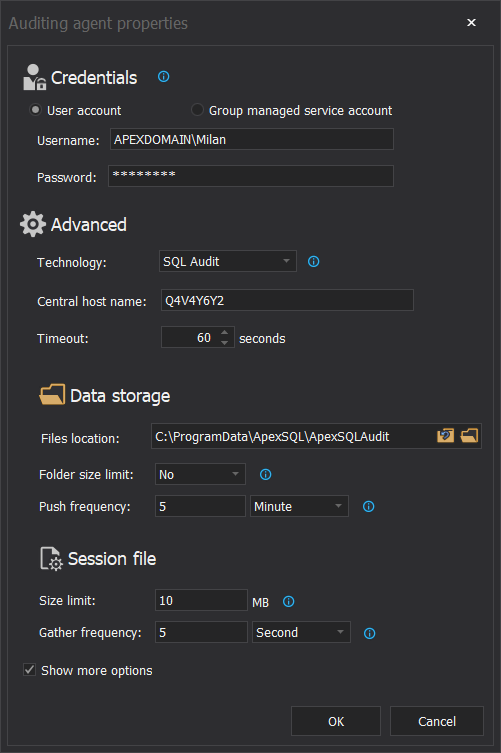
For clarification on how additional options work see the article: Configuring auditing via the advanced session options in ApexSQL Audit
-
With this, SQL Server is added for auditing, and we can now proceed and configure which server and database level operations/events we need to audit. There are several different approaches here:
- Simple filter
- Advanced filters
- Out-of-the-box templates based on supported compliance standards
Using simple filter
A simple filter is an easy solution which requires all event that needs to be audited to be checked. To configure SQL Server auditing using a simple filter, once we’ve added SQL Server instances for auditing, we need to do the following:
-
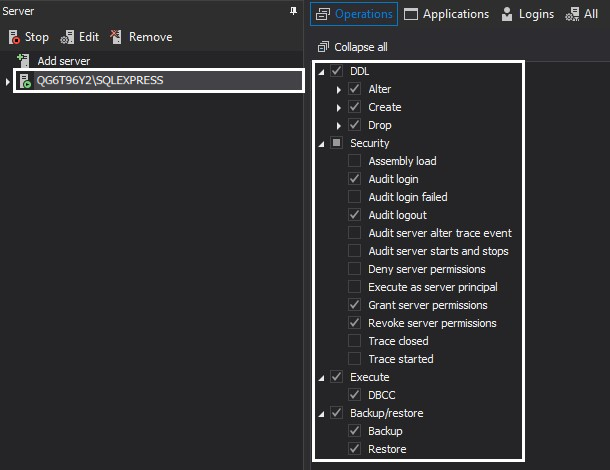
Select the SQL Server instance we’ve previously added for auditing in the Server panel on the left and check the server-level operations which need to be audited from the list
-
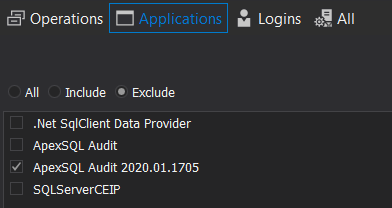
At the top of the panel, click on the Applications or Logins buttons to bring in the tabs which will enable you to include/exclude specific windows applications or SQL Server logins in/from the auditing process. Simply choose the appropriate radio button and check applications and logins to include or exclude
-
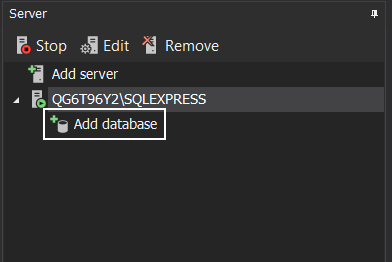
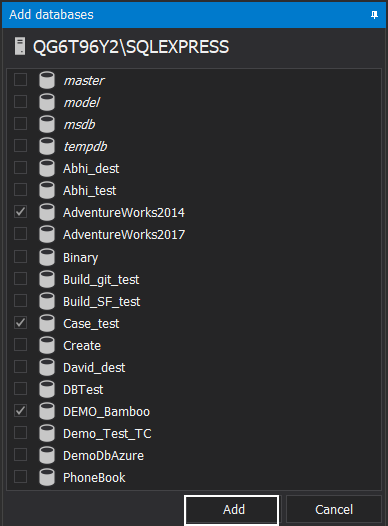
Next, add databases for auditing by clicking on the Add database button in the server pane. The list of databases is shown, and simply check those that need to be added to the auditing process
-
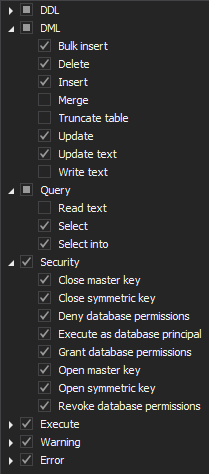
In the same manner, when server-level operations/events were being added, choose appropriate database-level operations/events for auditing
-
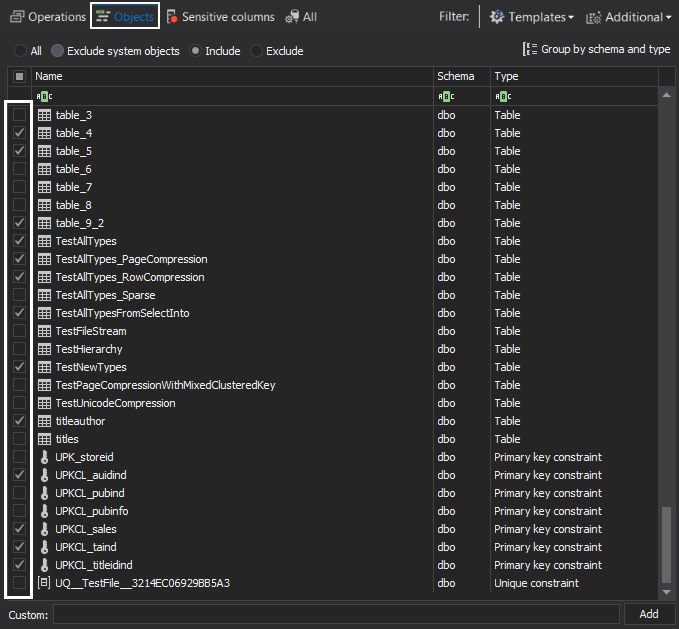
It is also possible to specify which database objects will be included/excluded in the auditing task, so click on the Objects button to show the panel which will allow the selection of objects. As before, choose the appropriate radio button and thick checkboxes for specific objects
-
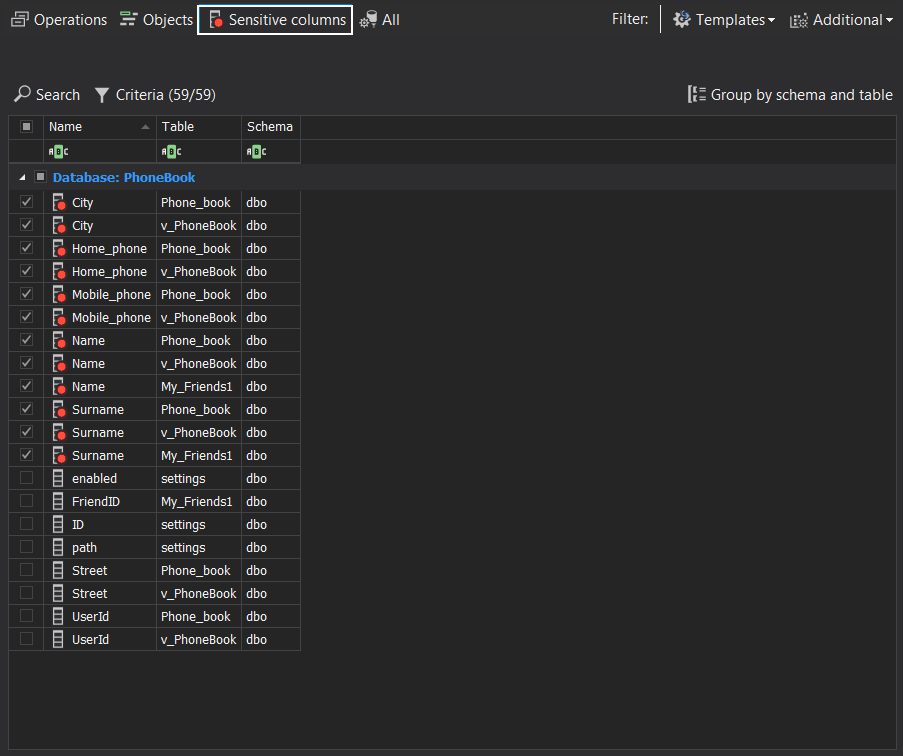
Optionally, to find and configure monitoring specific columns for sensitive data reads, use the Sensitive columns button:
-
Last, but not least, click on the Apply button to finish the configuration process and initiate auditing

Repeat steps 4, 5, and 6 for each SQL Server database
|
Quick tip: If the same/similar configuration needs to be applied to multiple SQL Servers or database, instead of configuring each one manually, simply configure the first one and then use import/export configuration to apply it to multiple instances |
Using advanced filter
The advanced filter offers greater precision than the simple filter because it is based on combining an unlimited number of logical conditions in order to configure auditing. It is generally recommended to use an advanced filter when there is a need to combine different auditing requirements (e.g. internal requirements together with a compliance standard) or when the need requires auditing of advanced use cases which cannot be achieved via the simple filter
Auditing based on advanced filters differentiates from simple filter based auditing in the fact that server and database levels are not separated as is the case with the simple filters
- The first step, again, is to add the SQL Server, as was shown above
-
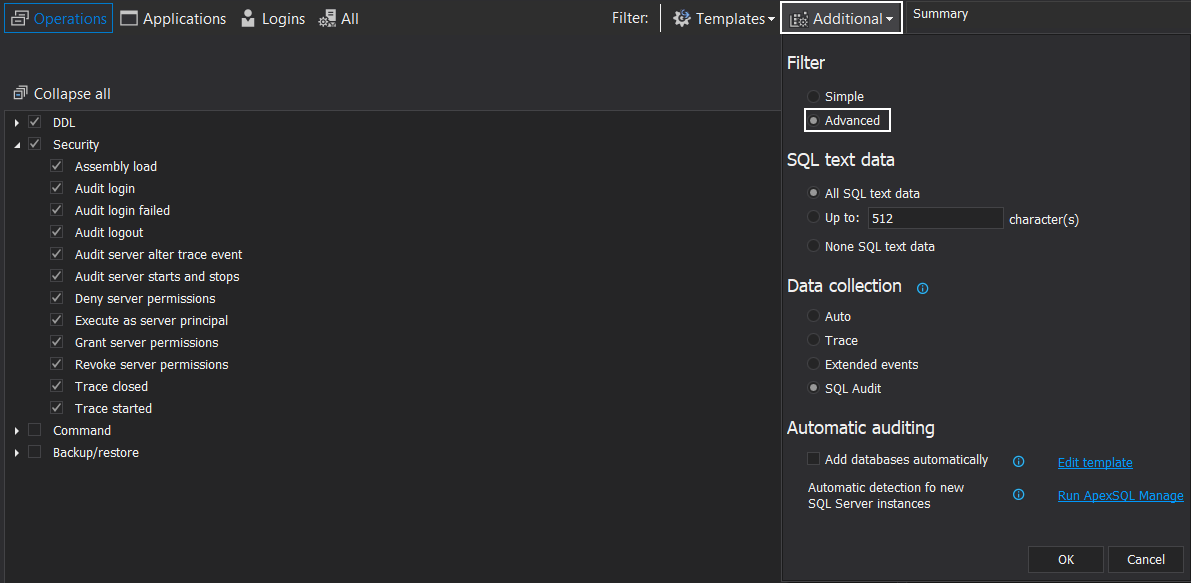
Next, click on the Additional menu and switch to the Advanced option to swap to the advanced filter
-
Next, click on the green “plus” icon to add the first condition

-
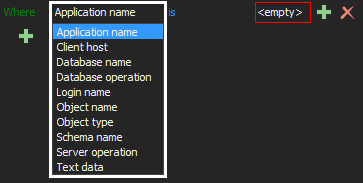
Click on the condition drop menu and choose the one to be used. For example, let’s choose the Application name
-
Next, click on the operator and choose one from the list. Let’s pick is for our example
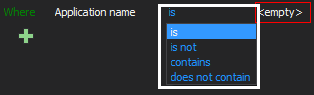
-
Finally, click on the remaining field and choose the value. We will pick SQL Server Management Studio for our example

With this, our condition is set – We have opted to audit events that were executed via application “SQL Server Management Studio”
-
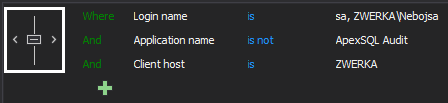
To continue configuring, repeat steps 3-6 as many times as is needed to achieve the desired configuration, and change conditions to fulfill the auditing requirement. Conditions can also be grouped by using the navigation button in front of each condition and bringing them in the same line to form groups
Additionally, here is an example of a more complex advanced filter
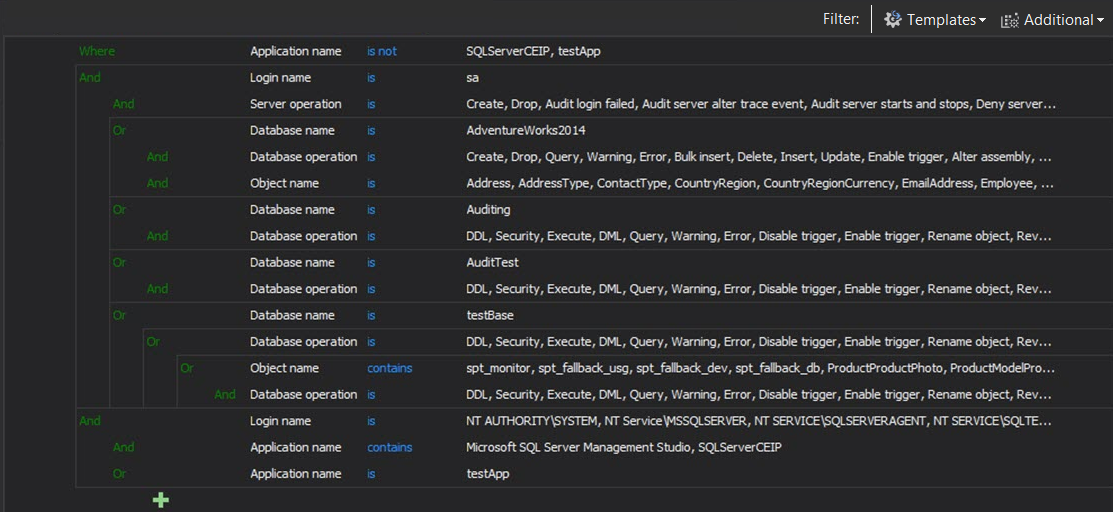
The explanation for the logic behind advanced filters can be found in the Advanced SQL Server auditing filters article
Out-of-the-box (compliance) templates
In addition to the fully customizable simple and advanced filters, ApexSQL Audit offers pre-defined compliance-based auditing templates which can quickly be used to import compliance-based configuration on multiple SQL Servers and databases.
- Start with adding SQL Server instance(s) for auditing as in the previous scenarios and select the SQL Server in the Servers panel to the left
-
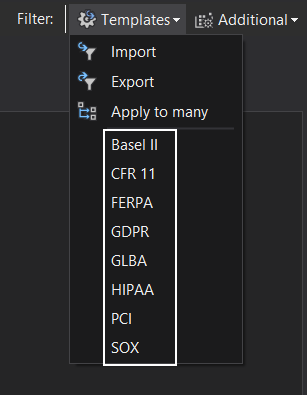
Next, click on the Template button and choose the appropriate compliance-based configuration from the list
-
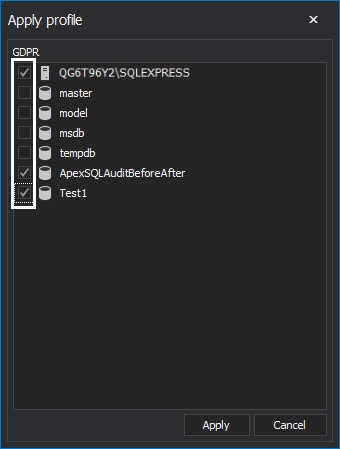
In the Apply profile dialog, thick the server and/or database(s) which need to be audited for the chosen compliance standard and click Apply. With this, appropriate operations will be included for auditing on the selected server and database(s)
After implementing one (or multiple) out-of-the-box configurations, it is possible to further customize/change the SQL Server auditing configuration via both simple or advanced filters to achieve the desired precision.


