Summary
This article explains how to use the Recover table data from a database backup option in ApexSQL Recover that allows you to recover multiple tables stored in a SQL database backup, without restoring the backup itself
Recover lost data due to a TRUNCATE operation – ApexSQL Recover
Applies to
ApexSQL Recover
Summary
This article explains how to use the “From TRUNCATE” operation option in ApexSQL Recover, in order to recover data lost due to a malicious or accidental TRUNCATE statement.
Audited events in ApexSQL Audit
Summary
This article provides a list of SQL Server events for each operation type group used in ApexSQL Audit GUI (DDL, DML, Query, Execute, Error, Warning, and Security).
Description
The events audited by ApexSQL Audit are divided into 7 groups, by operation type.
ApexSQL Audit custom queries and reports
ApexSQL Audit provides a range of built-in queries as part of the reporting module that cover the most common user reporting requirements. For more specific reporting requirements, we have provided a possibility to create custom SQL Server auditing reports by using a drag-and-drop technique. If this still doesn’t provide the specific information you need, you will still be able create queries and reports of your own using T-SQL , due to the fact that ApexSQL Audit stores all audited data in a SQL Server database.
ApexSQL Audit Tamper-evident design features
ApexSQL Audit stores all configuration and audited data, from local and remote SQL Server instances in a centralized repository database named ApexSQLCrd. The packages with captured data are transferred automatically and safely via network, parsed, and data is stored into the central repository database. This approach makes it is easier to backup and protect captured data.
ApexSQL Audit Central Repository Database design
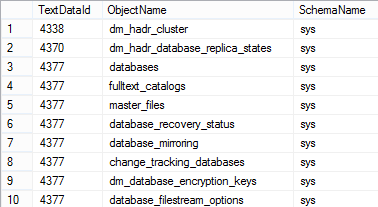
All configuration and audited records from all audited SQL Server instances are stored in a centralized auditing repository database called ApexSQLCrd. The tables in the ApexSQLCrd database are
ApexSQL Audit limitations
Summary
This article describes the limitations you should consider when working with ApexSQL Audit.
Description
The maximum number of audited distributed instances
There is no specific limit on the number of auditing instances (remote SQL Servers) that may be audited. The maximum number depends on your environment, the number of transactions executed against audited servers/databases and network bandwidth. The more distributed instances, the more likely it may be for you to encounter performance problems, as a large number of packages transferred through your network can cause bottlenecks.
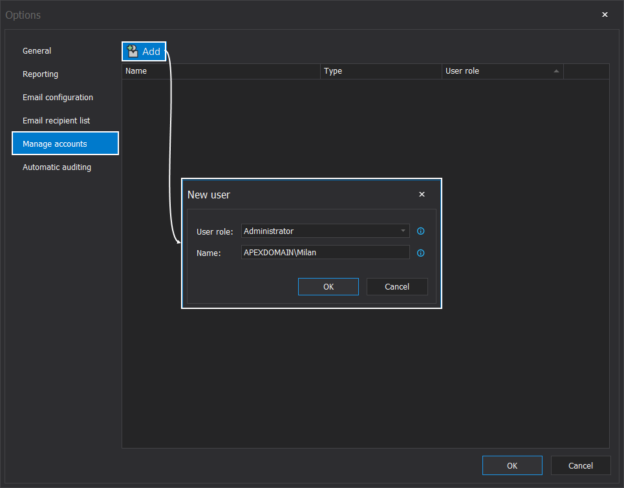
Permissions and requirements for SQL auditing
Applies to
Summary
This article provides information about SQL auditing application installation prerequisites including required permissions and software requirements.
When to use ApexSQL Restore
ApexSQL Restore can attach native or natively compressed backups and backup sets created in SQL Server 2000 and above to any edition of SQL Server 2005 and above, including full and differential database backups as well as transaction log backups
As such, ApexSQL Restore is very useful, among others, in the following scenarios:
How to use ApexSQL Script to deploy a database as a .Net executable
See how to script both structure and data for a database, and how to compile it into a .Net executable
The good news about the executable is that it can be executed even on the workstations without the SQL Server client tools installed
- Run ApexSQL Script
- Connect to a SQL Server instance
- Select a database and click Load
- Select the objects to script on the Structure tab
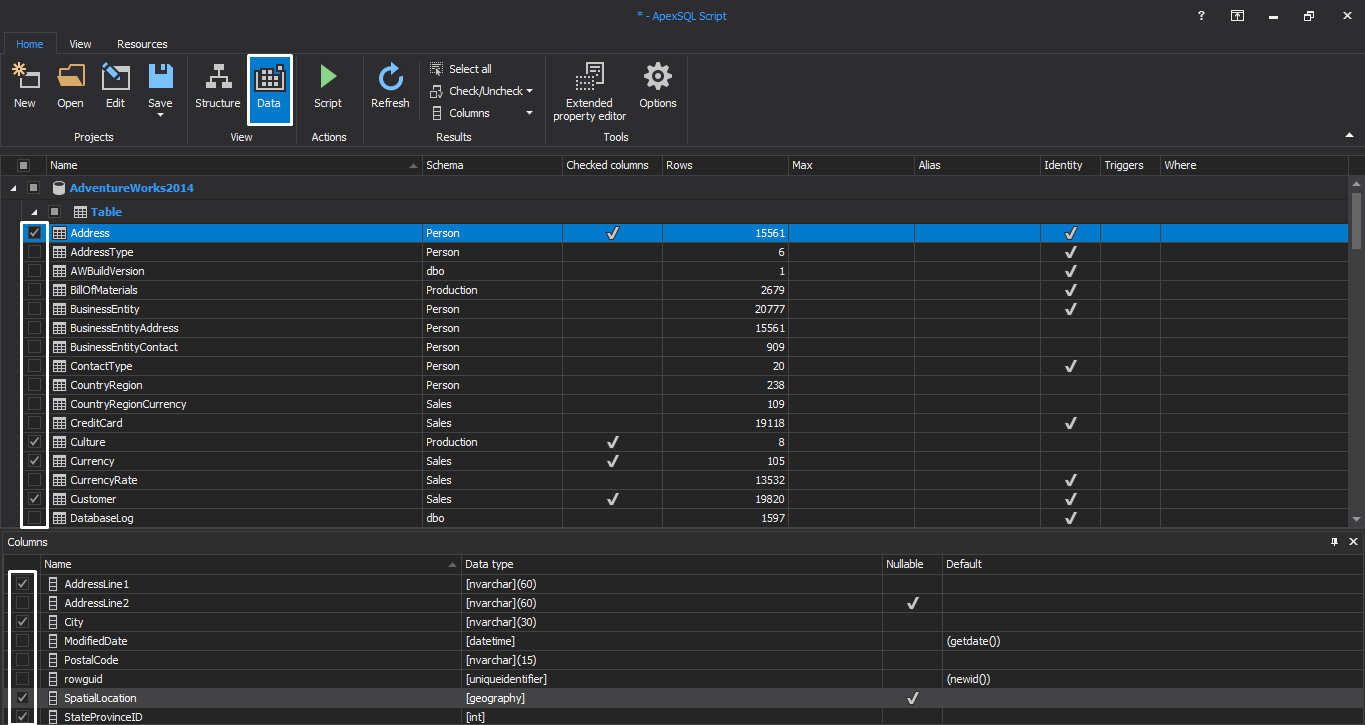
- On the Data tab, select the tables in views of which you want to script the data
- On the Home tab, in the Actions group, click Script wizard
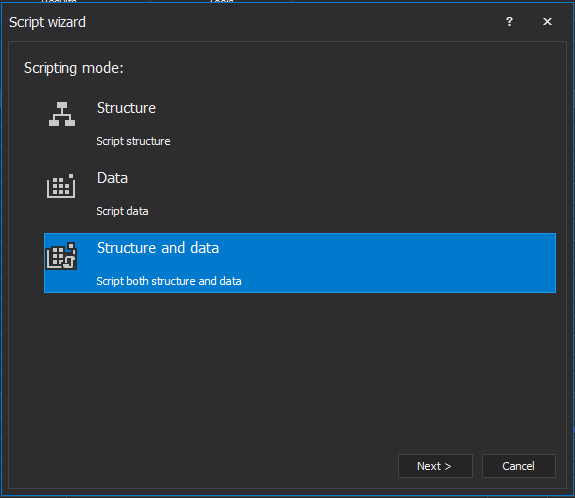
- Select Structure and data in the Scripting mode page:
- Click Next
-
Select the Include dependent database objects option to avoid constraint problems
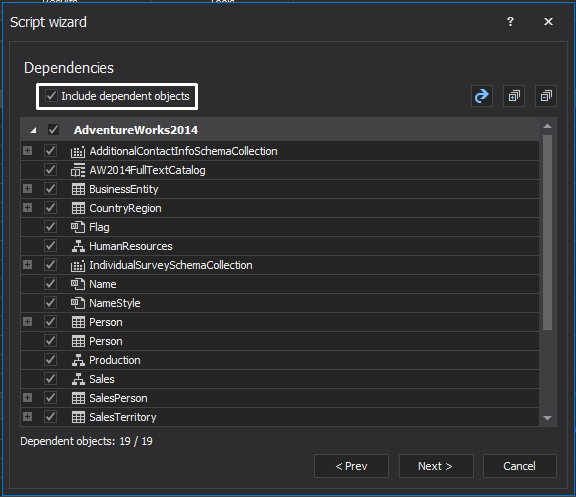
- Click Next
-
Select the options for the executable file
- Check Run executable now to execute the created exe file immediately after it’s been created
-
Specify the database name, MDF and LDF file directories, collation, recovery model, and size
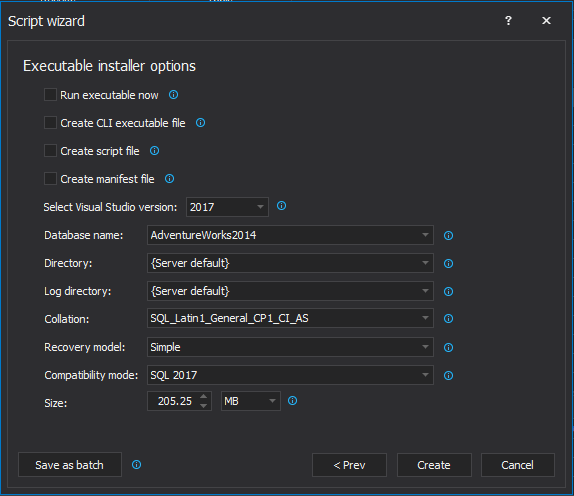
- Click Create
- Specify the file name and the patch for the created file. The executable file is started as soon as it’s created
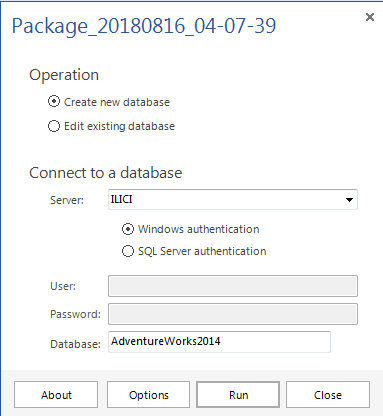
- Select Create new database, specify the database name to create a new database, and run the file against it
-
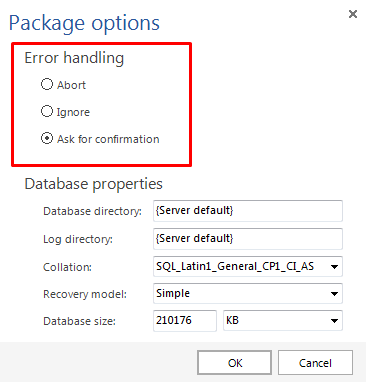
To specify what to do when an error is encountered, click Options and in the Error handling section choose between Abort, Ignore and Ask for confirmation options:
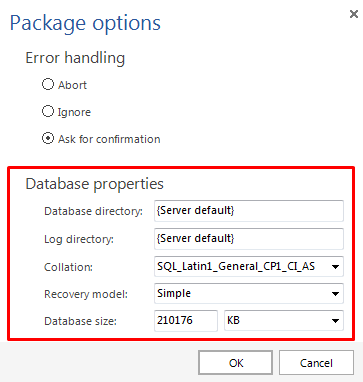
- Specify the database MDF and LDF file directories, collation, recovery model, and size on the Database properties pane:
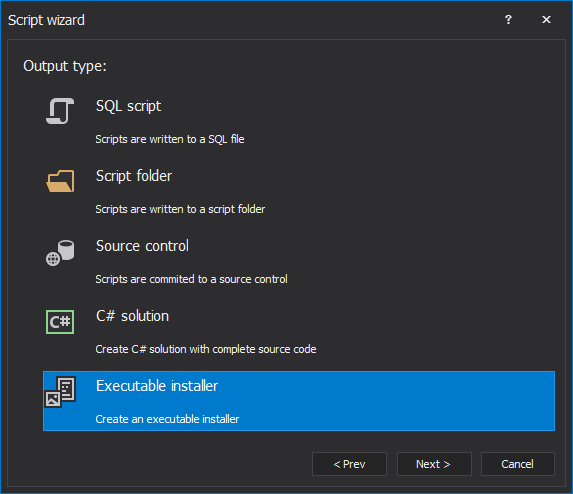
Select Executable installer in the Output type page:
Last updated
August 21, 2018


