


Applies to
ApexSQL DevOps toolkit
Summary
This article explains how to configure ApexSQL DevOps PowerShell script to set up the following steps included in the CI pipeline: Notify, Build, Populate, Test and Audit.
Note: Additional CI steps and products may have been added since the publishing of this article
Inventory
The following components are included in the ApexSQL DevOps toolkit
- PowerShell cmdlets – These free, pre-written scripts provide programmatic control over the ApexSQL console application for each step in a pipeline. They generally don’t need to be changed, although, as they are open source, they can be. These control each of the various steps, analogous to step configurations for the Web dashboard or native build server e.g. Jenkins, plug-ins.
- PowerShell configuration script – This single script provides a central location and means to set options like verbose output and connectivity to data sources and repositories. It acts as a configuration interface, much like options and settings forms in a windows or web application would.
- ApexSQL console applications – These are the applications e.g. ApexSQL Diff that will process each step.
Downloads
The aforementioned PowerShell cmdlets and PowerShell configuration script are part of the ApexSQL DevOps toolkit, which is both free and open source, and can be downloaded via Downloads page
All ApexSQL applications can be downloaded from the Downloads page. The console applications will be installed along with the application. Professional editions of most tools, will be required to utilize the CLI
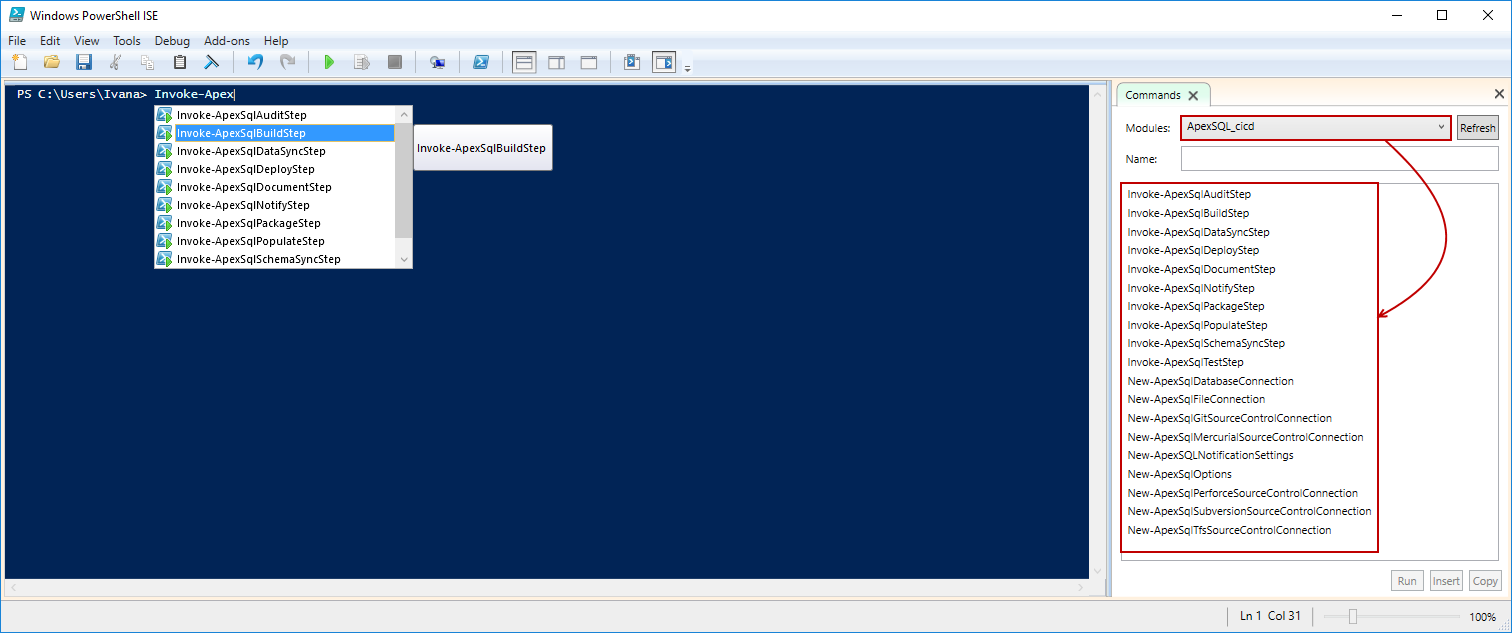
After downloading and installing the ApexSQL DevOps toolkit all ApexSQL DevOps toolkit cmdlets will be available in Windows PowerShell:
Description
An example of the PoweShell script which will automatically run all steps included in the CI pipeline can be downloaded from the ApexSQL CI examples download page. Each step included in the CI pipeline can be adjusted per user’s needs, i.e. additional options can be added or some predefined options can be removed or altered if necessary.
To successfully run a CI pipeline, the previously downloaded ApexSQL DevOps PowerShell script needs to be configured. This configuration consists of replacing example variable values with real values, for example “ServerName” for the Server variable in the data source definition, should be named by the exact server name where the new database will be created, or “example@email.com” in the Notify step should be replaced with exact user’s e-mail address where notifications will be sent.
The first step in configuring the ApexSQL DevOps PowerShell script is configuring the initial settings. Initial configuration of the PowerShell script includes setting up parameters and defining variables for each step in the pipeline, which will be used for the ApexSQL DevOps toolkit PowerShell cmdlets.
All the parameters from the initial configuration are important as they will be used in this segment of the PowerShell script configuration (i.e. $My_CI_options, $My_QA_db, $My_tfs_repo).
The second step in configuring the ApexSQL DevOps toolkit PowerShell script is to configure all steps that will be included in the CI pipeline:
- Notify
- Build
- Populate
- Audit
- Test
All ApexSQL tools will run with the default options set if only required parameters are used for each pipeline step. As a part of configuring the CI pipeline steps, a project file should be created for each ApexSQL tool except for ApexSQL Unit Test. The created project files for each ApexSQL tool will run that particular tool in the CI pipeline with the exact set of options as user selected and with only one cmdlet parameter for each tool.
See the article about how to create a project file, for an example of setting up the options and configuration for a particular ApexSQL tool and saving it as a project
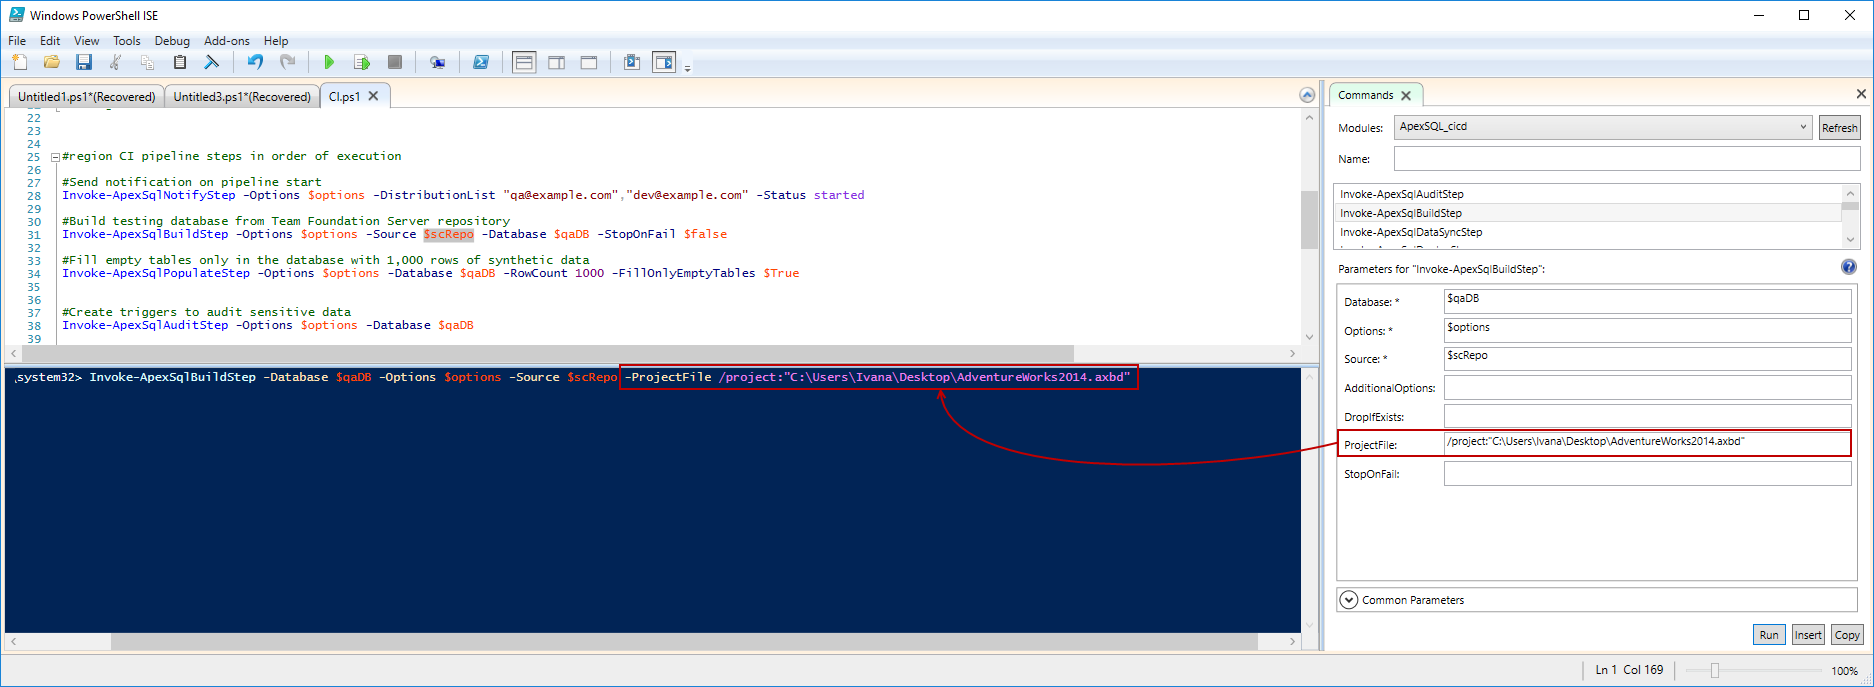
To use the created project file for each step enter the /project:Full_path_to_the_saved_project_file.extension switch with the ProjectFile parameter:
Notify step
This step is used for sending notification messages about the pipeline status. It can be used on the beginning, during the process, or in the end of it and it can be configured to send notification that the pipeline has started, it is in progress, or that it has finished. Notification messages will be sent to the user’s e-mail which he defined as a part of the initial configuration. Cmdlet used for this step is Invoke-ApexSqlNotifyStep.
Syntax:
Invoke-ApexSqlNotifyStep [-Options] <string> [-DistributionList] <string> [-Status] <string>
Required parameters:
- Options: Previously defined parameter $My_CI_options
- DistributionList: List of the e-mail addresses where notifications will be sent
- Status: Information about the pipeline status (i.e. start, in progress, completed)
Example:
Invoke-ApexSqlNotifyStep -Options $My_CI_options -DistributionList
"qa@example.com","dev@example.com" -Status started
In this example, notification that the pipeline has started will be sent to the two selected e-mail addresses – qa@example.com and dev@example.com.
Build step
This step consists of building a new database from the source control repository. A new database will be created with all objects and static data that are in the source control. ApexSQL PowerShell cmdlet for this step is Invoke-ApexSqlBuildStep. This cmdlet will automatically run ApexSQL Build , which will build a new database from the previously defined source control repository.
Syntax:
Invoke-ApexSqlBuildStep [-Database] <string> [-Options] <string> [-Source] <string> [-StopOnFail] <Boolean>
Required parameters:
- Database: The name of the database which will be created
- Options: Previously defined parameter $My_CI_options
- Source: Previously defined parameter $My_tfs_repo for the source control repository which will be used as a source for creating a new database
- ProjectFile: The previously created project file in ApexSQL Build. It should be used in the following way: /project:”Full_path_to_the_saved_project_file.axbd”
Optional parameter:
- StopOnFail: This parameter defines which action will be taken if an error occurs while creating a database. The user can set value for this parameter as $true or $false, which means that the database creation process will be stopped when error occurs, or continued by skipping the creation of an issued object
Example:
Invoke-ApexSqlBuildStep -Database qaDB -Options $My_CI_options -Source
$My_tfs_repo -ProjectFile /project:"C:\Users\Ivana\Desktop\qaDB.axbd"
-StopOnFail $false
In this example database qaDB will be created from the source control repository and, if an error occurs, the process will continue but the issued object will be skipped.
Populate step
With this step we will populate empty rows of previously created database with test data. ApexSQL PowerShell cmdlet for this step is Invoke-ApexSqlPopulateStep. ApexSQL Generate tool will be used for populating database with test data.
Syntax:
Invoke-ApexSqlPopulateStep [-Options] <string> [-Database] <string> [-RowCount] <integer> [-FillOnlyEmptyTables] <Boolean>
Required parameters:
- Options: Previously defined parameter $My_CI_options
- Database: Previously defined parameter $My_QA_db
- ProjectFIle: The previously created project file in ApexSQL Generate. It should be used in the following way: /project:”Full_path_to_the_saved_project_file.axgn”
Optional parameters:
- RowCount: Number of rows that will be inserted, if omitted, 100 rows will be inserted by default
- FillOnlyEmptyTables: When this switch is used with the $true value, only empty tables will be populated with test data. If omitted or if the $false value is used with it, data will be inserted in all tables
Example:
Invoke-ApexSqlPopulateStep -Database $My_QA_db -Options $My_CI_options
-FillOnlyEmptyTables $True -ProjectFile /project:"C0:\Users\Ivana\Desktop\
qaDB.axgn" -RowCount 100
In this example, only empty tables of the previously created database will be populated with 1000 rows of synthetic test data.
Audit step
This step is used for creating auditing reports – creating detailed reports containing all changes made to audited objects. It will run ApexSQL Trigger tool which will create a report audited by DML changes in the database. ApexSQL PowerShell cmdlet for this step is Invoke-ApexSqlAuditStep.
Syntax:
Invoke-ApexSqlAuditStep [-Options] <string> [-Database] <string>
Required parameters:
- Options: Previously defined parameter $My_CI_options
- Database: Previously defined parameter $My_QA_db
- ProjectFile: The previously created project file in ApexSQL Trigger. It should be used in the following way: /project:”Full_path_to_the_saved_project_file.axap”
Example:
Invoke-ApexSqlAuditStep -Database $My_QA_db -Options $My_CI_options -ProjectFile /project:"C:\Users\Ivana\Desktop\qaDB.axap"
In this example we will create triggers to audit sensitive data, in the database previously defined with $My_QA_db parameter
Test step
This workflow step includes running unit tests on the previously created and populated database. SQL Unit tests should be executed in order, to make sure that when the database is changed, its relationships or integrity will not be violated. ApexSQL Unit Test is the tool which will be used for this step and ApexSQL PowerShell cmdlet for it is Invoke-ApexSqlTestStep.
This is a CI pipeline step which doesn’t require creation of the project file since this product doesn’t support creation of the project file.
Syntax:
Invoke-ApexSqlTestStep [-Database] <string> [-Options] <string>
Required parameters:
- Database: Previously defined parameter $My_QA_db
- Options: Previously defined parameter $My_CI_options
Example:
Invoke-ApexSqlTestStep -Options $My_CI_options -Database $My_QA_db | Out-Null
In this example SQL Unit tests will run on the created database and no outputs will be displayed. If the user wants to have an output for this step, the Out-Null segment should be left out.
|
Quick tip: User can include one or more of the mentioned steps in his CI pipeline and combine them per his needs |
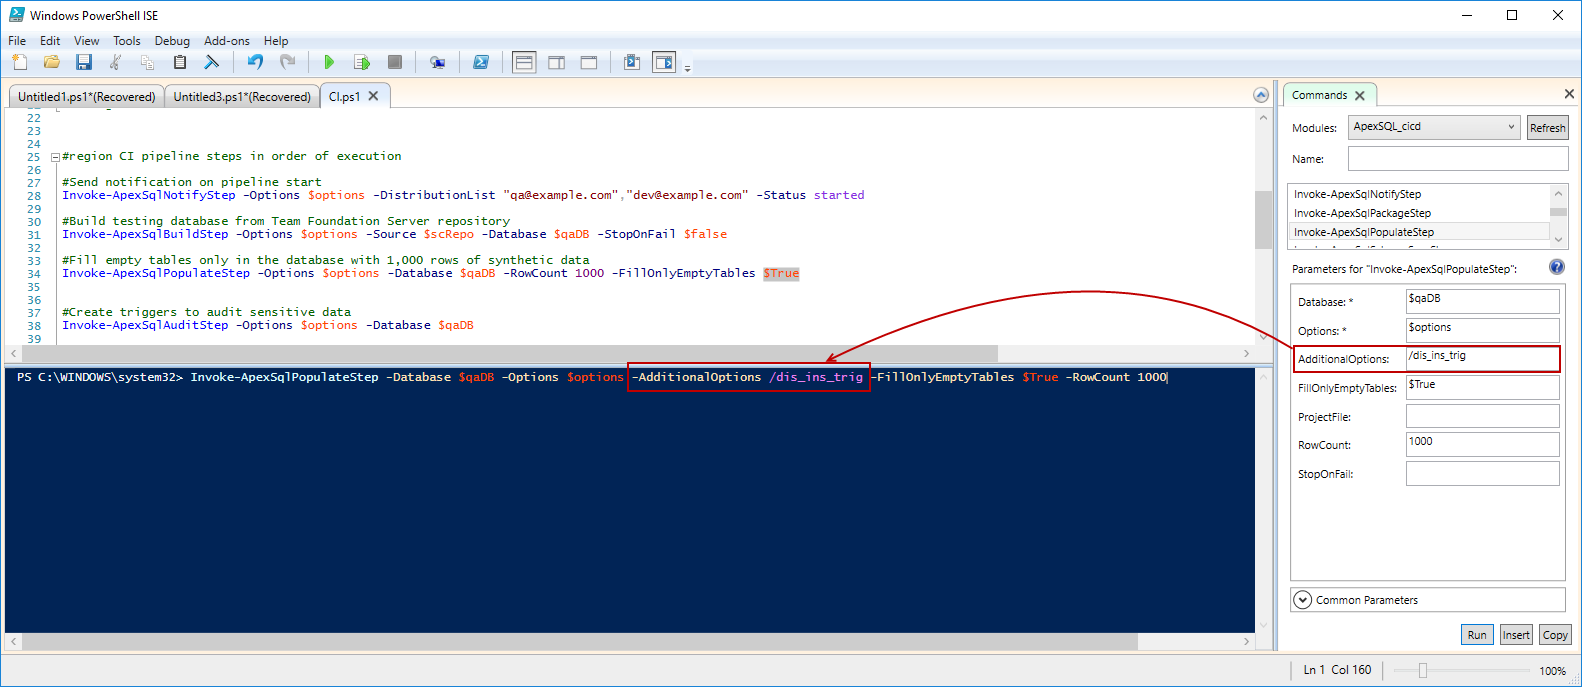
Each ApexSQL tool can be configured with predefined or additional cmdlet parameters. All parameters for each cmdlet can be seen in the Commands tab in the Windows PowerShell ISE:
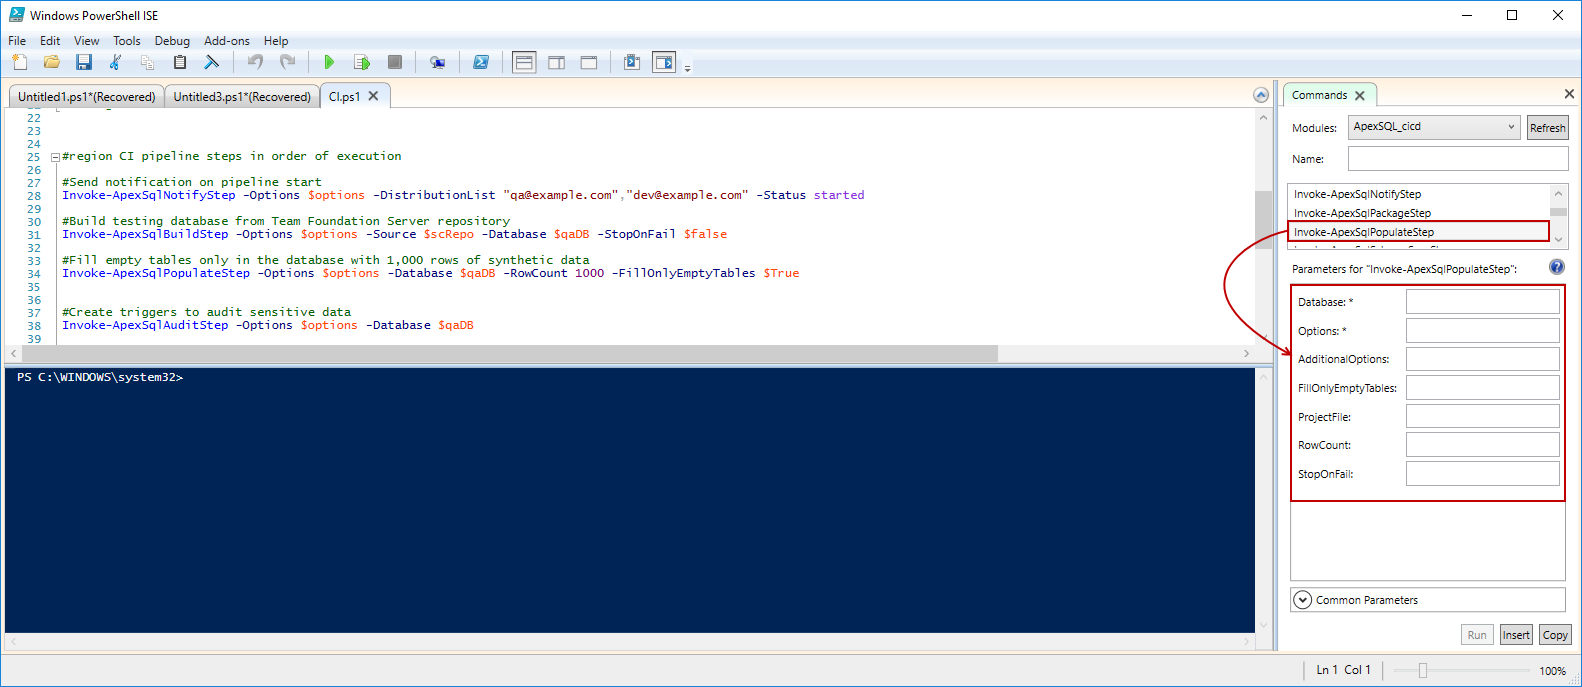
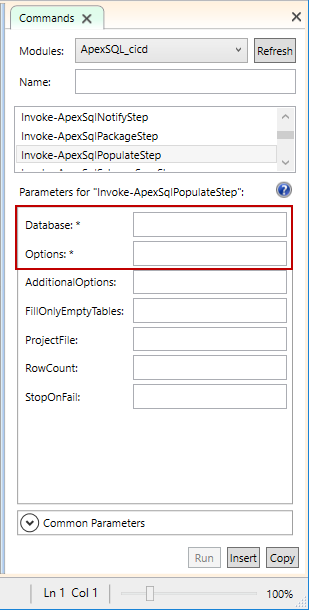
Required parameters are marked with the * next to them:
Each ApexSQL tool has some default state where some options are included and some are not. If there is need for some options to be included additionally, the AdditionalOptions parameter can be used for adding CLI switches for configuring each option that exists in the particular ApexSQL tool:
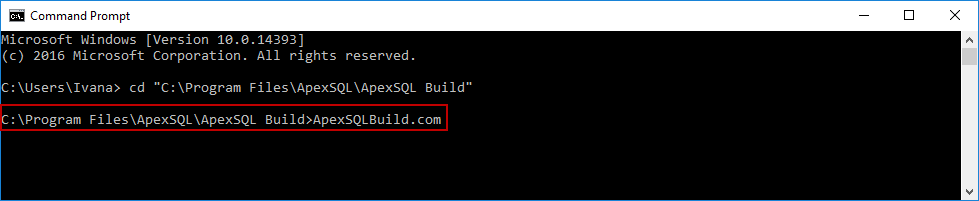
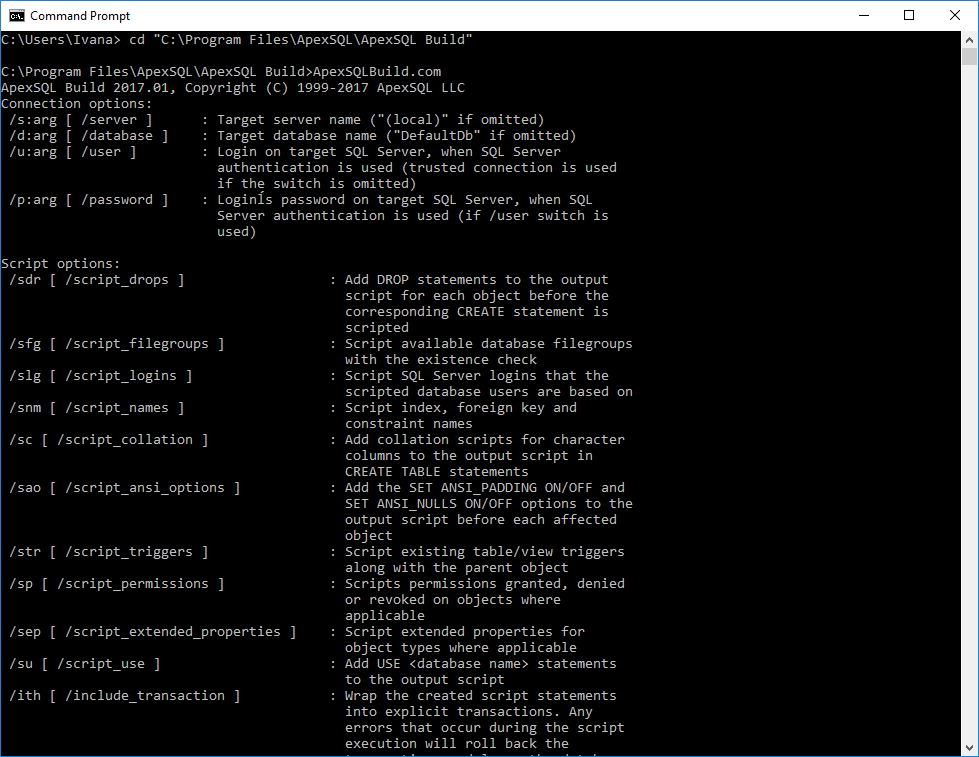
List of all CLI switches for each tool can be found within the Command Prompt. To list them just navigate to the installation folder and run the ApexSQLToolName.com command:
List of the CLI switches will show:
Note: Any option set in the project file will be overridden if the same option (switch) is used with the AdditionalOptions parameter or with the cmdlet parameters alone like Database, StopOnFail, etc.
With the parameters and cmdlets defined as a part of the initial configuration and CI pipeline steps defined in this article, we have fully set PowerShell script which can be saved and used to run a custom CI pipeline.
More information about ApexSQL DevOps toolkit can be found in the ApexSQL DevOps toolkit PowerShell FAQs.


