


Applies to
ApexSQL Restore
Summary
This article explains how to restore a database backup from a network path to a local SQL Server instance.
Description
ApexSQL Restore can use a remotely stored database backup as a source for a virtual restore. To restore a database backup from a network path:
- Select the Add virtual database option.
-
Select the SQL Server instance where the database will be restored, and type the name of the newly restored database. Note that a database with the same name must not exist on the SQL Server instance.
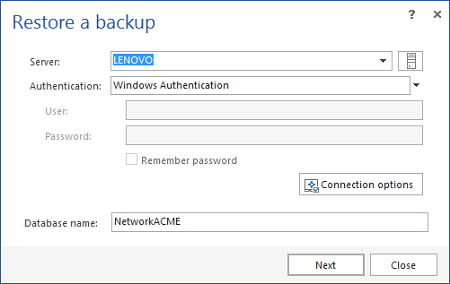
Click Next to continue.
- Use the Add files option in the Restore a backup dialog to browse the network and point to the database backup file.
-
After the backup file is added to the dialog, select the items (e.g. database, transaction logs, etc.) from its content to be restored
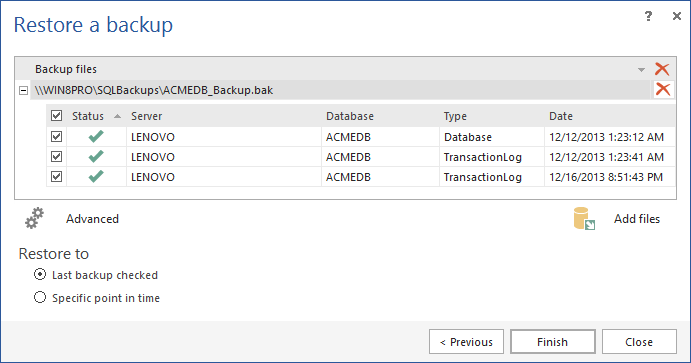
- Click Finish to complete the database backup restore.

In case this is the first time ApexSQL Restore access the remote machine (e.g. win8pro, as shown in the above screenshot), an additional dialog will prompt for the remote machine Windows credentials. The credentials must have Read access permission to the remote path.
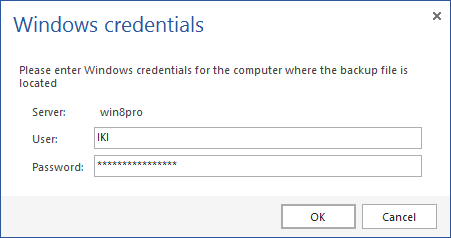
These credentials will be used by the ApexSQL Restore Windows service during the database backup restore and afterwards, to provide required data from the backup file. Note that the Windows account used by the SQL Server instance service also requires the Read access permission to the remote path.
In case the provided credentials are not valid, the following error will be shown:

For more information about the requirements visit the ApexSQL Restore – Permissions and requirements page.


