Table of contents
1 Introduction
1.1 Company
1.2 ApexSQL Refactor
2 Refactoring features
2.1 Qualify object names
2.2 Wildcard expansion
2.3 Unused variables and parameters
2.4 Split table
2.5 Safe rename
2.6 Change parameters
2.7 Replace one-to-many relationship
2.8 Add surrogate key
2.9 Encapsulate code as
2.10 Convert to code
3 Formatting features
3.1 Formatting
3.2 Capitalization
3.3 Comments
3.4 Statements
3.5 Lists
3.5.1 Tables
3.5.2 Columns
3.5.3 Values
3.5.4 Where in values
3.5.5 Assignments
3.5.6 Variables
3.5.7 Parameters
3.6 Expressions
3.6.1 Arithmetic
3.6.2 Comparison
3.6.3 Logical
3.7 Joins
3.8 Flow control
3.9 Obfuscation
3.10 Shortcuts
3.11 Format SQL scripts
3.12 Format SQL objects
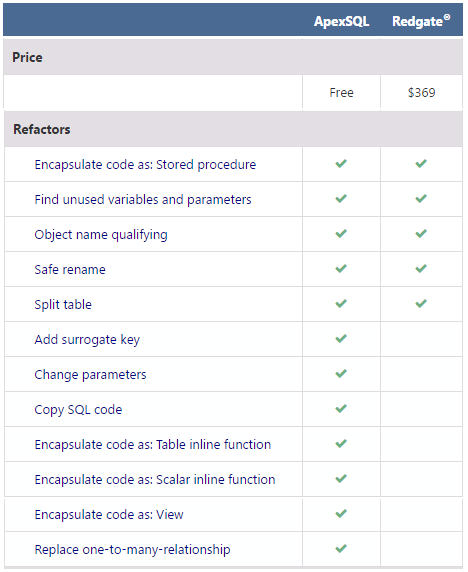
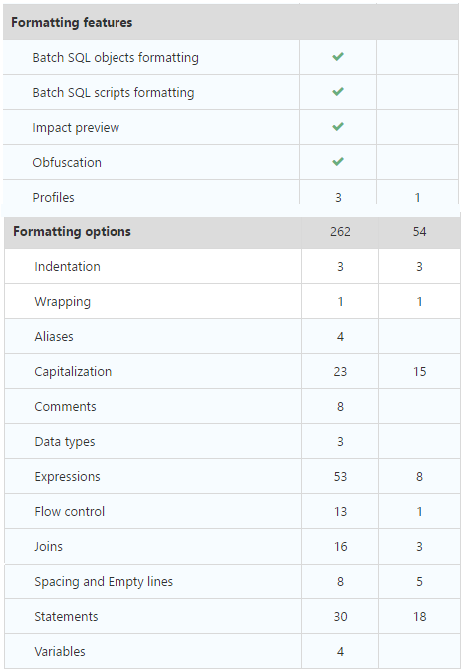
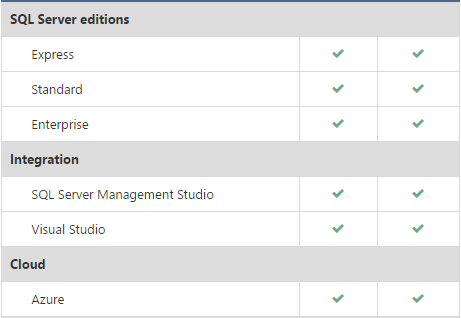
4 Compare ApexSQL Refactor and Redgate SQL Prompt
1 Introduction
1.1 Company
-
ApexSQL is a software development company headquartered in Chapel Hill, US. It was founded in 1998
-
The company specializes in developing professional software tools for Microsoft SQL Server including tools for Database Auditing, Recovery, Change Management, Development, Documentation and more
-
ApexSQL is a Microsoft Gold Certified Partner and provides services for over 10,000 customers in over 120 countries worldwide

1.2 ApexSQL Refactor
-
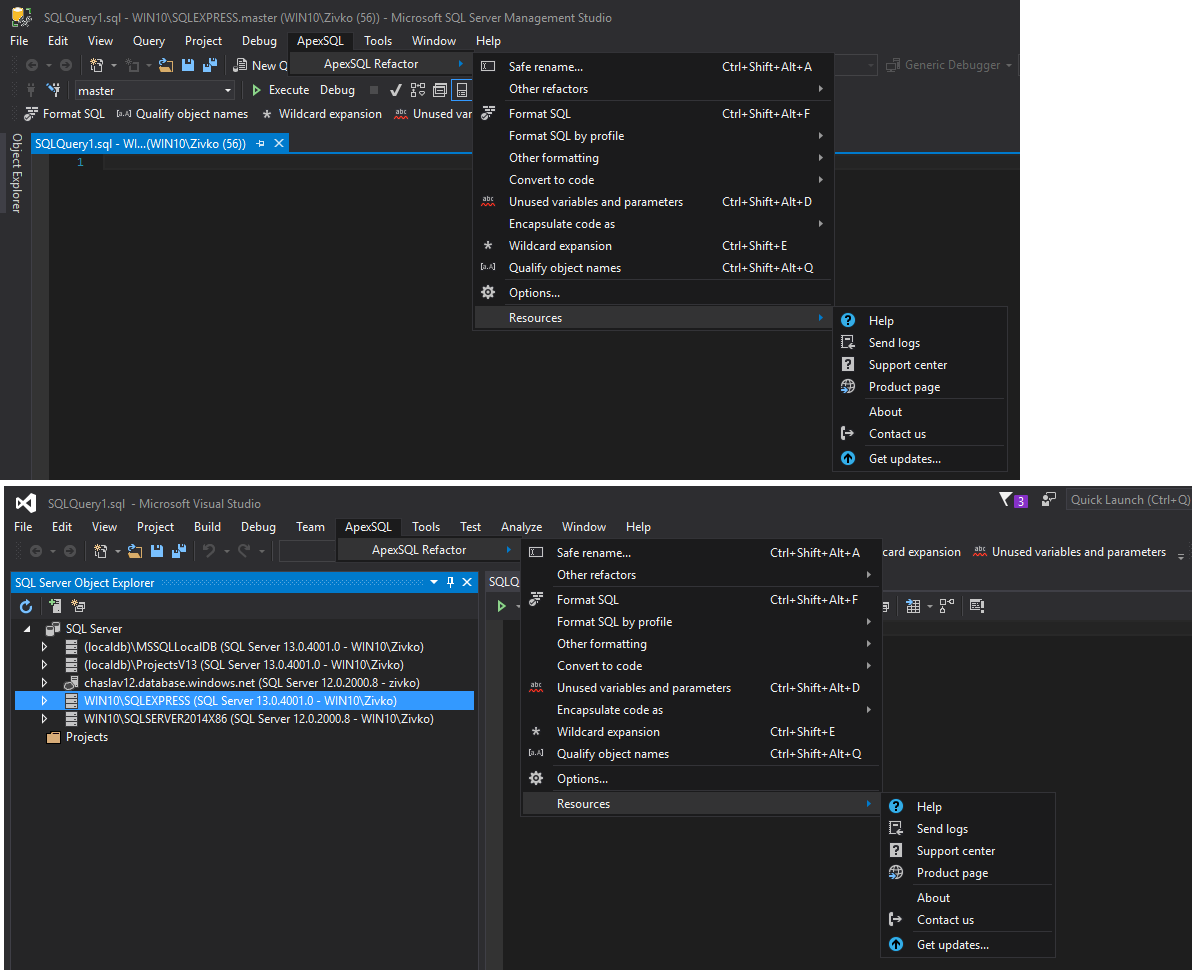
ApexSQL Refactor is a SQL Server Management Studio and Visual Studio add-in, for format and refactor SQL code and objects. ApexSQL Refactor has 200+ formatting options and nearly 15 code refactors
ApexSQL Refactor can:
-
Qualify SQL Server object names, expand wildcards and locate and highlight unused variables and parameters
-
Encapsulate SQL code into procedures, replace one-to-many relationships, add surrogate keys, change procedure parameters
-
Update all dependent database objects on renaming or changing columns and parameters without breaking any dependencies
-
Format SQL code in the SSMS or Visual Studio query window, it can format SQL objects or external SQL scripts:
2 Refactoring features
2.1 Qualify object names
-
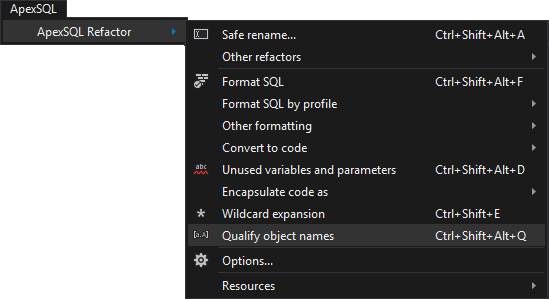
The Qualify object names feature enables to refactor SQL code in a way to add the owner (schema/user) of objects object name, or alias name
-
When object name is qualified, SQL Server will not check if the current user is the owner of the object, which means fewer resources to use, as a result, query will be executed faster.
-
All the changes made using the Qualify object name feature, can be reverted using the standard SSMS Undo command.
-
To apply the Object name qualifying option, choose it from the ApexSQL Refactor menu or from the ApexSQL Refactor tool bar:
ApexSQL Refactor toolbar:

2.2 Wildcard expansion
-
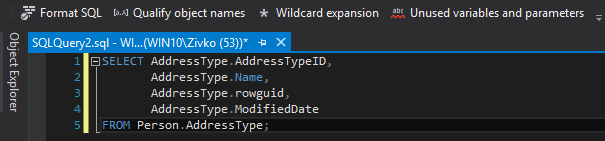
This will allow to expand wildcards e.g. “*” used in SQL, into column names:


-
The Wildcard expansion code refactor of ApexSQL Refactor is an effective way to improve SQL query performance and prevent errors related to wildcards in SELECT statements as well as improving the quality and readability of SQL code
-
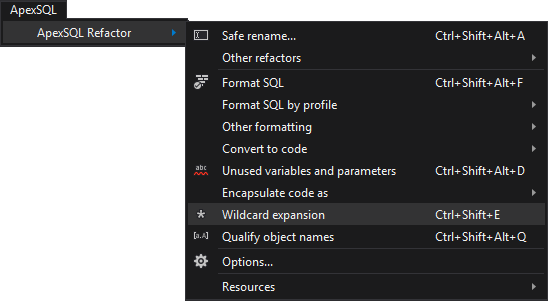
To apply the Wildcard expansion option, choose it from the ApexSQL Refactor menu or from the ApexSQL Refactor toolbar:
ApexSQL Refactor toolbar:

2.3 Unused variables and parameters
-
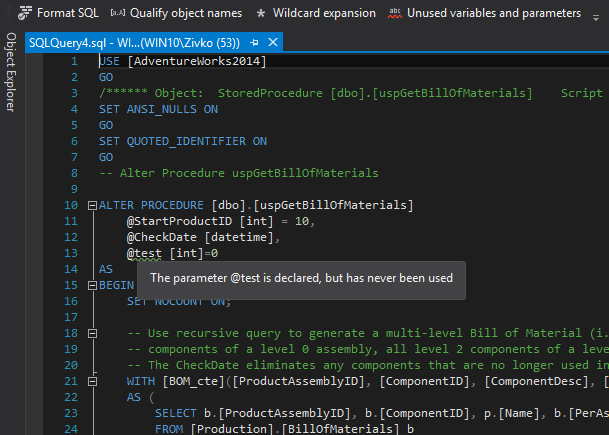
Find parameters or variables declared or assigned a value, but never use or queried in any statements as UPDATE, EXECUTE, WHERE, INSERT or PRINT is unused
-
ApexSQL Refactor can clean up SQL database code by analyzing and automatically highlighting the superfluous SQL objects. This is especially useful, for example, if there is a legacy database and there is a need to know if SQL objects are referencing other SQL objects that no longer exist in the SQL database and remove unnecessary bloat.
-
To find unused parameters and variables, run the Unused parameters and variables command from the ApexSQL Refactor menu of from the ApexSQL Refactor toolbar
-
If there are any declared, but unused variables or parameters, ApexSQL Refactor will find them
-
To confirm that the highlighted parameter/variable is unused, bring the mouse pointer to it, and the tooltip comes up:

2.4 Split table
-
The Split table option is used to split a SQL database table into two tables by copying or moving columns from the original table to a new one
-
It is useful when a table contains rarely used columns, they can be moved to another table, so the original table contains less frequently used columns
-
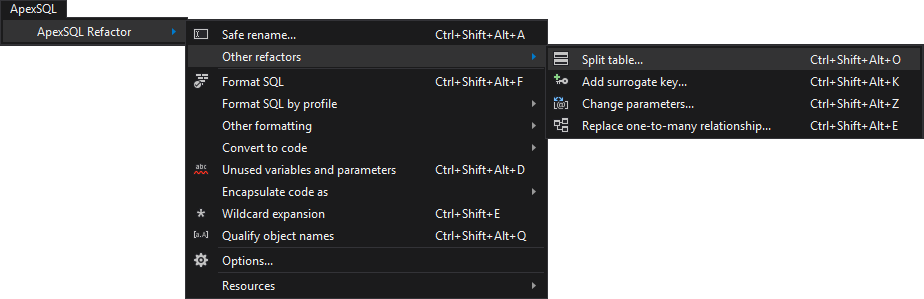
To split a table, in Object Explorer in SSMS or Visual Studio select a table, and choose the Split table option from the ApexSQL Refactor menu to open the Split table dialog:
-
Columns can be copied/moved from the original table to a new one
-
For the new table, can defined the name and schema
-
Before execution, the generated script can be previewed, see the impact of changes and affected dependent objects in the Generated script, Warnings, Sequence and Dependencies section:
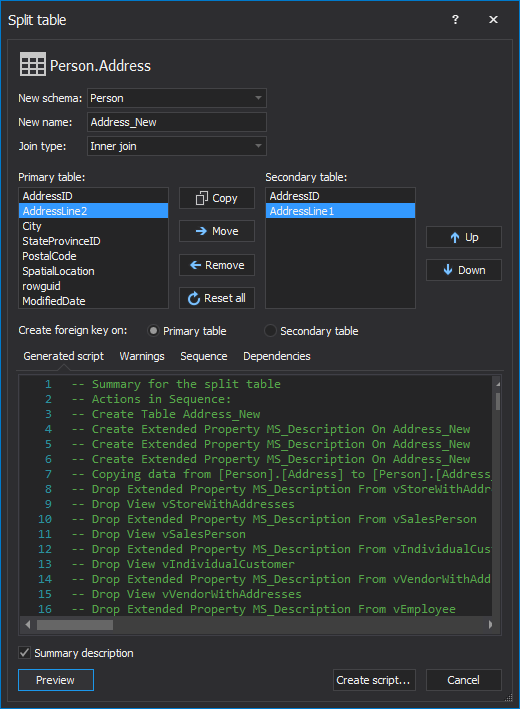
Generating script
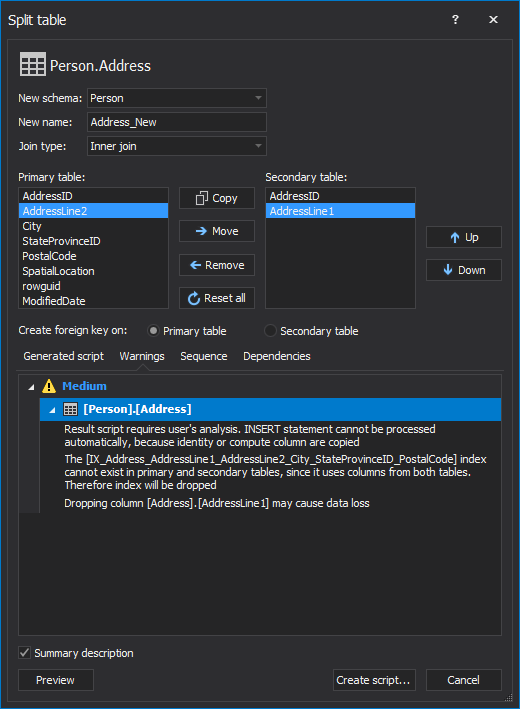
Few warnings that requires the referring objects need to be reviewed and updated accordingly analysis while splitting the table
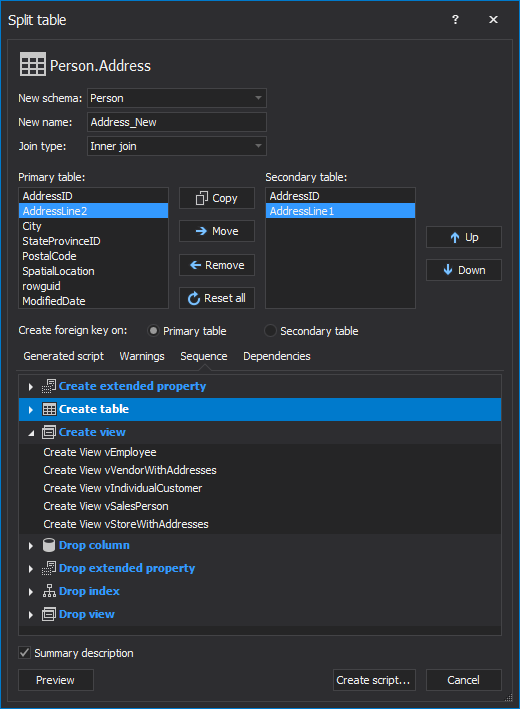
Actions sequence in the way ApexSQL Refactor executes one by one
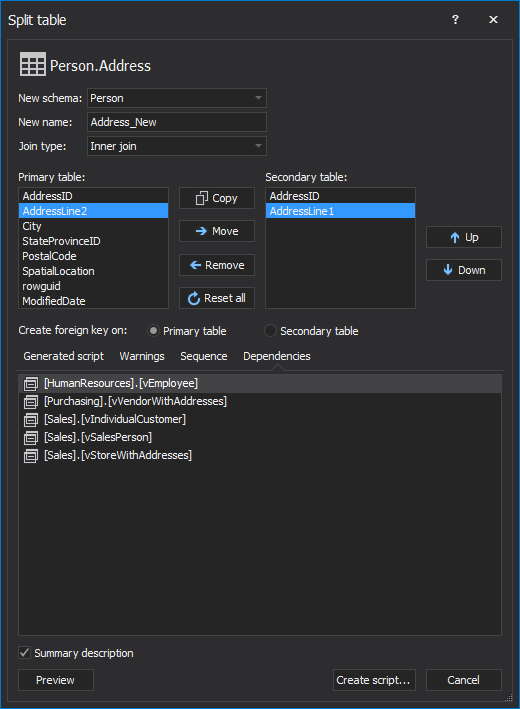
A list of dependent objects that refer to the table which will be split
2.5 Safe rename
-
This feature makes possible to rename objects in SQL Server without breaking the database dependencies. It generates a SQL script that changes the object name and updates all the dependent database objects
-
The Safe rename option can be applied to database tables, views, procedures, and functions
-
It applies to a table/view columns and function/procedure parameters
-
To rename any of the mentioned objects right click on it from the Object Explorer, or select it, and choose the Safe rename option from the ApexSQL Refactor menu. This will open the Safe rename dialog where a new name can be entered for the selected object:

-
The Sequence tab shows the process of renaming the object, listing the sequences that will be executed in order to rename the selected object:
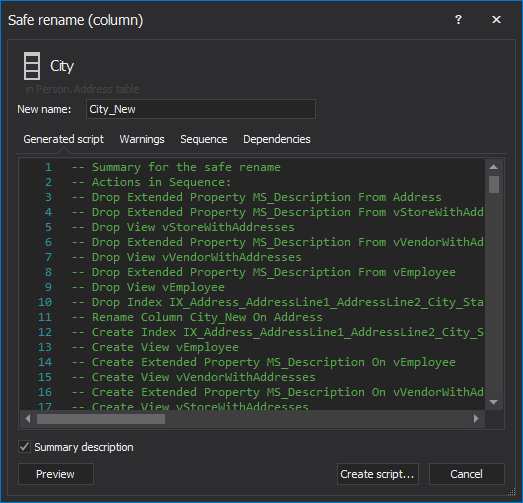
Safe rename dialog

Actions sequence in the way ApexSQL Refactor executes one by one

A list of dependent objects that refer to the column which will be renamed
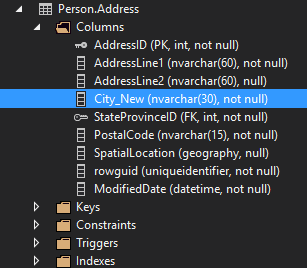
Updated column name
2.6 Change parameters
-
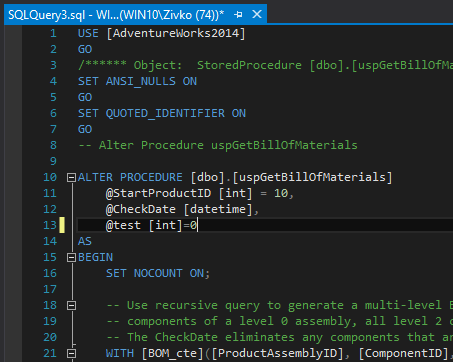
The Change parameters refactor ads removes or changes a parameter for a SQL Server function or procedure (triggers included) without breaking the database integrity. The SQL script generated by this feature reflects the selected parameter from the function/procedure, and updates all dependent database objects.
-
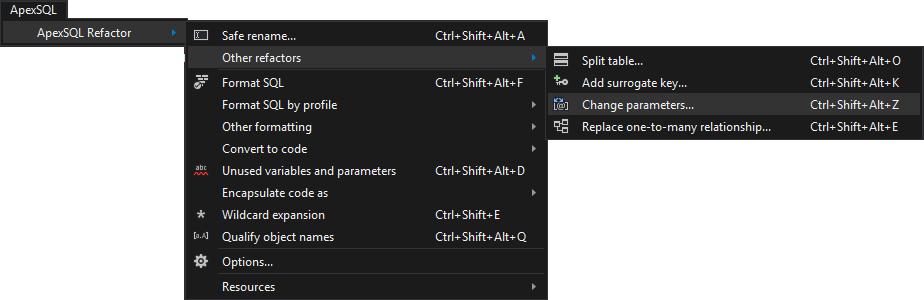
To launch Change parameters feature, select a procedure/function and choose it from the ApexSQL Refactor menu:
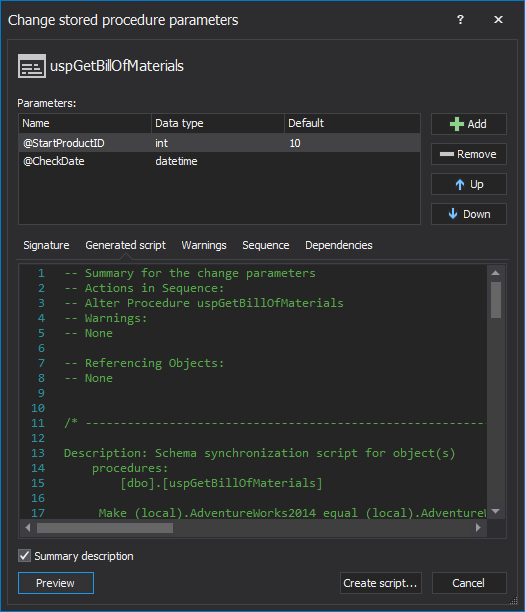
Generated script
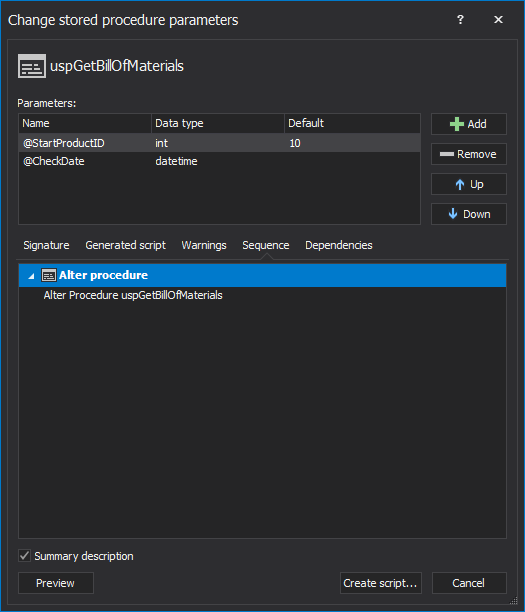
Actions sequence in the way ApexSQL Refactor executes one by one
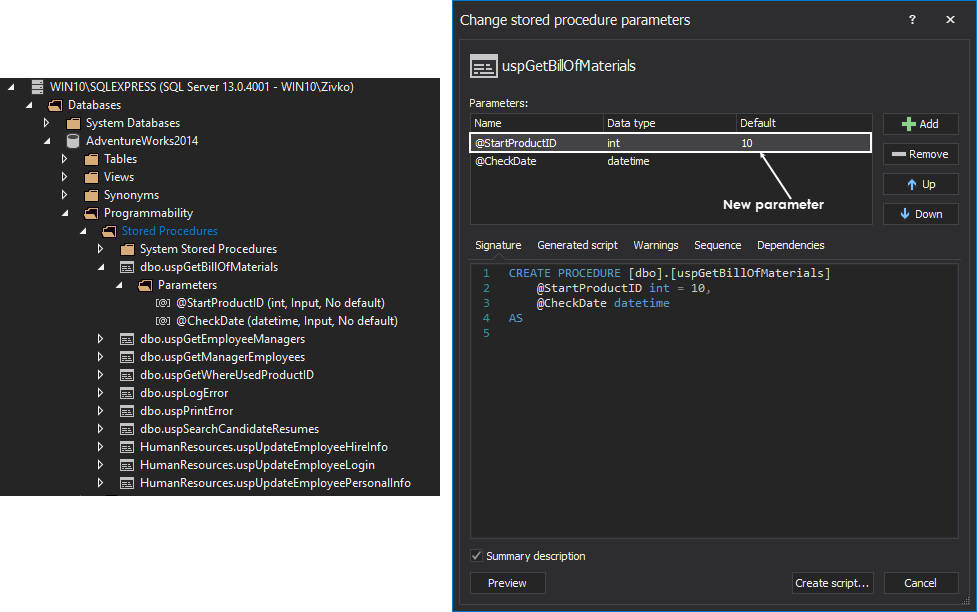
Changing value for @StartProductID parameter in the Stored Procedure uspGetBillOfMaterials
2.7 Replace one-to-many relationship
-
The Replace one-to-many relationship feature in ApexSQL Refactor, will isolate the relationship between two tables and add a separate association table
-
To use this option, select the table from the Object Explorer and choose the Replace one-to-many relationship option from the ApexSQL Refactor menu:

-
This will open a dialog where the associative table name can be specified, choose the dependent table, and a relationship
-
The Generate script option generates a SQL script, which replaces a relationship. Under the appropriate tabs, developer can review warnings, sequences, and dependent objects:
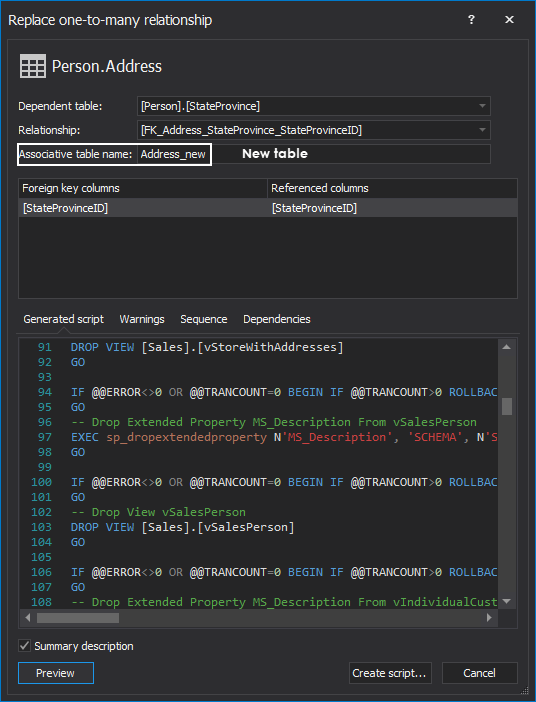
Replace one-to-many relationship dialog
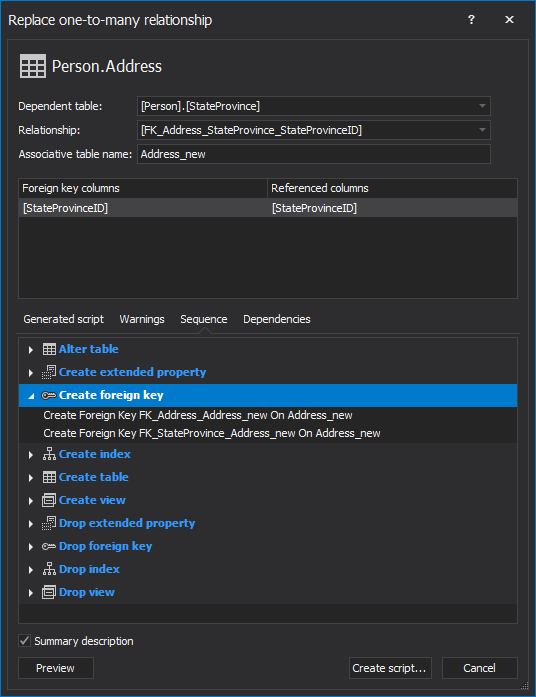
Actions sequence in the way ApexSQL Refactor executes one by one
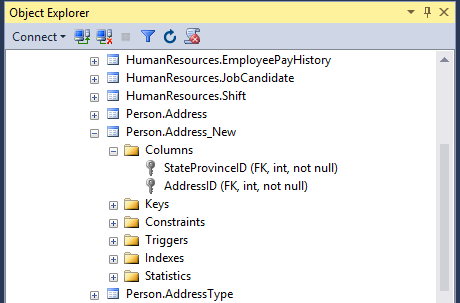
New associative table has been created by referencing Primary Key columns of both dependent tables
2.8 Add surrogate key
-
The Add surrogate key feature replace a complex natural key with a simple surrogate key thus keeping referential integrity, unifying key support for the whole database, and improving database refactoring performance
-
To add a surrogate key, select the table in Object Explorer and choose the Add surrogate key option from the ApexSQL Refactor menu. This will open the Add surrogate key dialog where developer can choose the one of the existing keys, and specify the Surrogate column name value:

-
The Generate preview option shows the generated SQL script in the preview section. All dependent objects, sequences, and warnings (if exist) will be shown under the appropriate tabs:
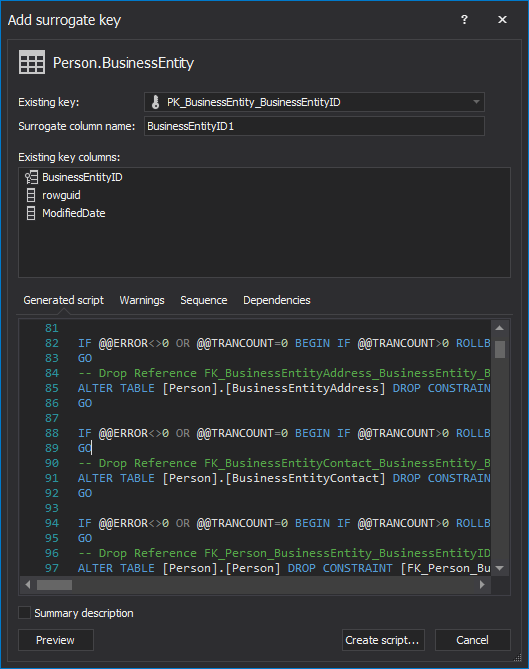
Add surrogate key dialog
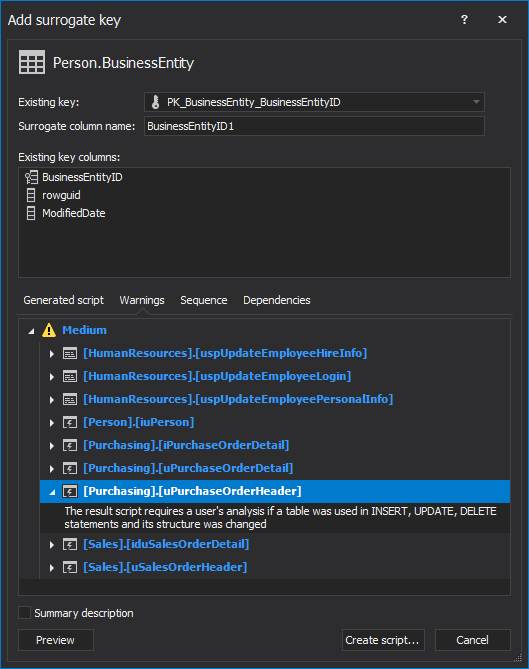
Few warnings that requires the referring objects need to be reviewed and updated accordingly analysis while add surrogate key
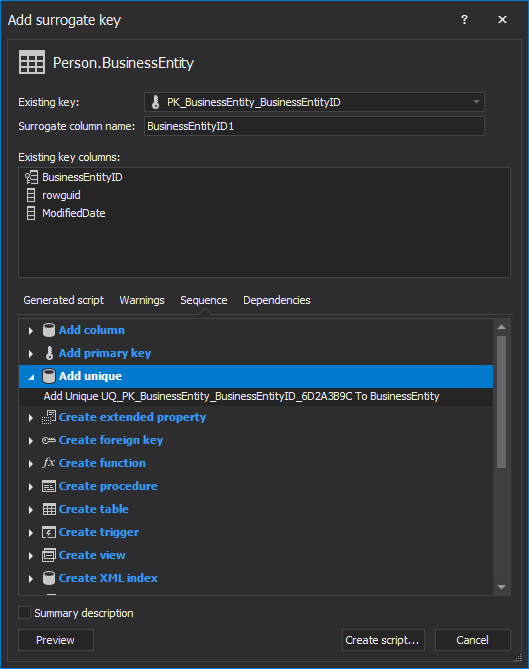
Actions sequence in the way ApexSQL Refactor executes one by one
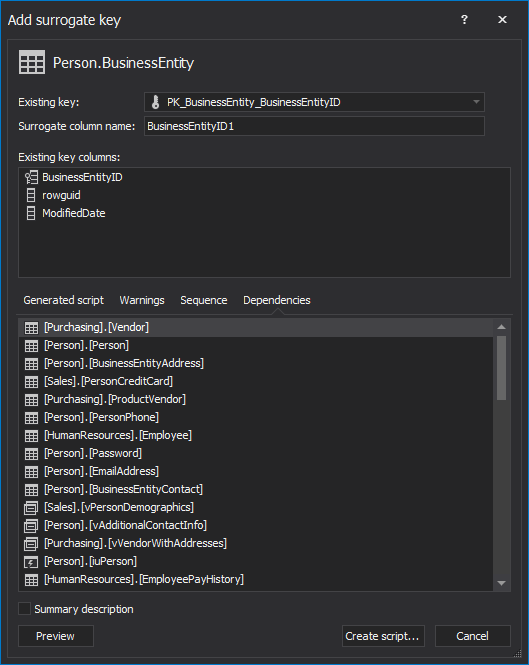
A list of dependent objects that refer to the table which in will be added surrogate key
2.9 Encapsulate code as
-
The Encapsulate code as feature creates stored procedures, view, scalar inline function, or a table inline function by refactoring the existing SQL queries, without a need to write any additional code or determine and declare parameters manually
-
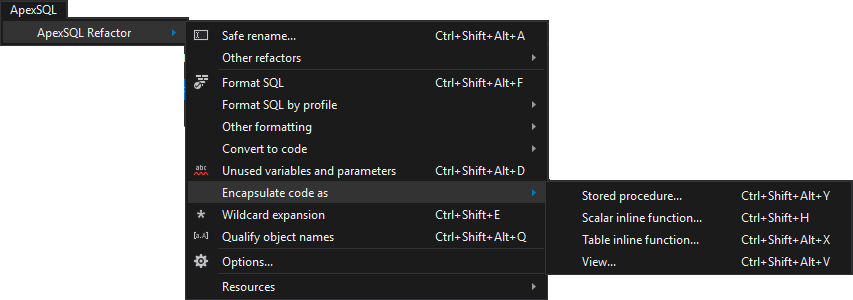
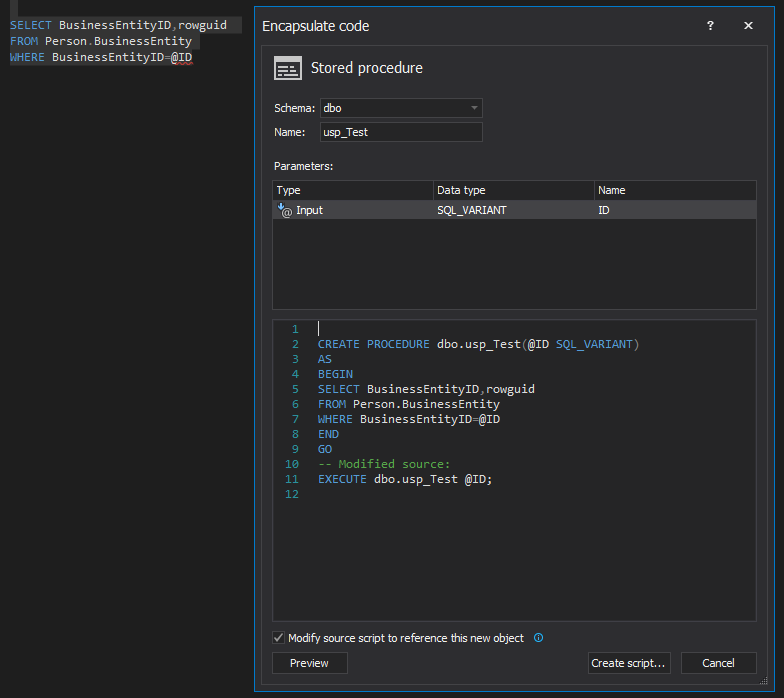
To encapsulate SQL code as one of the mentioned objects, select it in the query window, and choose the Encapsulate code as option from the ApexSQL Refactor menu:
-
Select the appropriate object, depending on what needs to be encapsulated, and the new window opens
-
Give a name and assign a schema to the selected object. If developer clicks the Preview button, a SQL script will be created, and the parameters will be listed in the Parameters section:
Encapsulate code dialog
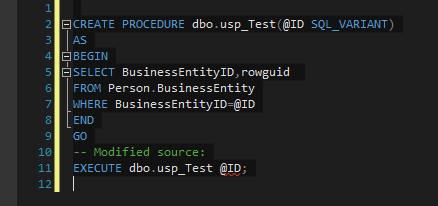
After encapsulation
2.10 Convert to code
-
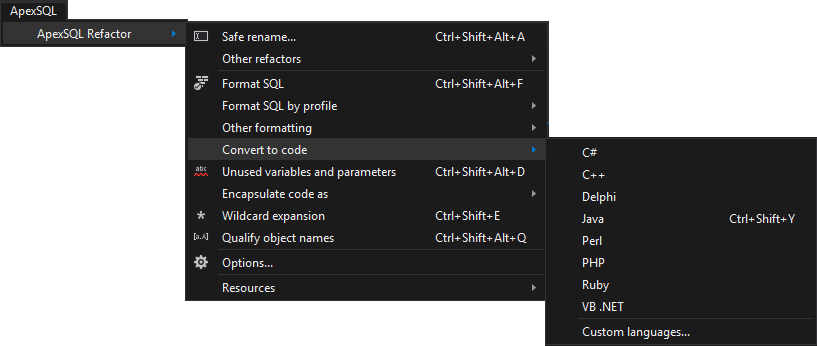
The Convert to code feature that provides a simple way to convert T-SQL script into client language-specific syntax – Java, VB.NET, c#, Perl, PHP, Delphi, Ruby, C++, or other custom languages for which conversion rules are defined:
-
To convert SQL code into any of the listed programming languages, point to a query window with SQL code that should be converted, and choose the language from the list. Select language from the list, open a new query window, and paste the created code:
Confirmation message
Code converted into Java
3 Formatting features
3.1 Formatting
-
In the Formatting tab, can be set indentation by using spaces or tabs. Aligns identifiers in the data statements like Select, Insert or Update statement by using Smart indent option. Additionally, space around assignment operators, before and after commas can be added. Using options under the Empty lines section empty lines can be removed or added before/after comments, before each statement, several empty lines can be changed into one empty line, etc.:

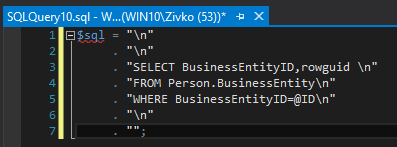
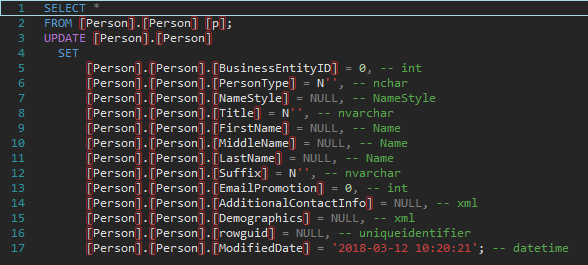
The Enclose identifiers in brackets option is checked:
Before:
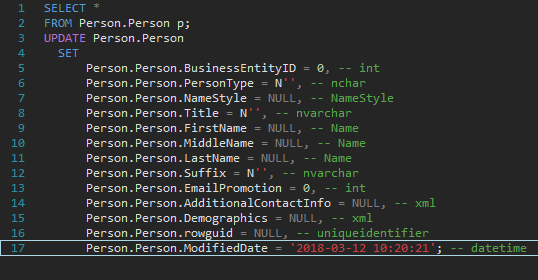
After:
3.2 Capitalization
-
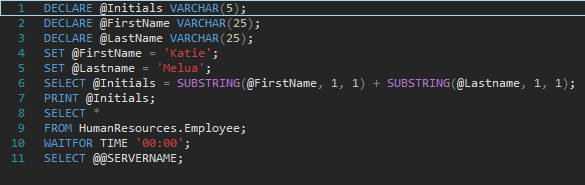
In the Capitalization tab, the capitalization can be enforced for SQL keywords, data type, identifiers, system functions, and variables. For each of the mentioned, developer can choose from the drop-down list whether it is going to be capitalized in upper case, proper case, or lower case:
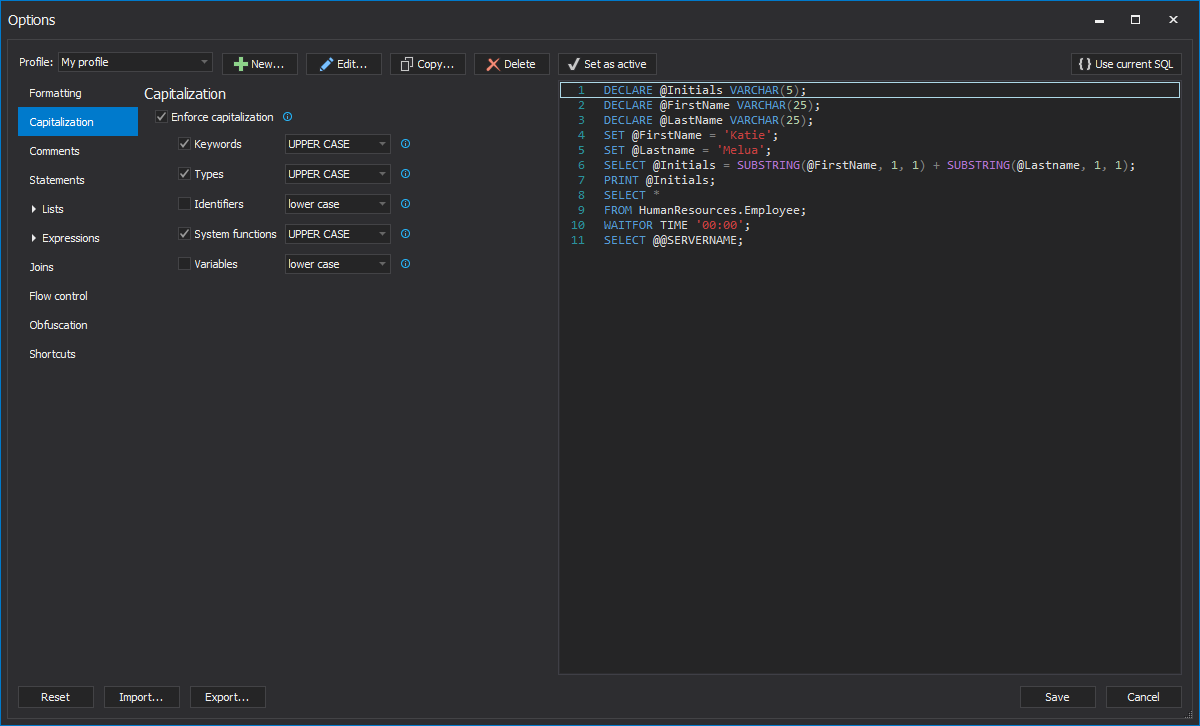
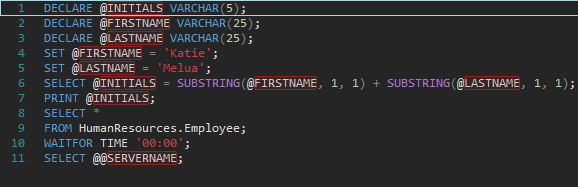
The Variables option set to upper case:
Before:
After:
3.3 Comments
-
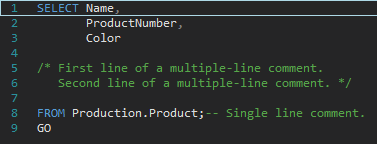
In the Comments tab, empty line before or after block comments can be added. Also, border above or below block comments can be set using any separator such (*, -, +, /). Additionally, all comments type can be change into block/inline comments or simply remove all comments from the code:

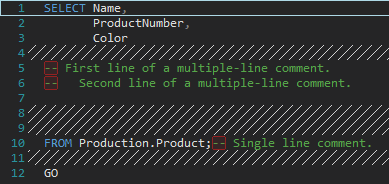
The Change all comment to line comment option is checked:
Before:
After:
3.4 Statements
-
Under the Statements tab, a lot of options can be set for data statements, nested selections, object definitions, aliases, etc. In the Data statements section, only statements that are longer than specified number of characters can be formatted. FROM, WHERE and SET clause can be moved to in a new line, align with the keyword, or indent by specified number of spaces. Parentheses in the nested selections can be placed into a new line, align with the keyword, or indented. The AS keyword can be aligned with the keyword or intended:
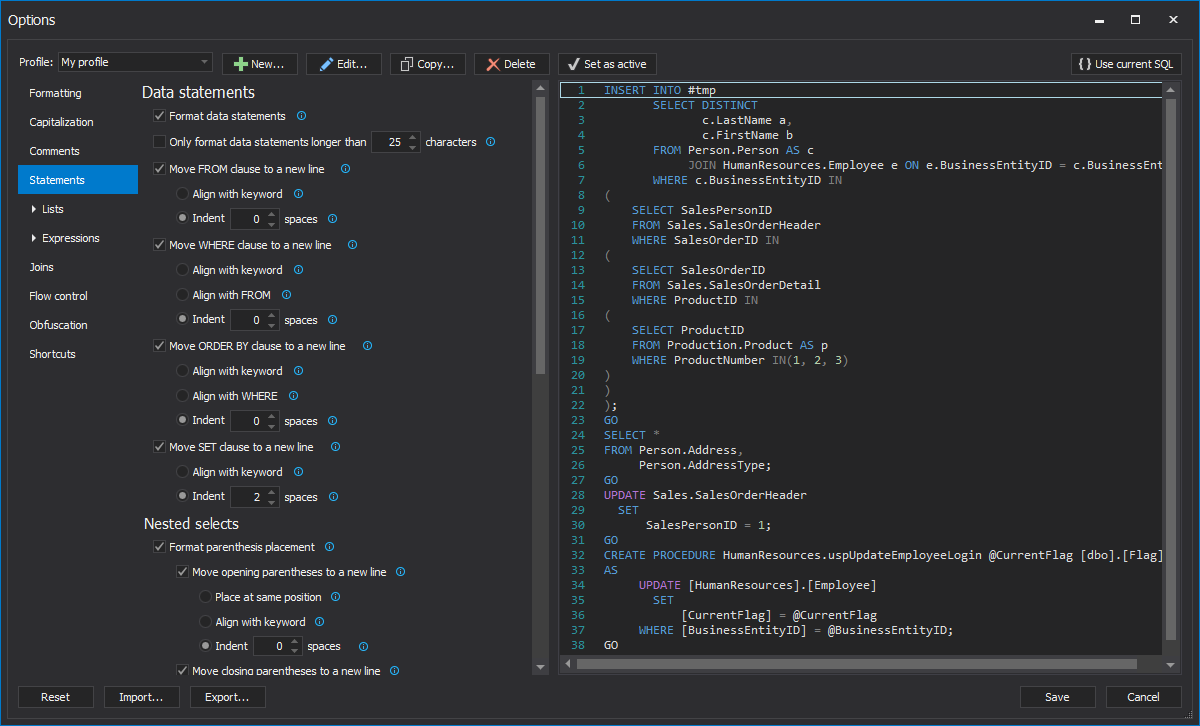
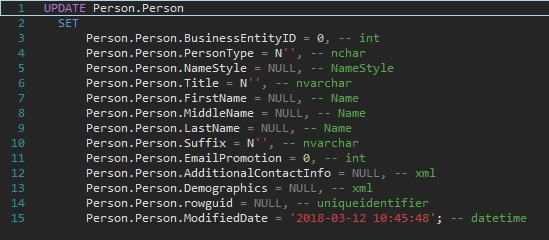
The Move SET clause to a new line option is unchecked:
Before:
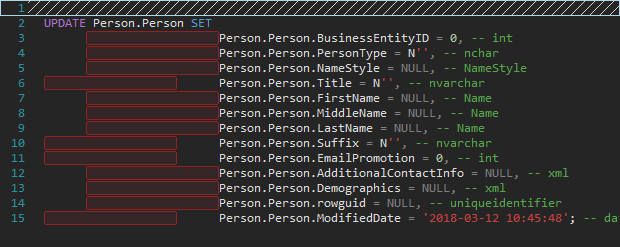
After:
3.5 Lists
-
Under the Lists tab are sub-tabs in which can be set up formatting style for tables, columns, values, where in values, assignments, variables, parameters.
3.5.1 Tables
-
In the Tables sub-tab, place the table item list can be set to a new table, align table item list with a keyword or indented them. Additionally, each item from the list can be placed on a new line and place a comma before or after each item:

The Place list on a new line option is checked:
Before:
After:
3.5.2 Columns
-
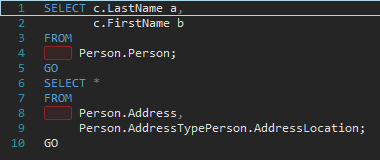
In the Columns tab, the column list can be set a list on a new line, aligned with the keyword. Also, each item from the column list can be placed at a new line with a comma after or before each column. Additionally, opening and closing parentheses can be moved to a new line, aligned with the keyword, indented etc. Place inside/outside parentheses can be added:
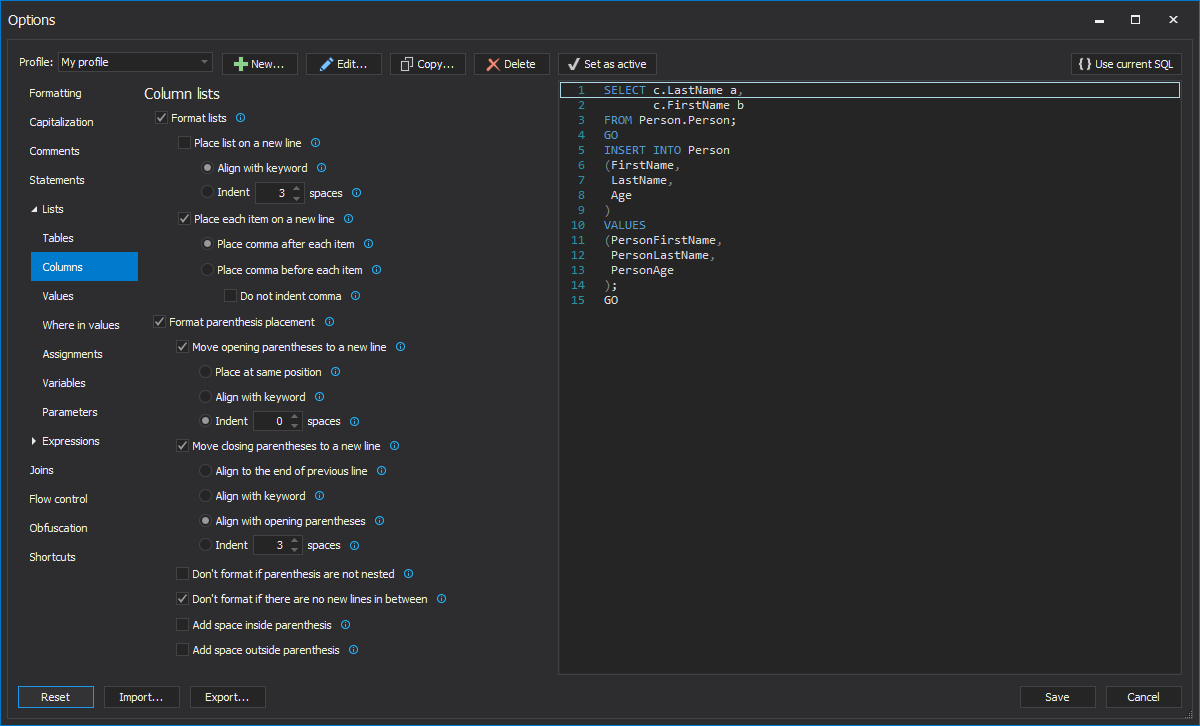
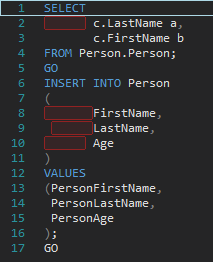
The Place list on a new line option is checked:
Before:
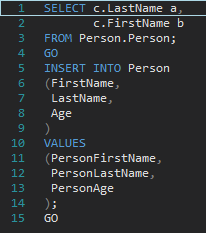
After:
3.5.3 Values
-
Under the Values sub- tab, complete value list can be move to a new line, aligned or indented. Also, each item from the list can be placed to a new line with a comma before/after each item. Opening and closing parentheses can be placed to a new line aligned with the keyword or indented. Additionally, closing parentheses can be aligned with the opening parentheses. Spaces inside/outside parentheses can be added:
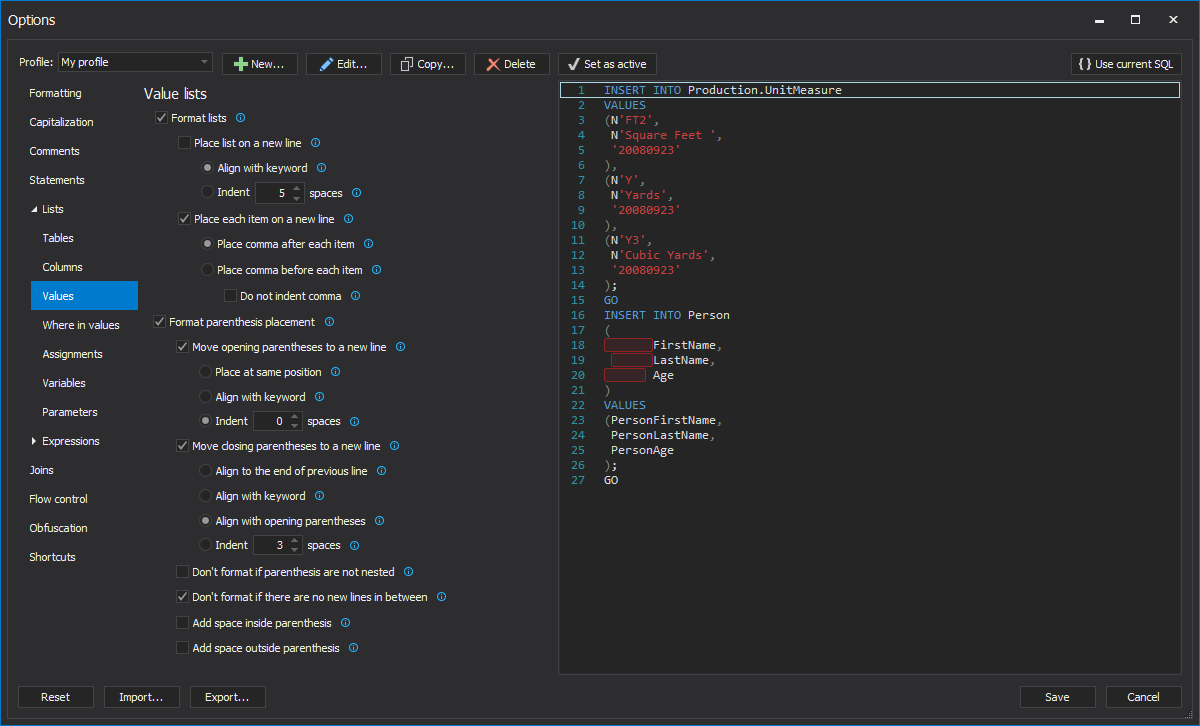
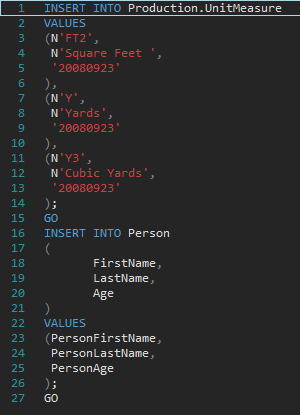
The Place list on a new line option is checked:
Before:
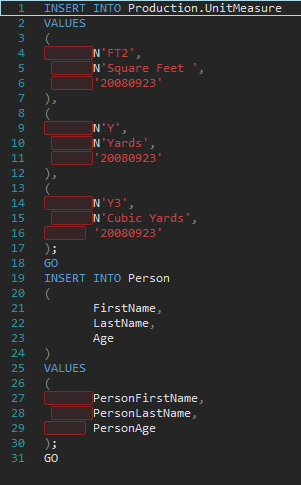
After:
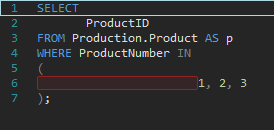
3.5.4 Where in values
-
Under the Where in values sub-tab, the Where in value list can be placed at a new line, aligned with the keyword or indented. Each item in the list can be moved to a new line with commas after/before each item. Additionally, opening and closing parentheses can be moved to a new line, aligned with the keyword, indented. Also, closing parentheses can be aligned with opening parentheses. Space inside/outside parentheses can be added:

The Place list on a new line option is checked:
Before:
After:
3.5.5 Assignments
-
At the Assignment sub-tab, assignments list can be placed to a new line, aligned or indented. Each item from the list can be moved to a new line with comma placed after/before each item. Opening and closing parentheses can be placed to a new line aligned with the keyword or indented. Spaces inside/outside parentheses can be set:

The Place each item on a new line option is unchecked:
Before:
After:
3.5.6 Variables
-
In the Variables sub-tab, variables list can be placed on a new line, aligned with the keyword or indented. Each item can be moved to a new line with a comma after/before each item
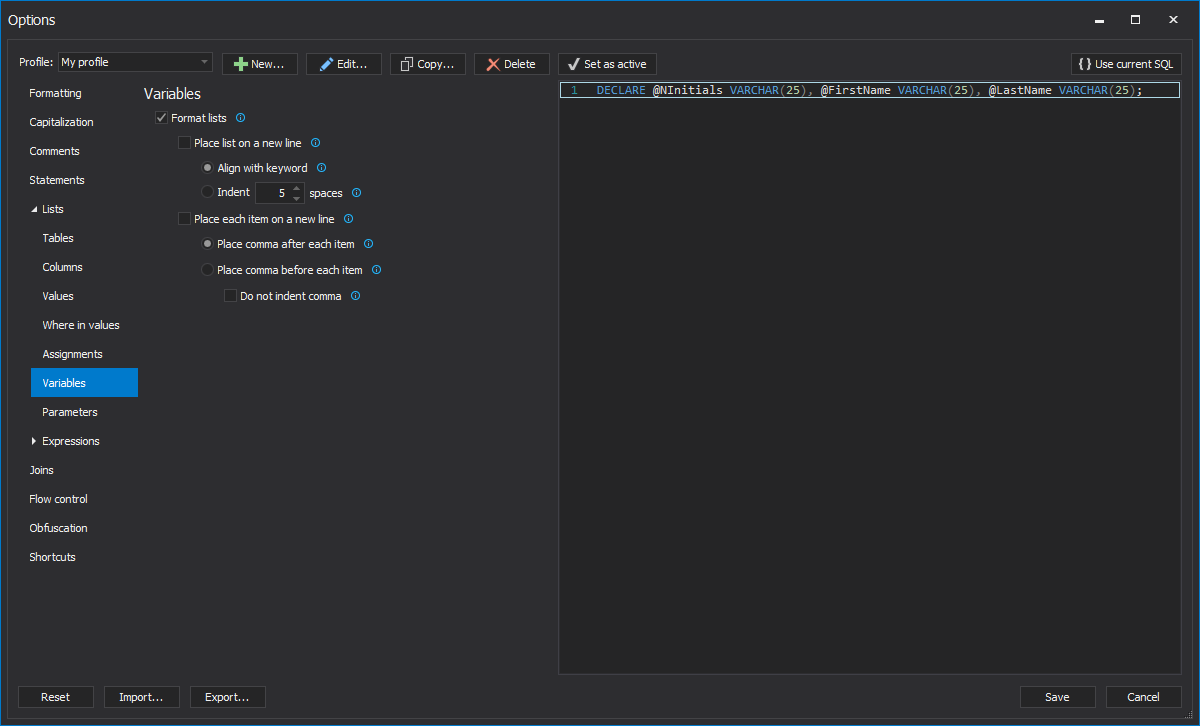
The Place each item on a new line option is checked:
Before:

After:
3.5.7 Parameters
-
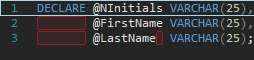
Using options under the Parameters sub-tub, the parameters list can be placed to a new line, aligned with keyword, indented, and each item from the list can be moved to a new line with commas before/after each item. Also, opening and closing parentheses can be moved to a new line, aligned with the keyword or indented. Additionally, space before and after parentheses can be added:
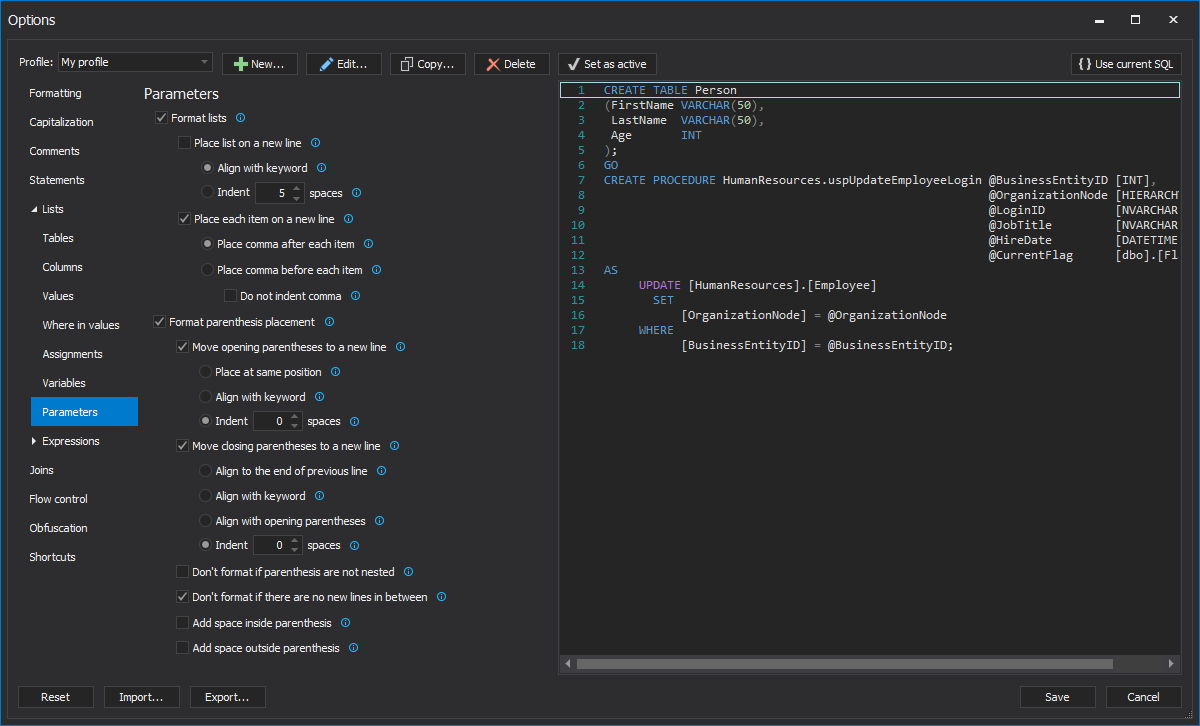
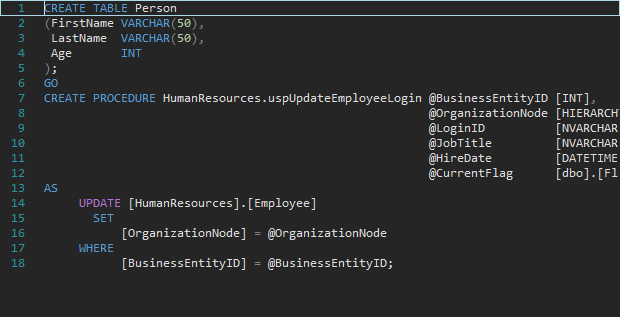
The Place list on a new line option is checked:
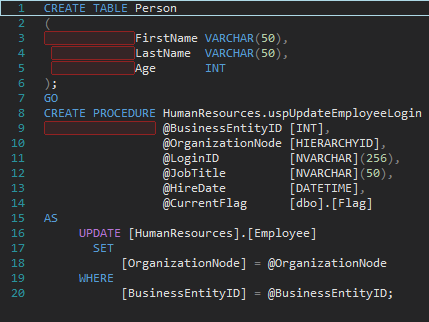
Before:
After:
3.6 Expressions
-
Under the Expressions tab, numerous options can be set for arithmetic, comparison, and logical operations
3.6.1 Arithmetic
-
In the Arithmetic sub-tab, can be set to format operations only if they are longer then specified number of characters. Also, arithmetic operation can be placed to a new line, show operations on multiple lines, add spaces around operators. Additionally, opening and closing parentheses can be placed to a new line, aligned with the keyword, indented, etc. Space can be set outside/inside parentheses:
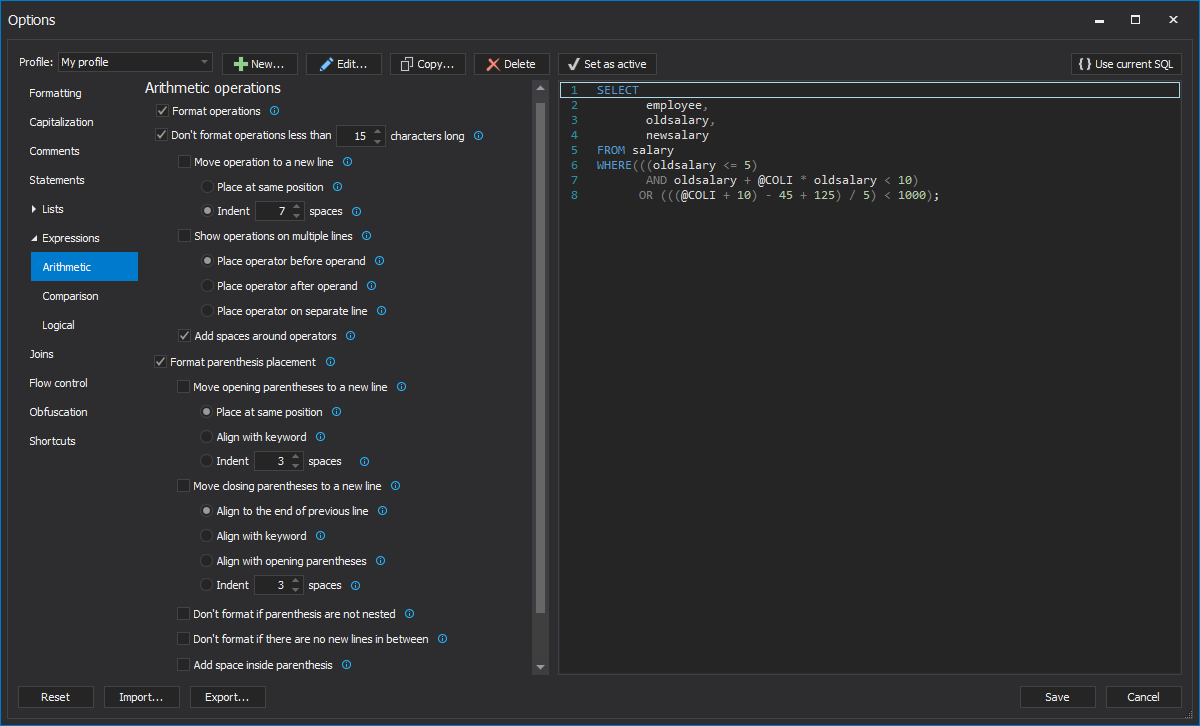
The Show operations on a new line option is checked:
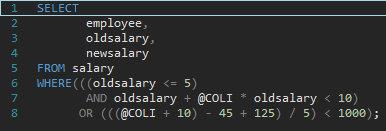
Before:
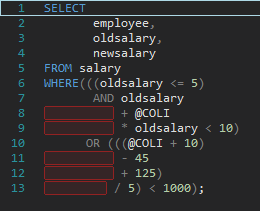
After:
3.6.2 Comparison
-
In the Comparison sub-tab, can be set to format operations only if are longer then then specified number of characters. Operation can be placed to a new line, indented, show operations on multiple lines, spaces around operators can be added. Additionally, opening and closing parentheses can be moved to a new line, aligned with keyword, indented. Also, spaces inside/outside parentheses can be added:
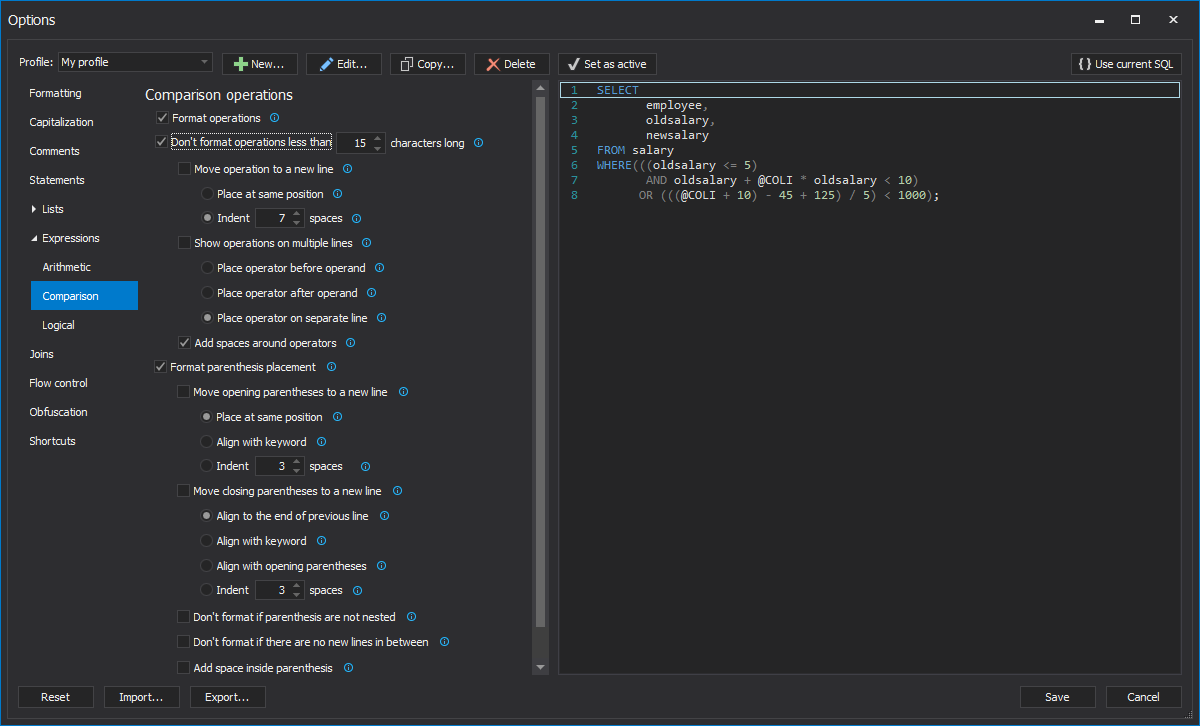
The Move operation to a new line option is checked:
Before:
After:
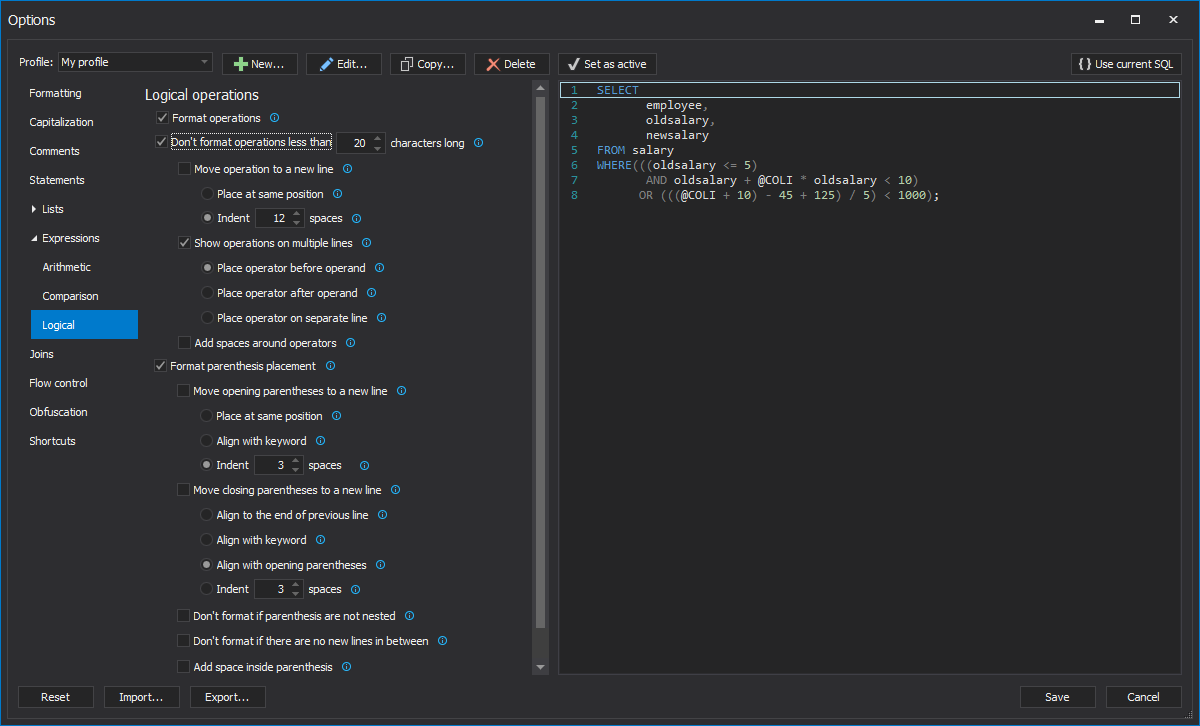
3.6.3 Logical
-
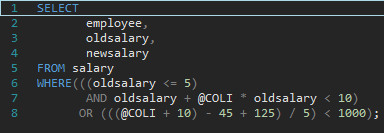
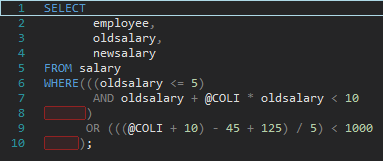
Under the Logical sub-tab, can be set to format operations only if are longer then then specified number of characters. Operation can be moved to a new line, indented, show operations on multiple lines. Opening and closing parentheses can be placed to a new line, indented, aligned with keyword. Additionally, closing parentheses can be aligned with opening parentheses. Space inside or outside parentheses can be set:
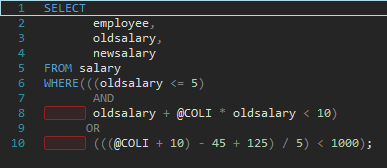
The Move closing parentheses to a new line option is checked:
Before:
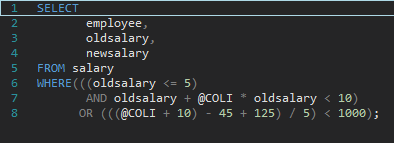
After:
3.7 Joins
-
In the Joins tab, set the minimum number of characters for JOIN statement to be formatted. The first table can be placed on a new line (at the same position, aligned with previous keyword, or indented). Joined keyword can be placed at start/end of the line, or on a separate line with indention. ON keyword can be placed on a new line aligned with JOIN keyword or indented. Nested join operations can be placed on separate lines, aligned with previous JOIN keyword, or indented:
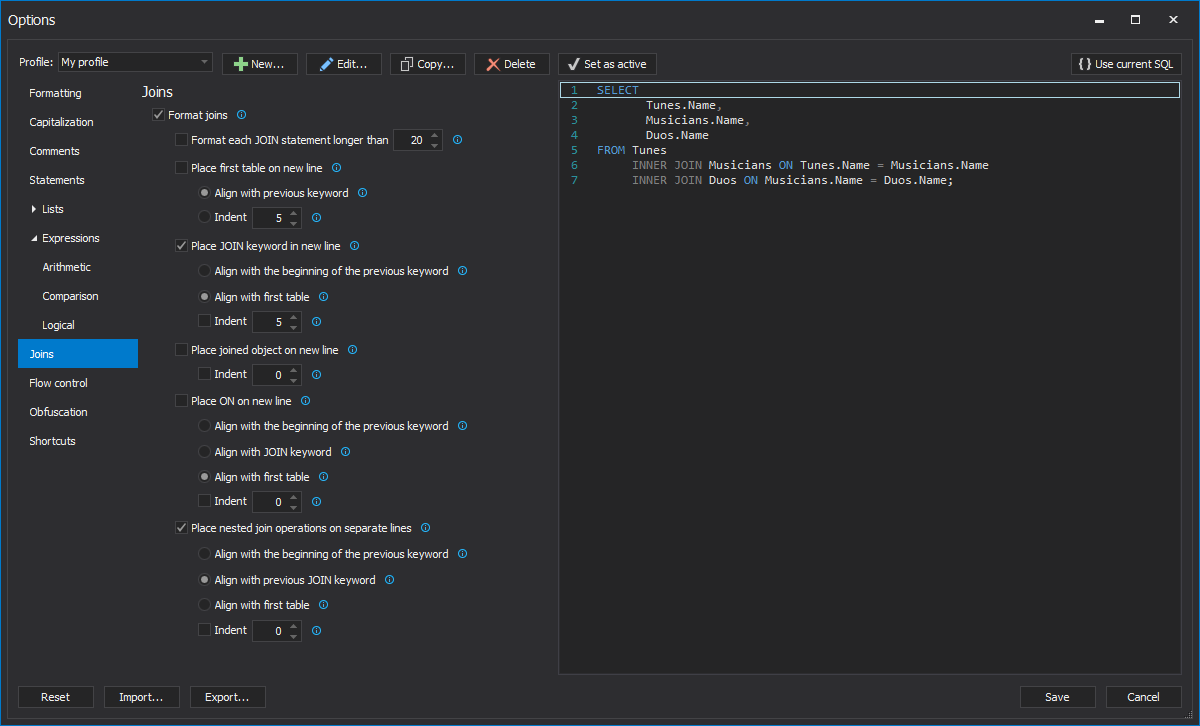
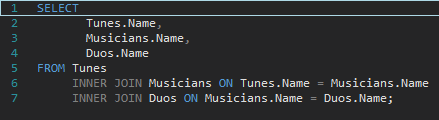
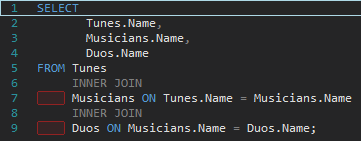
The Place joined object on new line option is checked:
Before:
After:
3.8 Flow control
-
Under the Flow control sub-tab, WHEN, THEN, ELSE condition keywords can be placed on a new line. BEGIN and END keywords can be set to be used in IF statement or in stored procedure. Also, BEGIN /END block can be indented. Additionally, code inside condition statement can be indented:
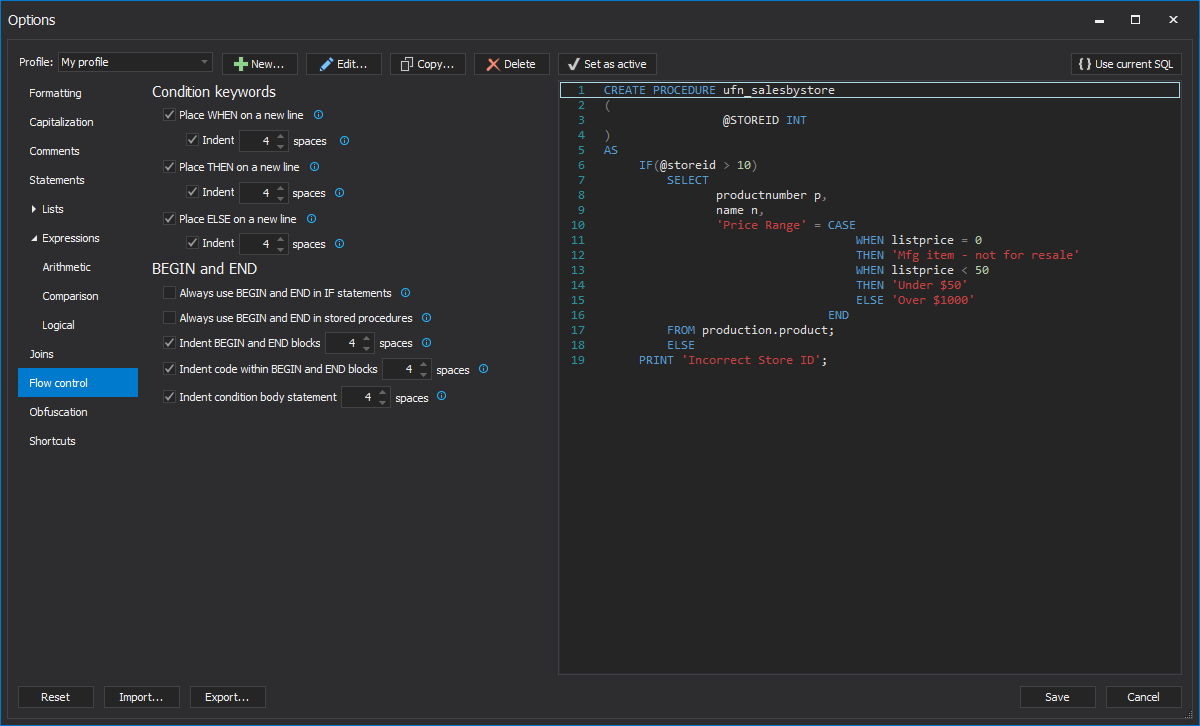
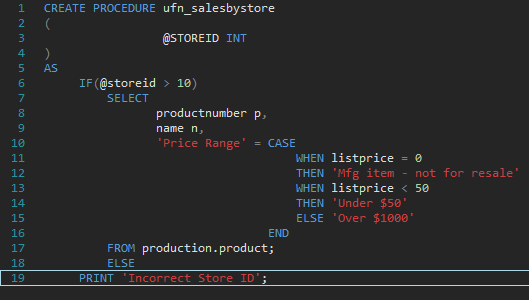
The Always use BEGIN and END in IF statements option is checked:
Before:
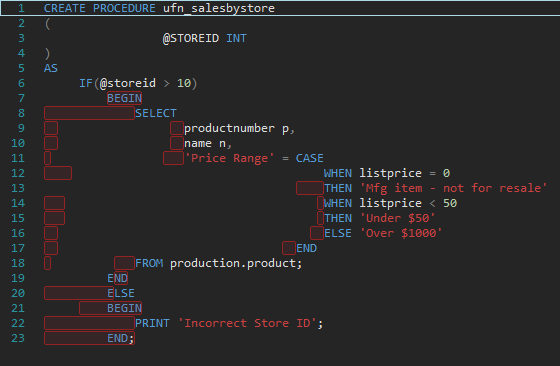
After:
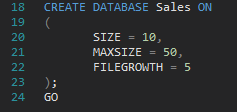
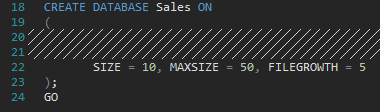
3.9 Obfuscation
-
In the Obfuscation sub-tab, the SQL code can be set to be less readable by using the Wrapping, Randomize keywords case or Remove comments options:
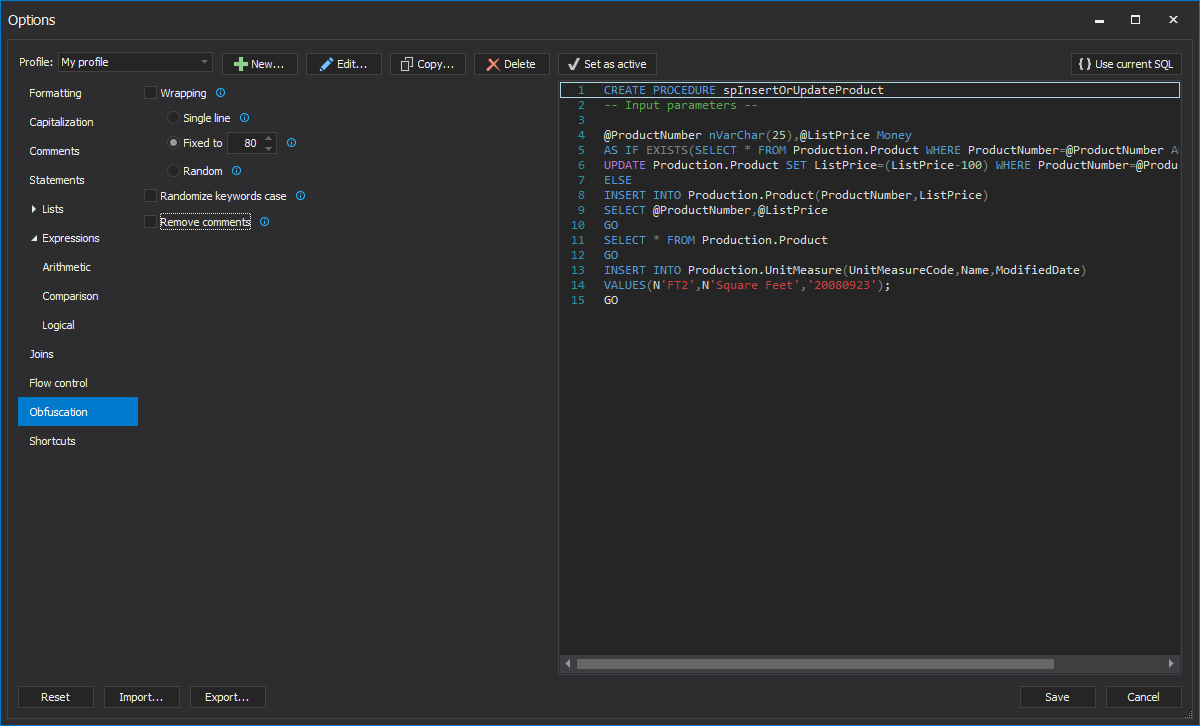
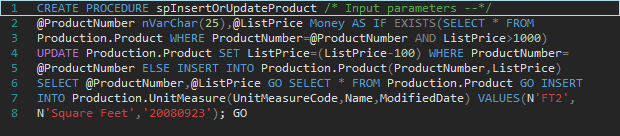
The Wrapping option is checked:
Before:
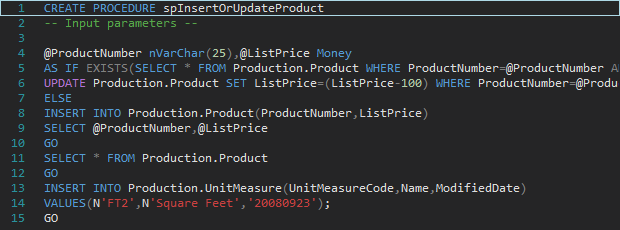
After:
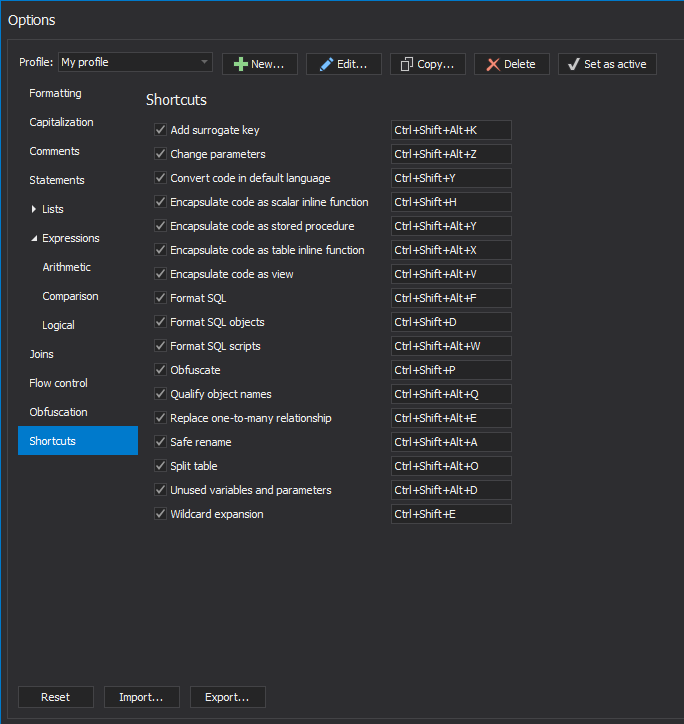
3.10 Shortcuts
-
Define custom keyboard shortcuts for commands:
3.11 Format SQL scripts
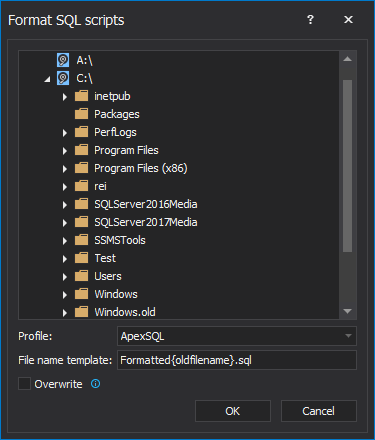
-
The Format SQL scripts window allows users to select the SQL script files, or a single folder, which contains the SQL script files to be batch formatted:
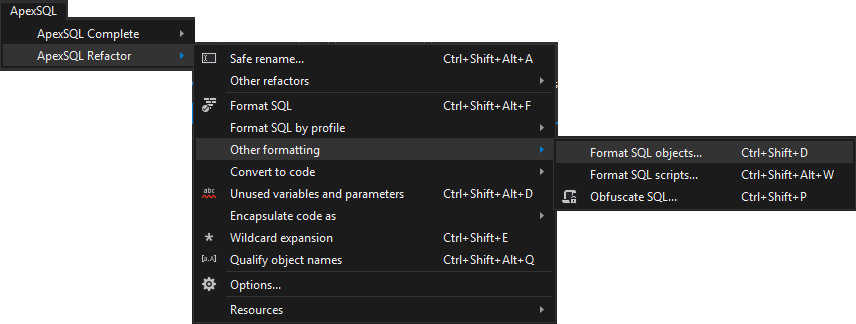
3.12 Format SQL objects
-
The Format SQL objects feature allow formatting one or more database objects with the specified formatting profile
-
Select a database in the Object Explorer window and from the ApexSQL Refactor menu, choose the Format SQL objects option:
-
Or right click on a database in the Object Explorer window and select the Format SQL objects command

4 Compare ApexSQL Refactor and Redgate SQL Prompt: