


Applies to
ApexSQL Database Power Tools for VS Code
Summary
This article is an all-in-one guidebook for everyone interested in getting started with ApexSQL Database Power Tools for VS Code extension for Visual Studio Code and exploring its features and capabilities.
Requirements
ApexSQL Database Power Tools for VS Code is a VS Code extension that allows users to connect to MySQL and MariaDB instances, execute and display query results, search for objects in databases, export query results into several standard formats, and generate DDL and DML scripts from ApexSQL server explorer. All of this is possible on multiple computing platforms like Windows, Linux, and macOS.
First things first, before continuing any further, it’s always a good idea to check ApexSQL What’s supported and Requirements page just to verify if this extension is actually what you’re looking for, does it do the job, and to see what are the minimum system requirements that have to be met for the application to run smoothly.
It’s recommended to have the latest Visual Studio Code installed and also to keep the program always up-to-date. If you’re running the nightly Insiders build of Visual Studio Code, there is no guarantee that the extension will work properly because the extension is not being tested on any nightly builds.
Visual Studio Code itself is a lightweight application and adding ApexSQL Database Power Tools for VS Code extension to it does not affect its performance at all. So, don’t let the size fool you. The extension’s download size of > 100MB is due to its necessary components that ensure smooth operation and no additional download of any third-party software.
Installation process
Once going through the requirements is done, it’s time to increase the power of Visual Studio Code by installing ApexSQL Database Power Tools for VS Code extension.
Install from the Marketplace
The easiest way to install and manage the VS Code extension is from the Visual Studio Code Marketplace.
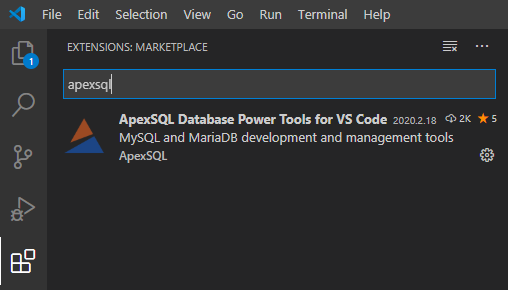
Go to the Extensions view by clicking on the Extensions icon in the Activity Bar on the left side of Visual Studio Code.
In the search box, start typing the name of the VS Code extension and ApexSQL Database Power Tools for VS Code should appear at the very top of search results:
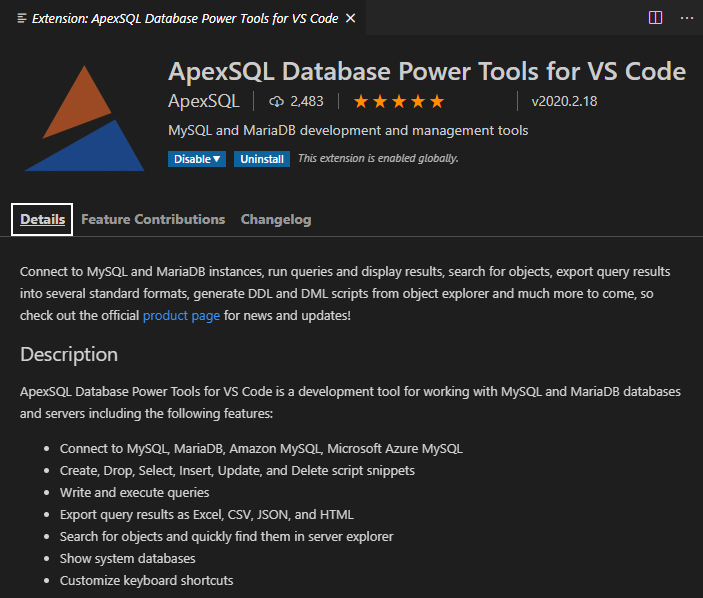
Select the extension by clicking on it to display the extension’s details page on the right where you can learn more about it:
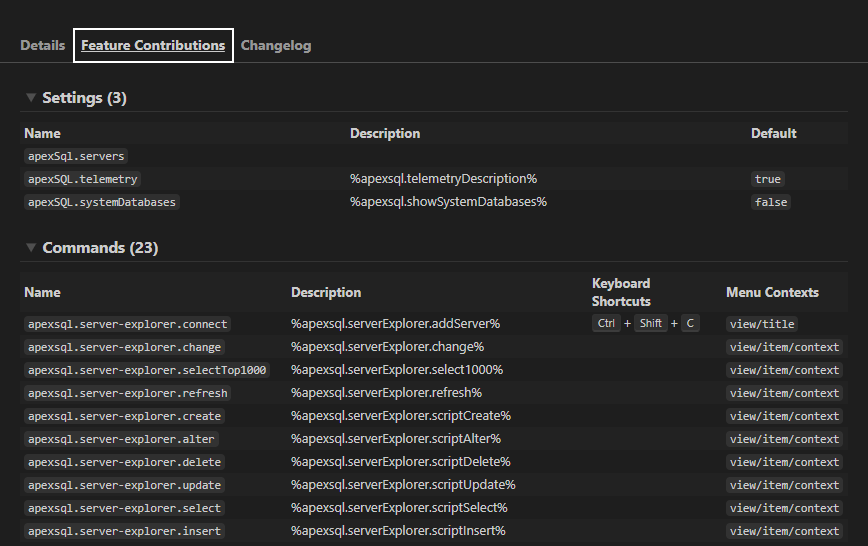
Switch over to the Feature Contributions page to see the extension’s additions to Visual Studio Code such as settings, commands, and keyboard shortcuts:
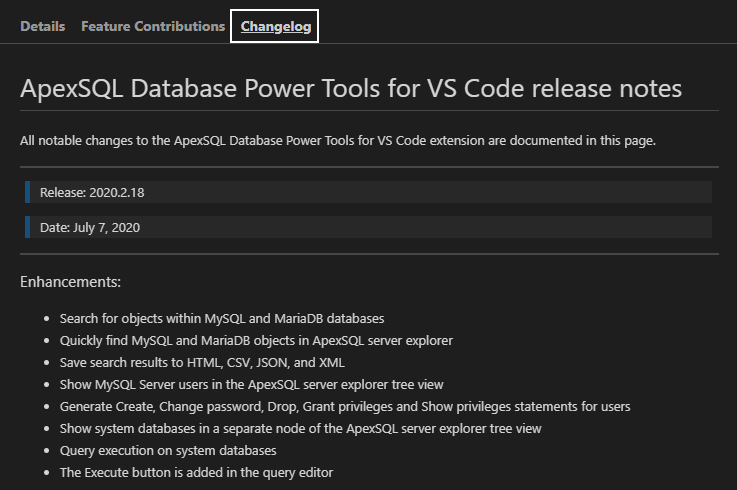
On the last page, Changelog represents extension repository CHANGELOG AKA release notes. This page describes features, enhancements, and changes made to the VS Code extension:
Back to the installation, to add VS Code extension to the host application, simply click the Install button right below the five-star rating and download count in Extensions view. Once the installation is complete, an information message will be shown in the lower right corner:
When installed, there will be a new ApexSQL extension icon in the Activity Bar at the bottom:
![]()
Install from VSIX
If for some reason you are not able to access the Marketplace within Visual Studio Code, let’s say the computer’s Internet access goes through a proxy server and you don’t want to configure the proxy server. Then, another way of installing the VS Code extension is downloading the VSIX installation file from the ApexSQL site and installing it manually.
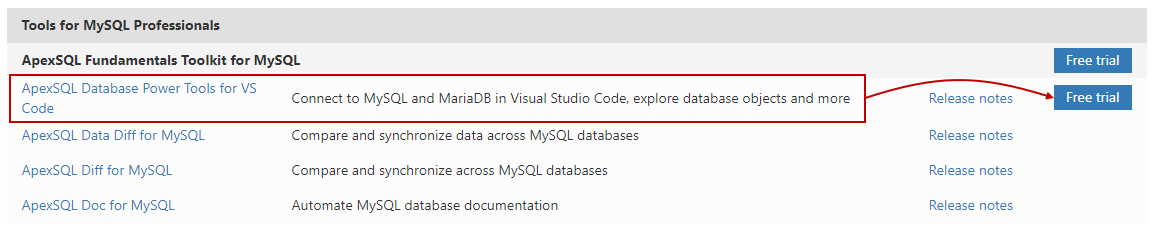
Head over to the Downloads page and scroll down until you find ApexSQL Database Power Tools for VS Code under the Tools for MySQL Professionals section, and click Free trial to download the installation file:
Fill out the Download form on the next page, make sure to check “I have read and accepted the license agreement”, and click Submit to initiate the download.
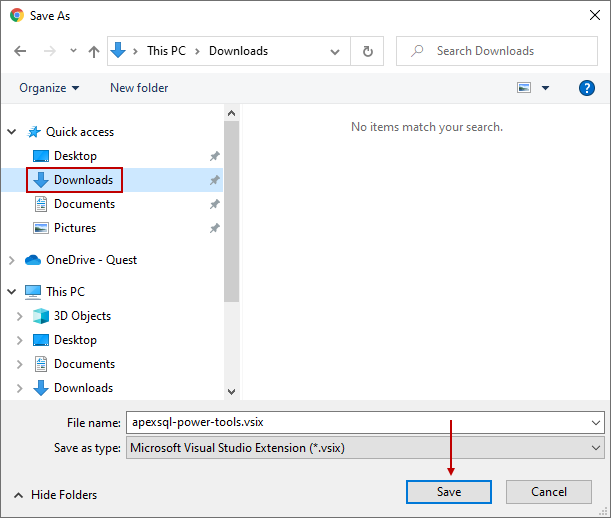
Choose the desired location where the file should be saved and click Save:
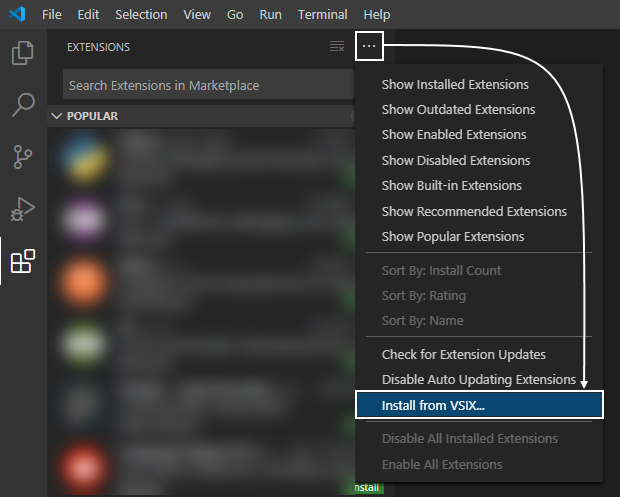
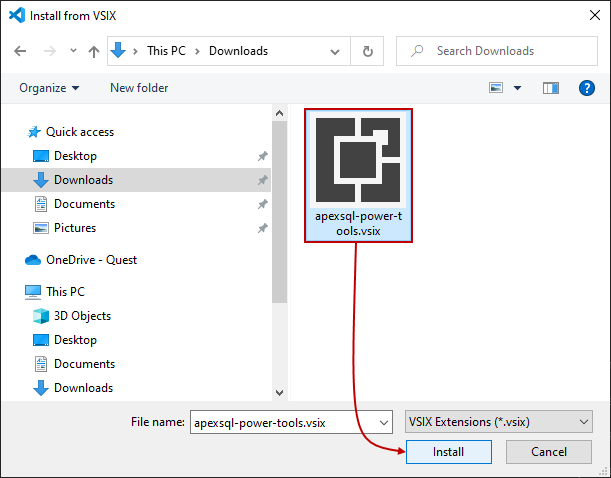
Next, fire up Visual Studio Code and go to the Install from VSIX command from the Extensions view command drop-down menu:
In the newly opened window, navigate to where the installation file was previously saved, select it and click Install:
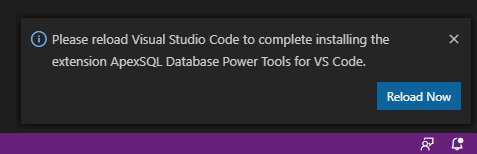
In a matter of seconds, the installation will be completed and the same information message will be shown in the lower right corner as when installing it from the Marketplace.
Bear in mind that when the VS Code extension is either upgraded or deleted, the user is prompted to reload the host application in the information message on the bottom right as shown below:
- Note: Visual Studio Code checks for extension updates and installs them automatically. After an update of the VS Code extension, you might be prompted to reload the host application as described above
Connecting to servers
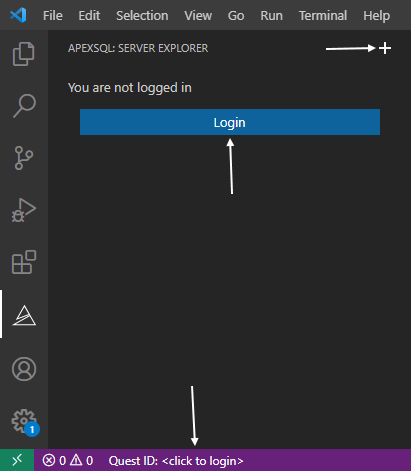
Before using any of the VS Code extension’s features and functionalities, the user must log in first, and then a connection to a server can be established. To log in, click either Login button, plus icon (+) used for adding servers or Quest ID from the status bar:
The user will be redirected to a web login in the default web browser. Follow the instruction, and upon successful login/registration, the “You can now close this page” message is shown. Close the tab and go back to VS Code.
- Note: From the initial login, the 30-days trial period begins during which the extension is fully functional. When the trial is expired, you’ll have to purchase a license to continue using the extension
Standard TCP/IP connection
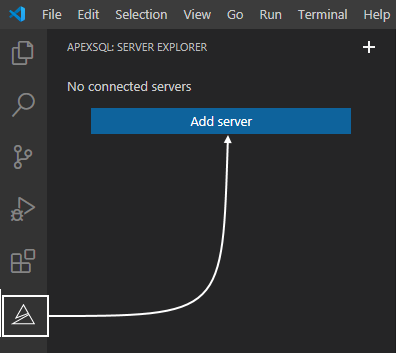
Once logged in, users can add a server by going to the ApexSQL extension icon in the Activity Bar and clicking the Add server button:
In the newly opened Connect to server tab on the right, enter server connection parameters and click Connect:
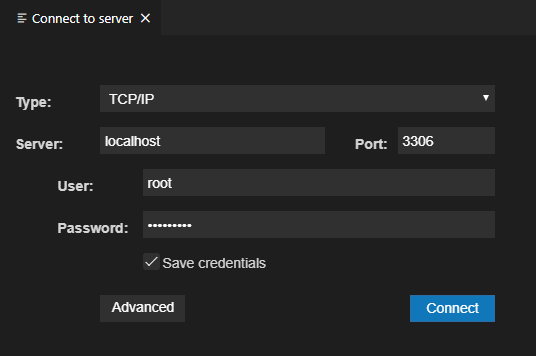
Checking Save credentials in the connection dialog before establishing a connection will save server connection parameters making the server available in ApexSQL server explorer between sessions without a need for re-entering credentials. This is recommended for frequently used servers as it will save you a lot of typing and don’t worry – the password gets encrypted so no one can view it in plain text.
This example used a local instance of MySQL with server name specified as “localhost“ but feel free to enter the full name or IP address of the server host and appropriate TCP/IP port.
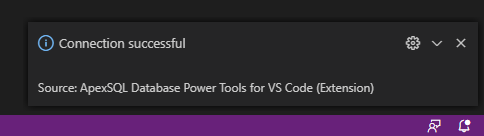
For the credentials, use the correct name and password of the user to connect with and when Connect is clicked, an information message will appear saying that the connection was successful:
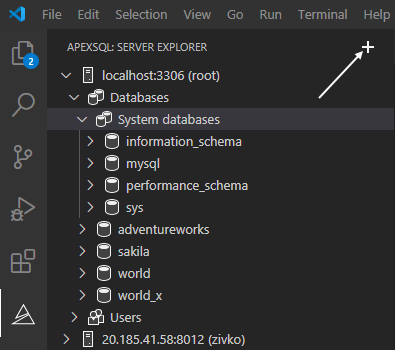
Back to the ApexSQL server explorer, the newly added server will appear. Use the Connect to server button (plus sign in) to open a new connection dialog and add more servers to the list when needed:
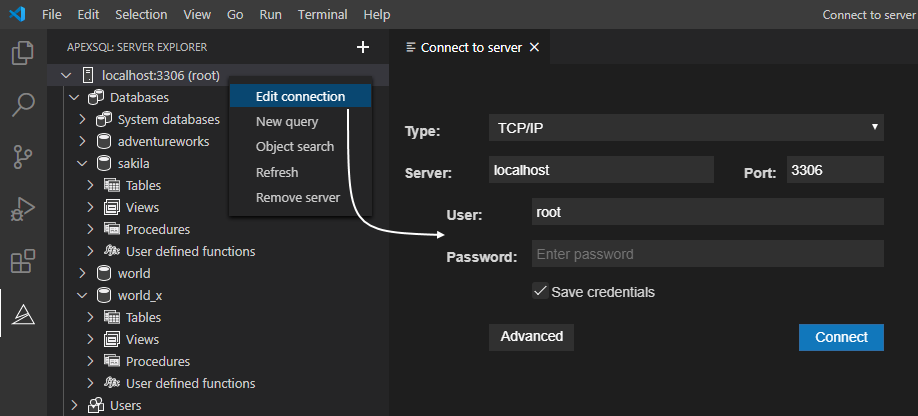
If a connection to a server fails after it has been successfully added previously, it’s most likely because the password for the user has expired. In such a case, there’s no need to re-add the instance again, just right-click it in ApexSQL server explorer and choose Edit connection. Enter new credentials and click Connect to save changes:
Secure types of connections
A connection can be established to MySQL and MariaDB servers choosing from the two methods under the Type drop-down menu in the connection dialog:
- TCP/IP
- Socket/Pipe
There is also an Advanced option in the connection dialog, on the left of the Connect button that is used for configuring SSL and SSH for establishing an encrypted link between a server and a client.
SSH
In the connection dialog, when the Advanced option is clicked it will expand the connection options and an option for configuring and adding server using SSH (Secure Shell) from the VS Code extension will be available as shown below:
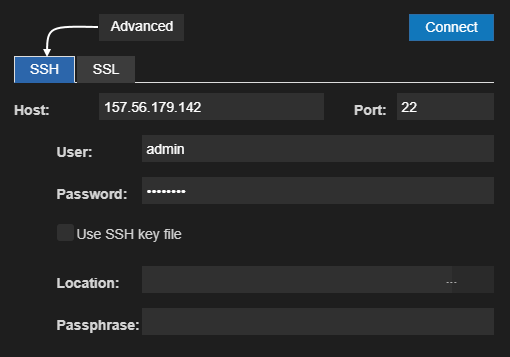
Make sure to fill out all the required information and know that the connection will fail if SSH is not available:
- Host: The name of the SSH server. Do not specify the port number in the host’s name, for example, localhost:22. Instead, use the Port box to the right
- User: The name of the SSH user to use for the connection
- Password: The SSH password
It is recommended that an SSH key file is also used. Check the Use SSH key file option and provide the following:
- Location: A path to the SSH key file
- Passphrase: Passphrase for the private key
Once everything is set, hit the Connect button and the new instance will be added to the list of servers.
SSL
Switch over to the SSL tab for connection options related to establishing an SSL (Secure Sockets Layer) connection. Same as described in the previous example, the connection will fail if SSL is not available:
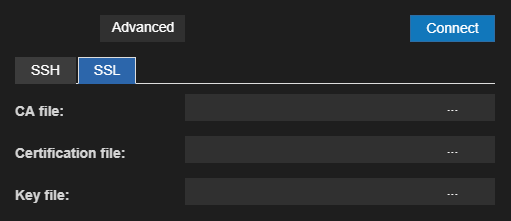
SSL parameters are:
- CA file: Path to the Certification Authority file for SSL
- Certification file: Path the Certificate file for SSL
- Key file: Path to the Key file for SSL
Once these are specified, test the connection by clicking the Connect button. If everything is in order, the instance will appear in the list of servers.
Executing queries
Once the ApexSQL server explorer is populated with servers and databases, it’s time to start writing and executing MySQL and MariaDB queries.
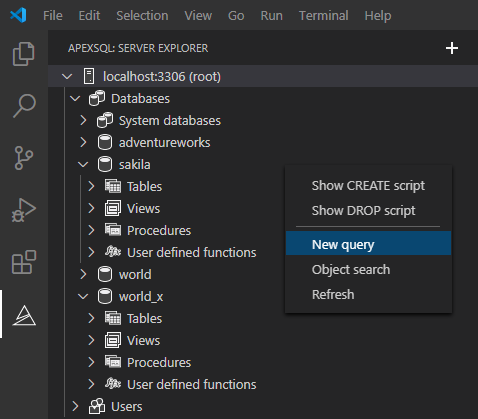
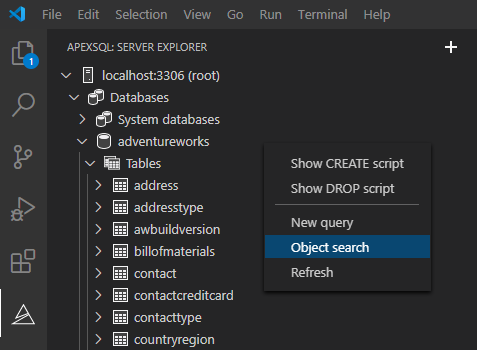
From ApexSQL server explorer, right-click on a database or server and choose New query from the context menu:
The new SQL editor tab will be opened. Write or paste some code, right-click anywhere in the query window, and select Execute query from the menu or use the Execute button:
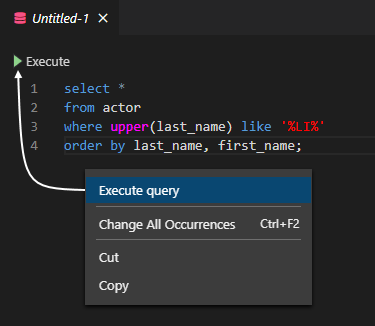
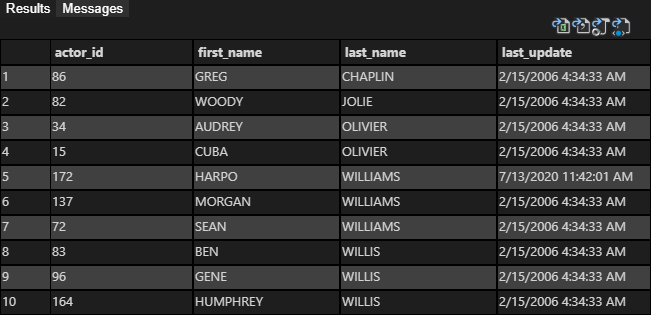
If this is a SELECT query, the results of the query appear in the query Results (spreadsheet-like grid) pane on the bottom:
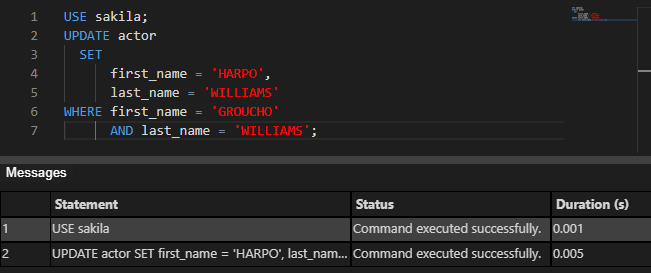
If you are manipulating data using an INSERT, UPDATE, and DELETE, the Messages tab displays a summary of executed statements for the current session, including general status information and error if any:
If there is a syntax error in the executed script, an appropriate message will be returned referring to the manual that corresponds to the server version for the right syntax, and at which line the error occurs.
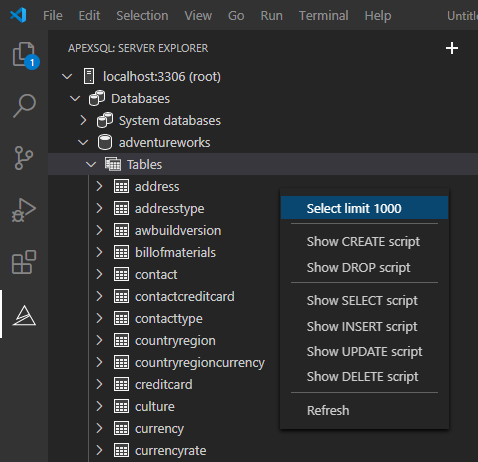
Besides opening a new query, there is also Select limit 1000 command in ApexSQL server explorer that opens a new query editor with SELECT * FROM <object_name> LIMIT 1000 script snippet for the selected object (table or view) and displays query results:
When opening SQL scripts (.sql), they will most likely be opened in VS Code’s built-in Text Editor in which none of the extension’s functionality is available like Run, Format, and auto-complete.
Here’s how to fix this. When the script is opened, use Ctrl+Shift+P from the keyboard -> Reopen Editor With… -> ApexSQL editor:
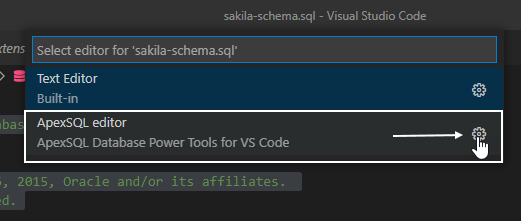
- Optional: You can also click the little gear icon on the right side of ApexSQL editor to set it as the default editor for *.sql files. This way, all reopened .sql files will be opened in the extension’s query editor and you’ll have all options
Searching for objects
First introduced in version 2020 R2 of the VS Code extension, the Objects search feature allows users to locate MySQL and MariaDB objects in databases containing the specified keyword, including system objects.
To initiate Object search, right-click an instance or a database from ApexSQL server explorer and choose the Object search option:
An Object search tab will be opened in which users can choose the targeted server and database of the search scope. Furthermore, the types of objects that should be included in the search can be selected on the right.
Once the search scope is set up, simply type or paste the search phrase in the Search phrase box, and click Find or hit the Enter key to perform a search in the database:
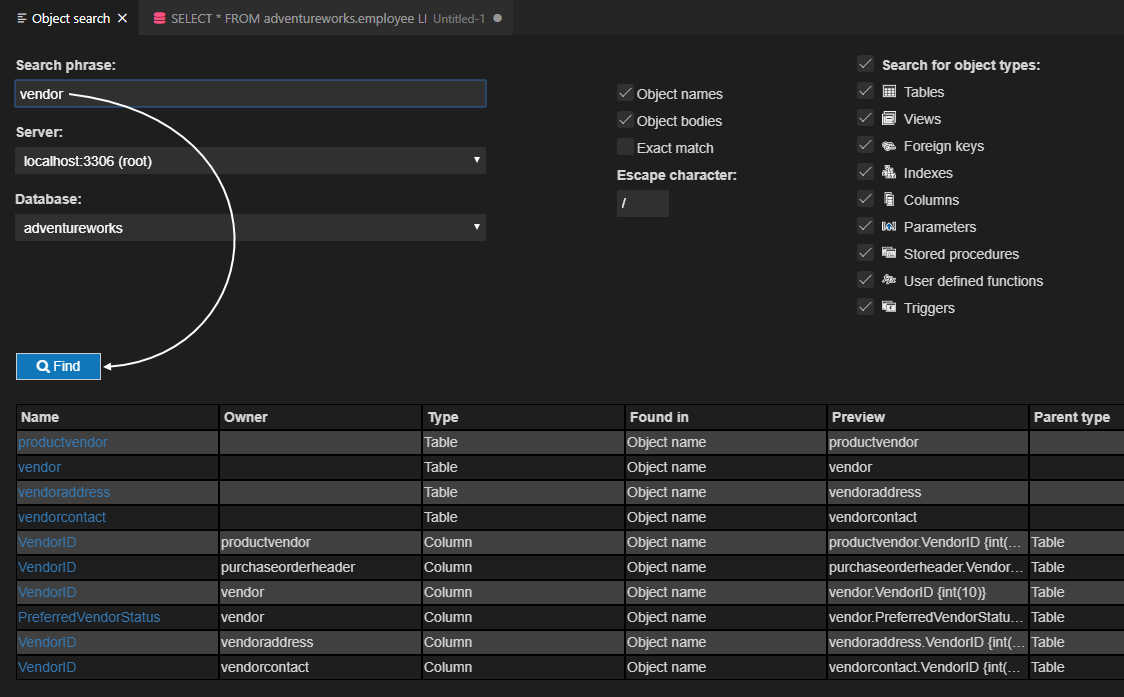
Clicking any objects from the results set under the Name column will jump to that object in ApexSQL server explorer.
Exporting query results
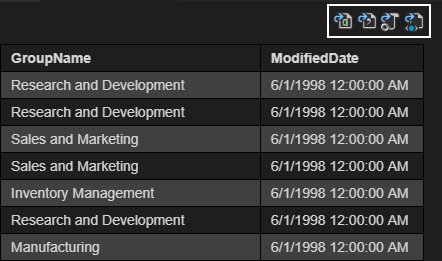
Wouldn’t it be nice if there was a way to export query results? Well, there is. Query results can be exported into several standard formats. Look for the export icons in the upper right corner of the query Results pane and click one of them to save query results as:
- Excel
- CSV
- JSON
- HTML
file formats in that order from left to right:
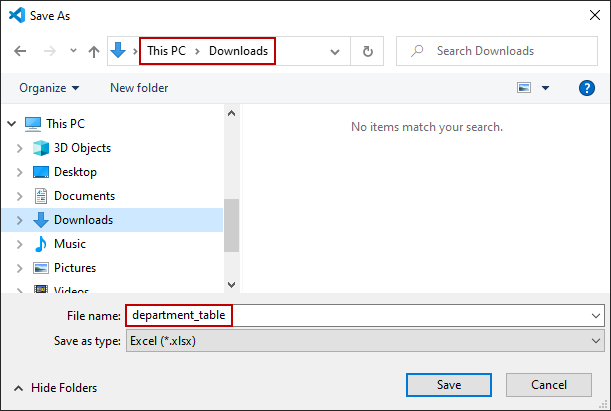
Clicking any of those icons will open the Save As dialog in which two things should be specified: the file name and where it should be saved on the computer:
A notification will be shown upon successful export to any of the available formats. Clicking the Show option will open the previously chosen location in file explorer:

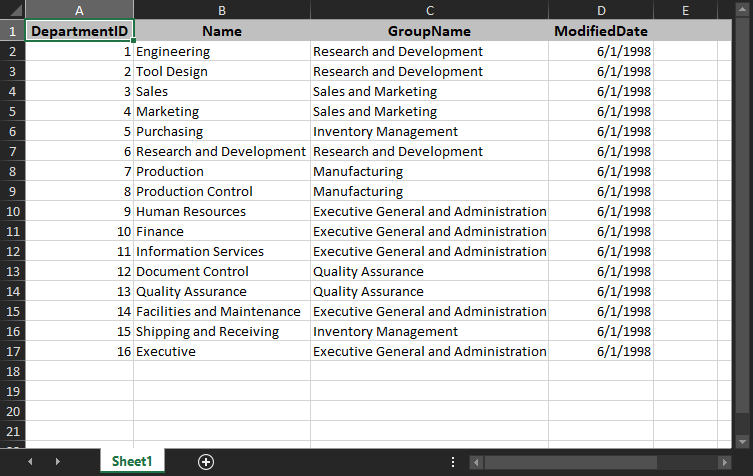
This query result is saved as an Excel worksheet and when opened, it will be filled in by following the order of appearance of Query results:
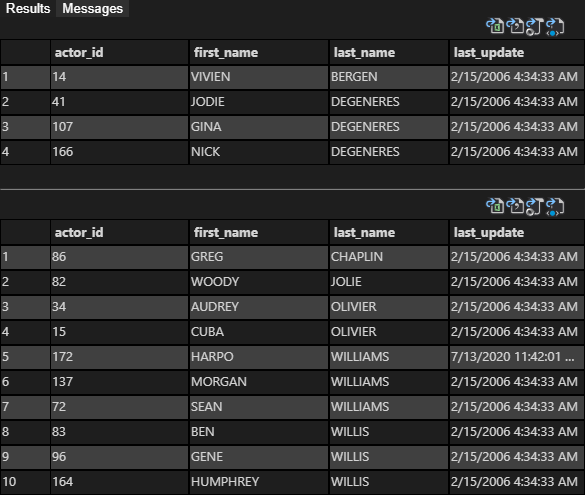
If the executed batch contains two or more SELECT statements, each SELECT statement will have its separate pane within the query Results and the results can be exported individually:
Creating statements
This feature enables users to generate DDL and DML scripts for objects in a database.
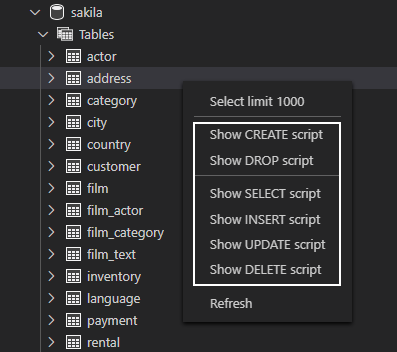
Right-click any object within ApexSQL server explorer and choose the available DDL or DML command:
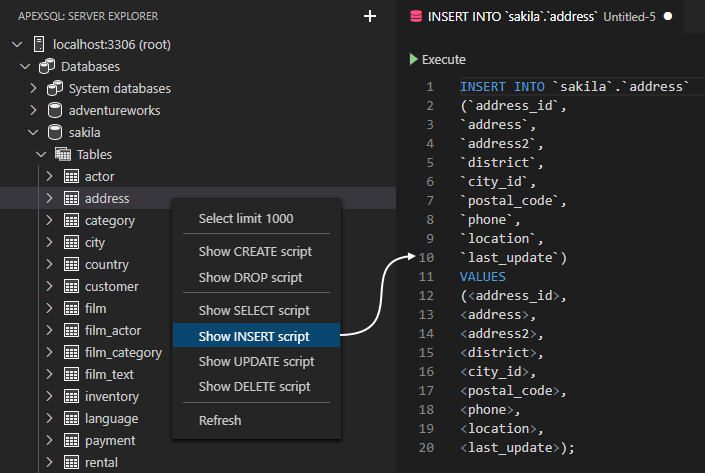
This action will open a new SQL editor and generate code for selected operation:
DDL
DDL options are:
- Show Create script – Create script snippet for the selected object
- Show Drop script – Drop script snippet for the selected object
Create and drop commands are available for databases, tables, views, procedures, functions, indexes, and triggers.
DML
DML options are:
- Show SELECT script – Select data script snippet for the selected object
- Show INSERT script – Insert data script snippet for the selected object
- Show UPDATE script – Update data script snippet for the selected object
- Show DELETE script – Delete data script snippet for the selected object
DDL commands are available for objects that have data residing in database tables.
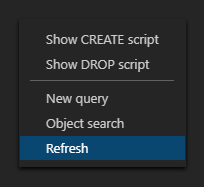
To display newly created objects in a database, use the Refresh command in ApexSQL server explorer:
FAQs
The FAQs page has answers to some frequently asked questions about ApexSQL Database Power Tools for VS Code extension, so check those to see additional product information.


