


Applies to
ApexSQL Doc
Summary
This article explains the documentation process of Azure databases, using ApexSQL Doc, and the settings which need to be configured.
Description
Azure server settings
In order to gain access to Azure servers through ApexSQL Doc, there are a few things that need to be set up before the documentation process can begin.
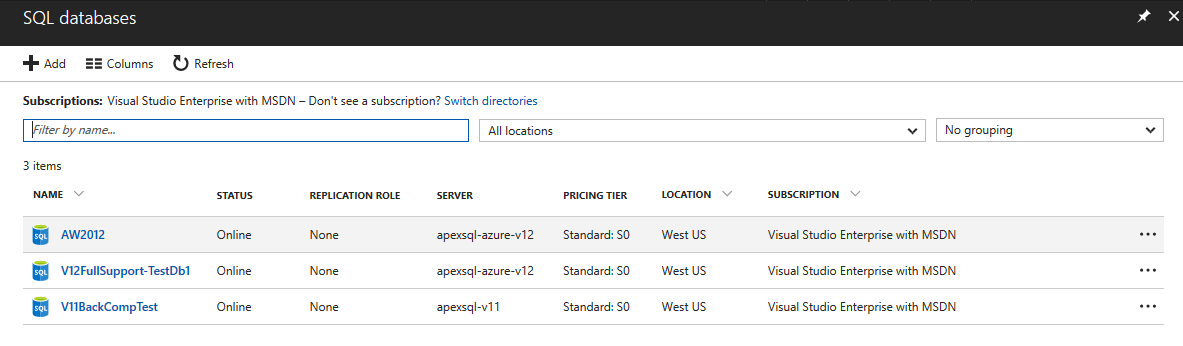
When logged into an Azure account, a list of created SQL Servers and databases can be seen. In the SQL databases panel, various information can be found about all created databases (status, server, pricing tier, location etc.):
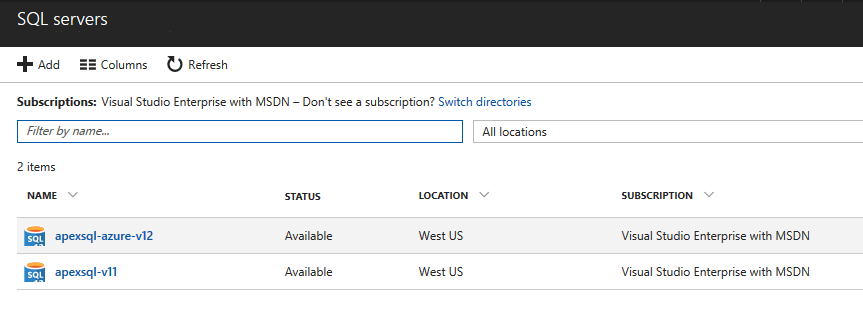
To manage the access of those databases, the corresponding server must be selected. In the SQL Servers settings panel, a list of created servers can be found:
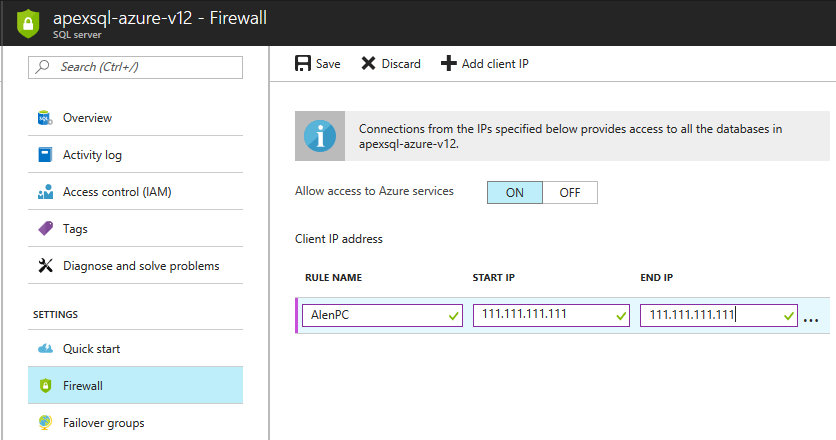
After selecting the desired server, the settings menu will appear. To allow access to a server or a database for example, for documenting purposes, the configuration of firewall settings needs to be changed. That can be done in the Firewall tab. To configure the permissions for accessing the Azure server for a single user, enter the name and the start/end IP address of the desired client:
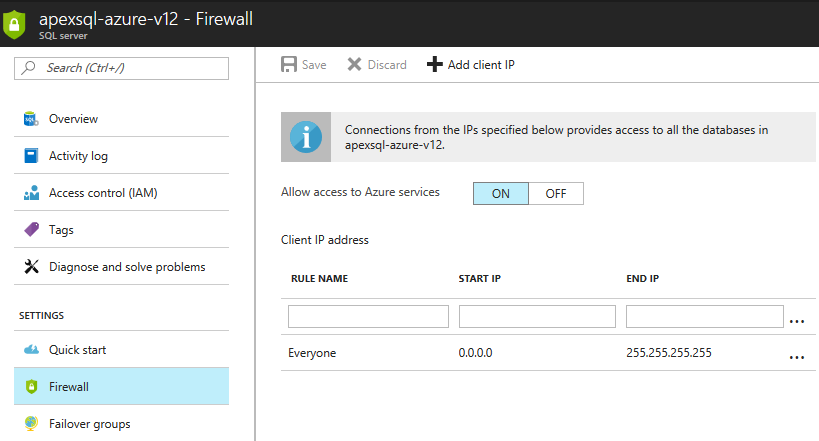
If the server needs to be accessible by all users or be made public, there is a way to do that also. In this case set up the firewall with the range of IP address like in the picture below:
Now, when the setup on Azure portal is complete, the documentation setup can be continued in ApexSQL Doc.
Connecting to Azure with ApexSQL Doc
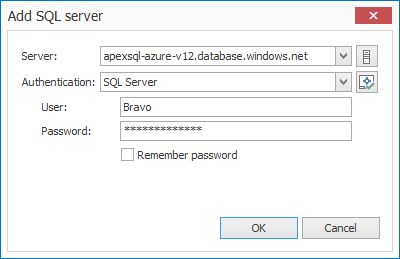
To establish a connection to the previously set up server, open ApexSQL Doc and click the add database button. A dialog will appear where it is necessary to enter the server name with valid credentials.
|
Quick tip: Documentation of Azure databases with a slow internet connection can be improved by increasing the Connection timeout value and the Execution timeout value. |
These values can be increased in the Connection options dialog as shown below:

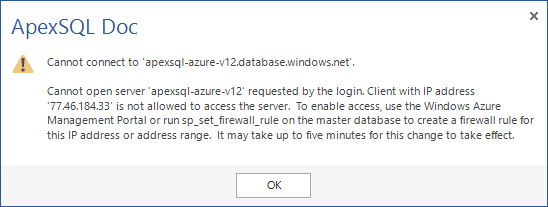
If the settings in the Azure server firewall, mentioned earlier, haven’t been configured properly, the user will receive the following message:
When the connection is established, a list of connected servers and databases will be displayed separately. In order to continue to the next part of the documentation setup, select the database(s) you want to document.

Setting up the documentation
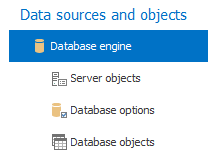
With ApexSQL Doc it is possible to document various server instance settings and objects and those options can be found in the Server objects tab. It is also possible to choose which database objects and options need to be included in the documentation. Those can be found in the Database options and Database Options tabs:
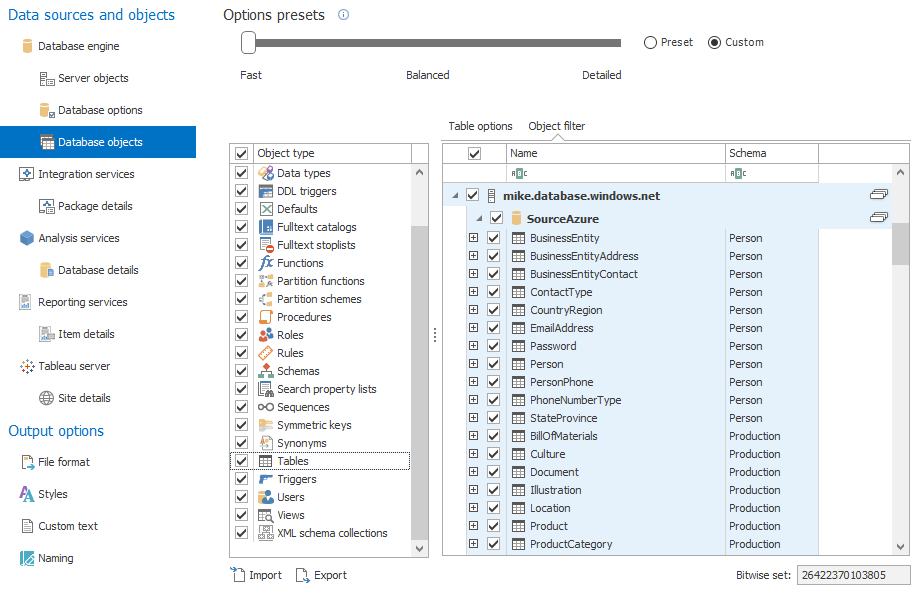
In order to document specific Azure database objects or properties, go to the Database objects tab. When filtering out a wanted group of objects, in this case Tables, it’s possible to choose which table needs to be included/excluded from the documentation:
After the selection of desired database settings and objects is completed, the documentation of the Azure database can begin by clicking the Generate button:

FAQ’s
Q: Can I document Azure and SQL Server databases and have separate documentation for both in one document?
A: Yes, for that you must select multiple databases from different servers, before generating the documentation. In this case from Azure server and SQL server database engine.
Q: Which versions of Azure databases are supported in ApexSQL Doc?
A: As of June, 2016, ApexSQL Doc has full support for both Azure V11 and Azure V12 databases.
Q: Which permissions are needed to document Azure databases with ApexSQL Doc?
A: In order to document from Azure, the owner of the server/database must configure the access to the server in firewall settings on his Azure server. For more details, about configuring firewall settings, follow this link.
Q: Can I document symmetric keys, asymmetric keys and certificates from Azure SQL database V12?
A: Yes, ApexSQL Doc offers full support for these features.


