


Applies to
Summary
This article explains what source control conflict is and how to resolve it in ApexSQL Source Control
Description
Conflicts will be detected when the user made a change on an object version, which is not the same as the one on the source control repository (the latest committed version). This is a common occurrence when two developers are working on the same object. The conflict must be resolved before performing commit or get operations. The conflict appears in the Dedicated database development model only.
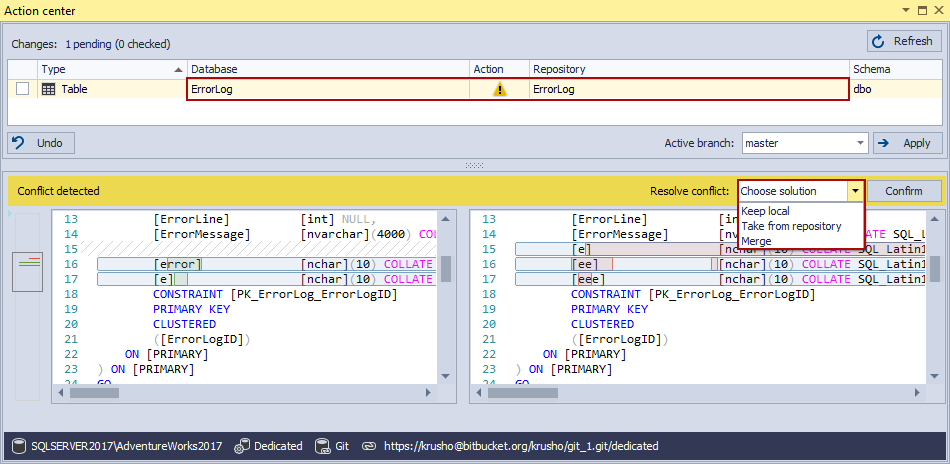
When the conflict is detected, the Resolve conflict bar appears in the Action center tab:
|
Quick tip: Conflicts can be avoided if the latest version of an object is pulled from the repository before modification |
To resolve conflict in the Action center tab, users can choose the following options:
- Keep local – Action for an object will be set to Commit to source control
 . After the Apply button is used to commit changes, a version of an object in a database will overwrite the latest version of an object on source control
- Take from repository – Action for an object will be set on Apply against a database
 . After the Apply button is used to get changes, the latest version of an object from source control will overwrite a version of an object in a database
- Merge – Choose particular changes from a database, and source control to be applied
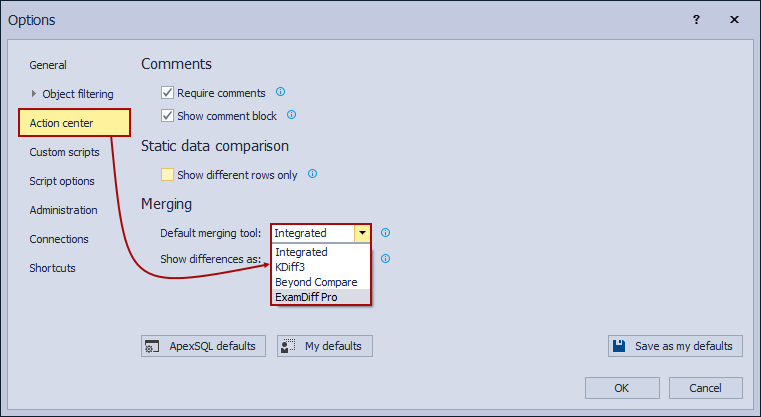
By selecting the Merge option, the user can merge script differences line by line with the Integrated tool directly from the Action center tab, or choose one of three 3rd party merging tools which are KDiff3, Beyond Compare, and ExamDiff Pro. Merging tool can be selected in the ApexSQL Source Control options under the Action center tab (the Integrated merging tool is set by default):
|
Quick tip: If one of the 3rd party merging tools is used, SQL Server Management Studio will be disabled (out of focus) while the 3rd party tool is opened |
Integrated merging tool
The Integrated merging tool will be initialized inside the Action center tab (below the Differences pane):
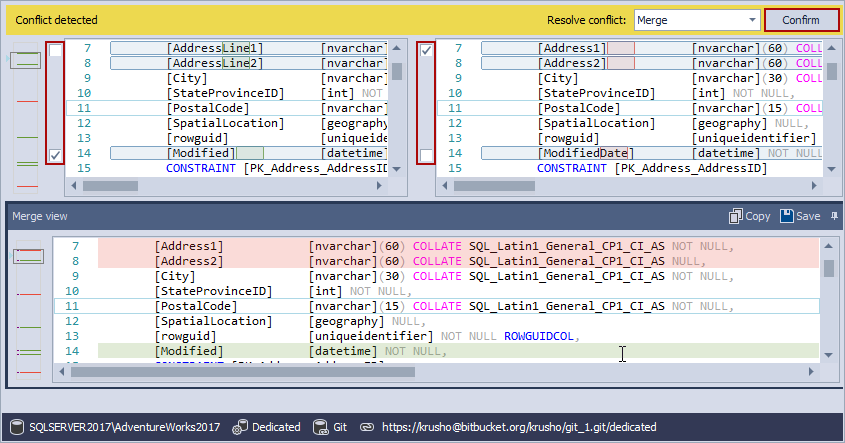
If the line exists only on one side, it will be automatically added to the merging pane. Conflicted lines can be resolved by clicking on the checkbox in front of that lines for Database or Repository. Merging will be completed by clicking the Confirm button in the upper-right section of the Conflict detected pane.
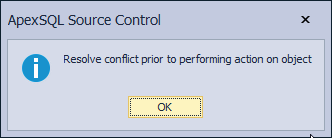
If there are still unresolved conflicts left, an information message will appear:
KDiff3 merging tool
When KDiff3 merging tool opens, the database object script is shown in the upper left pane A (Local), and the source control object script is shown in the upper right pane B (Remote). The outcome of a conflict resolution is shown in the Output panel:
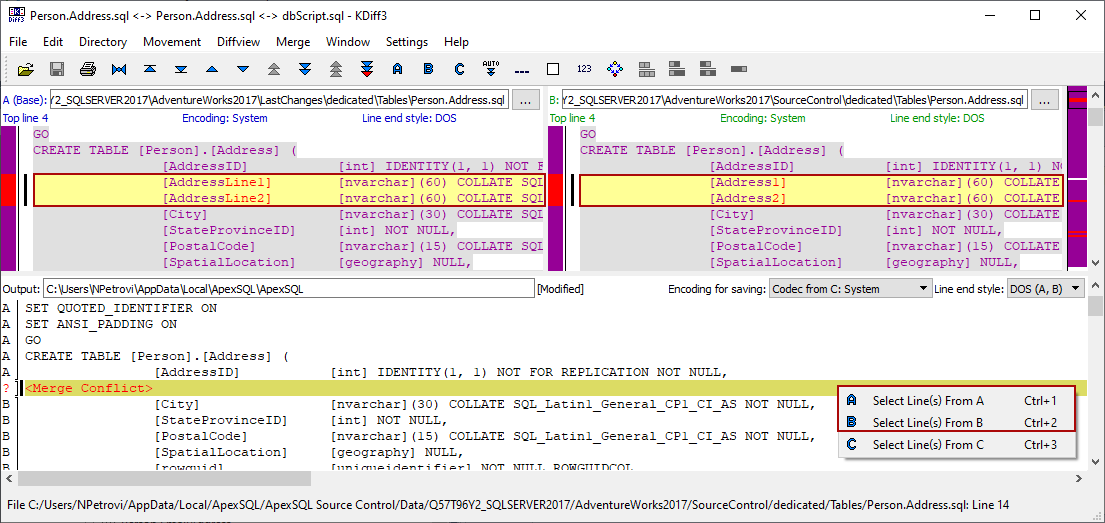
Conflicted lines can be resolved by choosing from A (local) or B (remote) from the context menu in the Output panel. Additionally, the user can input changes manually. Merging will be completed by clicking the Save button (the Save button is disabled until all conflicts are resolved).
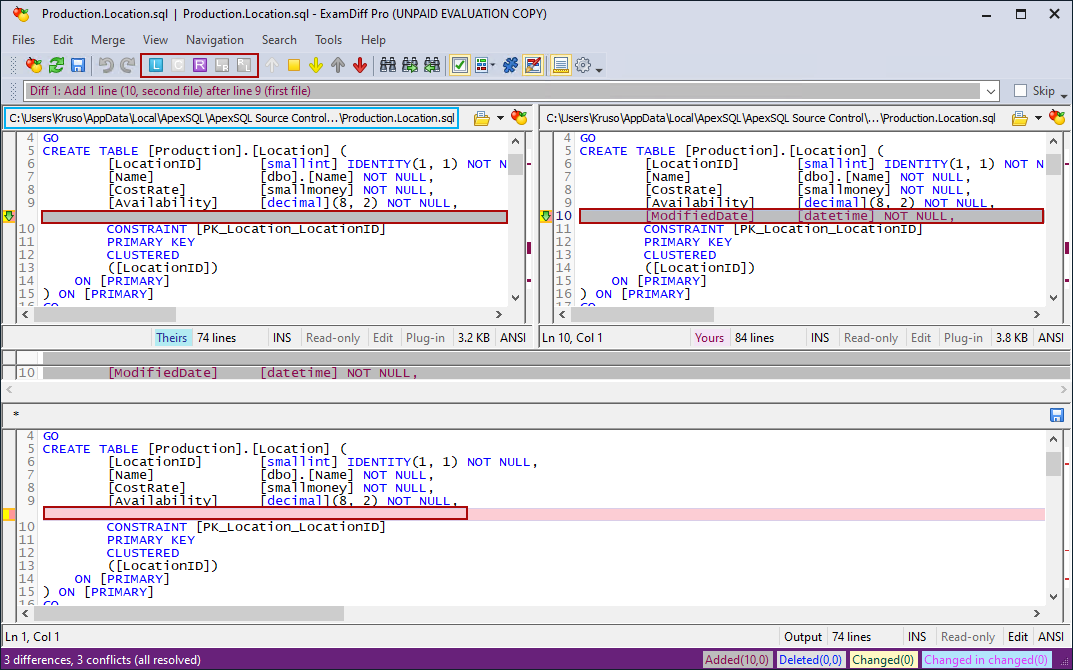
ExamDiff Pro merging tool
The only difference in use, compared to the previous tool, is that ExamDiff Pro merging tool has reverse sides for local and remote script panes. The merging process is similar with an addition to combined L/R and R/L buttons in the main menu which represents an option to include both conflicting lines of code from local and remote sources into the same script (L/R – from left script first, R/L – from right script first):
Beyond Compare merging tool
Beyond Compare merging tool groups, the differences in blocks which mean that if there are two or more different lines in a row, choosing from Local (blue arrow) or Remote (pink arrow) in the Merge panel will copy the whole block of differences. Line by line mode can also be activated by clicking in the arrows panel:
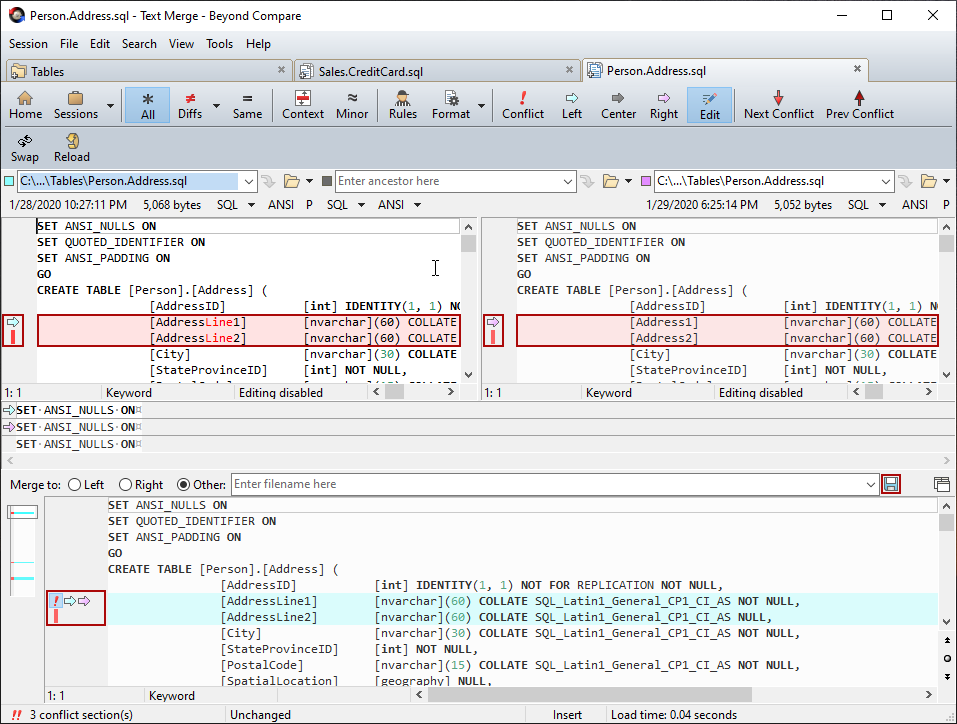
Additionally, the user can input changes manually. Merging will be completed by clicking the Save button.
How to apply a merged script
When the merging operation is done, the result is a single script that contains both sets of changes. The action of the object in the Action column in the Action center tab will be set to Commit/Apply  :
:
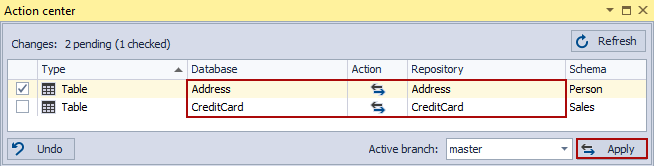
By clicking the Apply button, the object will be overwritten in both database and source control repository with the merged script.
FAQs
Q: Are there some SQL Server object types that are not supported for merging?
A: ApexSQL Source Control merging tool supports all SQL object types for merging.
Q: Do any of these 3rd party merging tools come preinstalled with ApexSQL Source Control?
No, the user has to download any of these tools and installed them manually.
Q: Is there a way to revert changes after merging is confirmed?
Clicking the Refresh button will revert the merge changes and the conflict will be displayed again in the Action center tab. However, if changes are applied, then they cannot be reverted.


