


Applies to
Summary
This article explains all necessary steps for the successful use of ApexSQL Source Control for the first time.
Requirements
ApexSQL Source Control is a Microsoft SQL Server Management Studio add-in, which integrates source control with SQL Server database development.
Before the add-in is downloaded and installed, there are some hardware and software minimal requirements that have to be met. All the hardware and software requirements minimal requirements are listed in the Minimum requirements for installing ApexSQL Source Control article.
Before installing the add-in, is a good idea to check supported software just to be sure that the add-in can be used without any problems in the setup environment. In the Supported software for ApexSQL Source Control article, are listed all supported Windows versions, SQL Server versions, SQL Server editions, SQL Server Management Studio add-in integration and source control systems.
Installation process
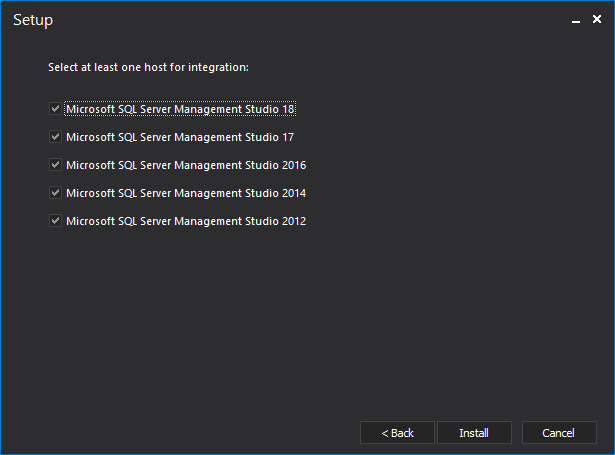
After all these requirements are checked and fulfilled, the installation process can be started. After the initial welcome screen, the Setup wizard gives the possibility to choose which version of Microsoft SQL Server Management Studio ApexSQL Source Control will be integrated into:
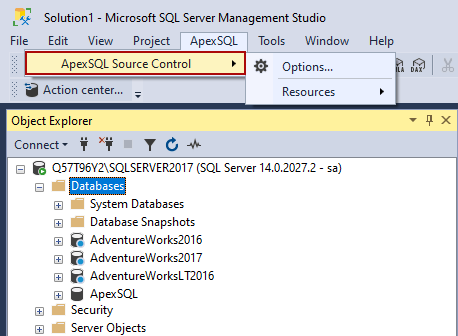
If everything went well, when a new instance Microsoft SQL Server Management Studio is opened, the ApexSQL folder, with the ApexSQL Source Control menu, will be present:
One more thing before starting to use ApexSQL Source Control is to check all necessary permissions for handling SQL Servers and databases. Different types of permissions are required for Dedicated and Shared development models. All the required permissions are listed and explained in the Permissions in ApexSQL Source Control article.
Linking process
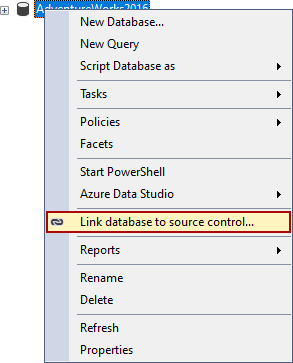
The first step in putting a database under source control is to link it.
To link a database, right-click on it in the Object Explorer pane, and from the context menu choose the Link database to source control command:
This action will open the Source control setup window.
With ApexSQL Source Control, a database can be linked to several source control systems. For some of them, like Git and Team Foundation Server (Azure DevOps Server/Services), before the linking process can be started, additional requests must be fulfilled. The explanations about how to meet those requests, for Git and Team Foundation Server (Azure DevOps Server/Services), are listed in the following articles:
- Setting up the Source control wizard for a Git repository
- How to treat Microsoft Team Foundation Server workspace to allow working with ApexSQL Source Control
The linking process is divided into several steps. In the first step (the Connection type tab) of the Source control setup window, the connection type must be chosen. ApexSQL Source Control provides two types of connection:
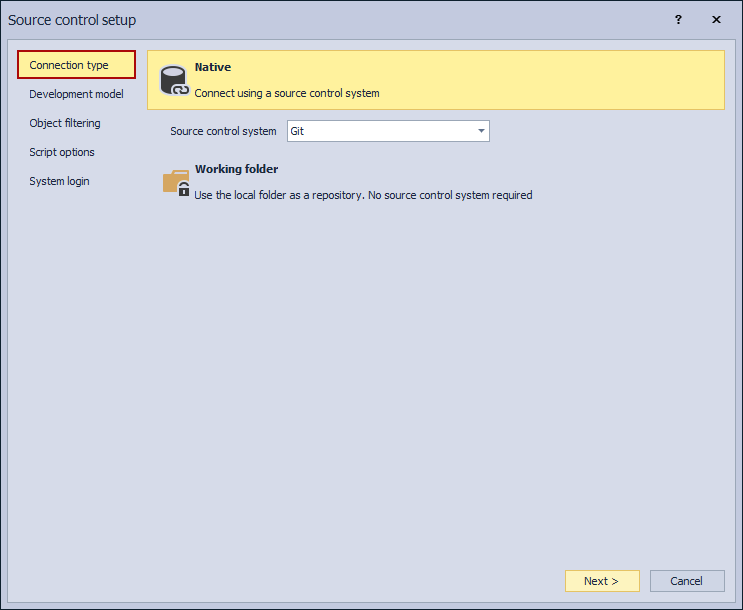
If the native connection type is chosen, then the user must decide which source control system will link a database. ApexSQL Source Control natively supports five source control systems:

In the second step (the Development model tab) of the Source control setup window, the user must choose the development model in which the selected database will be linked. There are two development model types:
- Dedicated and
- Shared
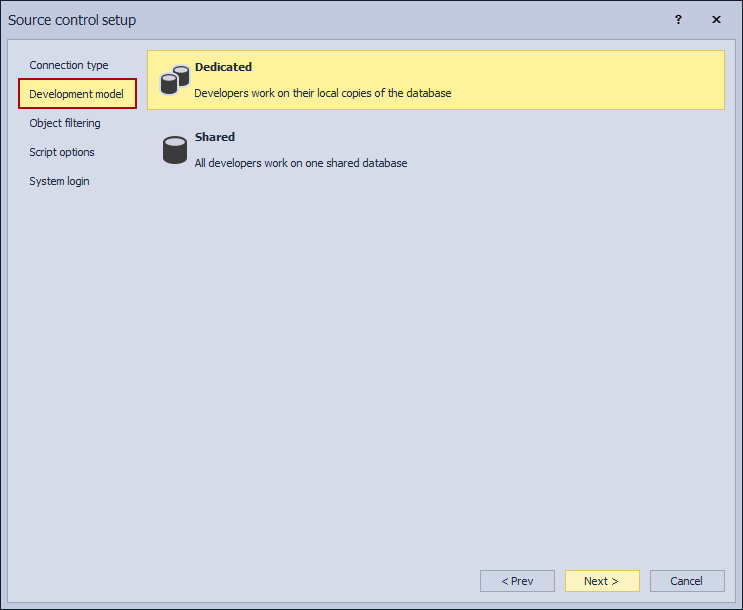
The Differences between the dedicated and shared development models article can be very helpful in deciding between these two development models.
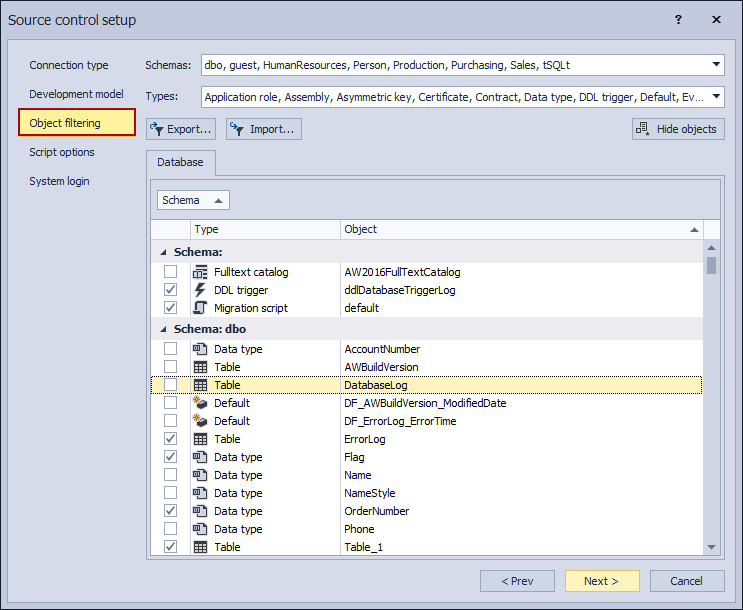
In the third step (the Object filtering tab) of the Source control setup window, ApexSQL Source Control gives the possibility to choose which objects will be excluded from source control. All the most frequent questions about this ApexSQL feature are answered in the Object filtering FAQs article.
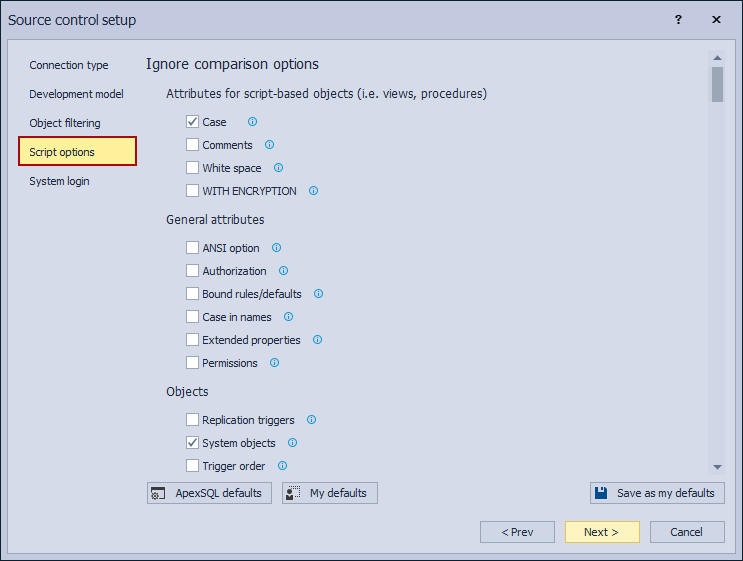
The fourth step (the Script options tab) of the Source control setup window is about setting the Ignore comparison options and the Synchronization options for the selected database. Every option under this tab is explained In the Script comparison and synchronization options in ApexSQL Source Control article.
All linking steps, for any of the natively supported source control systems, are the same, except the fifth and last step (the System login tab) of the Source Control setup window. Depending on which source control system is chosen, all information about the final step of the linking process in the Source control setup window can be found in the following articles:
- How to link a SQL Server database to a Git repository
- How to link a SQL Server database to a Git repository using the SSH protocol
- How to link a SQL Server database to a Team Foundation Server repository
- How to link a SQL Server database to a Subversion repository
- How to link a SQL Server database to a Mercurial repository
- How to link a SQL Server database to a Perforce repository
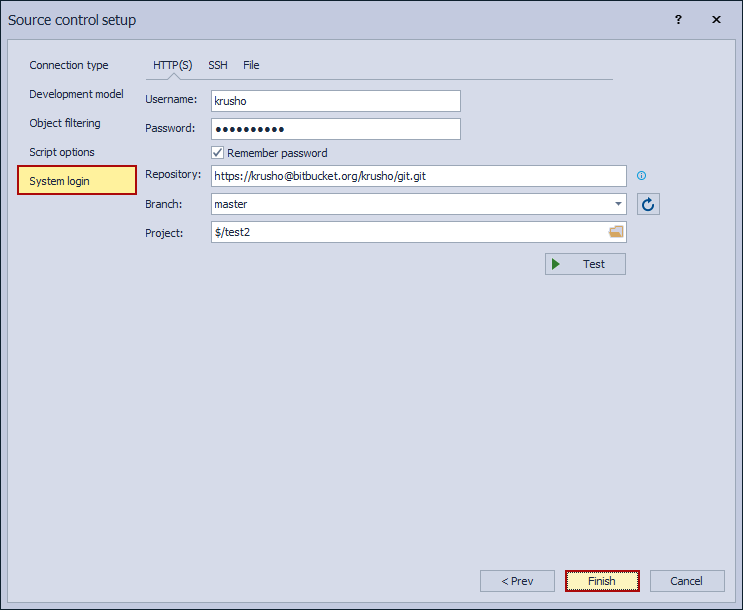
After everything is set, click on the Finish button in the Source control setup window. This will link the selected database to a chosen source control system and open the Action center tab.
ApexSQL Source Control creates several database/Server framework objects, which store important SQL Server source control metadata. Where and which framework objects will be created depending on the chosen Development type. Explanations about framework objects and what are they for are in the ApexSQL Source Control framework objects inventory article.
Features
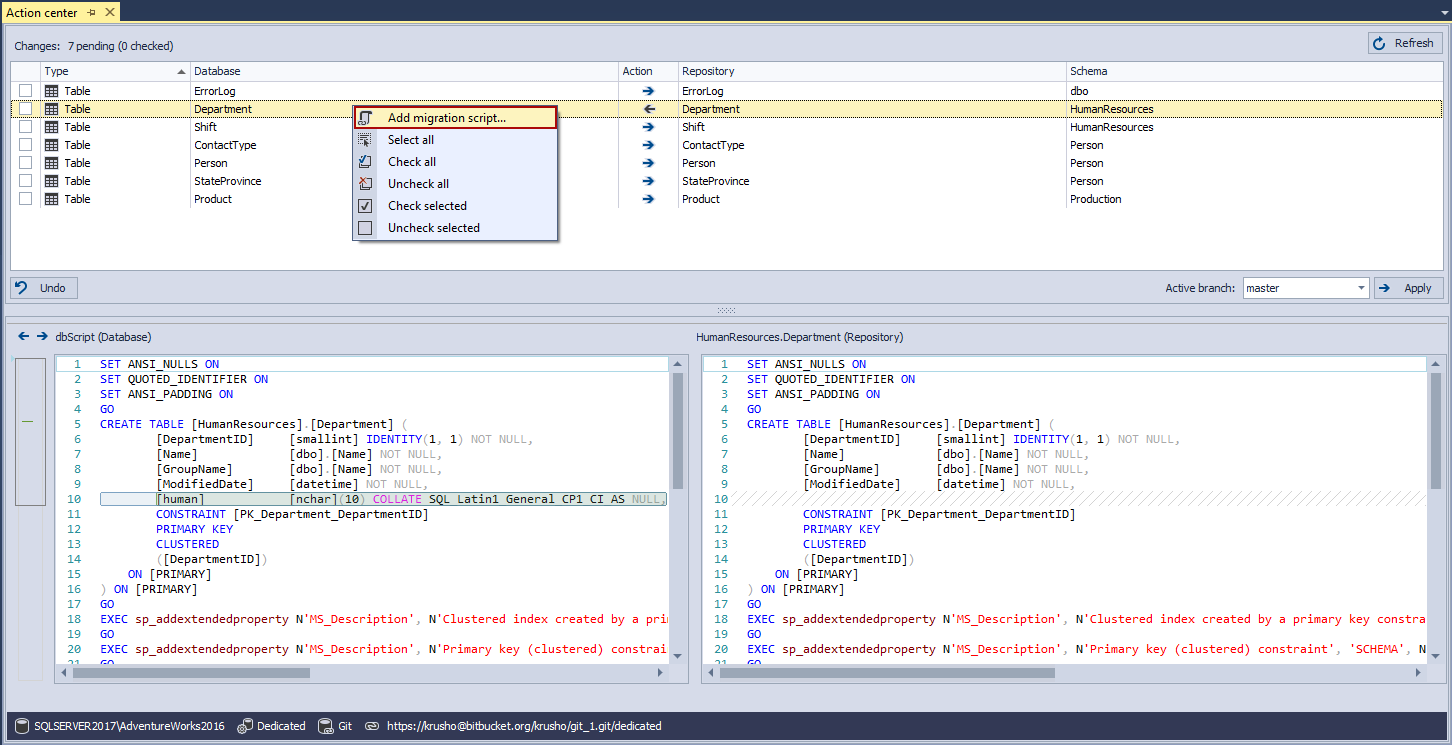
The Action center tab is one of the main features of ApexSQL Source Control. It can be initiated only for a linked database, from the Object Explorer context menu or the ApexSQL Source Control toolbar.
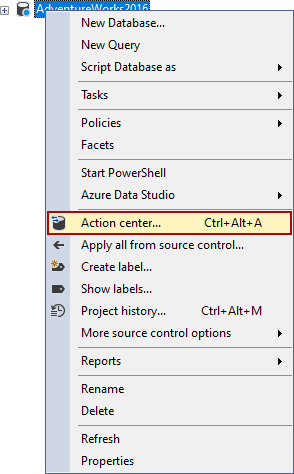

Everything that is needed to know about the Action center tab can be found in the Action center article.

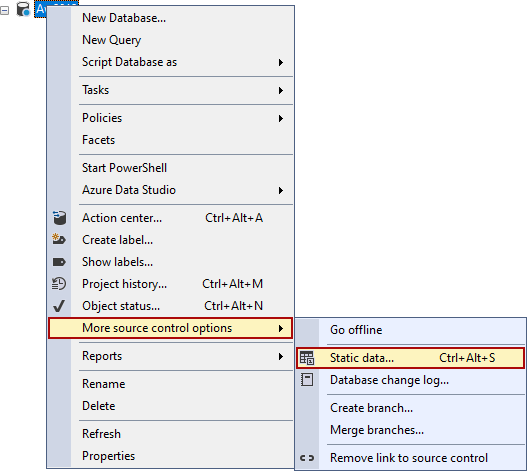
Besides tracking the schema changes for the database tables, with ApexSQL Source Control static data changes can also be tracked.
Putting the static data for a table under source control can be done in two ways. Right-click on the linked database in the Object Explorer pane and from the context menu, from the More source control options sub-menu, click the Static data command.
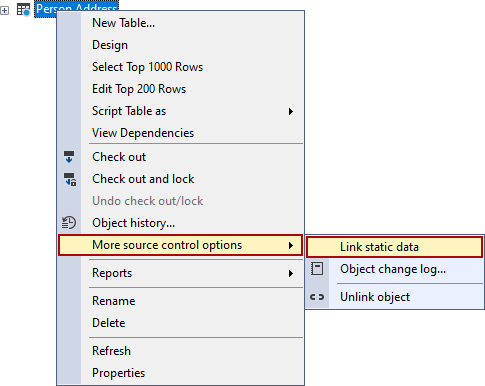
Or choose the specific table in the Object Explorer pane, and then right-click on it, and from the More source control options sub-menu, click the Link static data command. All this and much more about how to work with static data can be found in Working with static data article.
With ApexSQL Source Control, any text-based scripts (SQL, client code e.g., C#, Java) can be source controlled along with the database changes. These scripts, in ApexSQL Source Control, are divided into two groups, Custom scripts, and Migration scripts. Additional information about these scripts and how to work with them in ApexSQL Source Control are in the Source controlling custom scripts article and the Migration scripts introduction and general review article.
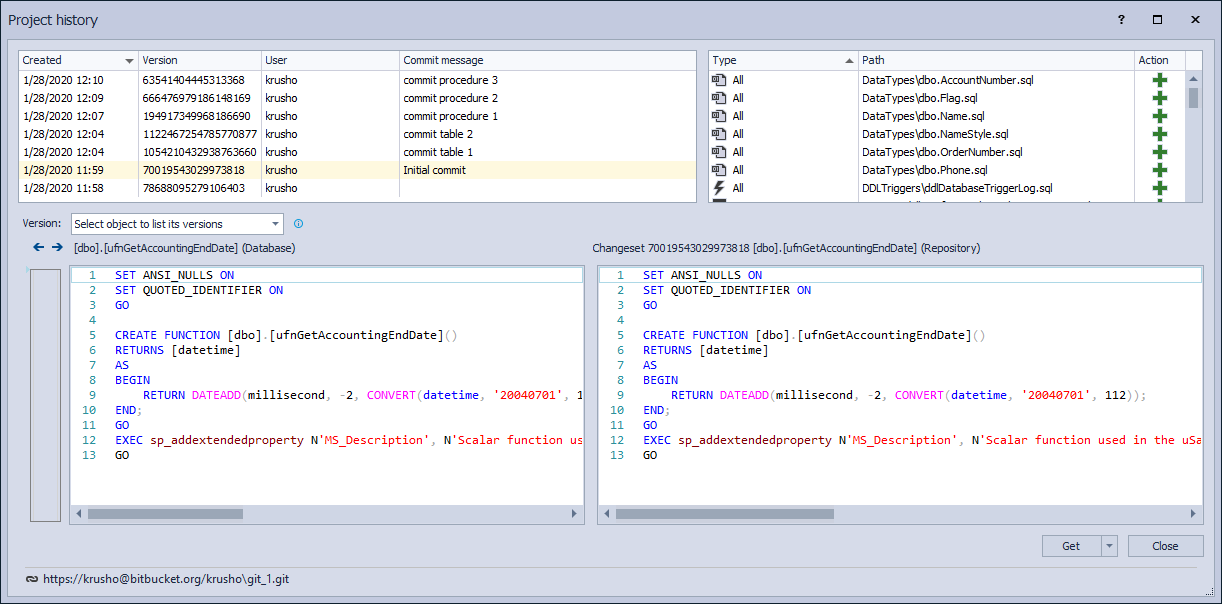
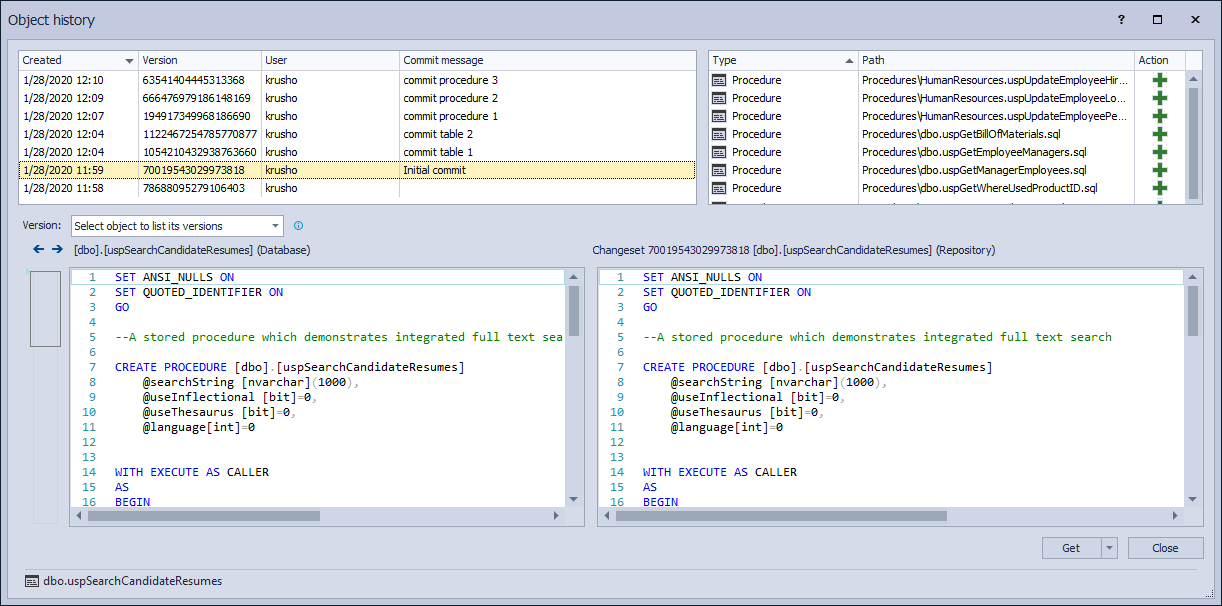
With the Project history and Object history features, any change of the database object that is committed to the repository can be reversed. An explanation about how these features work is in the Historical view article.
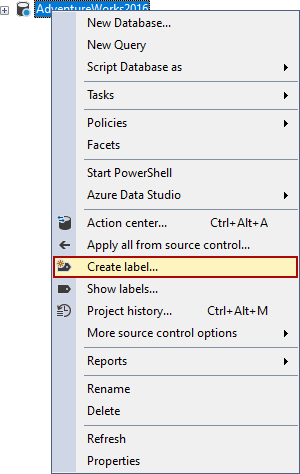
The Create label feature gives the possibility to create a snapshot of the current state of the source controlled database. To create a label for a linked database, right-click on the database in the Object Explorer pane and from the context menu, click the Create label command:
The Show labels command opens the Labels window, where a specific label can be chosen to be restored:
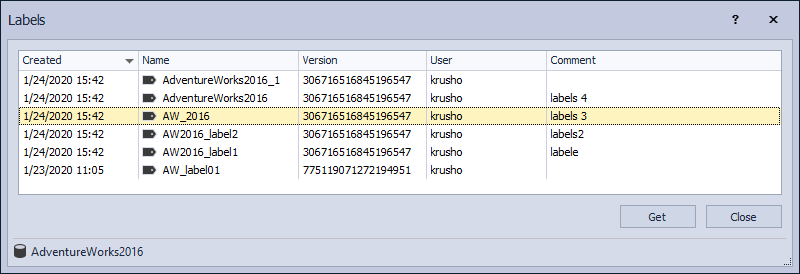
The Labels article contains instructions about how to work with this feature.
When working with a database linked using the shared model, some additional features will be available.
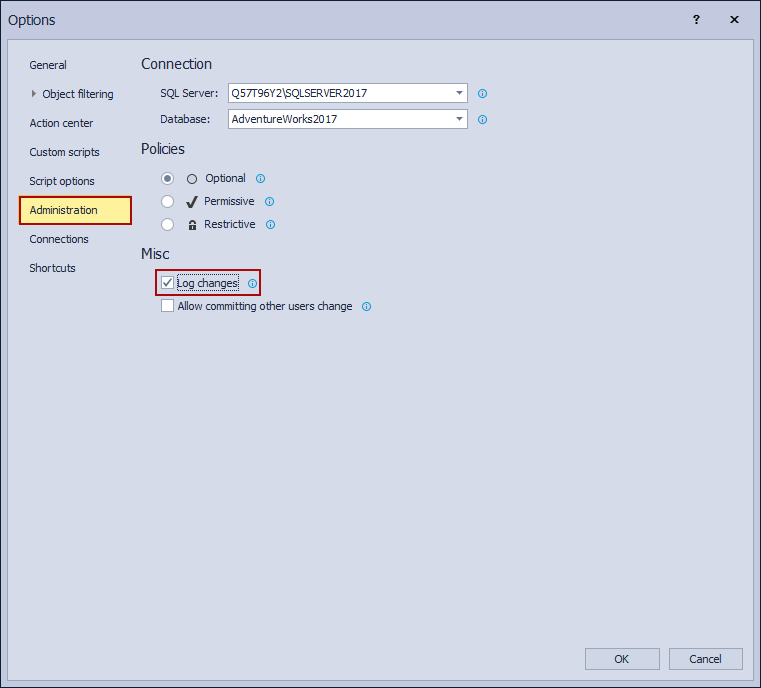
One of these features is the Change log feature, which provides information about any DDL change in a linked database, including which user changed an object when the change was made, and on which object. To allow this type of tracking changes, go to ApexSQL main menu, then the ApexSQL Source Control sub-menu and click on the Options command. When the Options dialog is opened, under the Administration tab, choose a SQL Server and a linked database from that SQL Server to set options for it. Check the Log changes option and click the OK button:
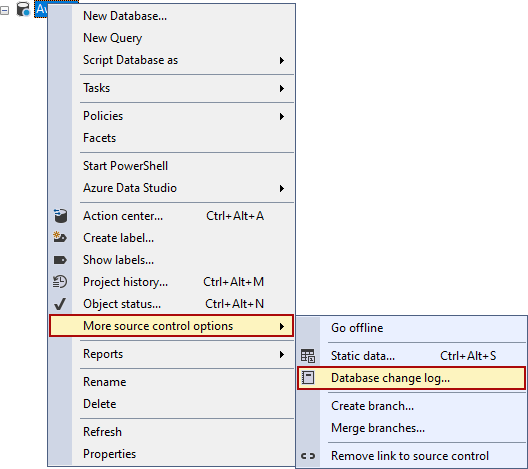
After this, every change made against the chosen database will be audited. To see all log changes made against this linked database, right-click on the database in the Object Explorer pane and from the More source control options menu click the Database change log command:
In the Database change log window are listed all made changes, with information about the user who made them and when he made them:
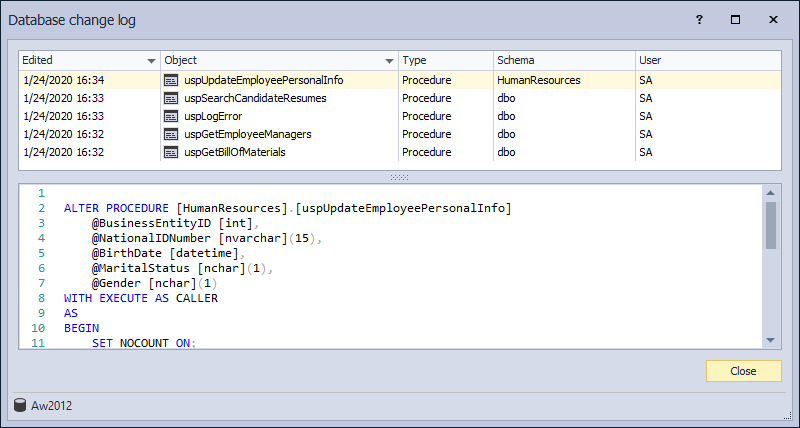
All additional information and instructions are described in the Change log FAQs article.
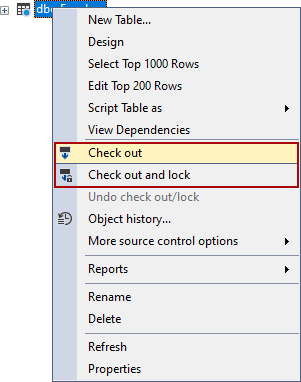
The Check out and Check in options are available only when using the Shared database development model in ApexSQL Source Control.The Checking out and checking in objects article describes all benefits of these features. Additional information about these features is stored in the Object status icons and visualization article.
All additional information about the ApexSQL Source Control features can be found here: ApexSQL Source Control knowledgebase – Table of contents.


