


Applies to
Summary
This article will explain possible issues with SQL audit administration account changes and how to resolve them.
Description
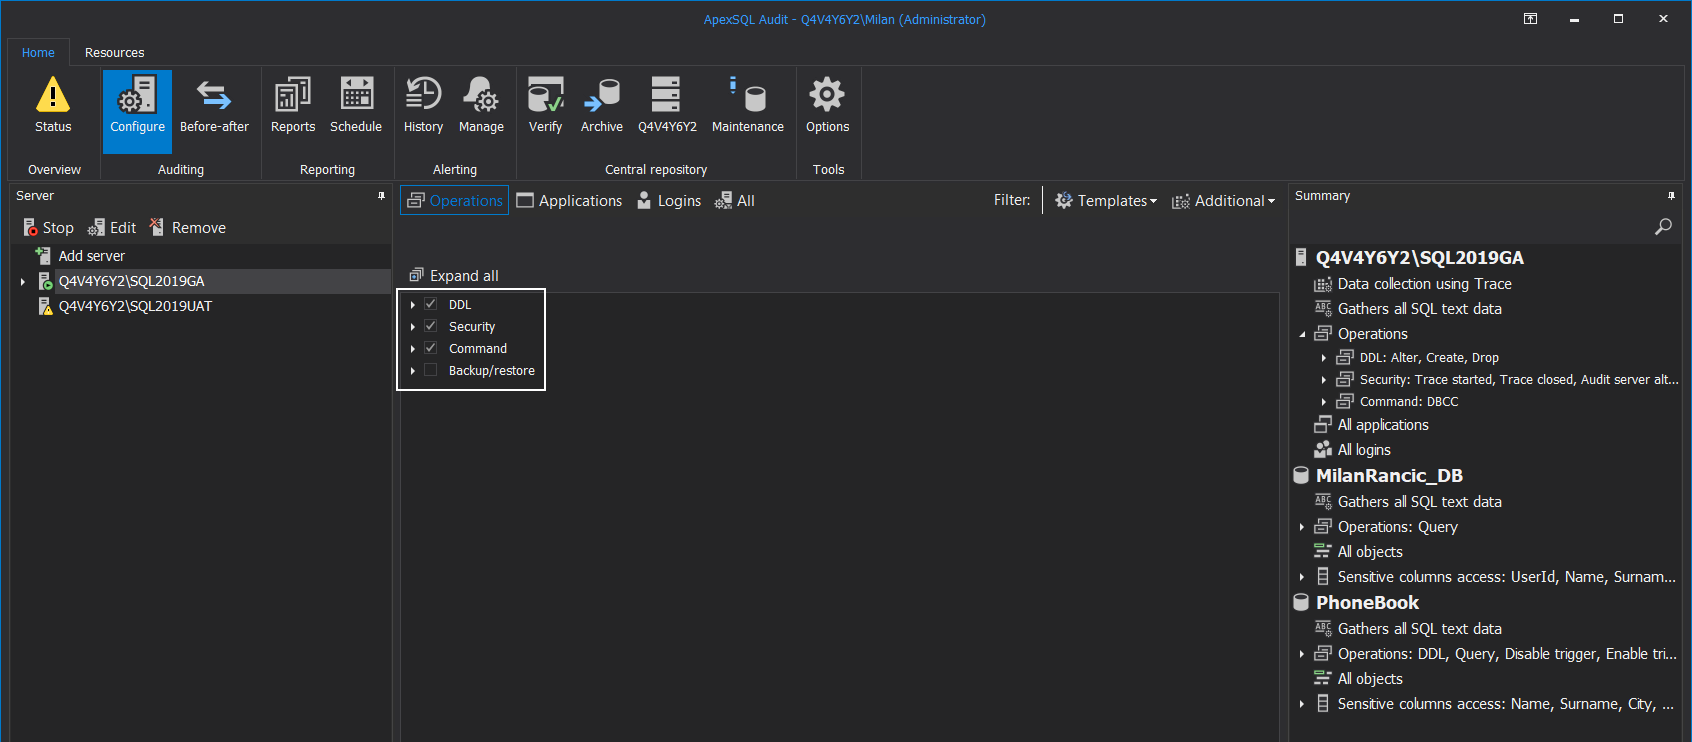
From the perspective of SQL auditing administration, it is always recommended to create and use a dedicated domain account in order to assign administrative privileges and to assign a dedicated person to manage this account (more information about required privileges can be found in the article ApexSQL Audit – Permissions and requirements). This account can be used for both the central repository deployment and management and remote instance auditing.
However, sometimes internal organizational standards might require that a personal account is used for SQL audit administration. And sometimes, even different accounts might be used for central repository management and instance auditing. This might lead to a question of what can be done when there are organizational changes, and the assigned account is updated with a changed password, or it is completely removed, and a different account is required for setup. As a result of this event, the collection of audited data will stop, so the following instructions will help to resolve the problem.
Updating the central instance account
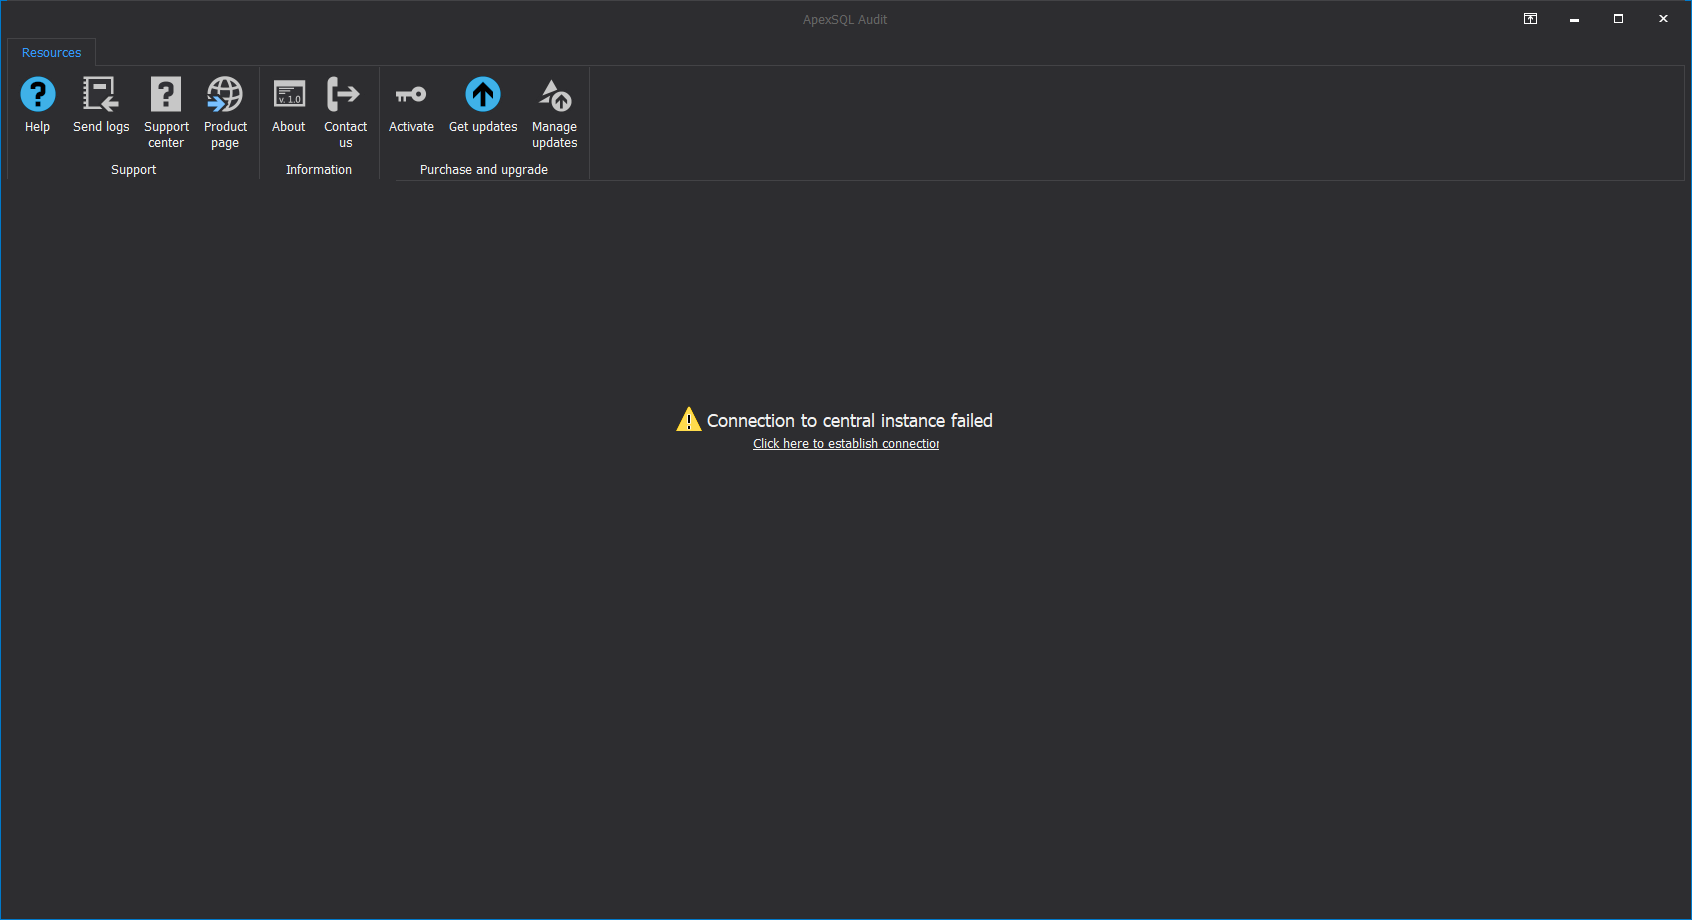
The first thing that will fail, due to a change in the audit administration account that is running the central processor, is the connection to the central repository. In other words, the collected audited data will not be imported into the repository. Note that if a different account is used for the distributed processor (for the audited instances), and only the central account fails, auditing will continue, but the import will not be possible, as previously explained. In that case, the following screen can be expected, and attempts to re-establish connection will fail:
At this point, it is necessary to update the configuration parameters for the central instance connection. This can be done with two methods that are similar but accessed differently. Make sure that the application GUI is closed before applying these methods.
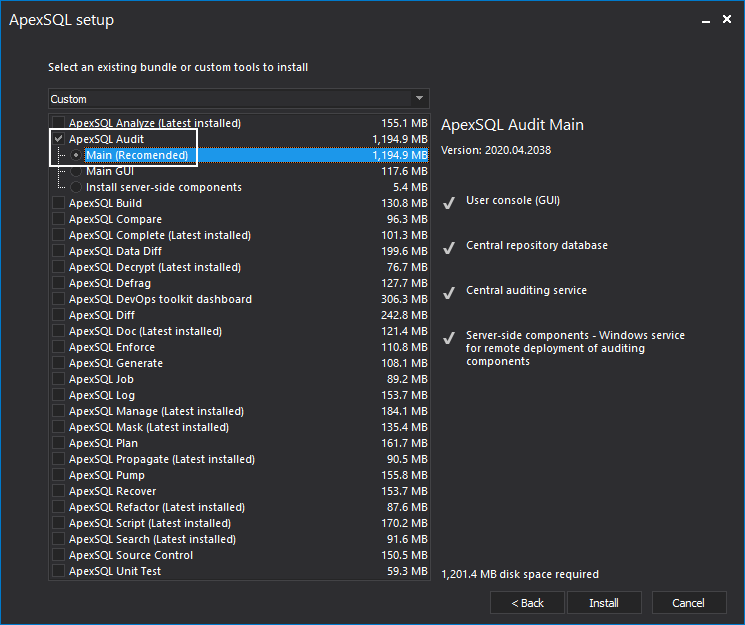
The first method is conducted through the ApexSQL application installer. When started, the installer will standardly show the selection of ApexSQL tools to choose from. Like with the first-time installation, pick the ApexSQL Audit tool with the main component selected and click the Install button:
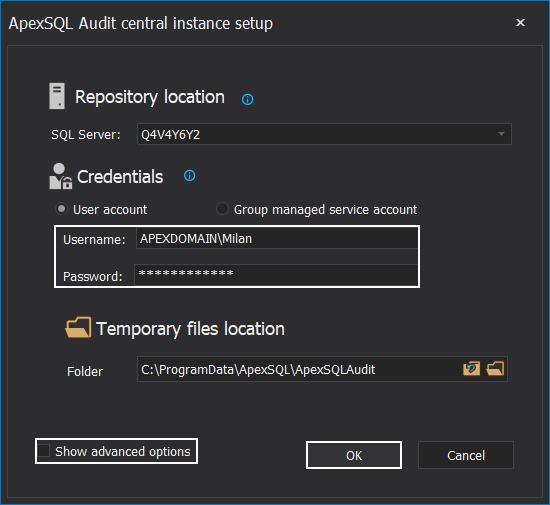
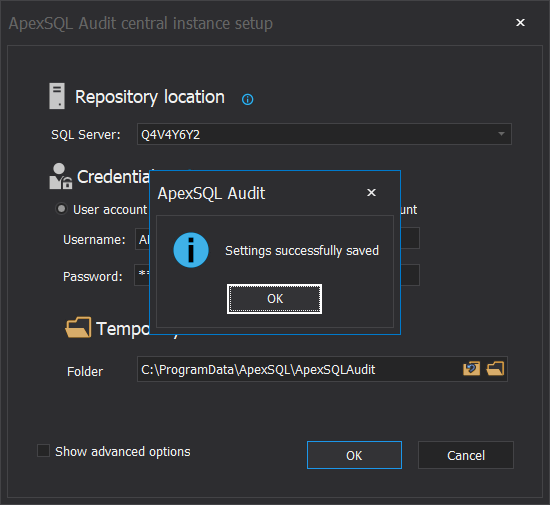
On the install action, same as with the first install, the central repository server configuration dialogue will appear, but this time, it will retrieve and show the current settings. This is where the new login details should be inserted, and everything else left unchanged (unless there is the need to change other options). Click the Configure button, and the information popup will appear and confirm with OK to continue:

On confirmation, the installation will start, which will extract program files to the installation folder (existing files will be overwritten), and the central instance processor will be updated with the account changes.
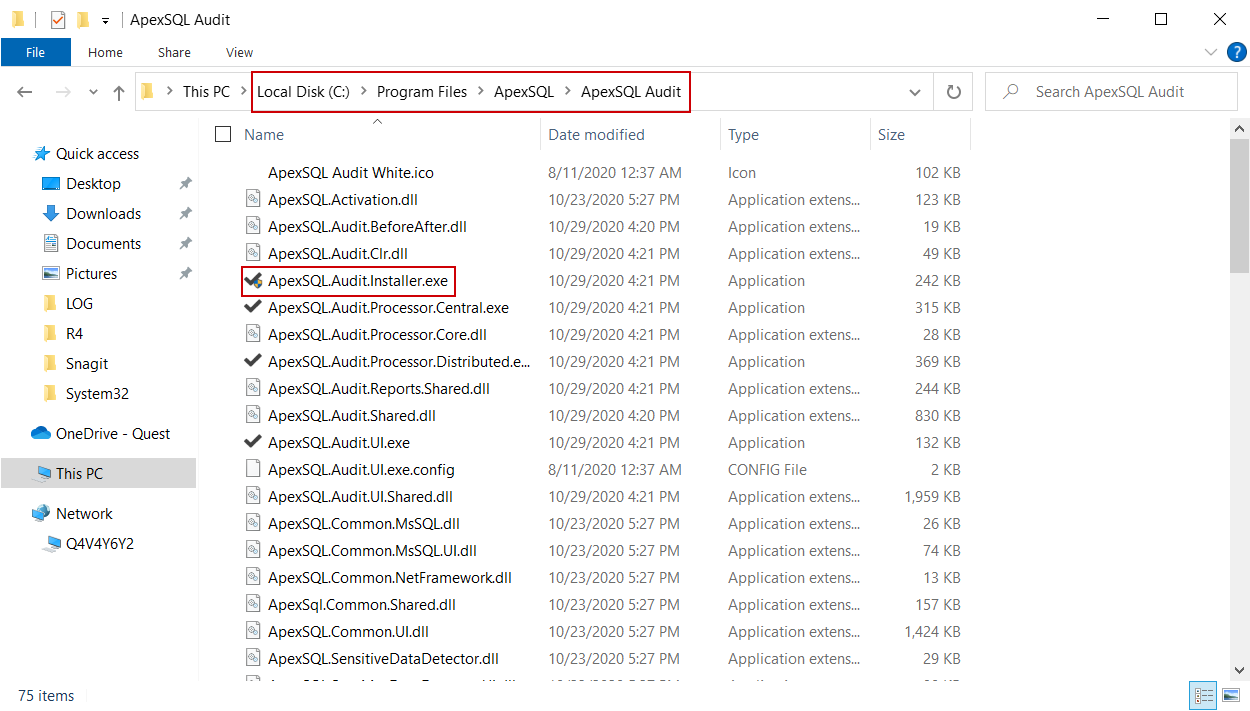
The second, probably more convenient method, does not require the main installer, but the central instance installation utility that can be found with the application program files. So, use the Windows folder browser to navigate to the program installation folder, locate the ApexSQL.Audit.Installer.exe file and run it (preferably as administrator):
As the action result, the same, previously mentioned, central instance configuration dialogue will appear, with the difference of additional settings being hidden until the Show advanced options are checked. Analog to the previous method, this is where the account running the central processor should be updated. When changes are entered, click the OK button to confirm:
After a few short processing steps, the information message will popup confirming that the settings are saved. Click the OK button to close the message box and configuration dialogue and proceed to start the GUI again:
The main advantages of this method are that there is no need to keep and use the main installer, and there is no repetition of the program files extraction, thus making it faster.
Now the connection to the central instance will be possible again, which will be confirmed with the status information within the GUI and, if the SQL auditing was working on remote instances, at this point, the residual data will start being imported to the repository:
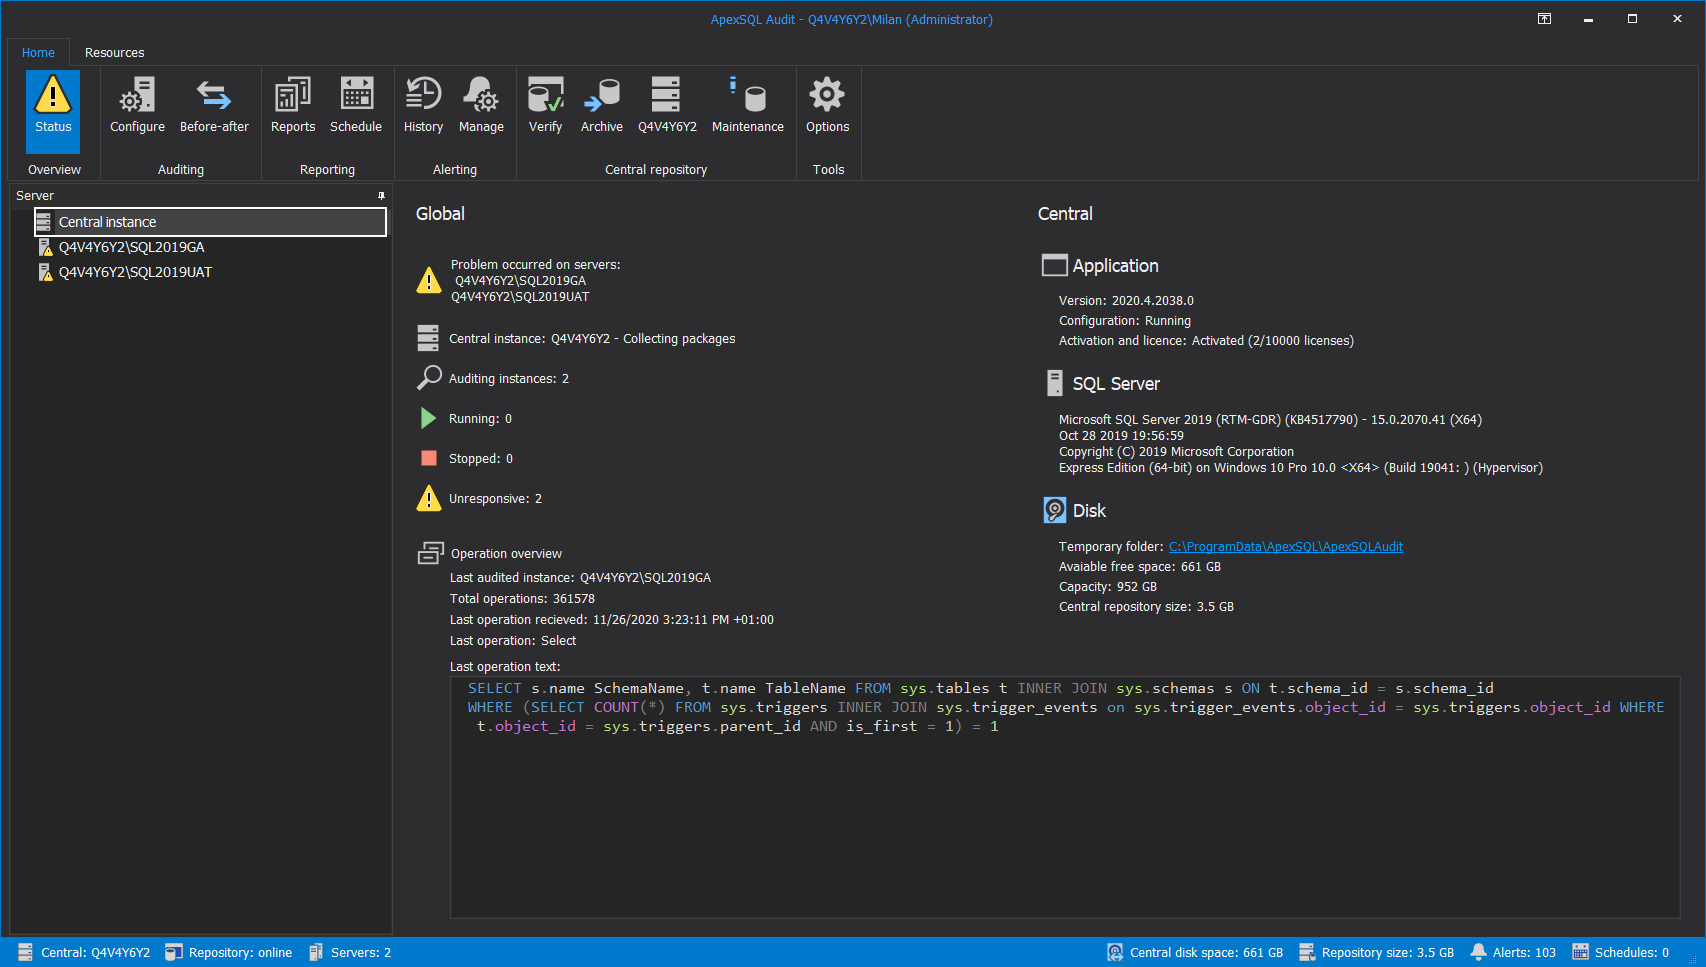
If the same, now obsolete, account was also used to connect to the instances where SQL auditing is applied, the status information in the GUI will show problems with those audited instances (like shown in the screenshot above. This means that the connection cannot be established due to missing authorization, and the problem can be now be resolved within the GUI.
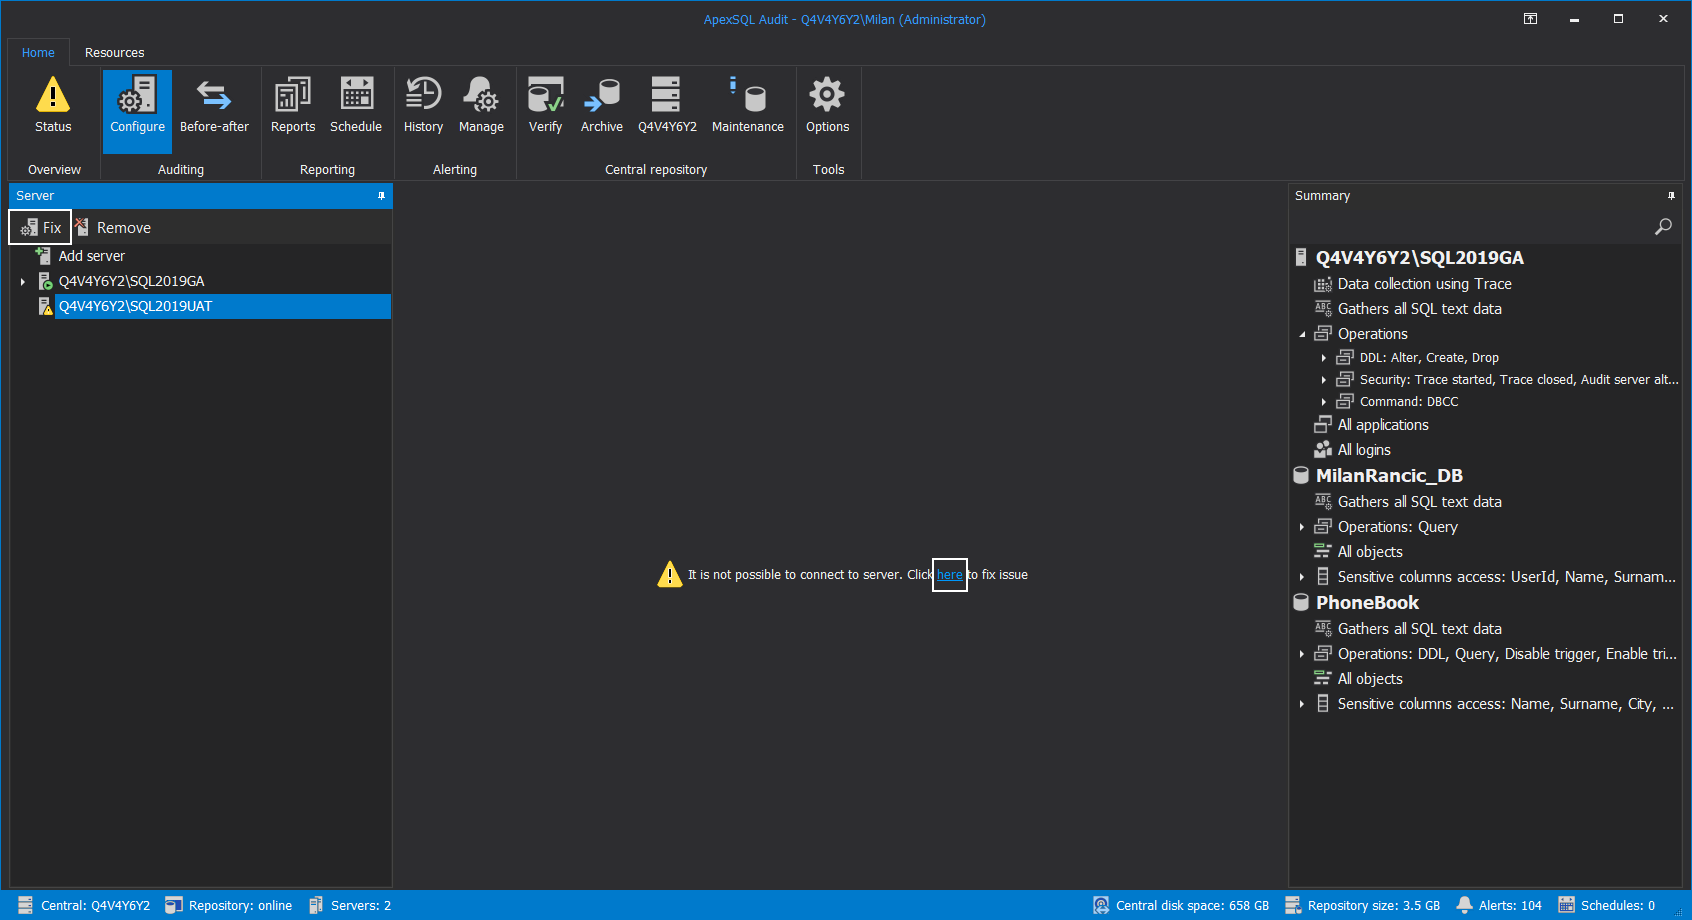
Updating the audited instance account
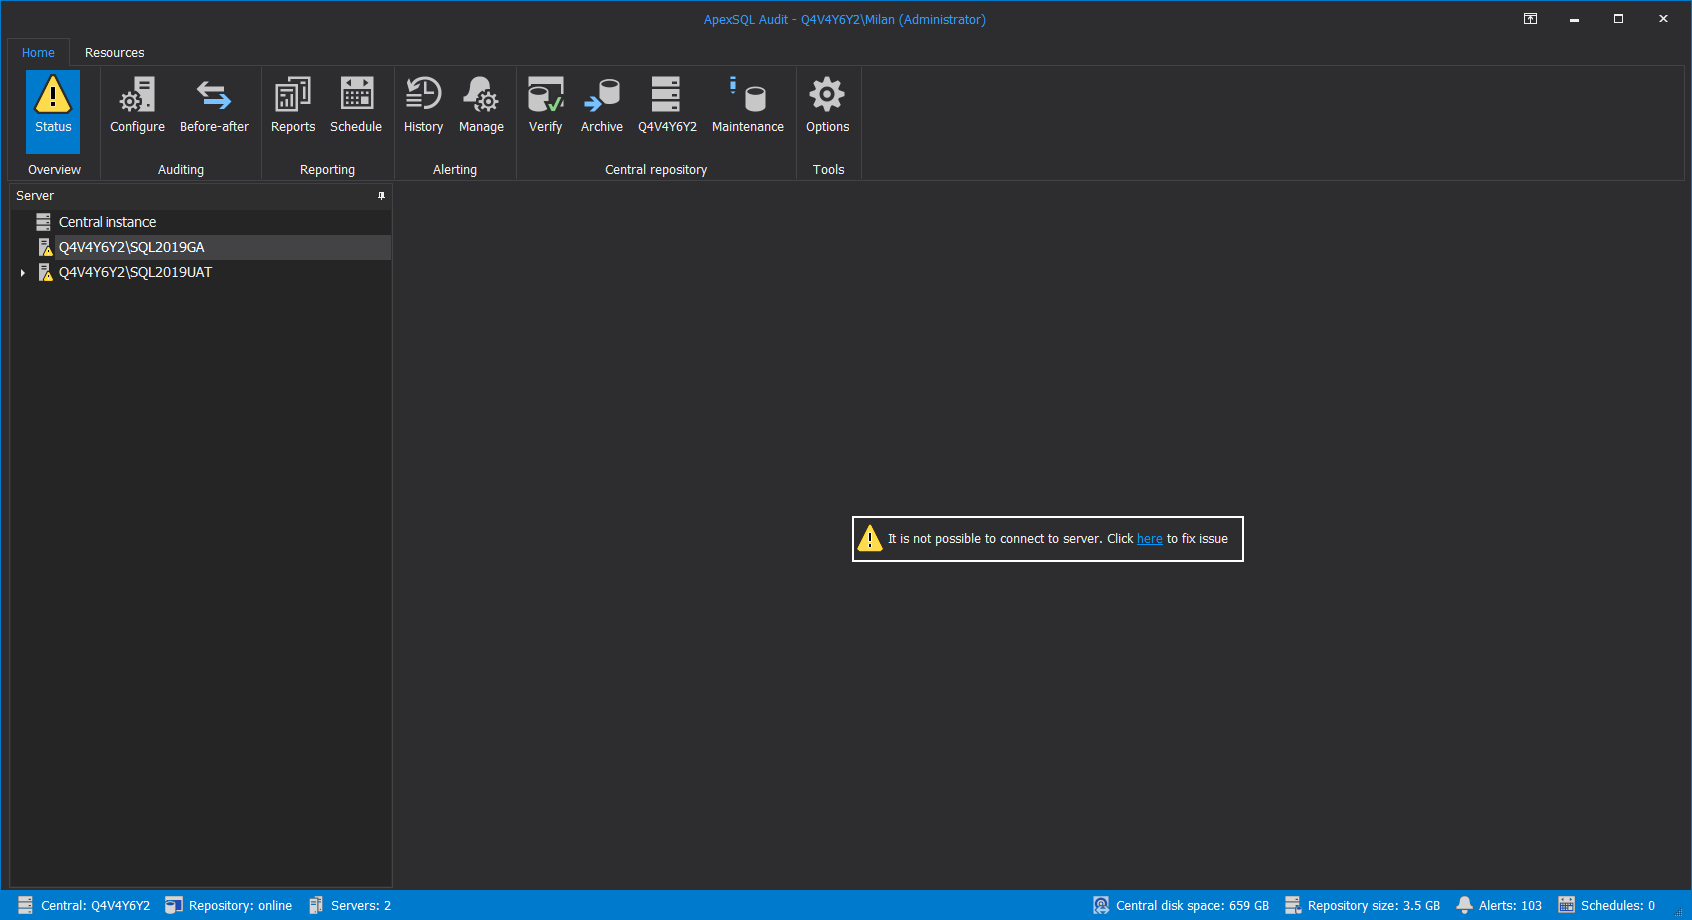
To update the account information needed to access audited instances, from the application GUI, click on the audited instance item with the problem (labeled with a small warring triangle) and, in the main panel, the simple message “It is not possible to connect to server. Click here to fix the issue” will be shown with the “here” link to the options to resolve the issue:
When the link is clicked, the view will switch to the Configure tab, where the same options dialogue used to set up the auditing of the SQL Server will pop up. This is where the information for the account should be updated:
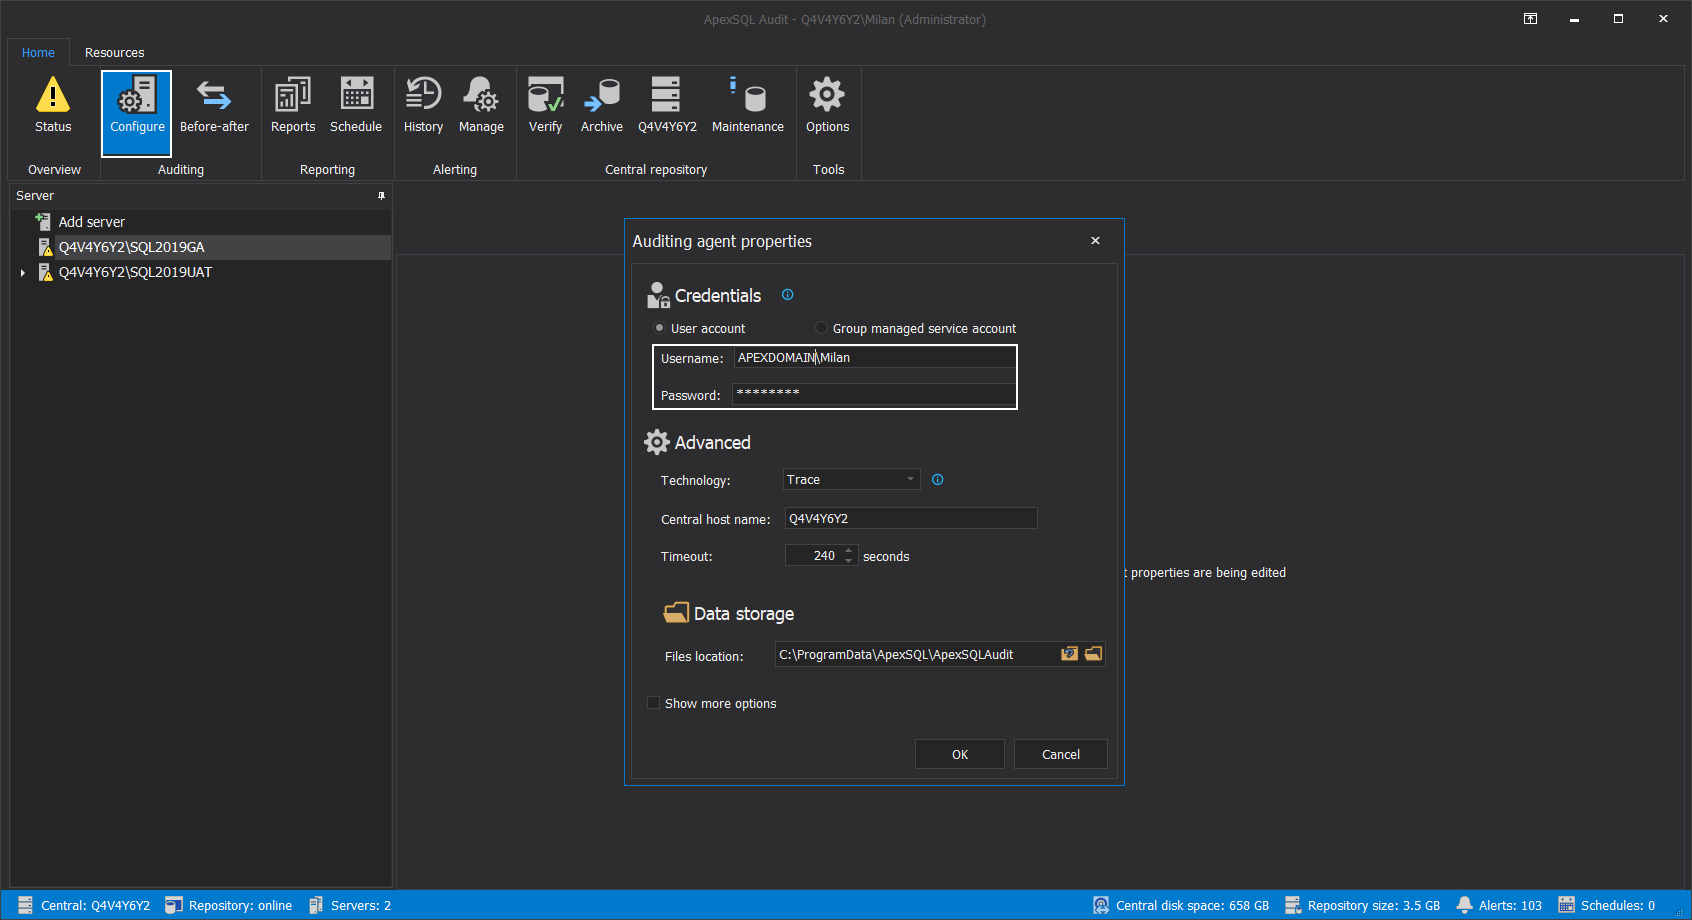
Along the way, the rest of the SQL audit-related parameters can be updated if needed. Click OK, and the filter configuration for the audited SQL Server can be seen now:
Repeat the procedure for all other SQL Servers affected by the account change. No need to switch back to the Status tab, the command to resolve the problem can be initiated from the Configure tab using the Fix button above the server tree panel, or the same “here” link in the center screen:
While the remote instance is inactive, the auditing session for the SQL Server will still be active, but the processing and packaging of audited data will stop. When account settings have resolved, the processing of the audit session files will start, and the central instance will be able to receive them.
The universal solution
To avoid these issues, it is recommended to use a Group Managed Service Account, or shortly gMSA, to engage the SQL auditing process. The gMSA account is a fail-proof method to avoid complicated account management and update issues (like password updates).
More information about how to setup gMSA accounts for SQL Server can be found in the article: Using Group Managed Service Accounts with SQL Server
For help on how to apply a gMSA account for SQL audits see the following article: Configuring gMSA account to run ApexSQL Audit processes


