Applies to:
ApexSQL Diff, ApexSQL Diff for MySQL
Summary
ApexSQL Diff and ApexSQL Diff for MySQL has an export option to easily customize with various options. Here is an explanation of how to export schema comparison results in an Excel report and what options can be selected:
Description:
ApexSQL Diff can compare different data source types and export their differences into different formats including Excel.
ApexSQL Diff for MySQL can compare only live databases as data sources.
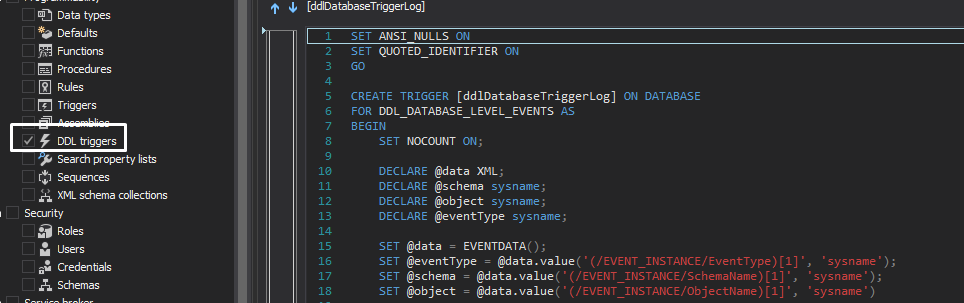
Selecting individual result items
After the comparison between data source types is completed, the main grid of the ApexSQL Diff or ApexSQL Diff for MySQL is populated with the comparison results. It will have the option to select all result items by selecting the checkbox above the grid.
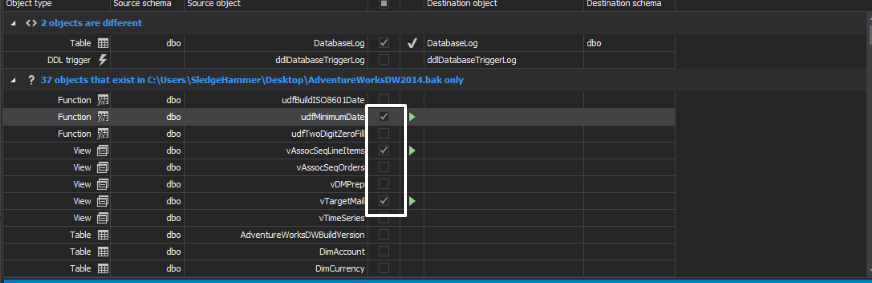
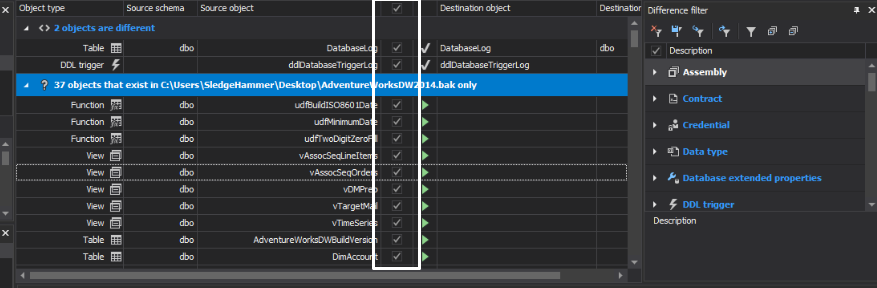
To select more specific comparison results, it can be done by individually selecting the objects from the main grid. Below are two images where can be seen how to complete selection and partial selection is done:
-
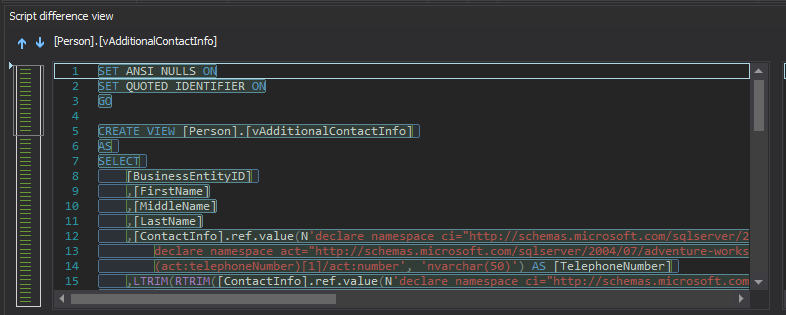
In the example below, only 3 objects are as a part of the partial selection of the comparison results:
-
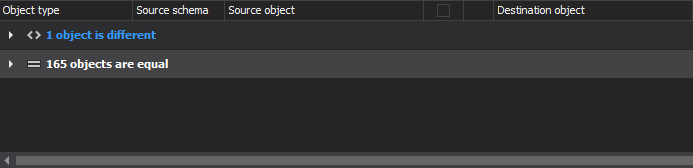
In this example below, all objects are selected as a part of the complete selection of results:
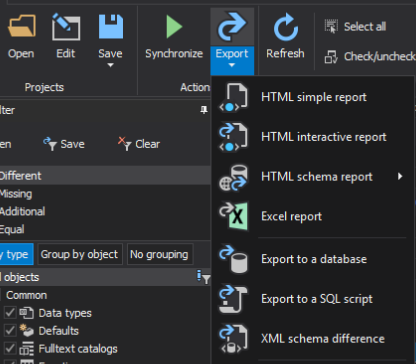
Exporting into Excel
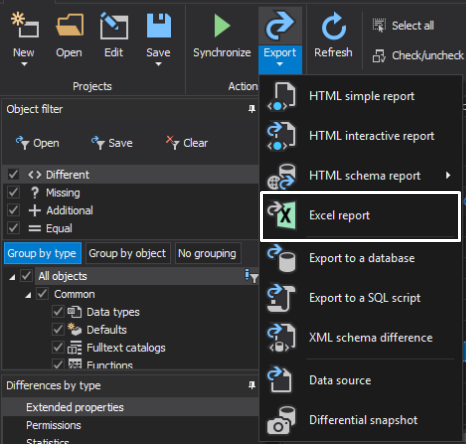
When desired results are selected, export it into Excel format with a click on the arrow button below the Export button in the Home tab and choose the Excel report:
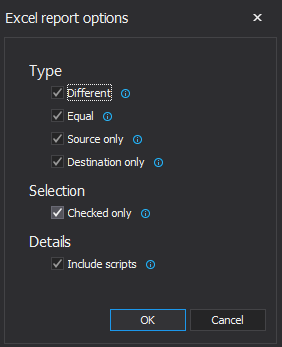
Export options
After the Excel report is chosen from the drop-down menu, the Excel report options window is shown, as in the screenshot below. The Excel report options window is divided into three sections: Type, Selection, and Details.
Excel reports can be customized.
- Type options allow users to select the type of result that needs to be exported:
- Different which will include different object
- Equal will include equal objects
- Source only will include an object that exists only in the source
- Destination only will include an object that exists only in the destination
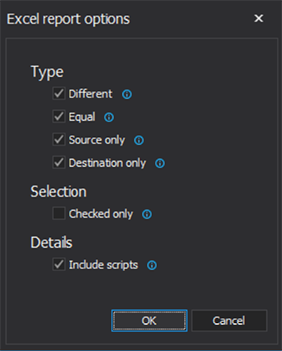
- Selection
If the Checked only option is selected, only the results that have been selected in the main grid will be exported. If the Checked only is not selected, all results from the main grid, that correspond to the Type option selection will be exported.
- Details
Include scripts option that allows users to include DDL SQL script for selected objects in the report.
Exporting
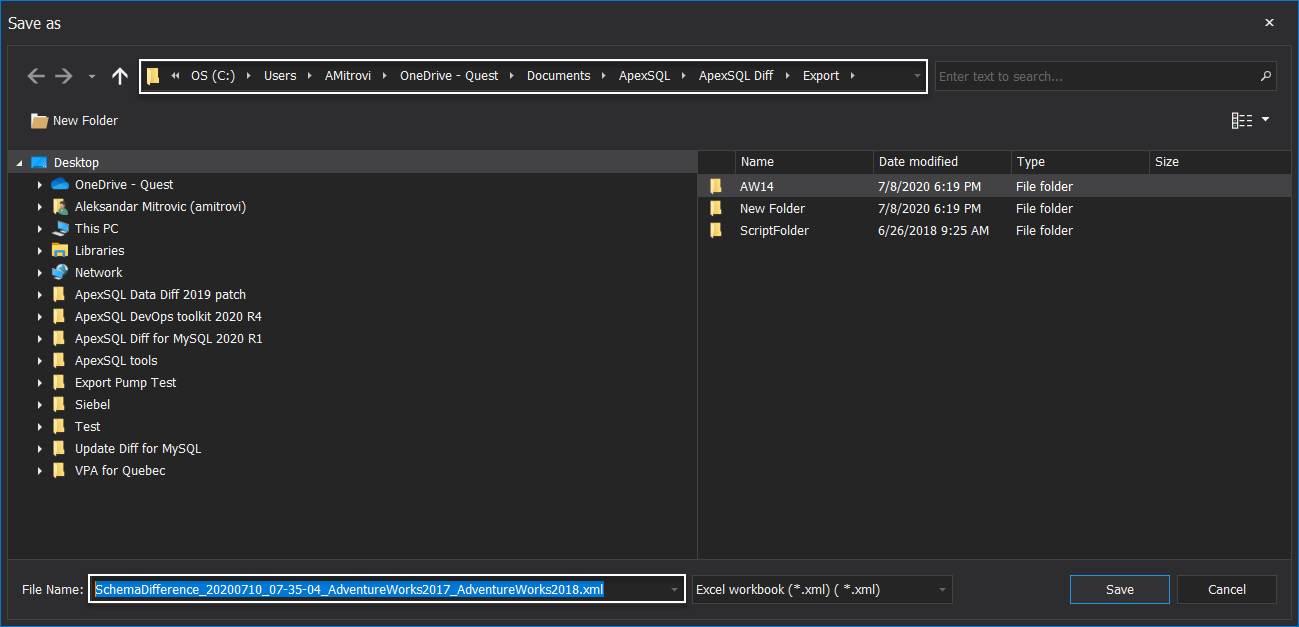
After the customization is done, the report can be exported and the location for the export file can be chosen in a window dialog box when appears to save the schema difference. The default file name and the location can be set as required from the Options menu in the toolbar shown below:
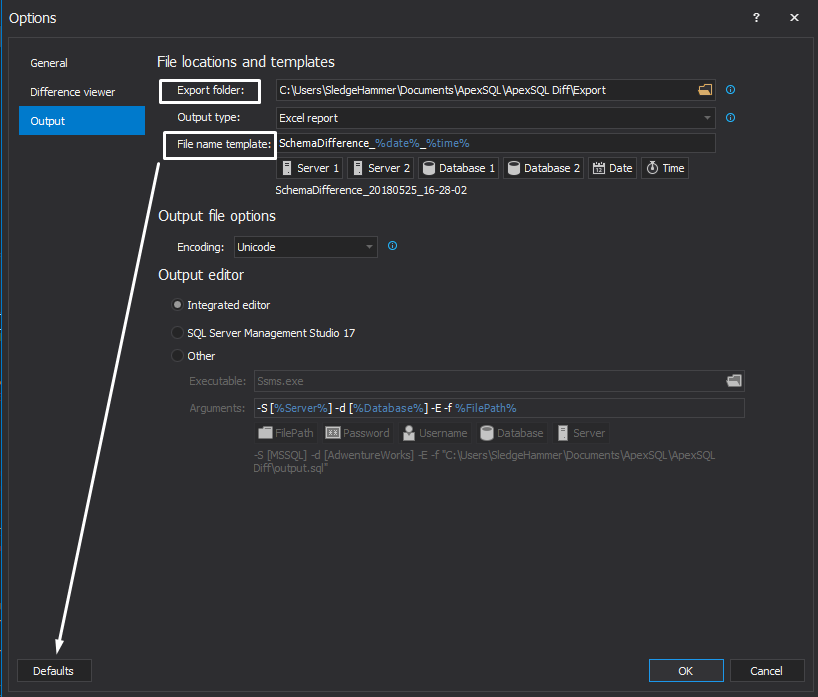
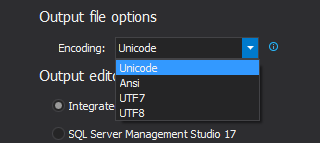
Default export folder and encoding of the output file can also be set as required:
The File name template can be set as required by clicking the switches:

Here, the file name template has been changed by setting the Date, Time, Database 1 & Database 2 accordingly.
The Excel report can be exported in two ways:
Export Menu: Choose the Export menu in the actions toolbar and select Excel report and then save:
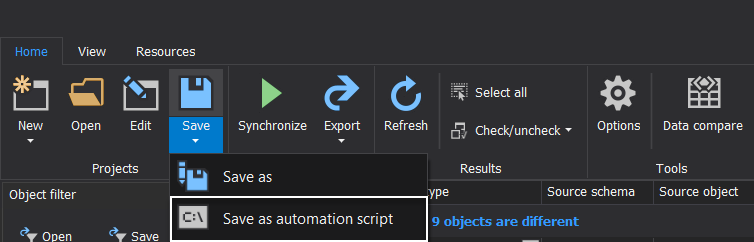
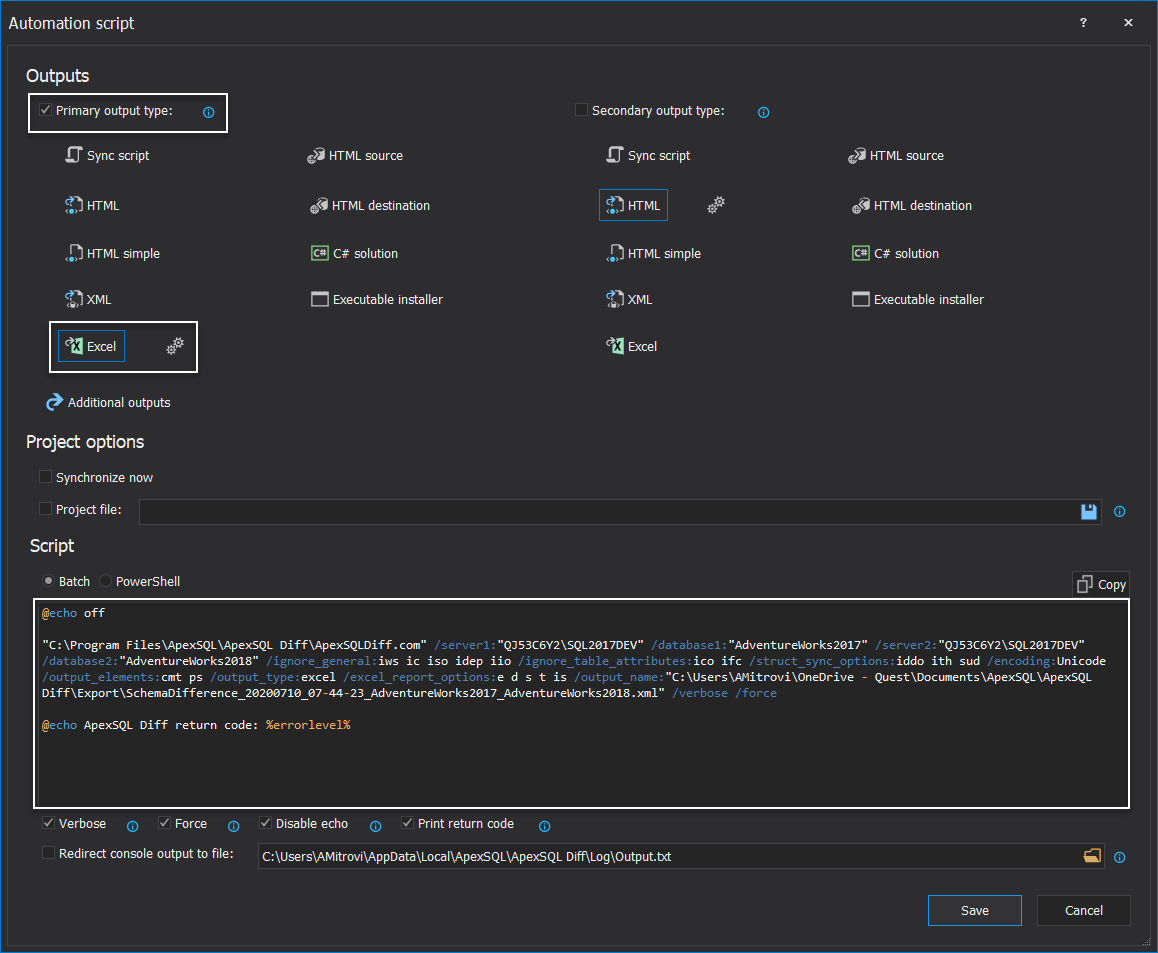
Save Menu: In the menu in the Projects toolbar, select Save as automation script. Here, the primary output types and the secondary output type can be set. The results can also be customized using the batch script. When Excel is set as a primary output, the export option can be changed from the adjoining button and the same applies to the secondary output type too.

The batch file is saved by clicking the Save button. The Excel report then can be generated by running the batch file. An example showing the run of a batch file is shown below:
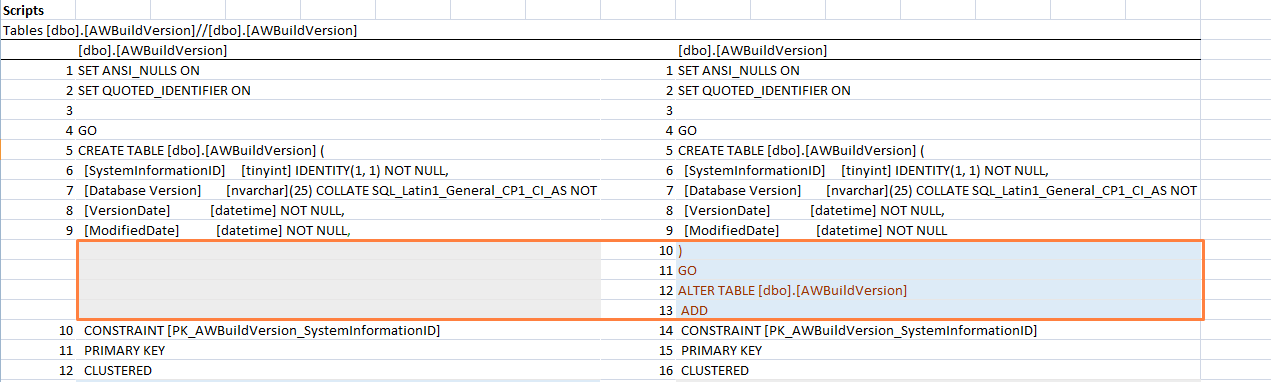
A comparison Excel report will look like the one in the screenshot below:
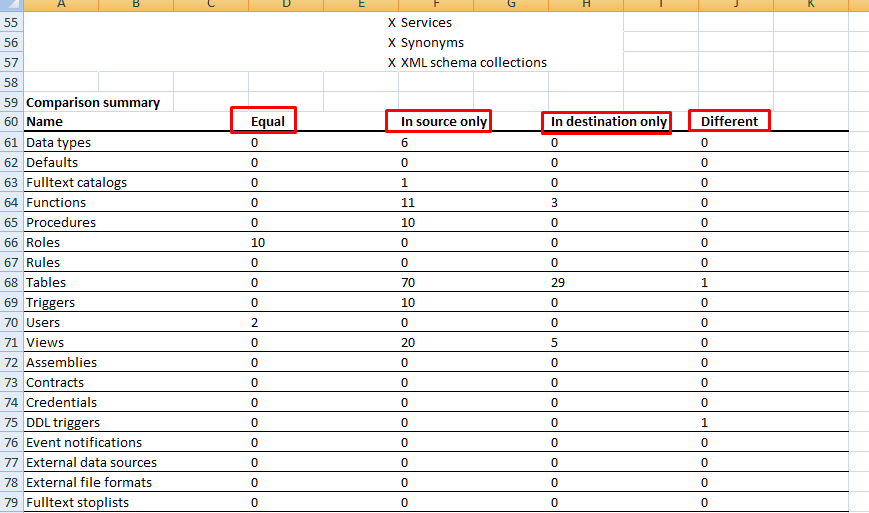
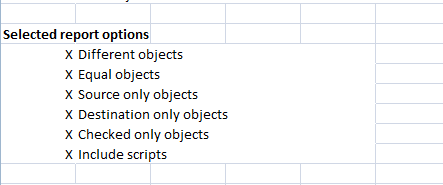
At the Excel report options, Different, Equal, Source only & Destination only were selected, which is reflected in the comparison result.
Similarly, since the Include script option was checked in the report options, scripts of all exported objects will be shown in the report:
FAQs
Q: Is there a limit to the number of result items that can be exported?
A: Export size is only limited by Excel itself. See Excel row limits by version
Q: Do I have to have Excel installed?
A: Yes, Excel needs to be installed to view the export result
Q: What versions of Excel are supported?
A: Excel 2003 and higher versions are supported
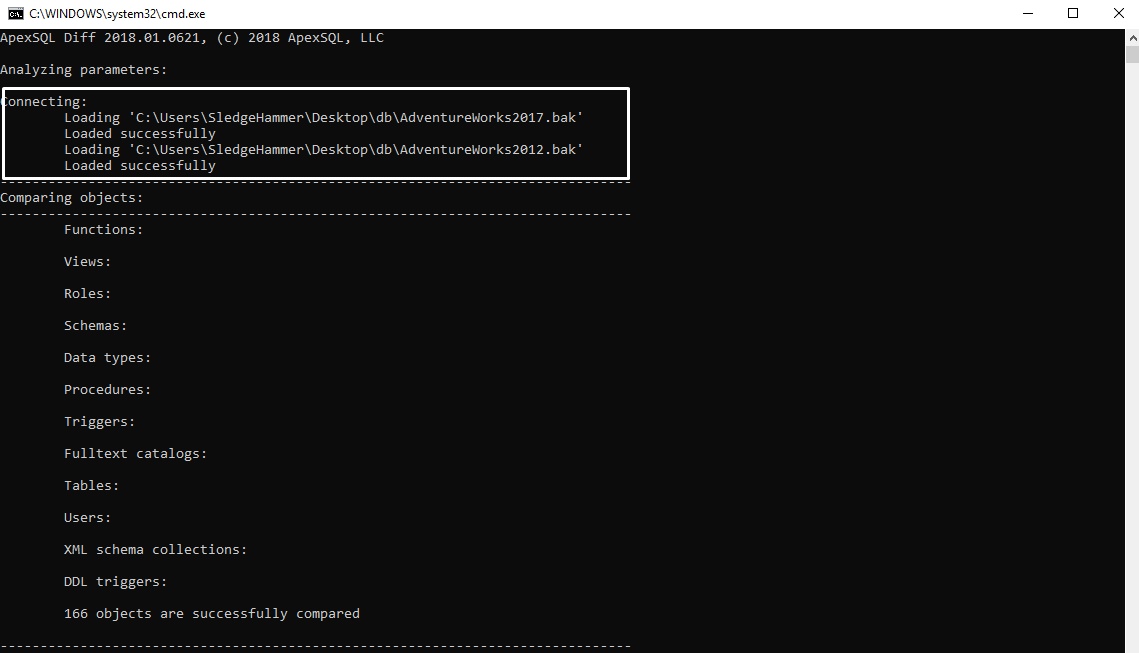
Q: Can I export results via CLI?
A: Yes, Results can be exported via CLI, check pictures bellow:
Here is a sample batch script from the screenshot above
” ApexSQLDiff” /backup1:” AdventureWorks2017.bak” /backup2:” AdventureWorks2012.bak” /ignore_general:iws ic iso idep iio /ignore_table_attributes:ico ids idc ifc /struct_sync_options:iddo ith sud /encoding:Unicode /output_elements:cmt ps /output_type:excel /excel_report_options:e d s t co is /output_name:” 2018052517-44-32AdventureWorks2017AdventureWorks2012.xml” /force /verbose
The different CLI switches used in this batch script are:
- /backup: Allows providing the path for the destination backup
- iws: ignores white space
- ic: ignores Case
- iso: Ignores System Objects
- idep: Ignores Database Extended Properties
- iio: Ignores invalid objects
- ico: Ignores column order
- ids: Ignores data spaces
- idc: Ignores data compression
- ifc: Ignores fill factor
- iddo: Includes Dependent Database objects
- ith: Includes Transaction handling
- sud: Script use database
- /excel report option: e: Equal, d: Different, s: Source, t: Destination, co: Checked only, is: Include scripts
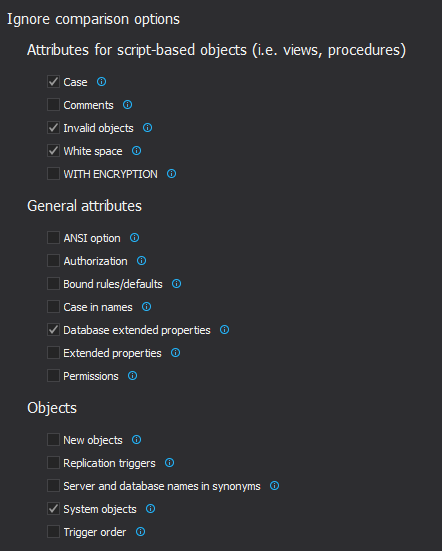
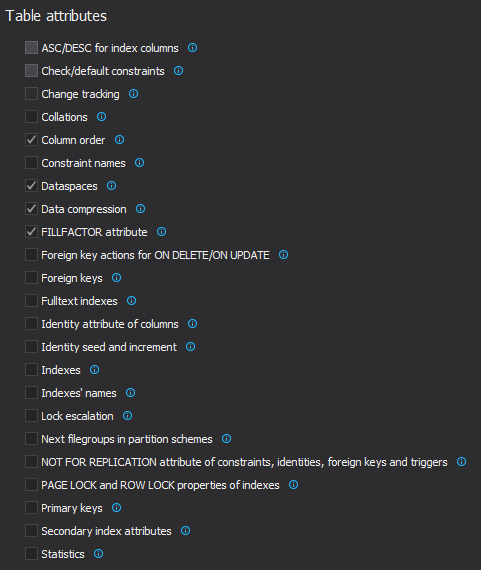
These can also be changed at the beginning when selecting the data source type. Below is a screenshot which shows a variety of comparison options: