


Applies to
Summary
This article provides the insight into the process of creating SQL Server snapshots within the SQL manage instance tool.
Description
Having to constantly monitor and worry about the current state of a SQL Server is a growing concern for a DBA. For many, this burden may be a very tiresome task, so finding the appropriate tool to remedy this problem may be a mayor timesaving solution.
Snapshots within the SQL manage instance tool are a current “picture” of SQL Server’s file system, its configuration settings, and an overall state. Once the server’s state is being “captured”, it will be stored in a location and later used as a comparison reference between live SQL Server or its new snapshot to highlight and distinguish the changes being made meanwhile.
That being said, snapshots are designed for both, short-term and long-term usage and the moment a snapshot is pulled for comparison solely depends on the user’s preference.
Furthermore, this before-after comparison of SQL Server states may prove to be a very handy feature in a DBA’s everyday workload.
So, without further ado, lets dive into the matter.
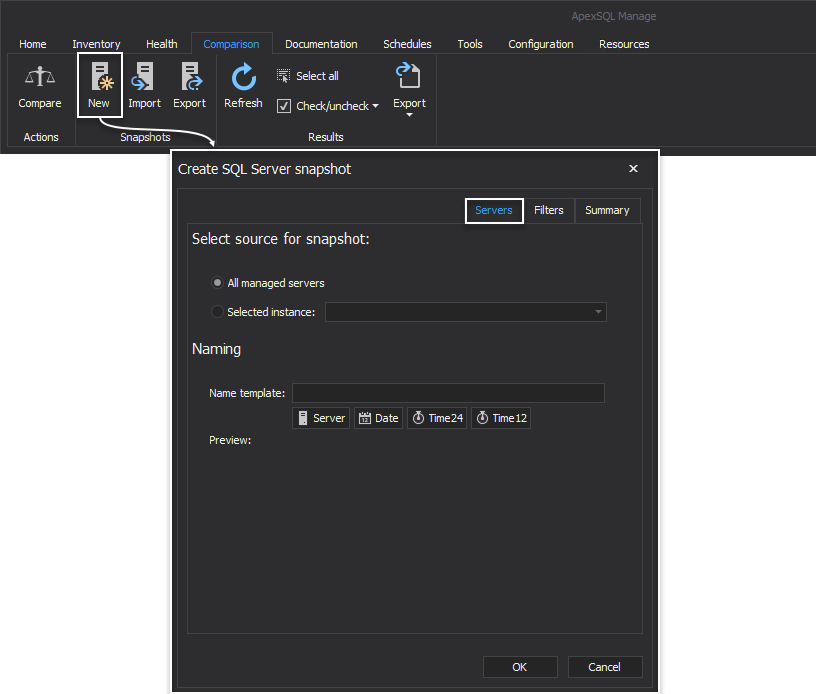
To create SQL Server snapshot, upon starting the SQL manage instance tool, head over to the Comparison tab and click the New button under the Snapshots category.
This action will initiate the Create SQL Server snapshot window where specific inputs must be provided. By default, the Servers tab is displayed:
Before continuing with this process, please first consult the How to discover SQL Server instances, SSRS, SSAS and SSIS services across the network article for detailed information on how to scan the network in search for SQL Servers and how to make a connection between the SQL manage instance tool and found servers.
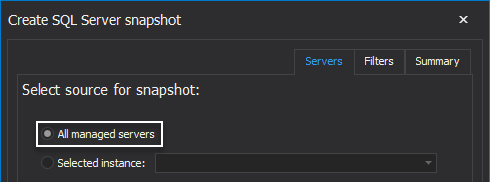
In the Select source for snapshot area, leave by default selected the All managed servers options to create snapshots for all connected SQL Server instances:
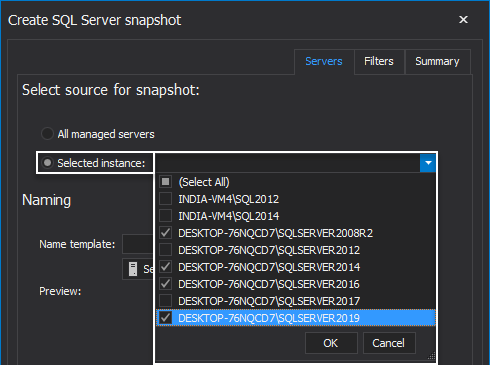
Additionally, in the same area, there is the Selected instance option to manually select one or more servers from its drop-down list:
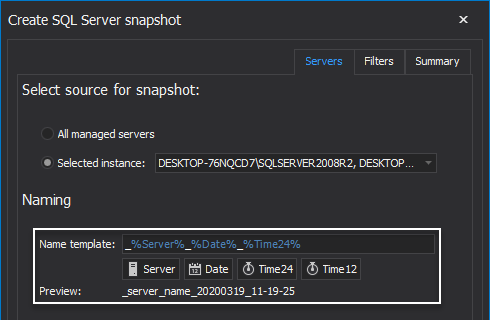
Under the Naming area, provide the preferred name template for the snapshots by clicking any of the offered choices thus creating the unique name:
- Server – the name of the SQL Server instance
- Date – the date of the snapshot creation
- Time24 – displays time in the 24-hour clock
- Time12 – displays time in the 12-hour clock
After choosing the preferred name template, the same is displayed in the Preview section:
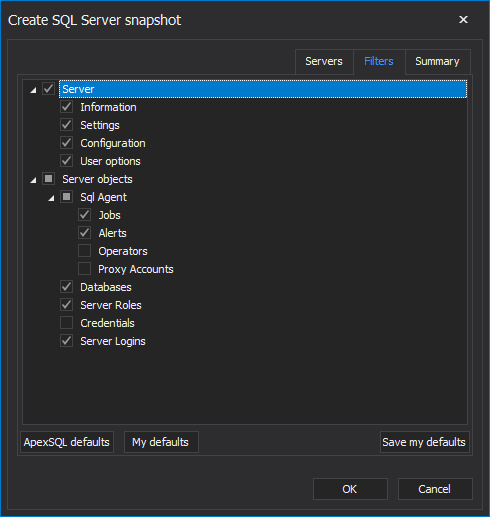
Under the Filters tab of the SQL manage instance tool, all basic information and configuration settings of a SQL Server instance are listed in form of a filters. Filters are divided in two sections: Server and Server objects. Choose the preferred settings to capture its current state:
-
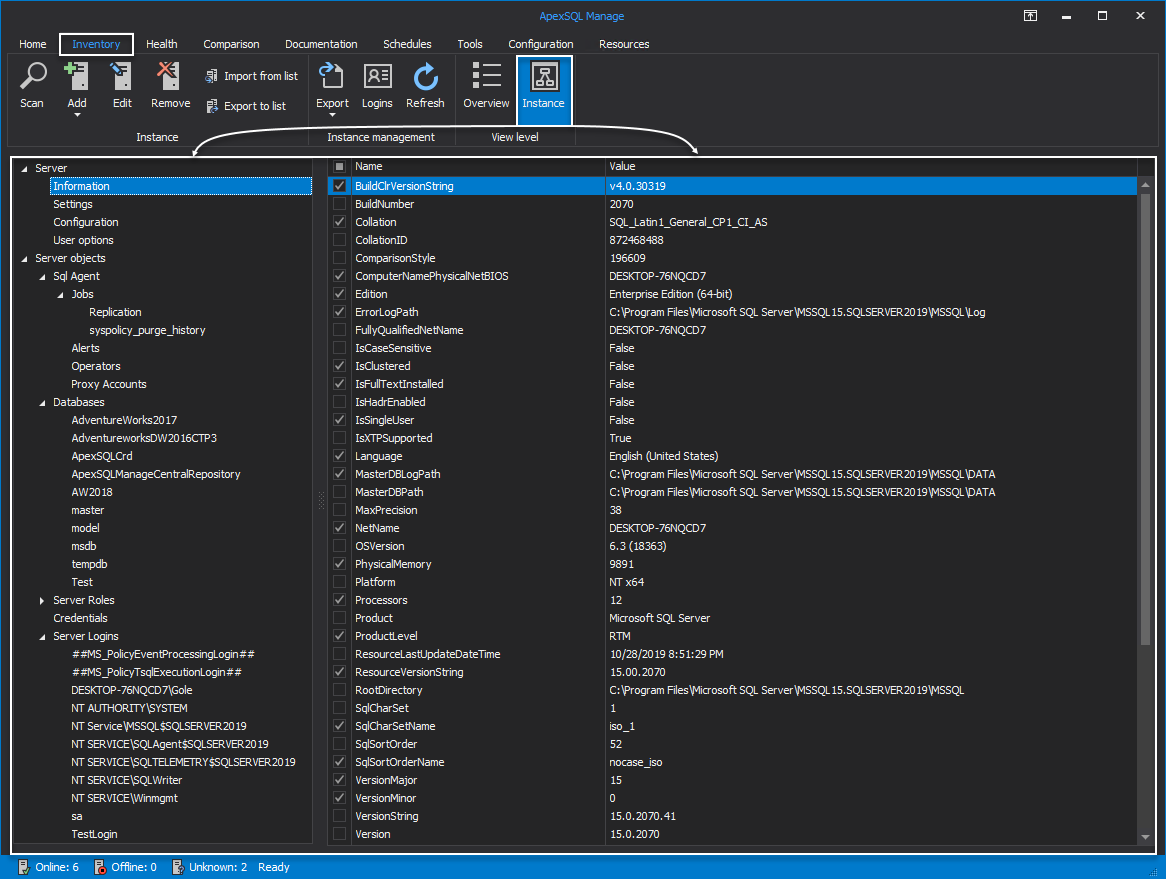
Note: To see in detail what each of those filters represent and what information include, head over to the Inventory tab, choose a SQL Server from the grid and click the Instance option under the View level section of ribbon:
In lower part of the Filters tab within the Create SQL Server snapshot window, the following three options are placed:
-
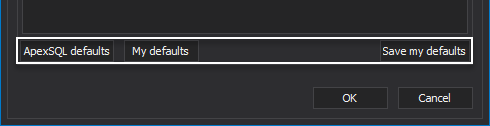
ApexSQL defaults – predefined filters are selected
-
My defaults – previously saved custom-selected filters are marked
-
Save my defaults – check the preferred filters and click this option to save them as the new My defaults choice:
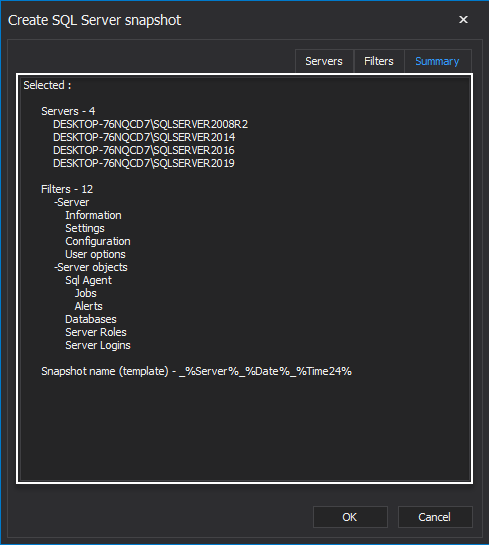
Within the Summary tab of the SQL manage instance tool, all previously selected options are displayed:
Click the OK button at the bottom to initiate snapshot creation for selected SQL Server instances based on the chosen filters:

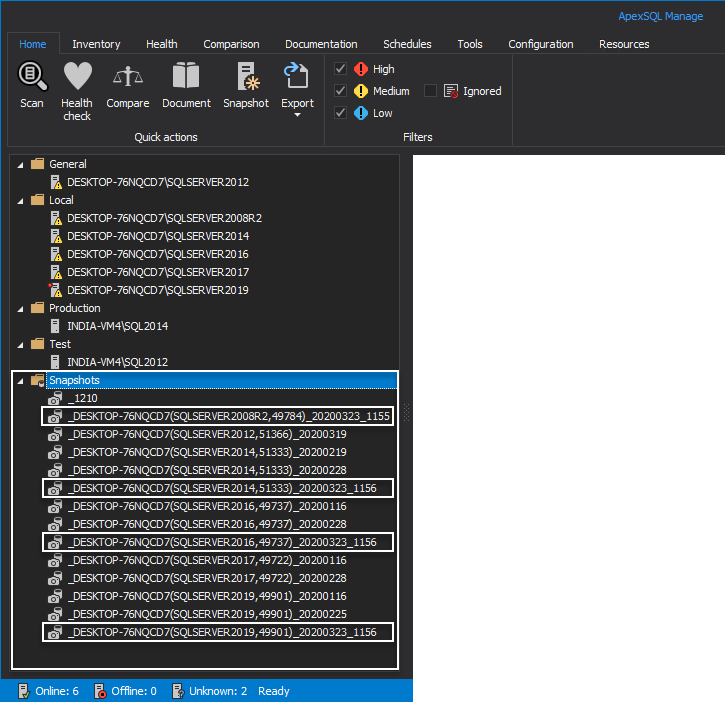
After the snapshots for selected SQL Server instances are generated, they are listed in the server panel under the Snapshots section of the Home tab:
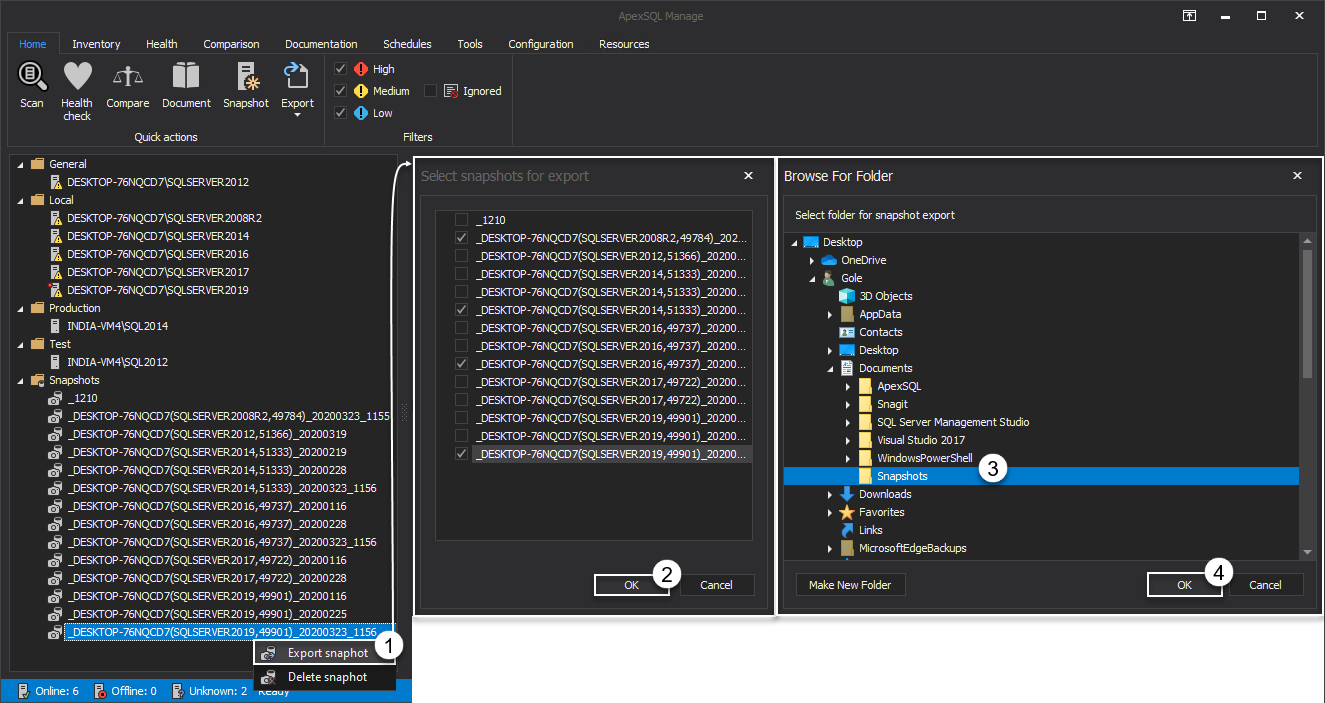
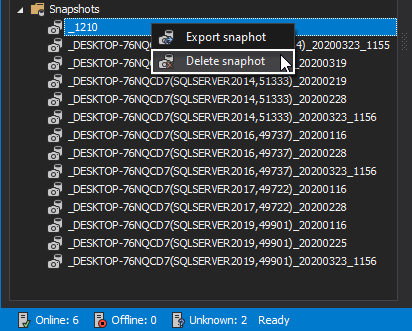
To delete or export snapshots, hover over any of the listed ones under the server panel and right-click on it, the following two options will be shown:
- Export snapshot – choosing this option will start the Select snapshots for export window from where the multiple snapshots can be exported to the custom location
- Delete snapshot – this option deletes the currently selected snapshot
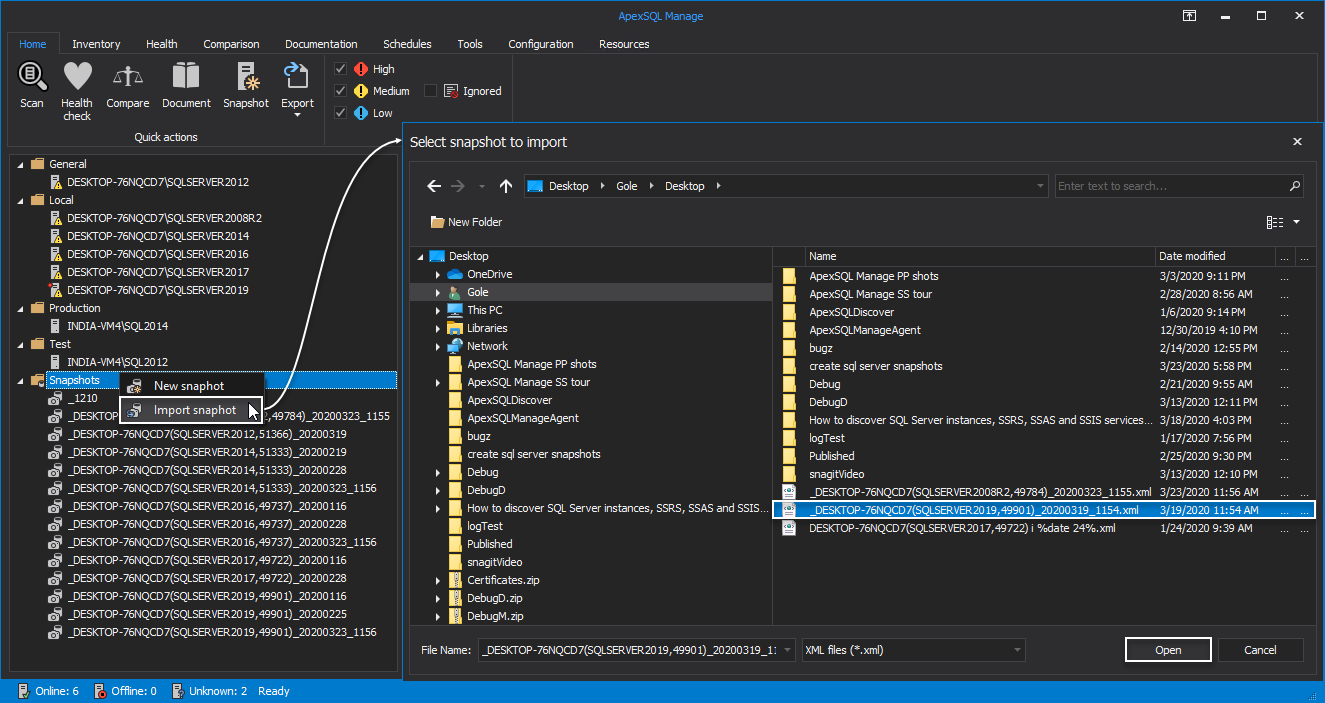
When right clicking on the Snapshots folder under the server panel, there are two options to choose from:
- New snapshot – this option initiates the Create SQL Server snapshot window
-
Import snapshot – choosing this will call for the Select snapshot to import window from where previously created snapshots can be easily imported:
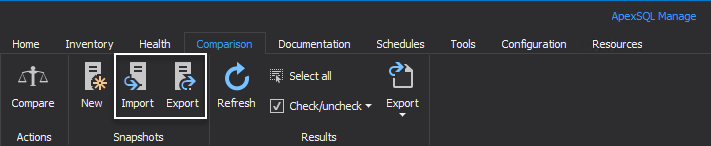
Additionally, SQL Server snapshots can be imported or exported, from the Snapshots ribbon section under the Comparison tab, by choosing the Import, Export options respectively:
To make comparison between two SQL Server snapshots and to see the results of it, please consult the How to make comparison between SQL Server instances and snapshots article.


