


Applies to
ApexSQL DevOps toolkit
Summary
ApexSQL DevOps toolkit offers a powerful, free and open-source collection of PowerShell scripts that will allow you to create and fully automate CI and CD workflow pipelines.
Description
In this worked example, we are going to assume just a few basic steps. If you want to add more or remove some, you can easily do that by following instructions in this tutorial.
In our example, we will create a continuous integration aka CI pipeline.
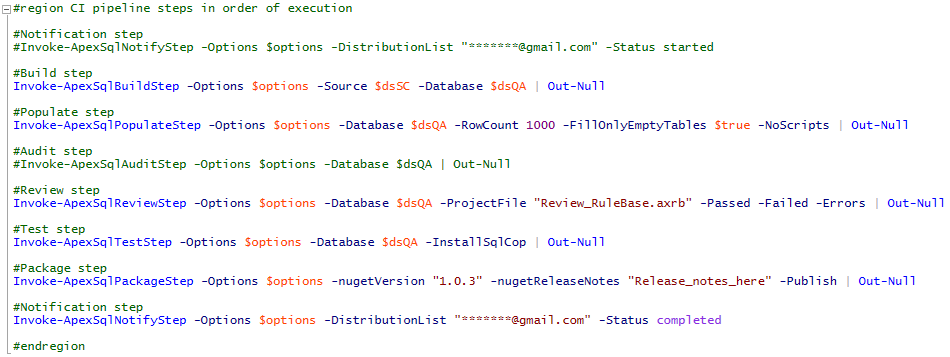
The steps we include are as follows:
- Build – this will pull scripts from a source control repository and create a new test database (destroying it first, if it already exists)
- Populate – this will fill up our newly created test database with synthetically generated test data, for tables not already populated with static data from step #a
- Test – we will run unit tests on our newly created database and abort the pipeline if they fail
- Review – we will run static database analysis against our test database to check to ensure best practices have been properly followed. If not, we’ll abort the pipeline
So, with that said, let’s get started…
Download
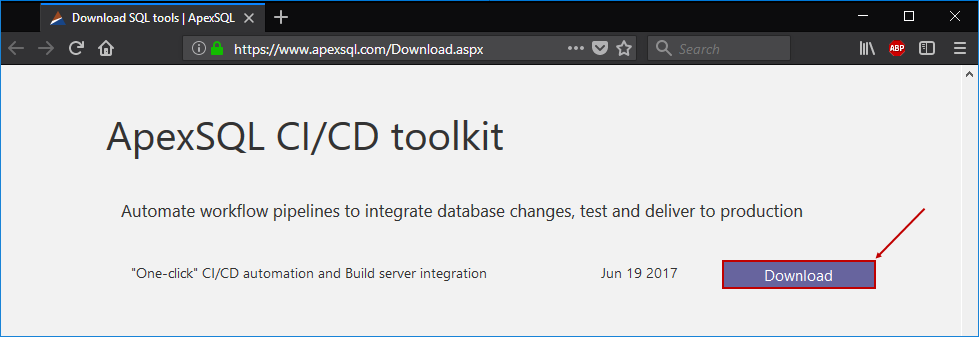
The first thing we need to do is to download the PowerShell scripts hosted on ApexSQL’s GitHub repository. This can be accessed via our download page or directly via this link:
Next, we’ll go ahead and download these scripts to our local client. To do this we check out article on How to download and install ApexSQL DevOps toolkit PowerShell cmdlets.
Installing
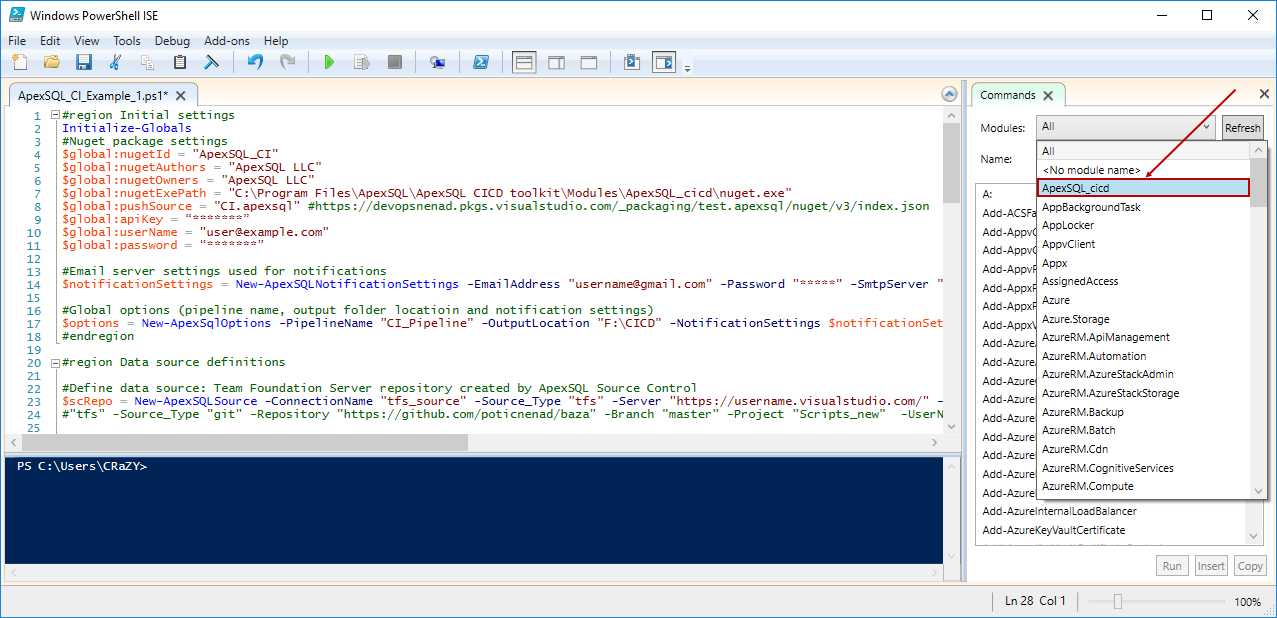
After downloading and extracting ApexSQL_DevOps_toolkit_PS_scripts.zip it is time to run Install.ps1 script which will make all needed functions to be available for use. Once the installation is complete, the complete list of functions can be found under the Commands panel, in the Modules drop-down list, when ApexSQL_DevOps is selected in Windows PowerShell ISE:
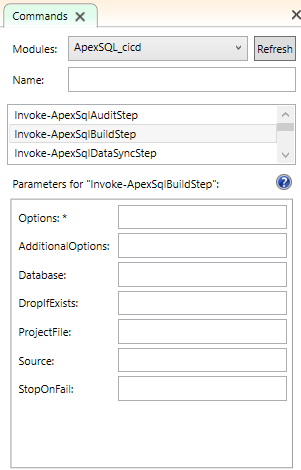
When selected, it will provide the list of all functions and if any of them is chosen, it allows to supply individual parameters:
Learn more about on How to install ApexSQL DevOps toolkit PowerShell cmdlets and How to initially configure the ApexSQL DevOps toolkit PowerShell one-click scripts.
File inventory
ApexSQL_DevOps_toolkit_PS_Scripts.zip includes the following files:
- Examples scripts:
- ApexSQL_CD.ps1
- ApexSQL_CI.ps1
- ApexSQL_DevOps.psd1
- ApexSQL_DevOps.psm1
- Install.ps1
- Package.nuspec
- Readme.txt
ApexSQL_DevOps.psm1 is PowerShell script module file where all needed functions are stored, while ApexSQL_DevOps.psd1 is module manifest file where min. system requirements (.Net, PowerShell version, etc.) are noted, along with script version, author, etc.
Install.ps1 is PowerShell script file which automates adding module to system in order to make new functions to be ‘callable’. After install script is executed successful, new (module) functions are ready to use. By executing Get-Module -ListAvailable it is possible to check if new module is added (in location where it is installed: “C:\Program Files\ApexSQL\ApexSQL DevOps toolkit\Modules”) to a list of available modules:

One more important file which is copied to installation location, besides ApexSQL_DevOps.psm1 and ApexSQL_DevOps.psd1, is Package.nuspec. This file is a template specification file which is used during packaging time. It consists of couple of variables which is assigned in example scripts and stores an information about author, company, owner of package etc.
The example scripts ApexSQL_CI.ps1 and ApexSQL_CD.ps1 are our recommended examples where users can see how to configure source and destination, how to use DevOps script steps itself along with rest of configuration. In this article, example we’ll be working with ApexSQL_CI.ps1.
NuGet
We’ll be using NuGet to package up all of our output including artifacts, log files, reports etc.
Download nuget.exe (min. version described in System Requirements section) and paste it in “C:\Program Files\ApexSQL\ApexSQL DevOps toolkit\Modules\ApexSQL_DevOps” directory. If you have already installed NuGet, assign the path to existing nuget.exe file to the variable $global:nugetExePath in both example scripts (CI and CD) and then this file will be used for package manipulation.
In order to make publishing (or fetching) the package to feed using the APIKey it is important to configure and set your feed (if it requires username and password authorization) up on your system. To do this, navigate PowerShell to your nuget.exe directory and run following commands:
.\nuget source add -name [custom_source_name] -source [feed_url] -username [username] -password [password]
.\nuget setapikey [ApiKey] -source [feed_url]
Now, it is possible to manipulate your feed by using only the APIKey.
Initial PowerShell script configuration
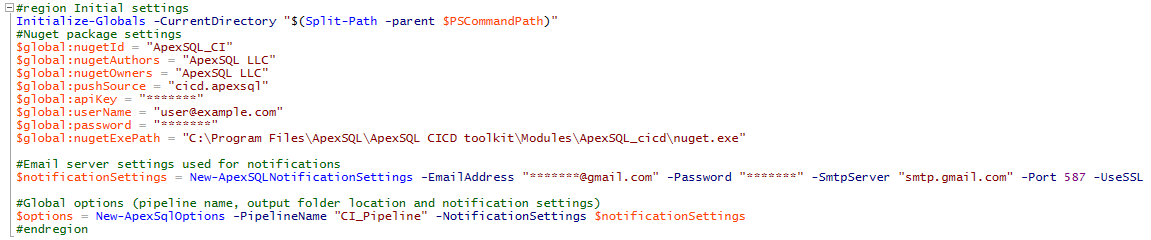
In both (CI and CD) example scripts, the very first section is Initial settings region – it is system level configuration section. This is where we set all of our pipeline level configuration settings that will impact all constituent steps in our pipeline, for example, email configuration and settings for notifications:
InitializeGlobals -CurrentDirectory $(Split-Path -parent $PSCommandPath)
We can use the parameter -CurrentDirectory to provide to our module location of current script with $(Split-Path -parent $PSCommandPath) as argument.
This next section covers all NuGet related information. NuGet is the technology used to push completed packages to production. All of these settings will be included in and/or configure the NuGet package.
$global:nugetId = “ApexSQL_CI”
$global:nugetAuthors = “ApexSQL LLC”
$global:nugetOwners = “ApexSQL LLC”
$global:nugetExePath = “C:\Program Files\ApexSQL\ApexSQL DevOps toolkit\Modules\ApexSQL_cicd\nuget.exe”
$global:pushSource = “cicd.apexsql”
$global:apiKey = “*******”
$global:userName = “user@example.com”
$global:password = “*******”
Use this section to set up email alerts including email address, smtp server, etc.
$notificationSettings = New-ApexSQLNotificationSettings -EmailAddress “*******@gmail.com” -Password “*********” -SmtpServer “smtp.gmail.com” -Port 587 -UseSSL
Global settings exist for things like the pipeline name, output folder location and notification settings:
$options = New-ApexSqlOptions
-PipelineName “CI_Pipeline”
-NotificationSettings $notificationSettings
#endregion
Note: The Default output directory is an example script location (script which is executed): here the [pipeline_name] directory will be created inside of which will be created timestamp directories. Also, users are permitted to add custom output path with -OutputLocation [path] to $options.
Adding data sources
Once the global settings have been configured, you will have to create data sources to allow the scripts to connect to your various source control repositories and databases.
|
Quick tip: These data sources are modular, so that once created they can be used in more than one step. Also, if they have to be changed, changing just one will update all steps that reference it |
In our case, we’ll want a data source $dsSC to connect to our source control repository to pull all of the scripts. And we’ll want a data source for the SQL Server on which we’ll create our test database, $dsQA. We’ll reference these data sources from the different steps based on the names provided e.g. $dsSC
- The build step will reference the source control repository data source, $dsSC
-
All other steps will reference the SQL Server live database data source representing the QA database, $dsQA
#Define data source (TFS example)
$dsSC = New-ApexSQLSource -ConnectionName “tfs_source” -Source_Type “tfs” -Server “https://devopsnenad.visualstudio.com/” -Project “$/Database/SourceControl_DB”
-UserName “*******@apexsql.com” -Password “********”In this example TFS is used as source, therefore following parameters are mandatory:
-Source_Type, -Server, -Project, -UserName and -Password.#Define destination DB
$dsQA = New-ApexSqlDatabaseConnection -ConnectionName “qaDB_dest” -Server “192.168.33.4” -Database “db_Temp” -WindowsAuthenticationAs destination is database, and mandatory parameters are:
-Server, -Database and -WindowsAuthentication (or -UserName and -Password).Note: -ConnectionName parameter is mandatory for both source and destination.
Managing steps
Now that you have configured the pipeline level variables and added the necessary data sources, you are ready to configure the actual steps in your pipeline
– Order – the steps are executed in the order that they exist in the script. To change the order just move steps up/down in the file
– To skip some step(s) – you can remove a step simply by deleting the code that runs it, but, also, it is enough just to comment the Invoke-[Step] function with # at very start of this line. In this example, the “Audit” step has been “removed” simply by adding a comment character, # at the beginning of the line.
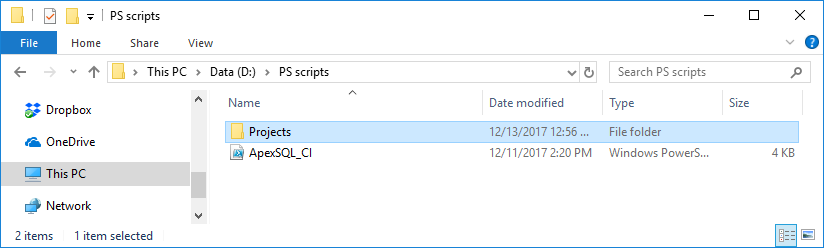
– To add reference project file 1 – for most steps a project file is required, which contains the options that will control how the step is executed, including configuration options, setting, output files and names, etc. To provide a reference to a project file it is important to create directory named Projects just beside the example script (e.g. ApexSQL_CI.ps1) and put project files in this directory:
-
Create directory Projects at location where is example script which will be executed:
-
Put project file(s) inside of Project directory. In this example, project files for ApexSQL Build (Build step) and ApexSQL Generate (Populate step) are placed in the Projects directory:
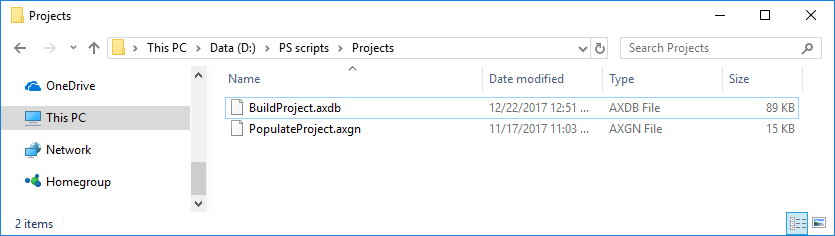
Then project file reference can be added to step configuration using the parameter -ProjectFile followed by project file name (including extension). Directory Projects should store all project files used in pipeline.
-
Reference the project file in wanted step configuration:

Note: It is important to keep in mind that if you use a data source in the same step where you “call” a project file too, the source/destination from project file will be overridden by the data source variables.
– Additional step customization Each step has several CLI parameters/switches (some of which are mandatory). For example, in step #Package step we use switch – Publish (in CI example) to perform a publish of created NuGet package to feed (which is already configured in Initial settings region). If we omit this switch NuGet package will not be published (but stays in pipeline output directory).
– To add an additional CLI switches it is enough to add parameter -AdditionalOptions followed by all desired switches and arguments (inside of quotes). Additional options are allowed for all switches which aren’t already ‘called’ by function parameters:

Note: Duplicate quotes for argument (””Secondary_out.xml””) is used due to PowerShell syntax in order to argument to be processed with quotes (“Secondary_out.xml”)
For example, if the following stays in build step:
-AdditionalOptions “/ot:db” -> this step will fail since it is already predefined that default output type is database and it is repeated once more.
Email notifications
If we execute given CI examples (from above) we get a following notification in an email:
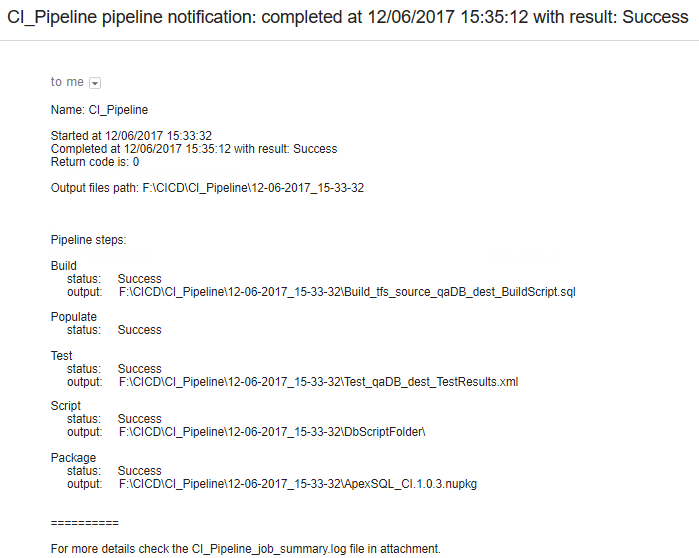
Note: – The Audit step is missing since we commented (excluded) it. The Populate step does not create an output file since we added switch-NoScript.
In this example, we configured steps in such way that we being notified only after CI process is completed (succeed or failed) skipping the first notification when we get a mail saying the CI process started on [datetime] step. This step is commented out (excluded). The notification, in general, consists of general information and steps information in orders as they are written.
General information includes pipeline name, starting and process ending time, pipeline result, etc.
Step information includes the step name, step status and output file name or directory name (if it produces output file(s), such as reports, scripts, etc.). If the step status is ‘failed’ then an exit/error code is displayed. In an email is attached general pipeline log which stores all verbose details.
Results
Result of CI example pipeline output include information written to file and also into the NuGet package.
In the information written to file, the pipeline name (e.g. CI_Pipeline), identifies the particular pipeline that was constructed and is displayed in the following output:
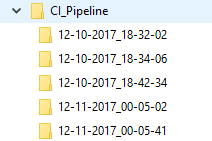
The output location is the top level directly where all artifacts, reports, summary files and documentation are placed during the execution of the pipeline. Sub-directories for each individual run of a pipeline, tagged by date and time, will be created for files associated with that particular pipeline run, so every single run of a pipeline creates a new timestamp directory inside of output location. Timestamp directory contents are NuGet package and pipeline job summary log file:

The Package file (e.g. ApexSQL_CI.1.0.3.nupkg) consists of all output files from all included steps:
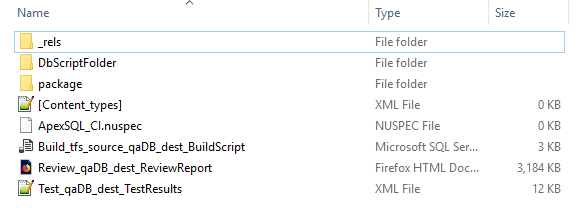
Pipeline output files created, in this example, were:
- Buld_tfs_source_qaDB_dest_BuildScript.sql (Build step) – this is the script to build our test database from the “Build” step
- Review_qaDB_dest_ReviewResults.pdf (Review step) – this is a report of best practice review results from the “Review” step
- Test_qaDB_dest_TestResults.xml (Test step) – this is a report of unit test execution results from the “Test” step
_rels, package (directories), [Content_Types].xml, and ApexSQL_CI.nuspec (files) are NuGet packaging process directories/files, and DbScriptFolder handles scripted qaDB database (also created in Package step by ApexSQL Script tool).
Learn more about CI/CD pipeline output files including a full inventory and description of all files, logs, artifacts, etc.
1 Steps which can accept project files are:
– ApexSQLBuildStep (ApexSQL Build)
– ApexSQLPopulateStep (ApexSQL Generate)
– ApexSQLAuditStep (ApexSQL Trigger)
– ApexSQLReviewStep (ApexSQL Enforce)
– ApexSQLTestStep (ApexSQL Unit Test)
– ApexSQLDocumentSyncStep (ApexSQL Doc)
– ApexSQLSchemaSyncStep (ApexSQL Diff)
– ApexSQLDataSyncStep (ApexSQL Data Diff)


