Description
This article describes how the ApexSQL Audit central repository database can be migrated to another SQL Server instance or host.
Migration scenarios
There are a number of scenarios when the migration of the central repository database used for storing audit information may be required. The most common scenario is that the server or SQL Server instance that hosts the repository requires maintenance (hardware or software upgrade), or is about to be replaced.
In such cases, it’s required to migrate the central repository database to a new (target) server/SQL Server instance and re-configure existing auditing instances, using the following migration checklist and action steps:
Export custom configurations for reuse
The migration process demands on reconfiguring the custom specifications and definitions, and ApexSQL Audit provides the ability to export and import following:
-
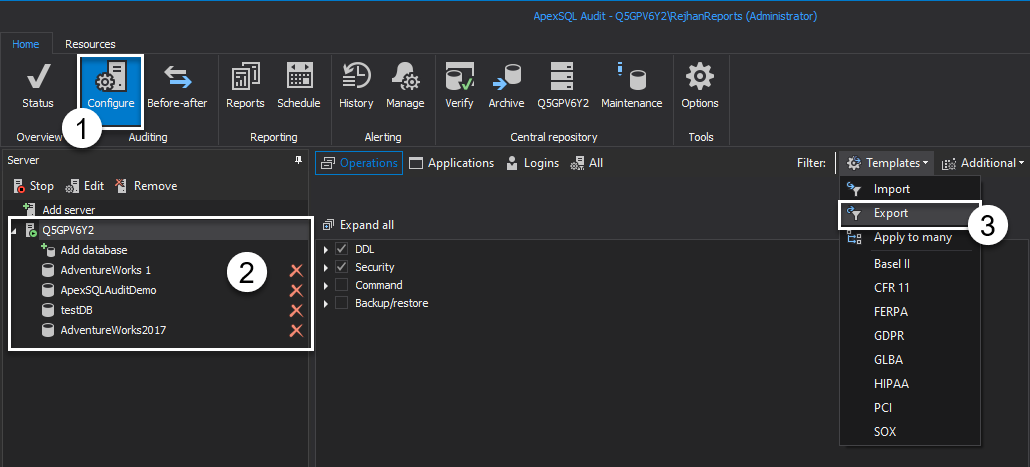
Auditing configuration
- Go to configure tab
- Highlight SQL instance or database level configuration
- Select Export from Templates drop-down
-
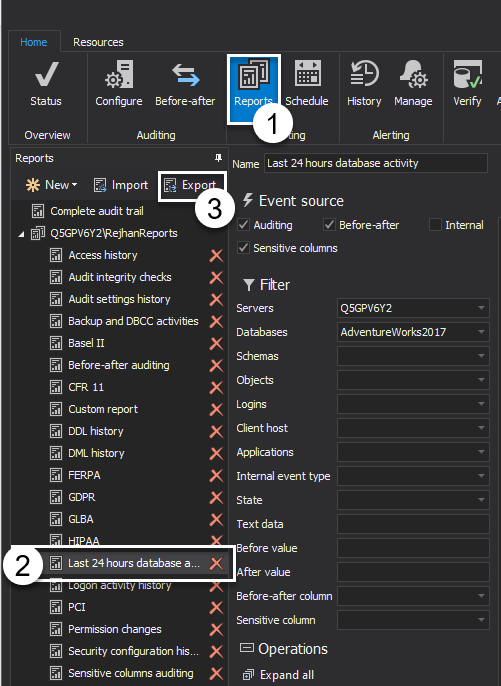
Report definitions
- Go to Reports tab
- Highlight the custom report
- Choose Export from header control buttons
-
Report schedule and alerts – similarly, both schedule and alert definitions can be exported
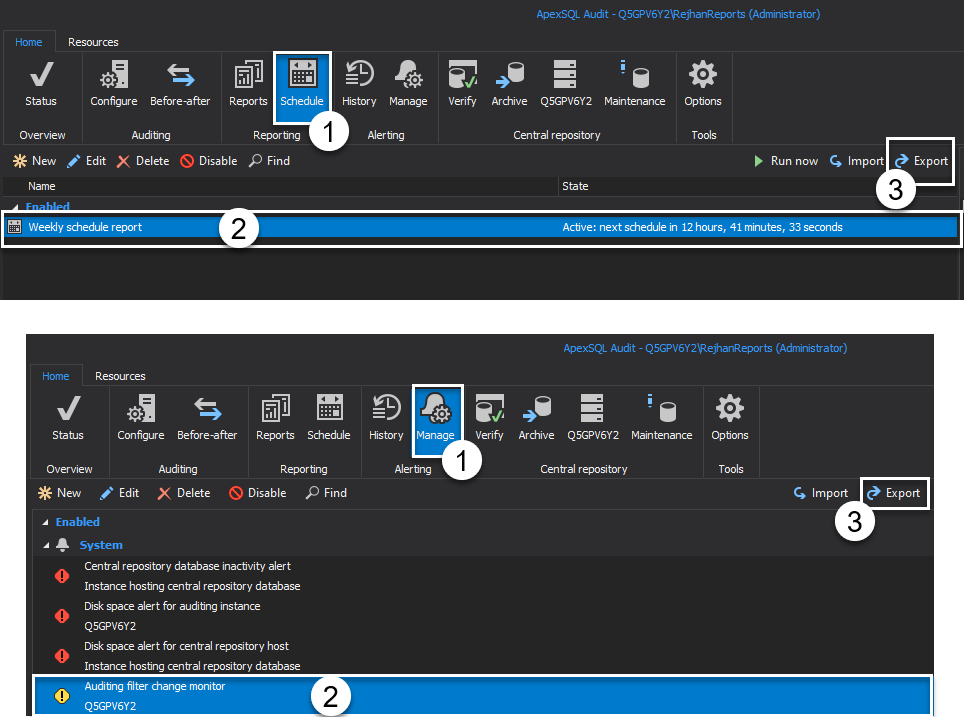
Now, the custom configurations can be easily replayed on the new central repository database by importing it.
Installation
Once the configuration is extracted from the central repository database, the next step is to create a new central repository database on a targeted SQL instance and host (e.g. ApexSQL_Central_repository_new)
Using the steps described in the Installing ApexSQL Audit knowledgebase article, install ApexSQL Audit on the target server/SQL Server instance. Once the GUI and central repository database are installed on the target server we can proceed further with reconfiguring auditing and update our system data to use a new database for storing audit data trail.
Prepare for data migration
Before we update system data to route the audit trail into a new database, we should consider data migration and prepare for it. First, let us archive the old central repository database in use as described in the Archiving the central repository database knowledgebase article.
Re-configuring auditing instances
After the installation of the new server, re-configure ApexSQL Audit auditing instances by adding them and importing the configuration. Here is a step-by-step scenario:
- Run ApexSQL Audit GUI and choose Configure tab
- Choose Add server and type SQL Server instance name or IP address of an instance you were auditing
- The auditing agent properties dialog will be populate the previously used data, so it is important to make sure new central repository host is updated here and click OK
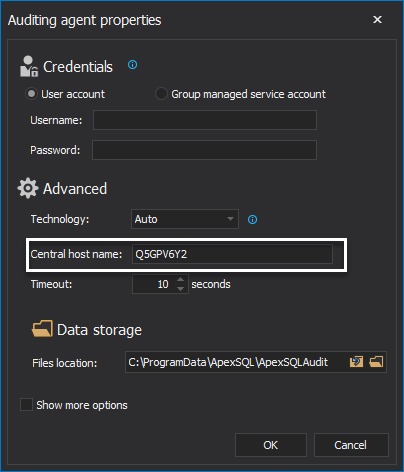
Afterwards, the instance is listed in server tree of the Configure tab, add auditing instances and database, and import custom configurations
Migrating archived audited information
Once the new central repository database is live and in use, you can migrate audited data that was being collected in the past from the old SQL Server instance to a new central repository instance for reporting purposes.
The archived databases use the ArchiveCrd_yyyymmdd_hhmmss database name pattern (e.g. ArchiveCrd_20200522_171318). To migrate the databases, create a backup of all archive databases and restore the backups to the new SQL Server that is being used to host the central repository database.
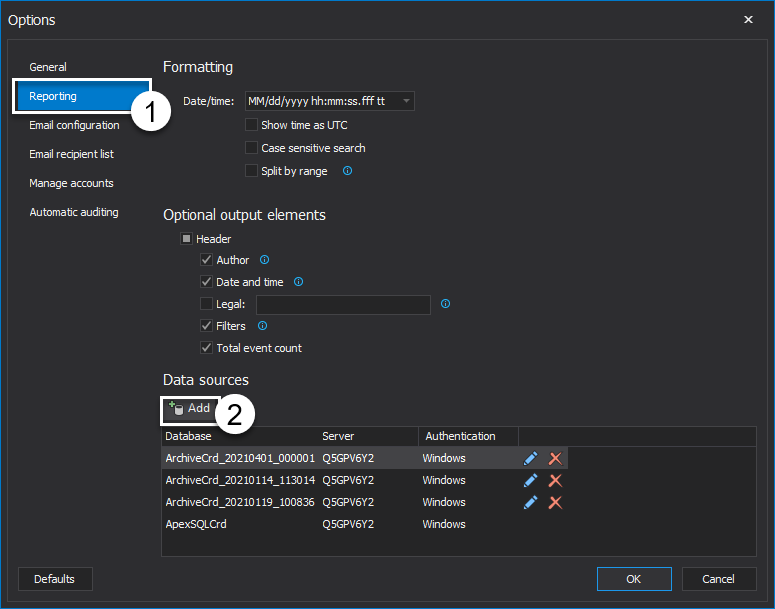
After the archive databases are up and running on a new instance, go to Options -> Reporting -> Add. Repeat database addition for each archive database that is restored on a new SQL Server instance
Data and files clean-up
On the old central repository host, there might be some left-overs that can be removed. After the product is uninstalled on the old repository host, you can consider keeping or removing data and files as it is detailed in this How to perform full application files cleanup after uninstalling ApexSQL Audit article.


