


Applies to
ApexSQL Recover
Summary
This article explains how to use ApexSQL Recover to retrieve data from an MDF file and offers advice on how to increase the amount of recovered data.
Description
When an incident occurs, it is important to take all precautions in order to protect the data and to increase chances of successful recovery. It is highly recommended to perform following steps immediately after an incident occurs:
- Take database offline – detach it from SQL server
- Create copies of the MDF and LDF files
- Attach MDF and LDF files copied to another SQL server
- Use appropriate recovery options in ApexSQL Recover to salvage lost data
Even though ApexSQL Recover’s full functionality is available only for databases in full recovery mode, it is still possible to use it in order to recover data loss when the database is in simple recovery mode. In this case, ApexSQL Recover can be used to recover deleted, dropped or truncated tables and even deleted blobs by directly reading from MDF file. This is possible due to the nature of SQL server that deletes logically, marking data as non-existing, but in reality, this data still exists in the MDF file. Eventually, it will be overwritten in the MDF file too, and this is why it is important to perform the post-incident steps described above. Additional measures that can be taken in order to increase chances of successful recovery are described in the article How to use ApexSQL Recover after data loss?
The main limitation of the simple recovery model is the fact that there are no transaction log entries, and hence no transaction log backups that would contain information about transactions you want to recover from.
Here are the steps that need to be executed:
-
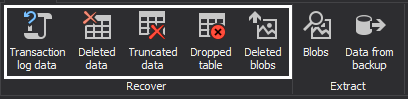
Start ApexSQL Recover and select the most appropriate option for your case from the Data recovery options
-
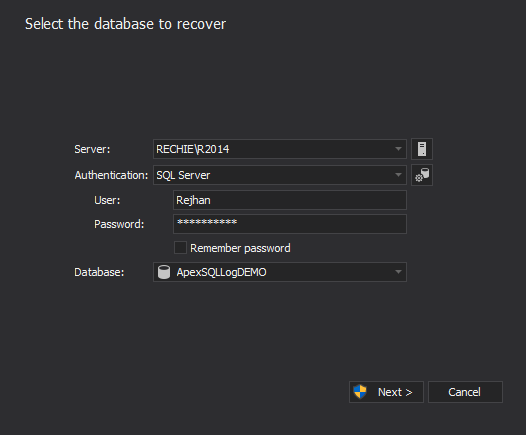
Enter valid credentials in order to connect to SQL server and database
-
In case of performing data recovery from DELETE or DROP operations, in the ‘Are additional data sources available?’ step of the recovery wizard, select ‘No additional transaction logs are available’ option (this step doesn’t exist in case of Data recovery from TRUNCATE operation or deleted BLOB’s recovery)
Note: the Date/time filter is not available when there are no transactions logs available
-
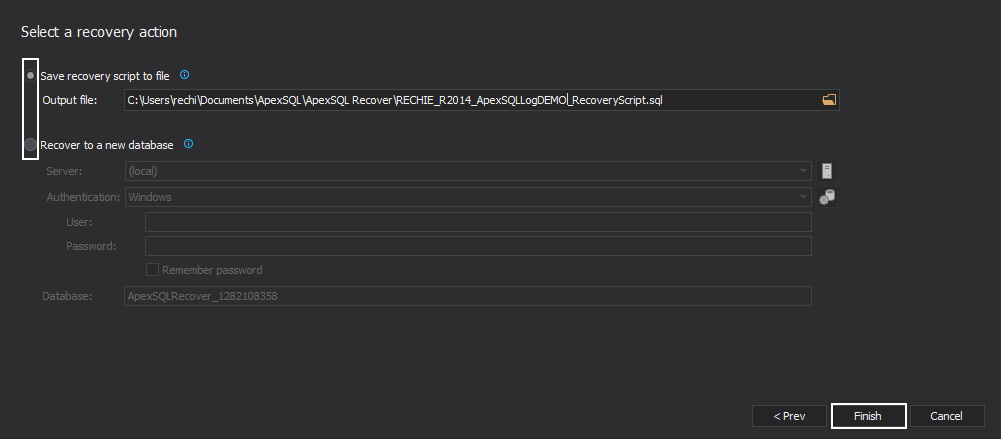
In the final step of the recovery wizard, choose the recovery action that suits your needs the best, recover directly to a new database, or save the recovery script to file that can be executed later. Click on the Recovery button to finish the wizard/recovery process.
There are 2 important notes when recovering a database in simple recovery model:
- Due to the nature/limitations of the recovery model it is not possible to guarantee 100% recovery. The sooner the pre-cautionary measures have been enforced, the greater the chances for successful recovery get.
- Recovering database in simple recovery model via the described method can result in false-positive results (less than 1%) in addition to the recovered data, process results will contain recovery for data than hasn’t been deleted/dropped/truncated. Due to this fact, it is recommended to examine recovery scripts carefully before executing them on the databases.
Last updated:
8/9/2018


