Applies to
Summary
In this article, it will be explained how to document MySQL databases using the MySQL documentation tool.
Description
ApexSQL Doc for MySQL is a new tool for documenting MySQL databases. There are no significant differences between using ApexSQL Doc and ApexSQL Doc for MySQL. This will greatly improve the process for developers who are already familiar with the ApexSQL Doc.
Complete database preparation, choosing which database objects and database options will be documented process is very straightforward. Using the MySQL documentation tool, the object types such as tables, procedures, functions, etc. can be documented. The MySQL database can be documented in six output file formats (CHM, HTML, Microsoft Word DOC, DOCX, PDF, and Markdown)
Sakila database will be used in this example in order to demonstrate the process. The database will be documented using ApexSQL Doc for MySQL with ApexSQL default settings.
Connection to the server
The first step is connecting to the server. When the Add database button is clicked from the Home tab, the Connection dialog will appear.
In this dialog, the following details need to be the configurated:
- Name – type name of the connection for later usage
- Type – select Type of the connection from the drop-down list
- Server – select Server from the drop-down list
- Port – in the Port field enter the port number
- User – type User name
- Password – type Password
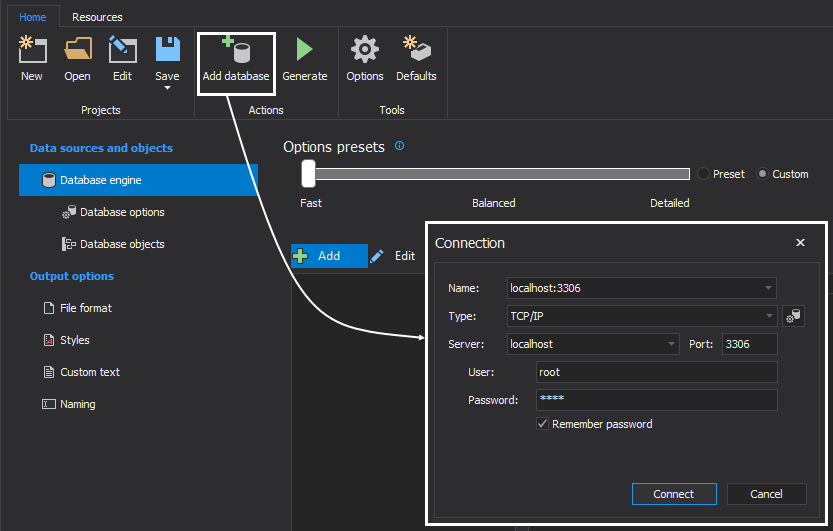
When the Connect button is clicked, connection to the server will be established. All databases from the selected server will be loaded and shown in the database section on the right side of the MySQL documentation tool. By defaults, all databases will be unchecked:
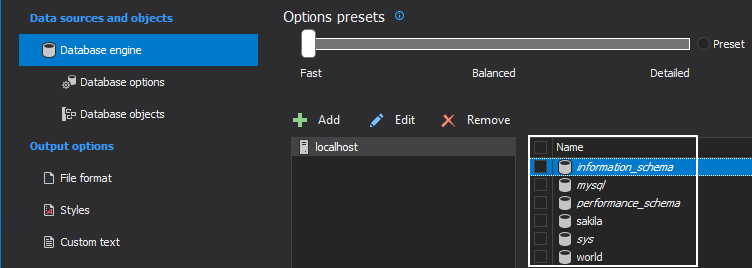
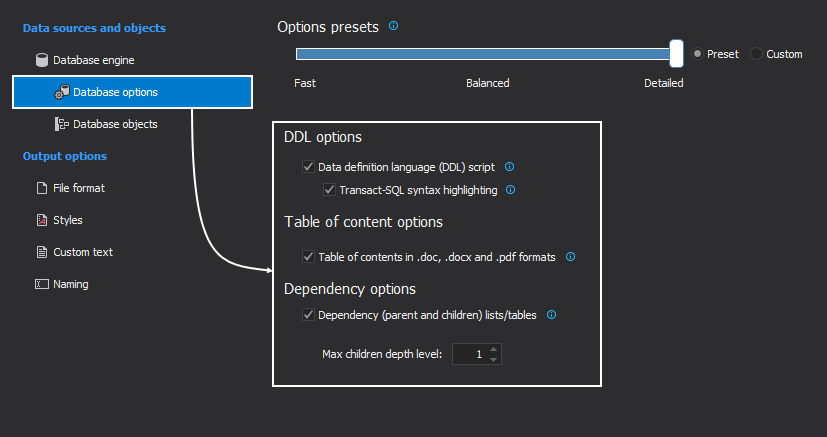
Check the desired database; in this case, it will be sakila. When a database is selected, click on the Database options tab in the Database engine panel:
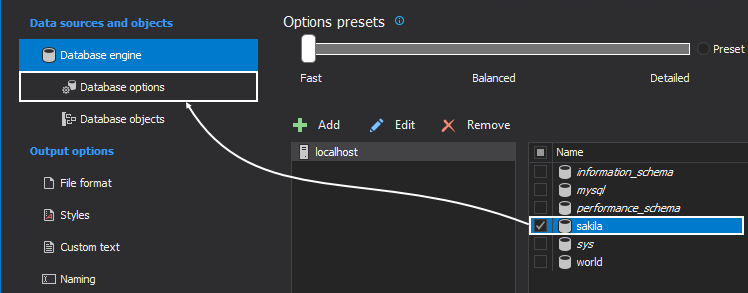
The Database options tab
In this tab, advance options for adding system objects such as DDL, Table of content and Dependency options can be checked and included in the database documentation. By default, all of those options will be checked, as shown in the screenshot below. This can be changed by checking/unchecking checkboxes for options, and it will determine which database options will be included in the documentation. Depending on how many options are checked and included in the database documentation, the process of generating documentation will take more time.
In this case, ApexSQL defaults options will be used:
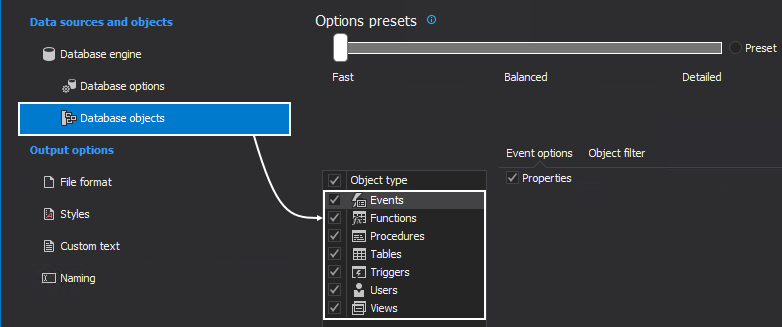
The Database objects tab
In the Database objects tab, the Object type grid will be shown in the middle of the main diagram window.
Object type grid contains database objects, and by ApexSQL defaults, all objects will be selected.
The database developer can check/uncheck the desired object, which will be documented.
In this case, all object types are selected:
|
Quick tip: If all objects from the Database objects tab are checked, the generate documentation process will take more time |
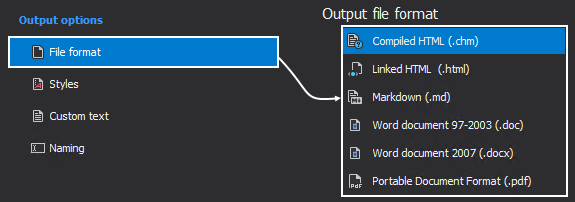
The next step is to select the output file format. This can be done with a click on the File format tab from the Output options panel, then select the desired file format:
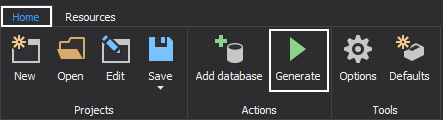
To generate documentation, click the Generate button from the Home tab:
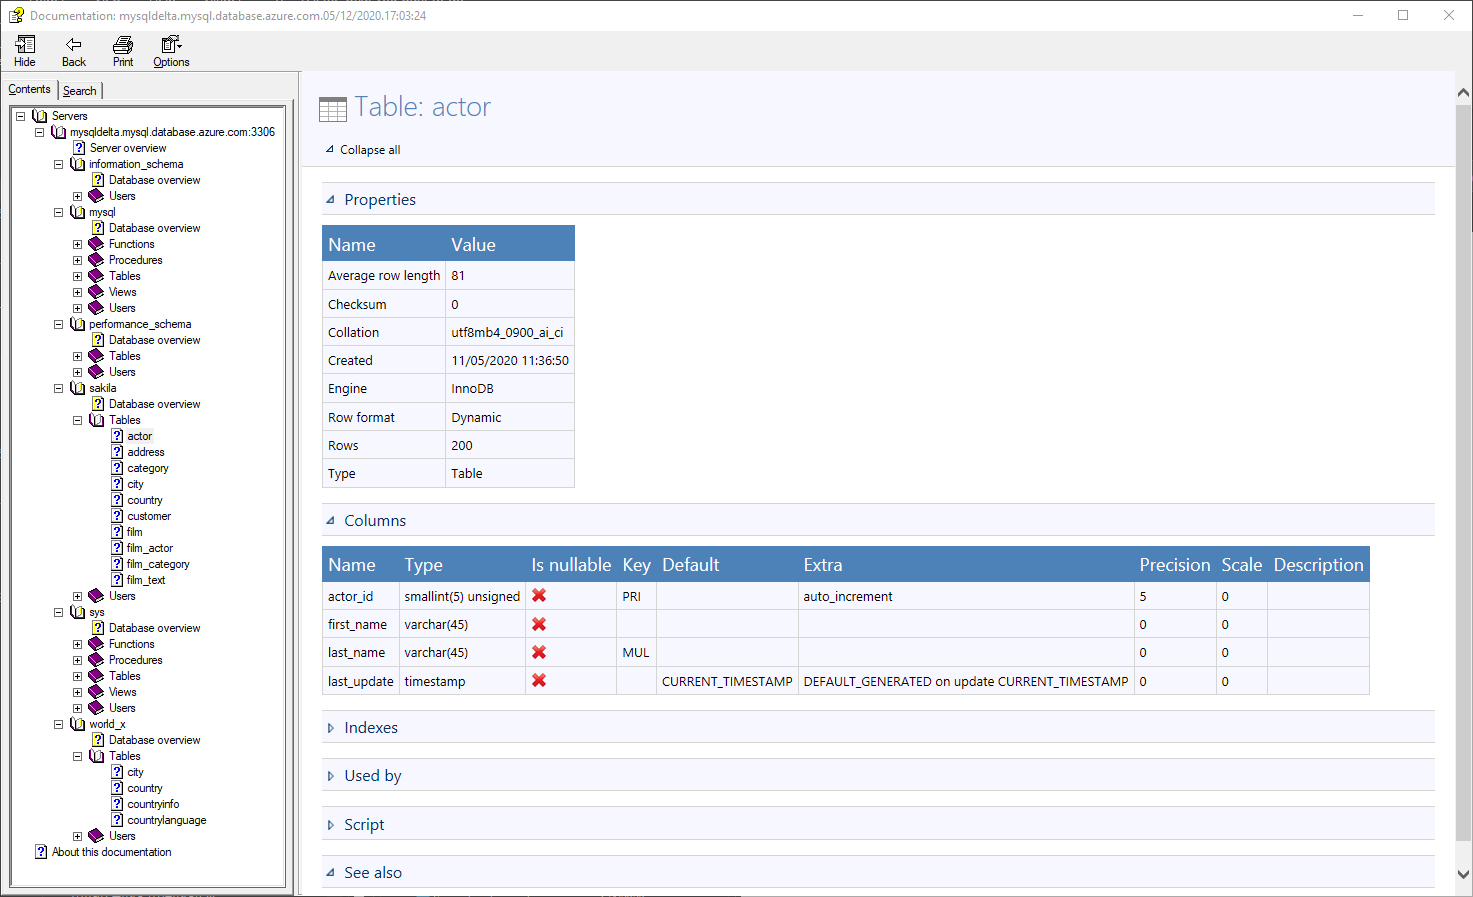
Here’s an example of how the documentation in the CHM format looks like, using the MySQL documentation tool: