


Applies to
All ApexSQL console applications with Command line interfaces (CLI)
Summary
This article describes how to schedule ApexSQL tool tasks to run unattended, overnight, etc., using Task Scheduler and a PowerShell script (.ps1 file) that automates ApexSQL Diff, via the command line interface
Description
In the following example, ApexSQL Diff will be used to schedule schema synchronization, using a project file, and create a time stamped HTML report and finally output the application execution results to a text file, to be run each night at 1:00 AM:
-
Open a text editor and enter the following ApexSQL Diff CLI switch values (learn more about ApexSQL Diff CLI switches from here), into the PowerShell script:
$diffLocation = "ApexSQLDiff"
$today = (Get-Date -Format "MMddyyyy_HHmmss")
$diffParameters = "/pr:""MyProject.axds"" /ot:html /on:""Report_$today.html"" /out:""Output_$today.txt"" /sync /v"

(Invoke-Expression ("& `"" + $diffLocation +"`" " +$diffParameters))

"ApexSQL Diff return error code is $LASTEXITCODE" >> "Output_$today.txt"
Explanation of the above PowerShell script:
$diffLocation = “ApexSQLDiff” # specifies variable for path to the CLI executable file of ApexSQL Diff $today= (Get-Date -Format “MMddyyyy_HHmmss”) # specifies variable for current date and time that will be used as time stamp for HTML report and output file $parameters = # specifies variable for ApexSQL Diff’s CLI switches “/pr:””MyProject.axds”” # the path of the application project file /ot:html # specifies HTML output type /on:””Report_$today.html”” # the path of the HTML report, along with the time stamp variable /out:””Output_$today.txt”” # the path of the output file for application execution, along with the time stamp variable /sync # executes the synchronization script /v” # prints all messages in console (Invoke-Expression (“& `”” + $diffLocation +”`” ” +$parameters)) # runs all specified variables “ApexSQL Diff return error code is $LASTEXITCODE” >> “Output_$today.txt” # return error code upon finished synchronization process is added to the application’s output file Save the above code as a PowerShell script (*.ps1) file.
In this example, Windows authentication was used in the project file, but if a SQL Server authentication is needed, the provided login password will be encrypted in the saved project file. For other ways of handling login credentials, check out article on this link.
Find out more about using Command Line Interface (CLI) switches in ApexSQL tools from here.
-
Click the Windows button, type schedule, and click the first find in the list, e.g. Schedule tasks:
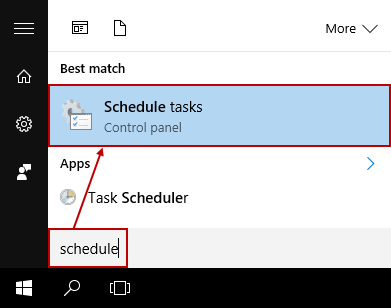
Note: Both, Schedule tasks and Task Scheduler will open the same window (see below), so any of these two can be used.
-
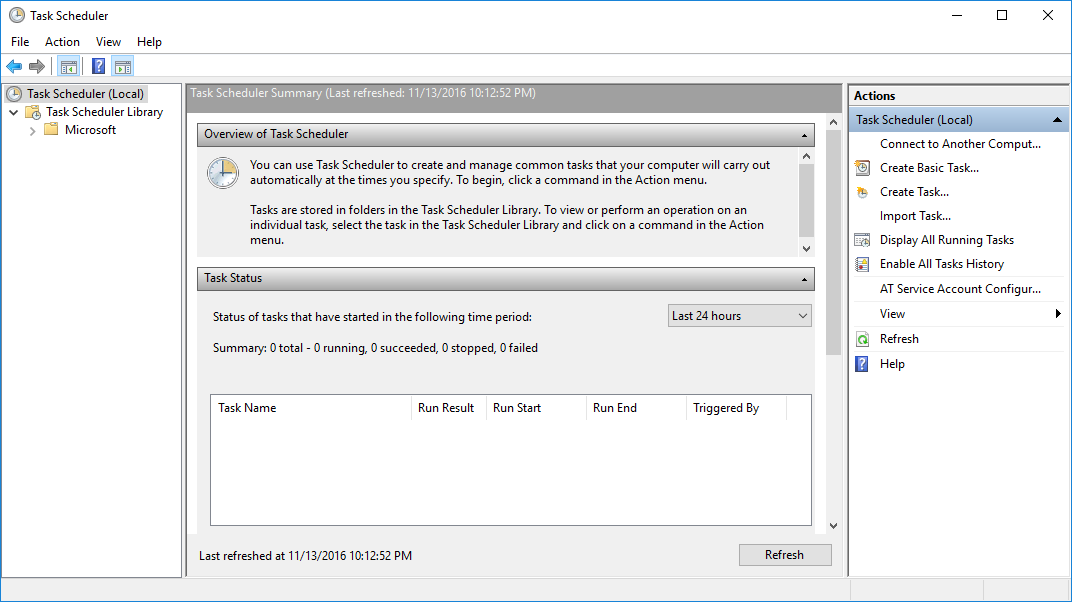
The Task Scheduler application window will be opened:
-
As shown in the screenshot above, there is the Microsoft folder in the left pane (if not shown, expand the Task Scheduler Library node), which contains all scheduled tasks by the Microsoft operating system. In order to organize tasks properly and don’t mix tasks, a specific folder where newly created tasks will be kept can be created in the following way:
-
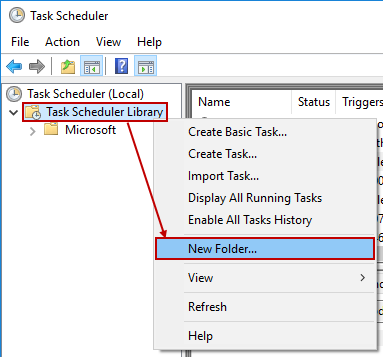
Select the Tasks Scheduler Library in the left pane and right-click it, and choose the New folder option:
-
Enter the name of the new folder and click the OK button:

-
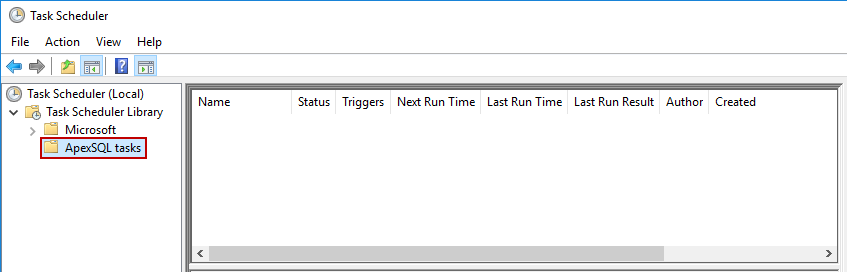
The newly created folder (in this example, ApexSQL tasks) will be located under the Microsoft folder:
-
-
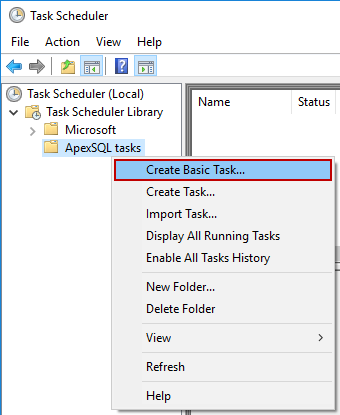
Right-click the newly created folder (ApexSQL tasks) and choose the Create Basic Task or Create Task option. In this example, the Create Basic Task is used, as it opens the wizard, which is easier to set up:
-
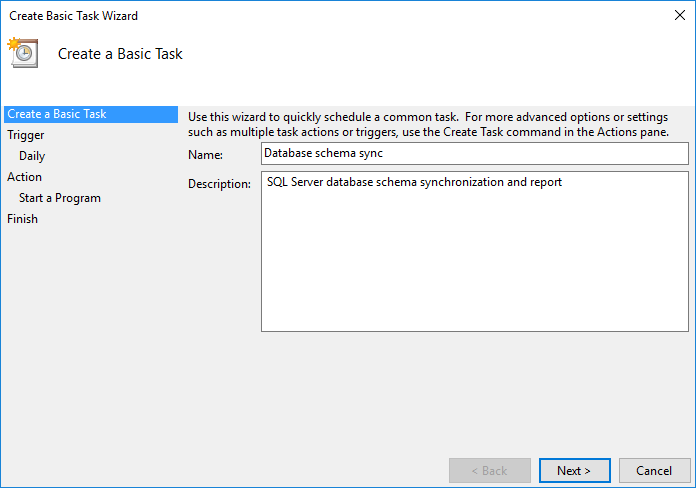
In the Create a Basic Task tab, enter the task name and its description, and click the Next button:
-
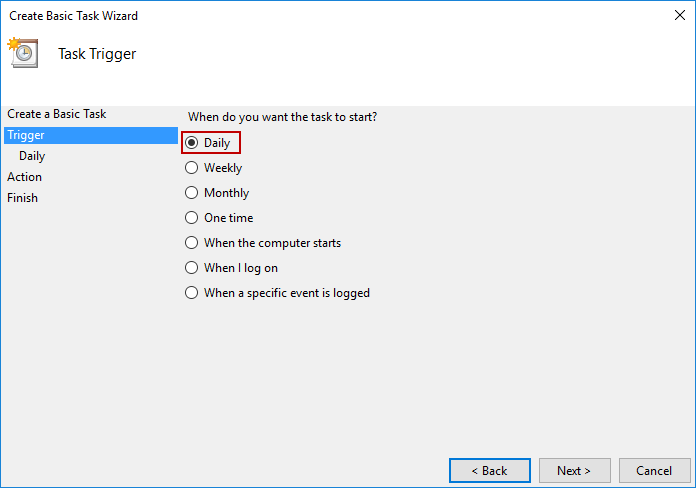
In the Trigger tab, choose when will be the task started. Since in this example it should be run each night at 1 AM, the Daily option is chosen and click the Next button:
-
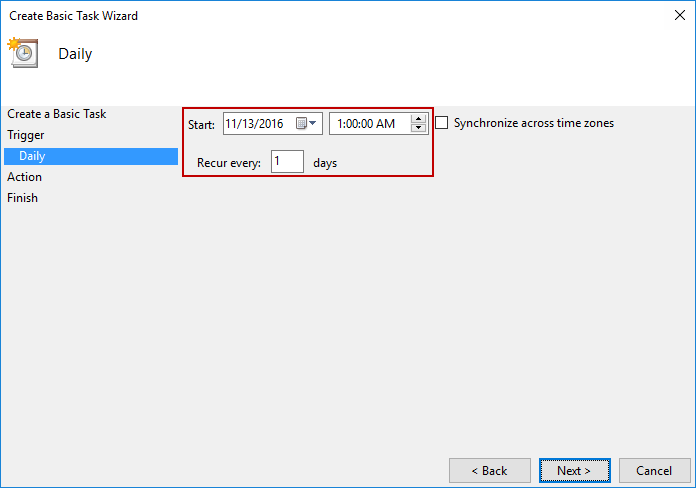
In the Daily tab, enter the start time of the task and when it should recur and click the Next button:
-
In the Action tab, choose the Start a program option and click the Next button:
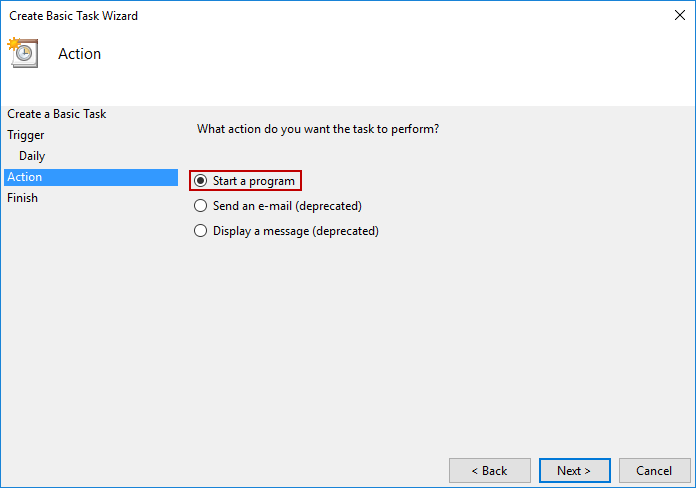

Quick tip:
The Send an e-mail and Display a message options are deprecated from Windows 8/Windows Server 2012
-
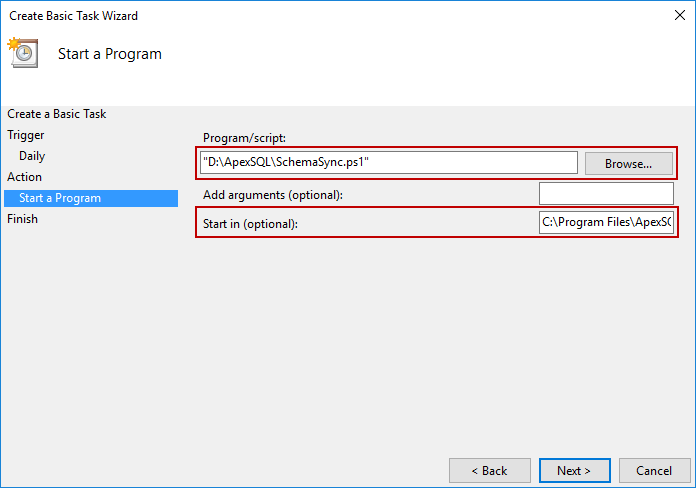
In the Start a program tab, click the Browse button and locate the batch file that was created in the beginning. Also, for the Start in (optional) option, enter the ApexSQL tool (in this case ApexSQL Diff) installation folder:
-
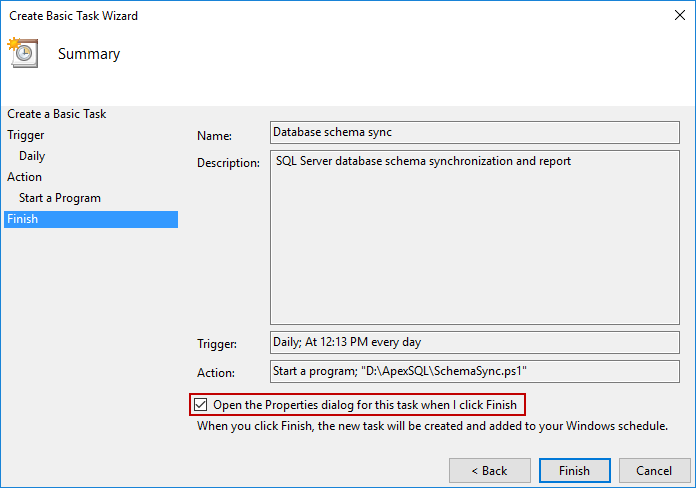
In the last tab of the wizard, the Finish tab, all previously set task options can be reviewed and if needed click the Back button to go back to the step which needs to be edited. At the end, check the Open the Properties dialog for this task when I click Finish option and click the Finish button:
-
The Properties window for the created task will be opened and under the General tab, check the Run with highest privileges option to ensure that the task will be completed successfully. Also, if needed, switch to the Run whether user is logged on or not option to execute the task even if the selected user is not logged on:
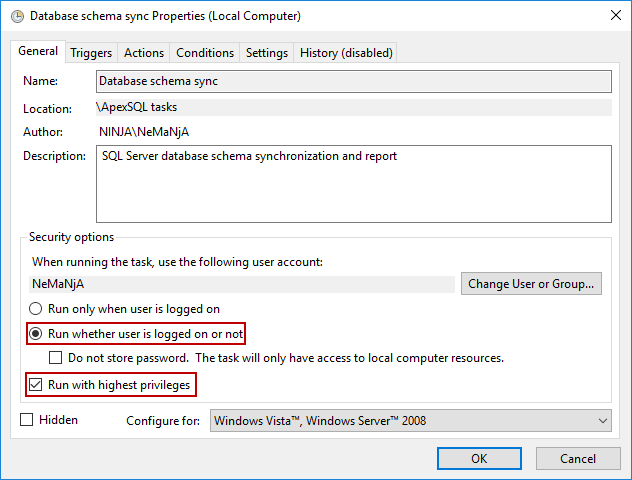
Quick tip:
The account used needs to have sufficient SQL Server privileges as well as the Write permission on the folder where the report will be saved. If the account doesn’t have the necessary privileges, the task will fail. To curtail this problem, change the User or Group under which the task will be run
-
Switch to the Conditions tab, in the opened Properties window, and if the Run whether user is logged on or not option was previously set, check the Wake the computer to run this task option. Additionally, if the batch file will be executed against a database which is located on a server on a specific network, check the Start only if the following network connection is available option, choose that network connection from the drop-down list, and click the OK button:
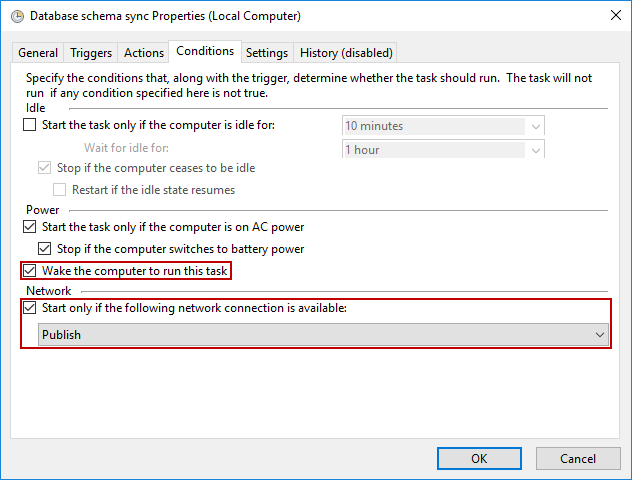
Quick tip:
If the scheduled batch file will be executed against a database on a remote server, the task must be configured for the remote server operating system as well
-
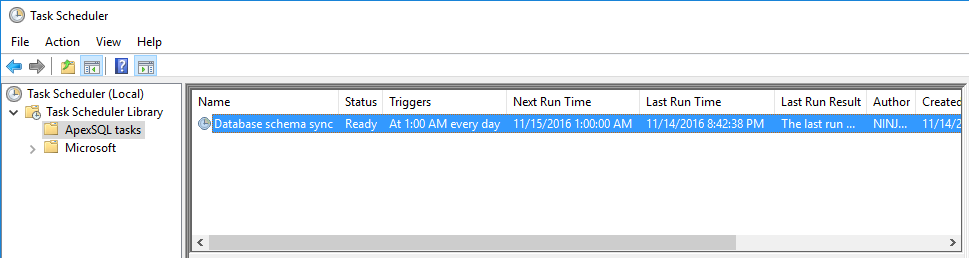
Once the OK button was clicked, the Properties tab will be closed, and the scheduled with all of its settings will be shown in the Task Scheduler window under the previously created folder:
-
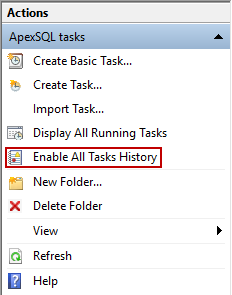
To keep track of the task history, click the Enable All Tasks History button in the Actions pane on the right-side:
-
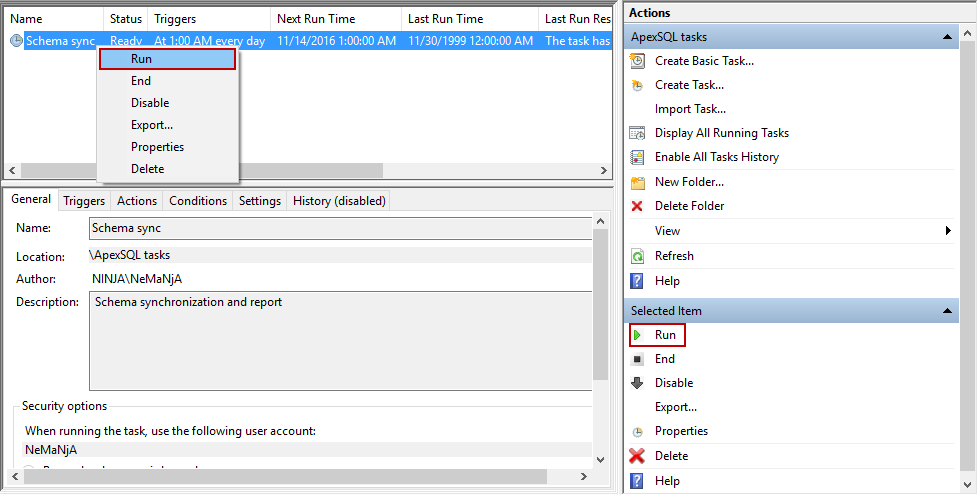
To test if the scheduled task will be executed successfully, right-click the selected task and select the Run option or select a task and click the Run button in the right pane:
-
The status of the task will be changed into Running:

-
Click the Refresh button and check the Last Run Result column if the task was completed successfully or not:

-
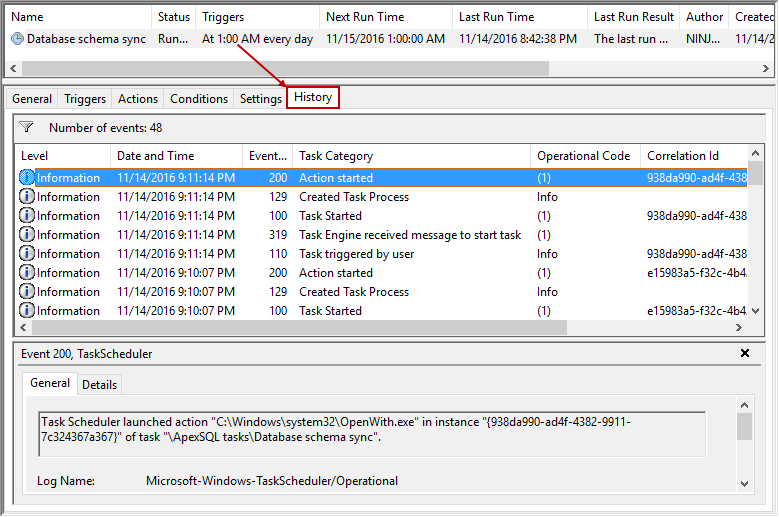
As the task history was enabled, by selecting the created task and switching to the History tab below, all information regarding this task can be viewed:
Additionally, check the time stamped Output.txt file that the ApexSQL tool created and see the summary of the execution process:
-----------------------------------------------------------------------
Synchronization summary:
-----------------------------------------------------------------------

Database 'Library' was successfully synchronized on 14-Nov-2016 09:12:56

Warnings:	1		See 'warnings.log'
Updated:	0
Added:		3
Deleted:	1
Synchronized:	4		See 'changes.log'

-----------------------------------------------------------------------
Changes:

Object            	     Updated            Added          Deleted
-----------------------------------------------------------------------
Roles				0	         0                0
Schemas				0                0                0
Data types			0                0                0
Procedures			0                2                1
Tables				0                1                0
Users				0                0                0

Total:				0                3                1
-----------------------------------------------------------------------

ApexSQL Diff return code is 0
In this way, any ApexSQL tool (that has a CLI) can be scheduled and run unattended, at specific time. By creating a specific folder for ApexSQL tool tasks, each of them could be easily found and managed/edited.


