


For the popular Jenkins build-server a set of build steps is available in form of ApexSQL DevOps toolkit plugin. This plugin has all necessary steps to use for SQL database DevOps to setup continuous integration and continuous delivery workflows. These steps will cover basic needs to build, test, pack and deploy SQL Server database changes from development, committed to source control to a package, that can be tested, reviewed and ultimately deployed to production via a continuous delivery (CD) pipeline.
In order for this plugin’s available steps to function a set of SQL developer tools needs to be present on the Jenkins build machine.
Installation
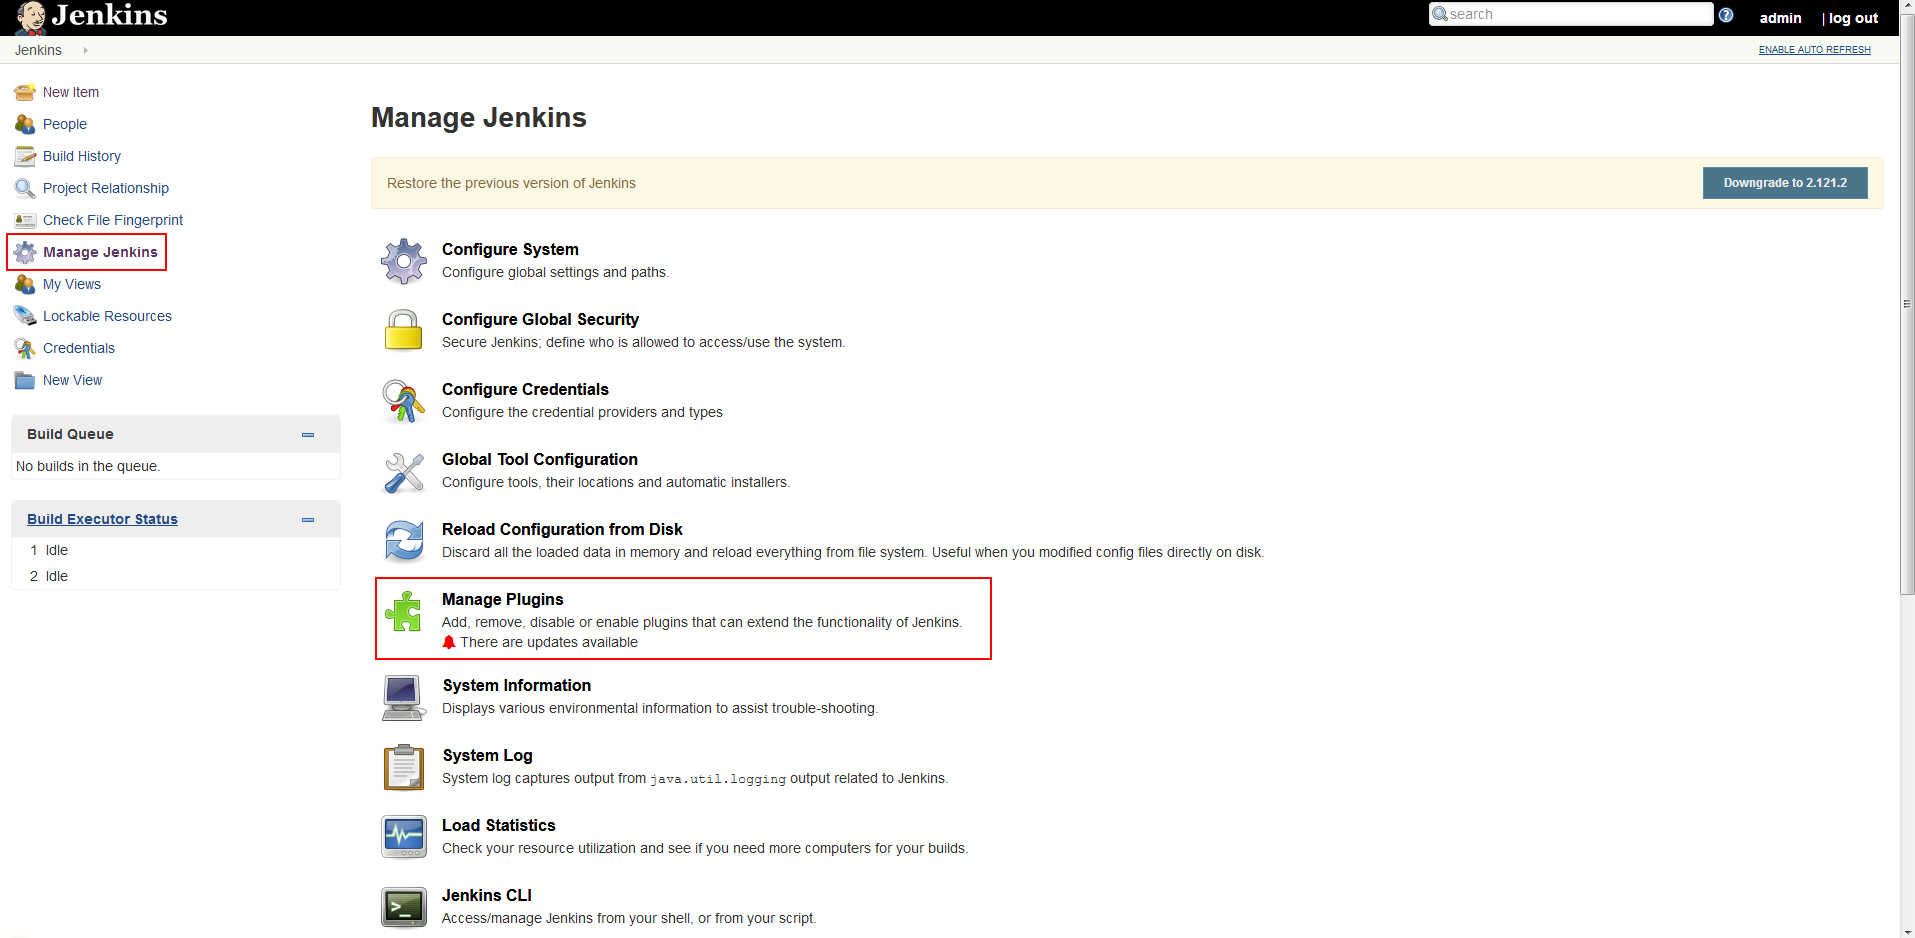
Installation of plugin is done in a usual way as for all other Jenkins plugins. From the home page use the Manage Jenkins link from the options list on the left side of the screen then from the selection of displayed options go to Manage Plugins option.
Further on, go to Advanced tab in order to upload the plugin installation file obtained from ApexSQL Downloads page. In the Upload plugin section of the Advanced tab click the Browse button and navigate to the installation file location.
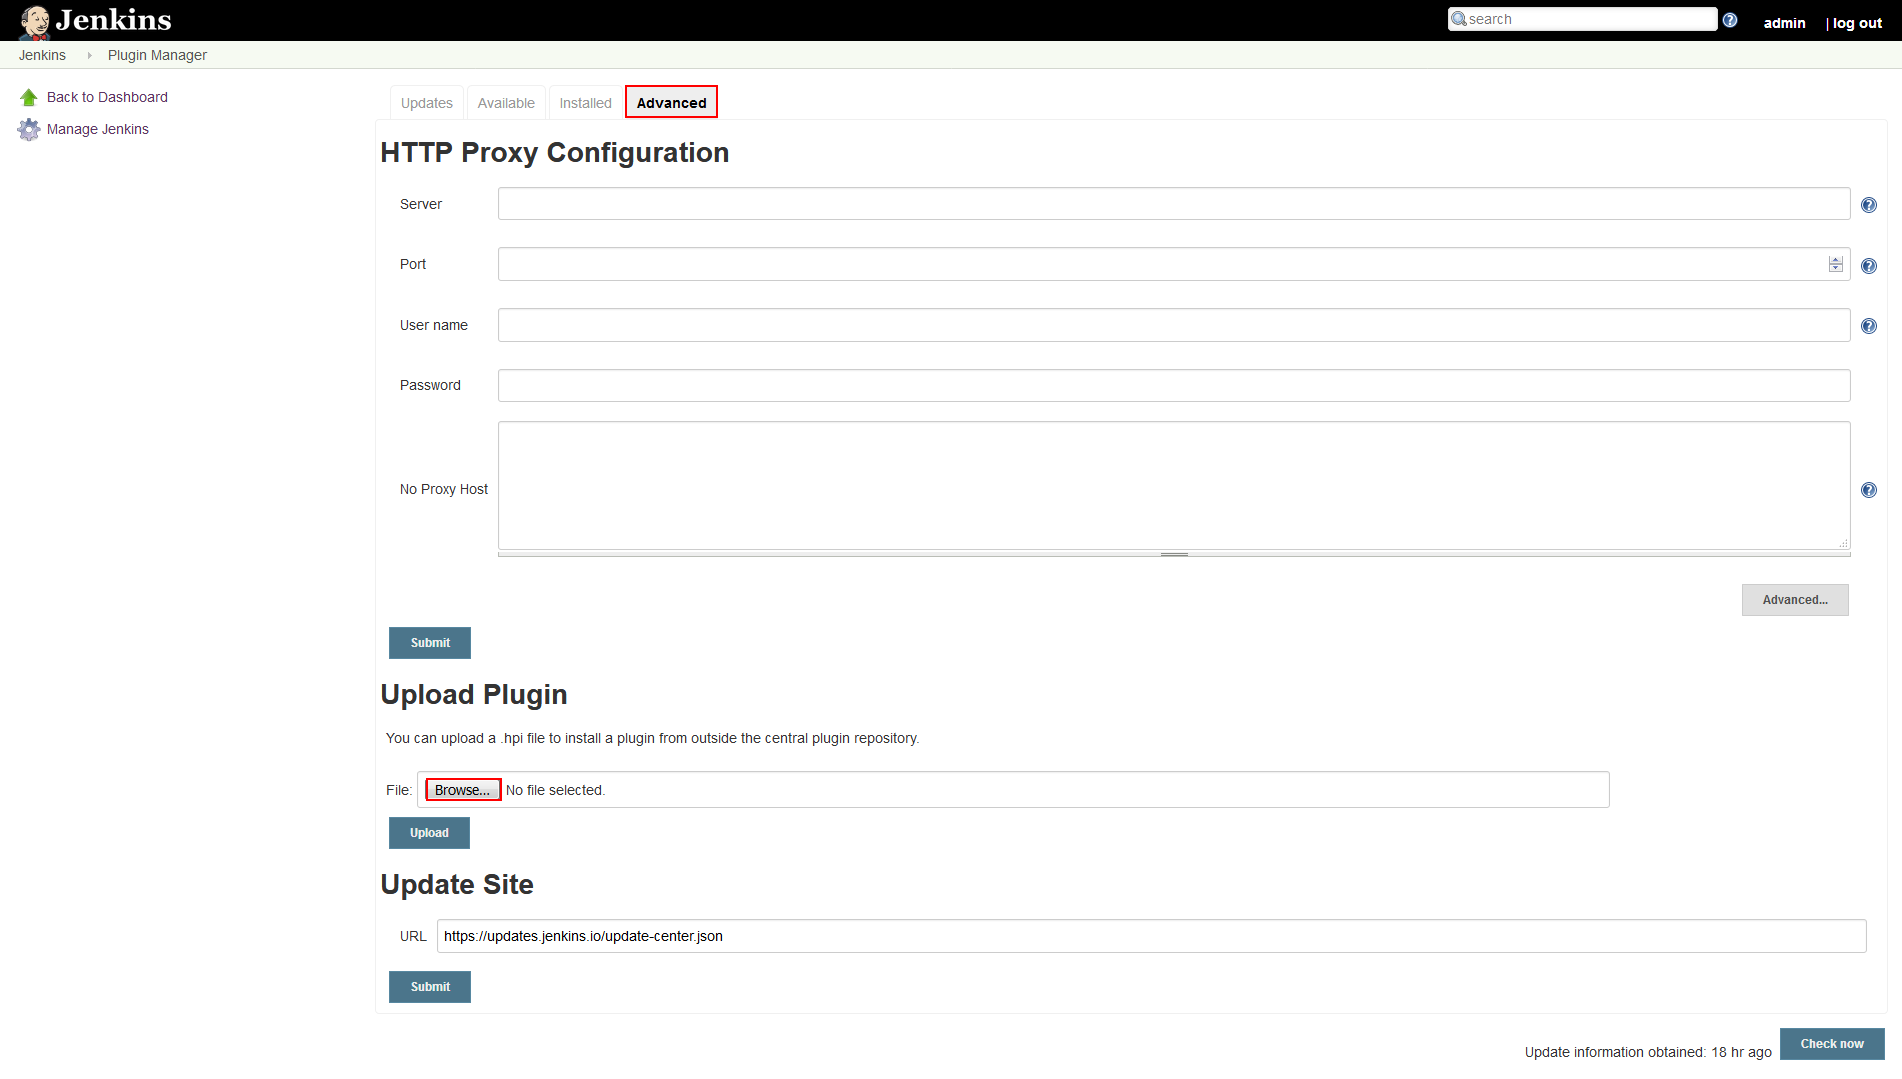
Then finish the process with the Upload button, wait for the installation to complete and restart Jenkins service to load the update.

Creating a new SQL continuous integration job
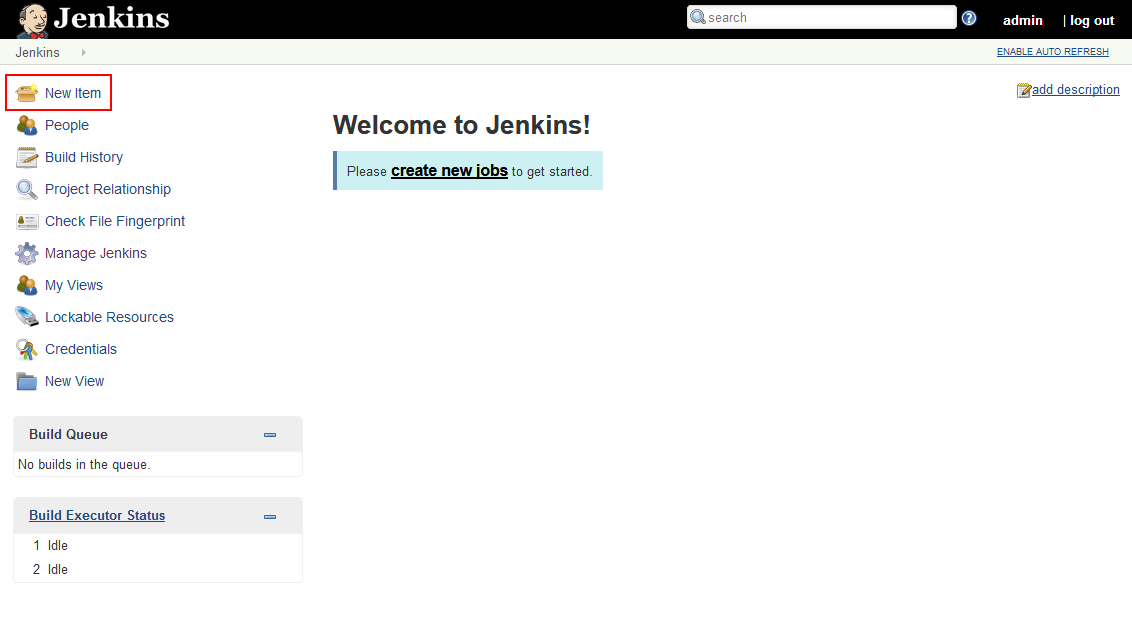
Now with the plugin installed on the system it is time to setup a continuous integration job. This will be done in a manner like any other Jenkins job. From main Jenkins option menu select the New items option.
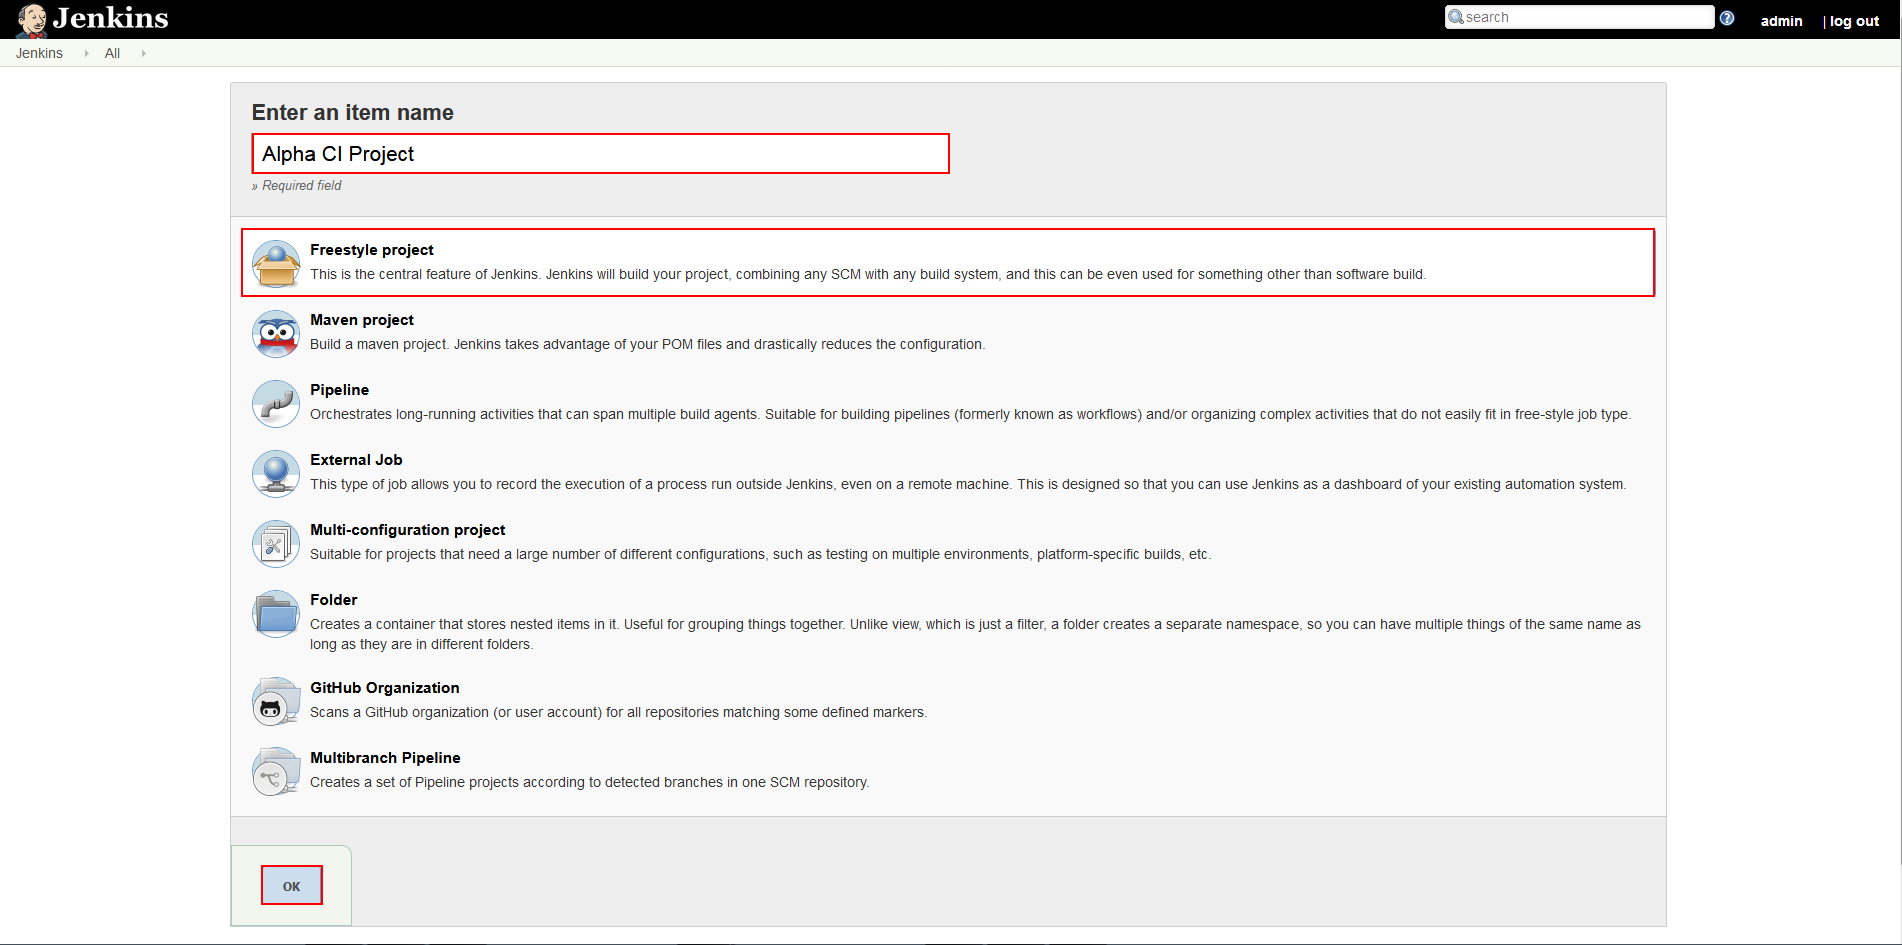
From the displayed view with the Jenkins project templates pick the Freestyle project and assign apropriate name to it. Click the OK button below to confirm.
Jenkins will show the configuration screen with the chosen template. From here first thing that needs to be done is to setup a source control repository for the build source. To do that go to the Source code management section, pick the appropriate source control system and configure the connection to the repository. Naturally this is the repository that contains database scripts with changes from development which we plan to build, test and deploy.
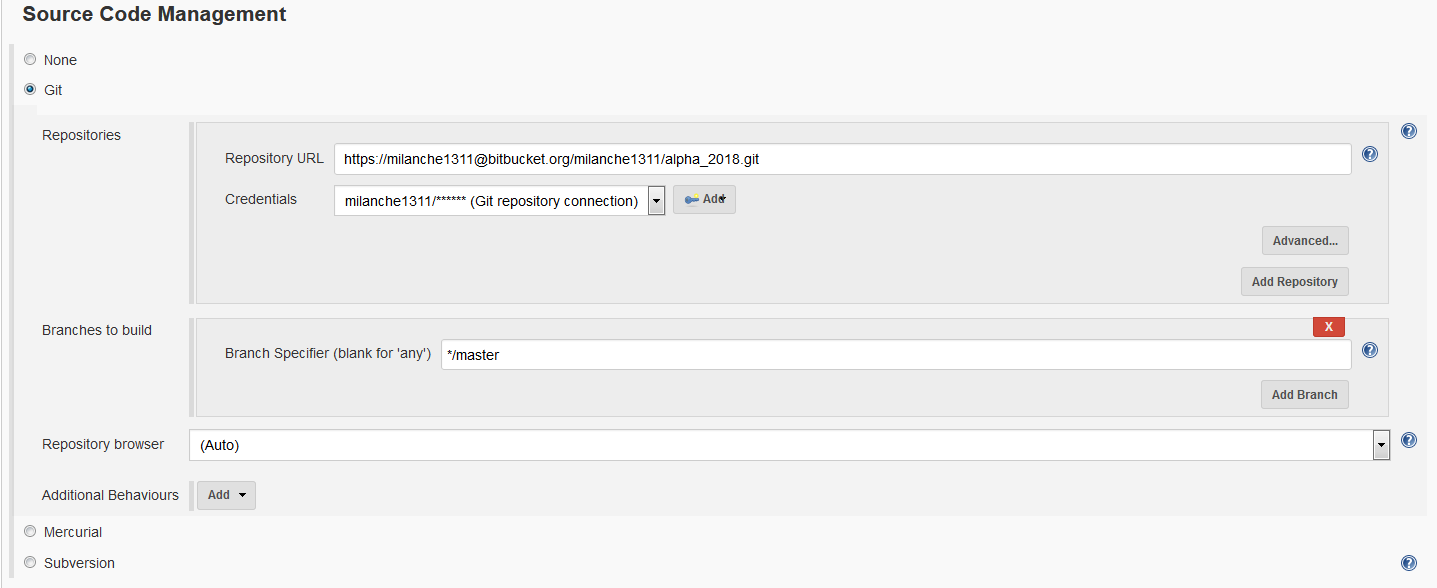
Note that Jenkins uses stored credentials here so in order to create them use the Add button

Then choose the type of security method, SSH or “Username with password” and enter the security information like shown below.
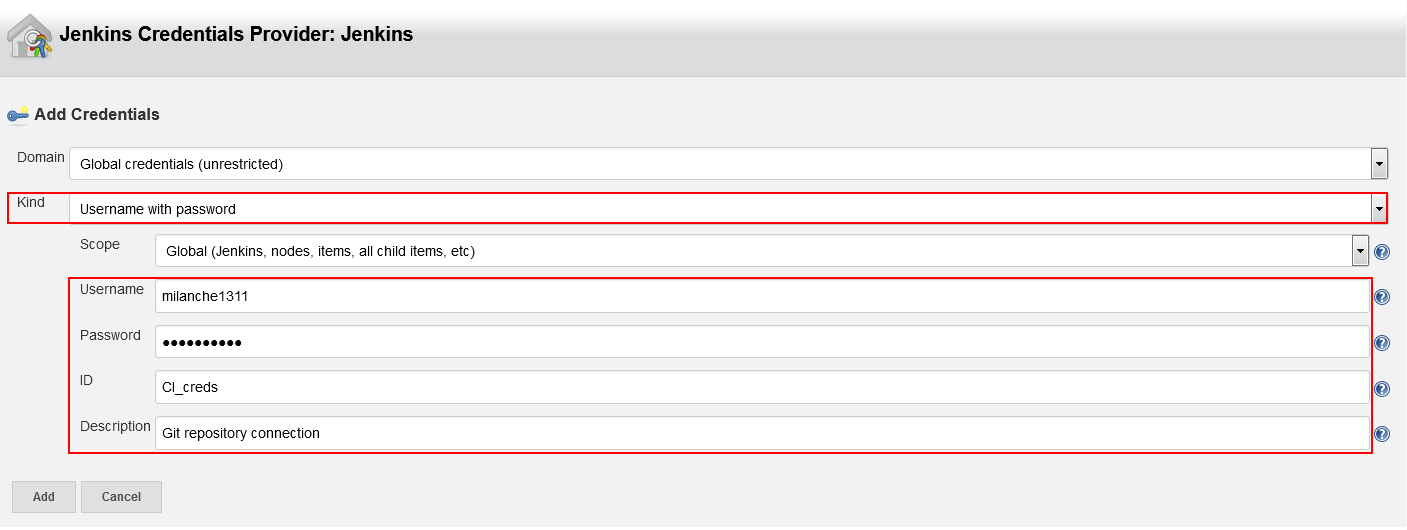
When saved, the credentials will become a selectable item in the Credentials combo-box.

To begin creating continuous integration configuration. Go to the Build section of the current view
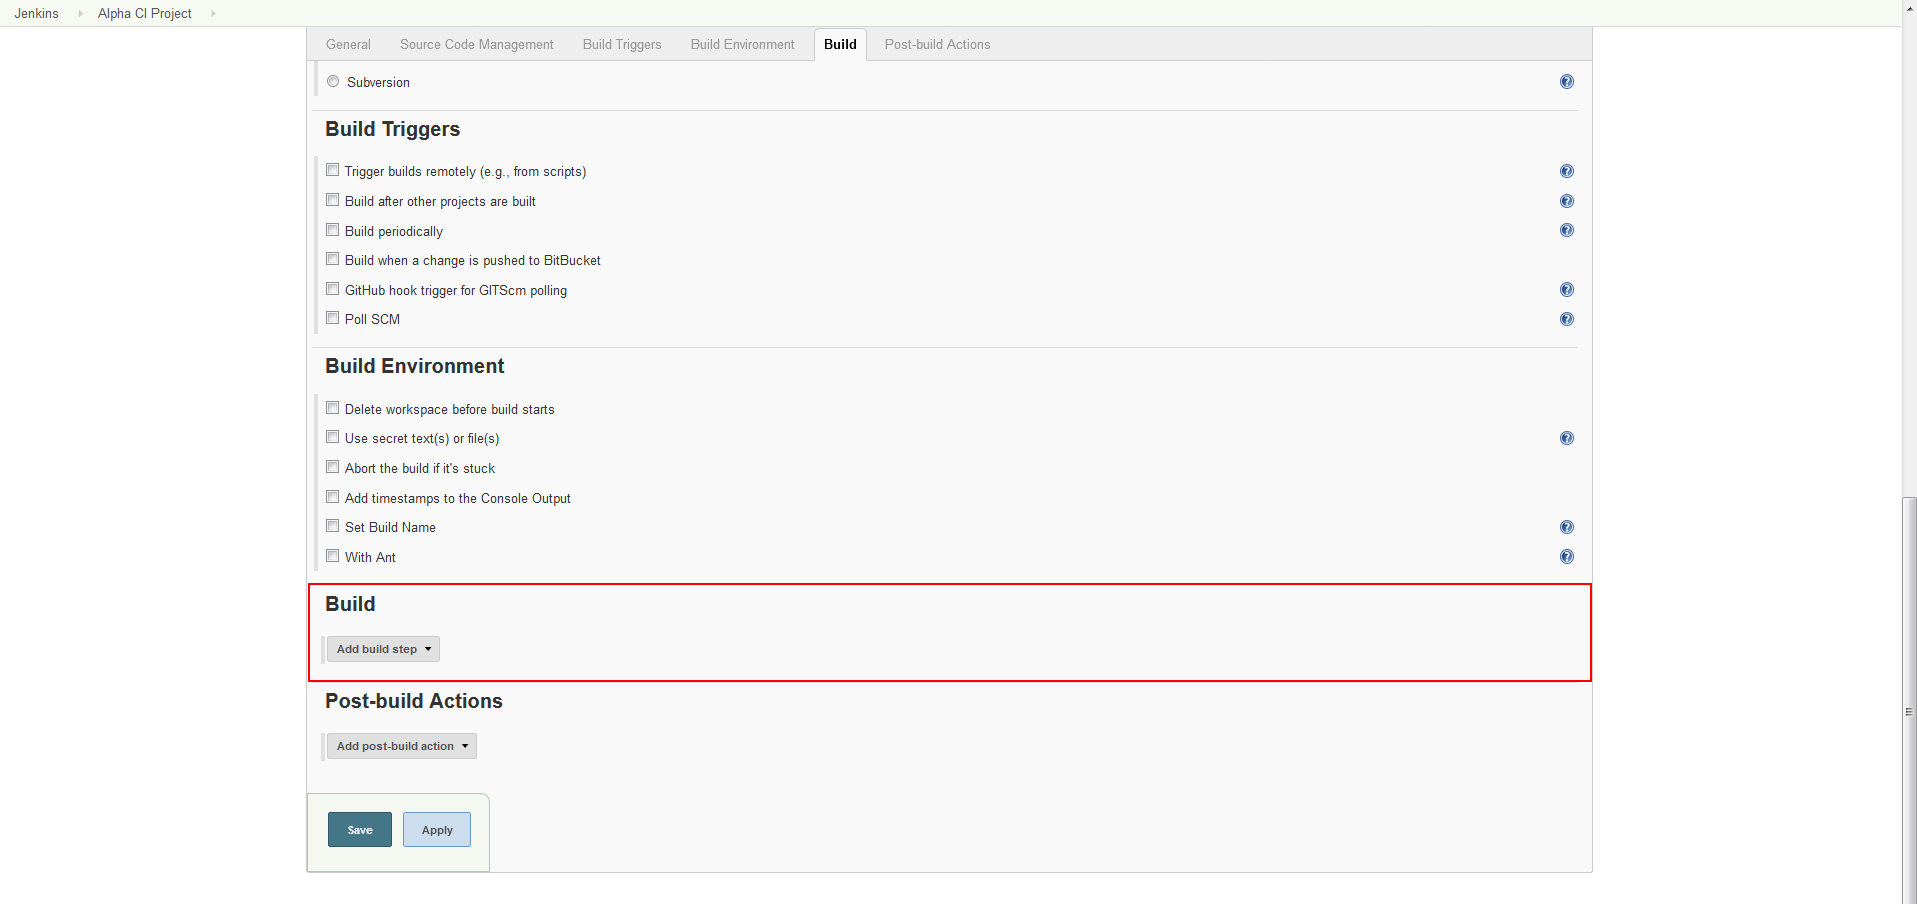
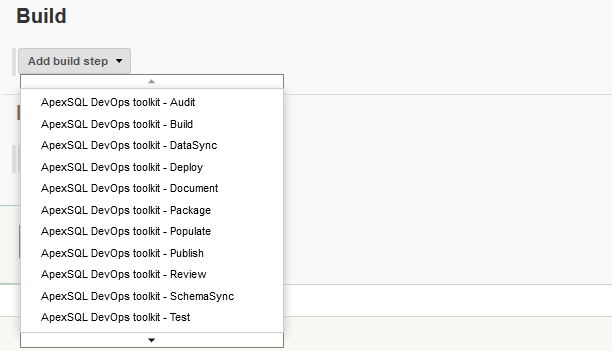
There will be a single action select button labeled Add build step and when clicked on it will show build steps that come from ApexSQL DevOps toolkit plugin among other built-in steps.
ApexSQL DevOps toolkit – Build step
The first thing that is required for successful continuous integration setup is to build a test database from source control. This will have two functions, one is to check if database from source control is “buildable” and another is to set the staging ground for applying tests contained in later steps. In order for this step to work ApexSQL Build is required on the Jenkins machine.
To set up the step use the ApexSQL DevOps toolkit – Build step which will look like this:
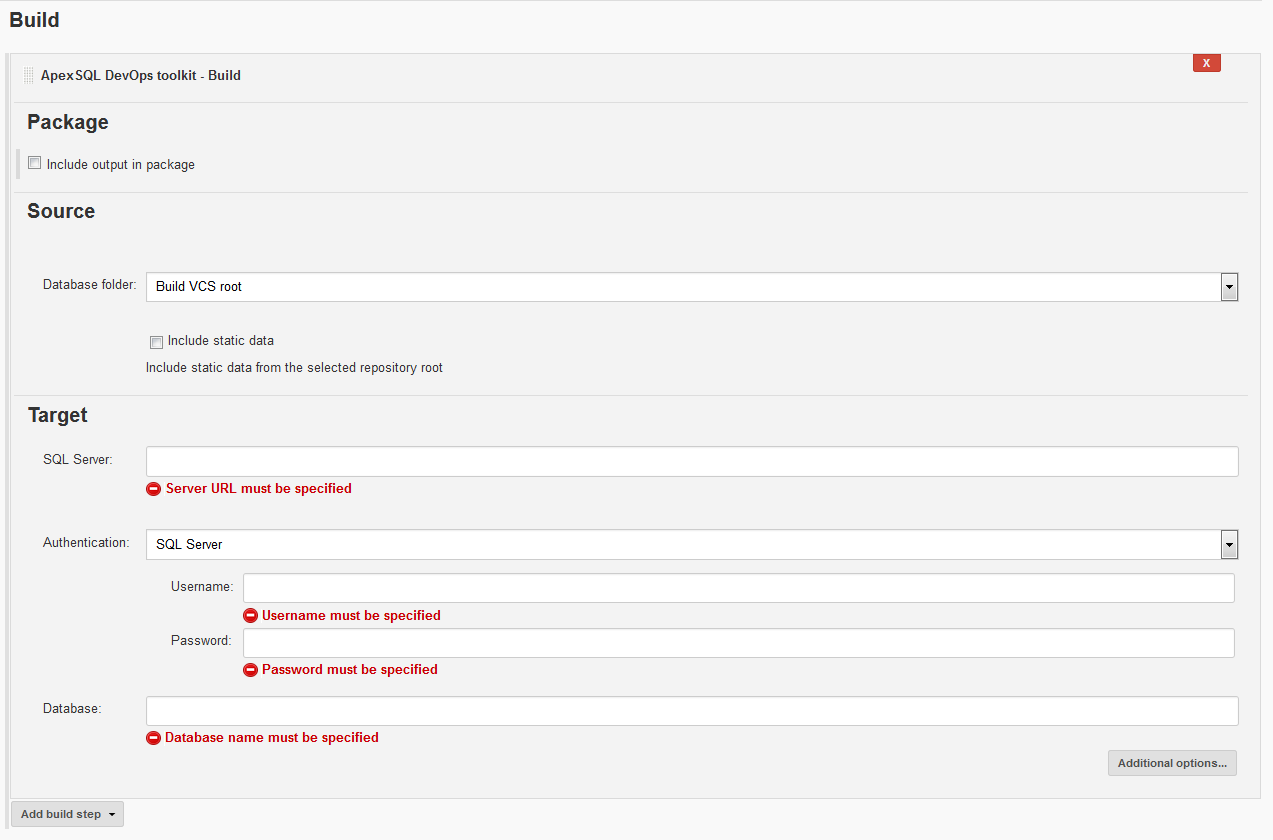
From top to bottom, first section is Package with the option to Include output in package. When this option is selected the package ID should be set where it is possible to use $BUILD_NUMBER environmental variable from Jenkins in order to assign current build number to a package name. This option will create NuGet package file which will later be used as source for deployment. It should be used in all consecutive step to store execution summaries and reports from every step and in the end a database script folder with changes which will update production database upon deploy. This is very handy way for deployment preparation as designated release manager can review all reports from the package and at the same time use it as source to push changes to production.

The second section is the Source section. As the source repository for this build was previously set this section will have the option to choose if the code is on repository root or in a specific project subfolder.
Another option is to include static data if there is any on the repository when building database. With this option set the static data will also be deployed to production along with other changes.

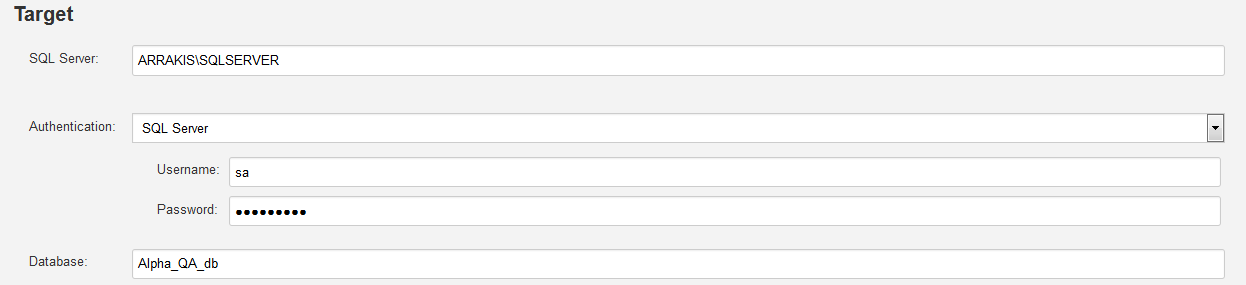
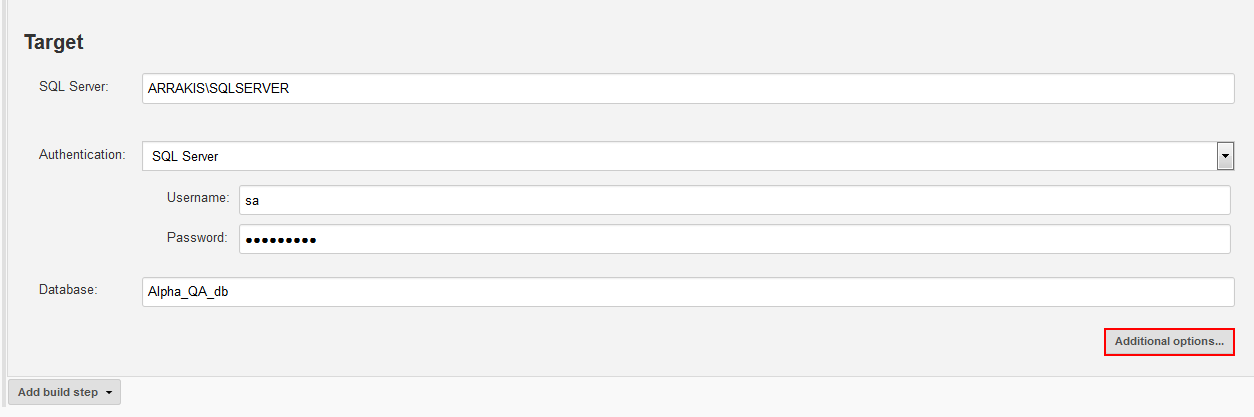
Next section is the Target section. This section has the connection parameters for the target SQL Server and database which is going to be built.
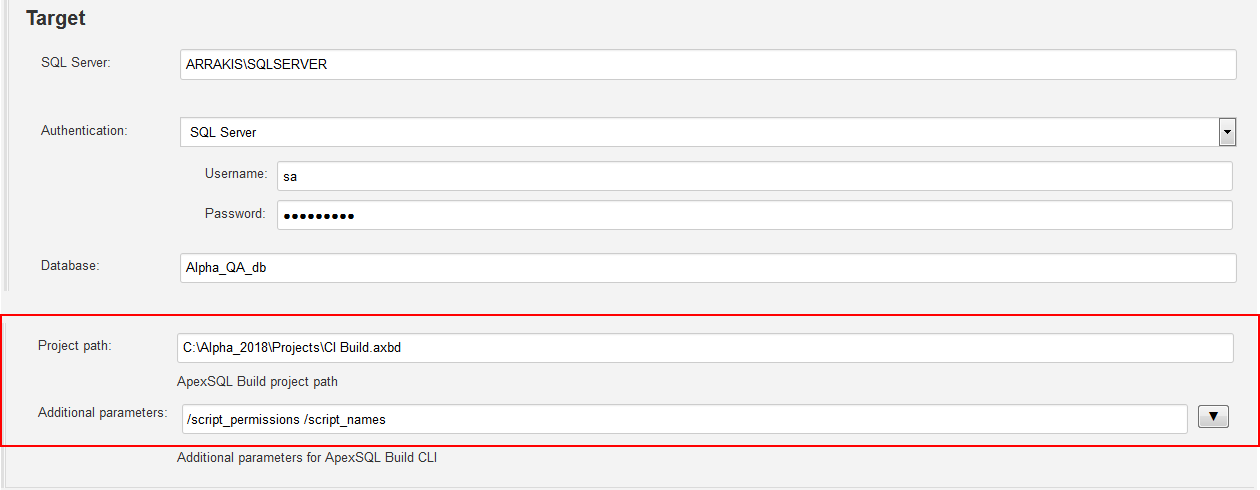
Last section will be shown with the Additional options button clicked.
This section contains the Project path field where the location to the saved ApexSQL Build project file. The project file is a way to create a template of build options using ApexSQL Build and import them for the Build step. The project file can contain list of excluded objects from the build, can contain options to script permissions, ANSI options etc. when generating the build script for creation of the database. The project file will also contain target SQL Server and database parameters and they can be used from the file but if those parameters are already set in the Target section they will take precedence over and override the ones in the project file.
Beside the project file there is the field to manually enter the additional parameters in a form of CLI option switches that correspond to the working tool, in this case ApexSQL Build. These options can be contained in the project file but used like this will override a setup and change the option without the need to update the project file. Also, in case some options are not included in the file, they will be combined with these switches.
All steps have this functionality and can include options from project file created by the working ApexSQL tool and CLI options that correspond to that tool.
- Note: For detail information on available option switches for the Build step see the article ApexSQL Build Command Line Interface (CLI) switches
ApexSQL DevOps toolkit – Populate
After successful build of a database it is possible to test how the empty tables will be populated with data. With ApexSQL DevOps toolkit – Populate step this test can be performed. It uses ApexSQL Generate to achieve that goal. Sections in this step are configured as previously explained for the Build step except for the Source section which is missing.
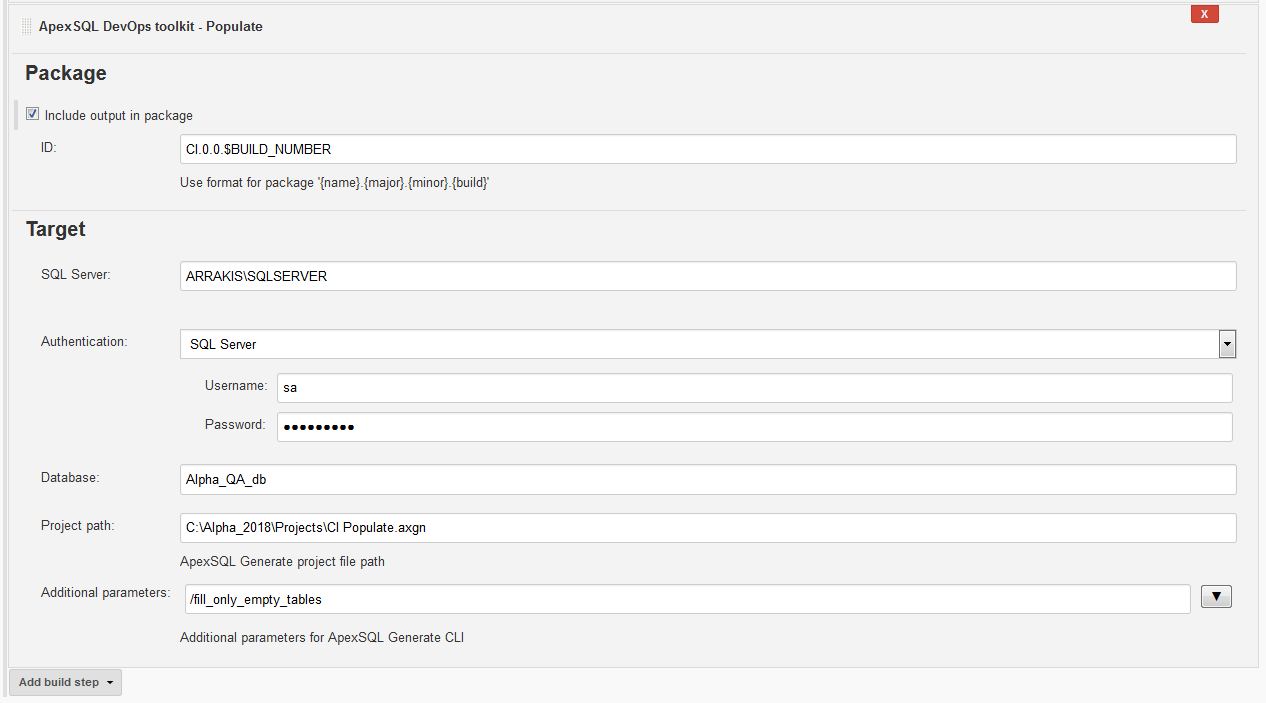
The Include output in the package option with the same package name should be used to will store the population summary in the NuGet package when selected.
The Target section should be filled with connection parameters to the database that was built in previous step unless the proper parameters are set in the project file.
In the Advanced options section the ApexSQL Generate project file can be included to import target connection definition or some options like the desired number of rows for each table or generator type and selection of tables to populate with data. It can be included along with the CLI switches, for example in a case where the project file setup will fill all tables, populated and empty, that can be overridden with the switch to fill only empty tables.

- Note: For detail information on available option switches for the Populate step see the article ApexSQL Generate Command Line Interface (CLI) switches
ApexSQL DevOps toolkit – Audit
Sometimes if there is a need to install triggers on new tables, which are sensitive to changes. If so, it could be practical to implement them during continuous integration phase so they can also be tested and prepared for deployment to production along with the parenting objects. To do that ApexSQL DevOps toolkit – Audit step should be used and ApexSQL Trigger will have to be present for this step to work.
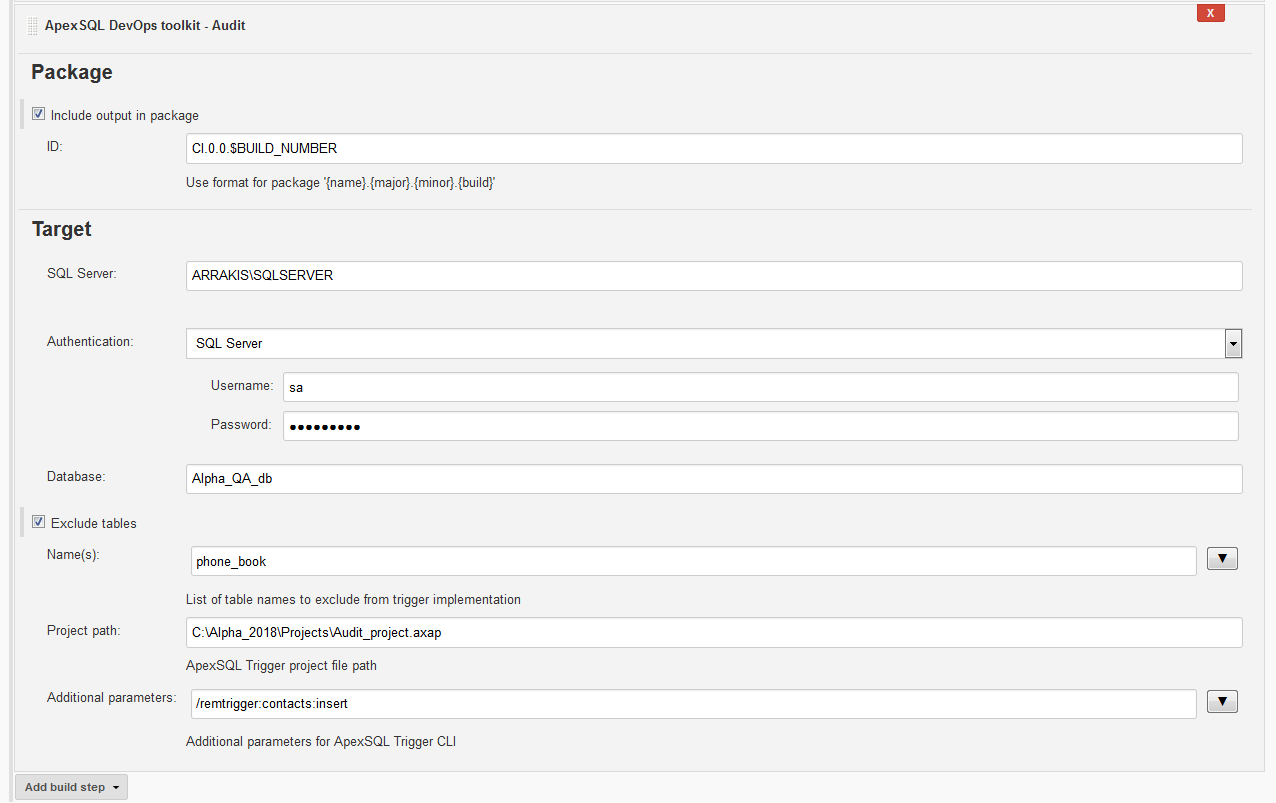
Include output in package option should be selected in case that NuGet package should have the step execution summary which contains information about which type of triggers and where are they inserted.
In the Target section the connection to test database should be defined in case it is not contained in the project file.
For this step’s configuration the ApexSQL Trigger project file is mandatory because it has the information about the existing auditing architecture and the name of the repository database where audit logs are stored. Since implemented triggers will be propagated to production upon deployment this information is needed so this process cannot disrupt the existing configuration. In case there is no existing architecture this step will create one and prepare tables for auditing.
In case there are tables with existing triggers in the test database they will be excluded by default from further handling by this step so they will be preserved as they are in a production database.
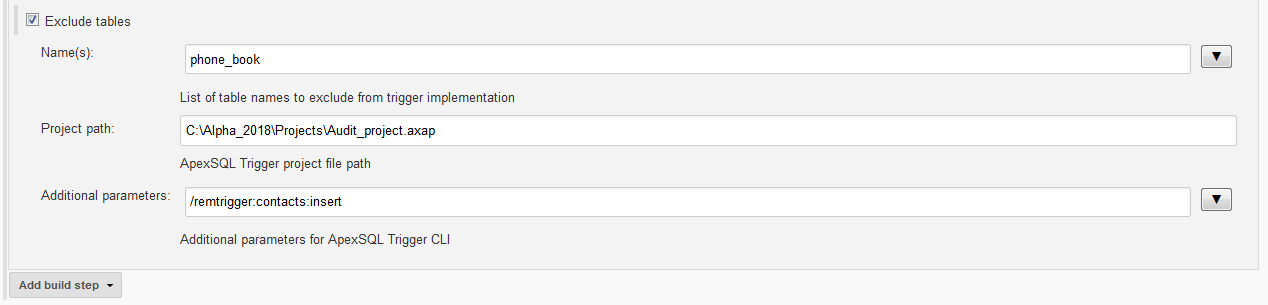
By default, all tables that do not have triggers will be subjected to auditing so there is the Exclude tables option in the Advanced options section to exclude specified tables from processing. Tables are specified one by one with their names in the Name(s): field delimited with the blank space character.
In the Additional parameters field ApexSQL Trigger CLI switches can be used to add an option like to update auditing architecture or to remove specified triggers from specified tables. In the example displayed on the screenshot below it can be seen that the table named “Phone_book” is excluded from trigger implementation and that from the table named “contacts” the “insert” type trigger will be removed.
- Note: For detail information on available option switches for the Audit step see the article ApexSQL Trigger Command Line Interface (CLI) switches
ApexSQL DevOps toolkit – Test
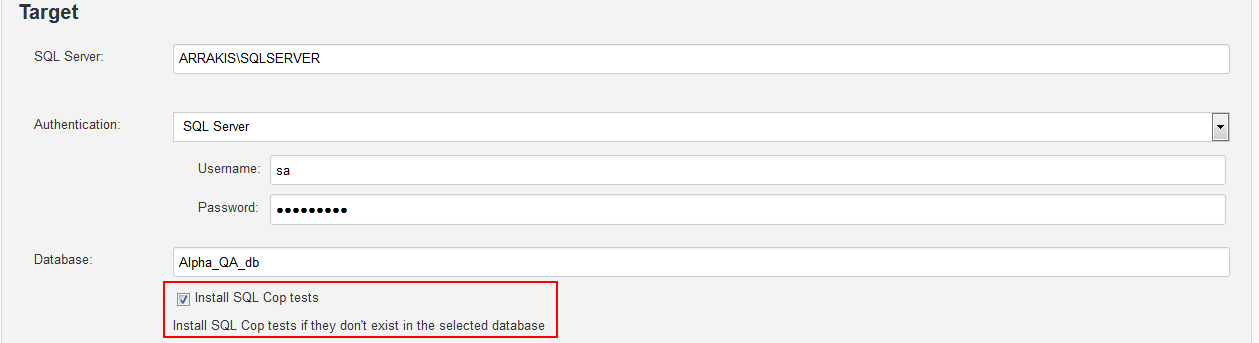
The major purpose of continuous integration workflows is to test the changes before sending them to production. Most commonly used for that are the unit tests. The ApexSQL DevOps toolkit – Test step that works with ApexSQL Unit Test will perform the task of installing the tSQLt framework on the test database and execute unit tests against it to evaluate the database for potential issues or poor coding practices.
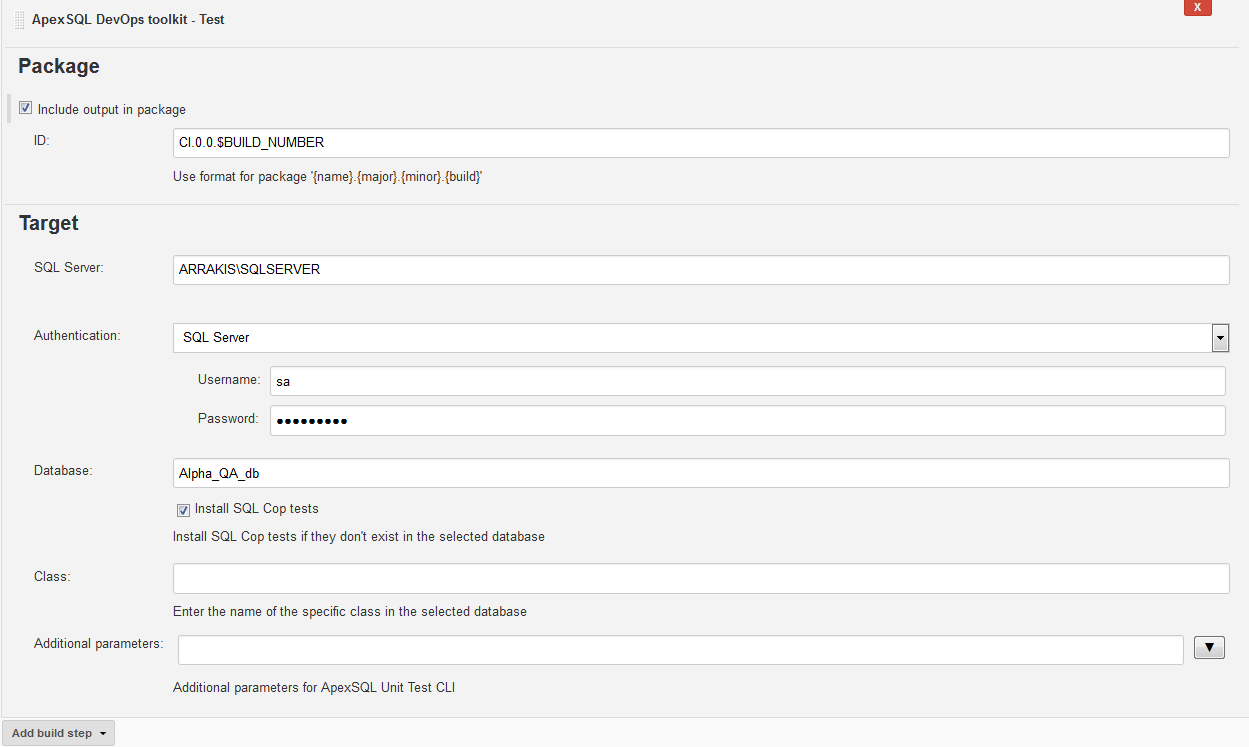
Unit test can be created in a class using ApexSQL Unit Test and the Class: field can be populated with the test class name for the database. As a direct alternative to importing the test class there is the Install SQL Cop tests option to install the set of 48 predefined unit tests and execute them.
The Include output in package option is recommended to be selected as the test results with the status of every executed test will be stored in the package with the rest of the reports for later review.
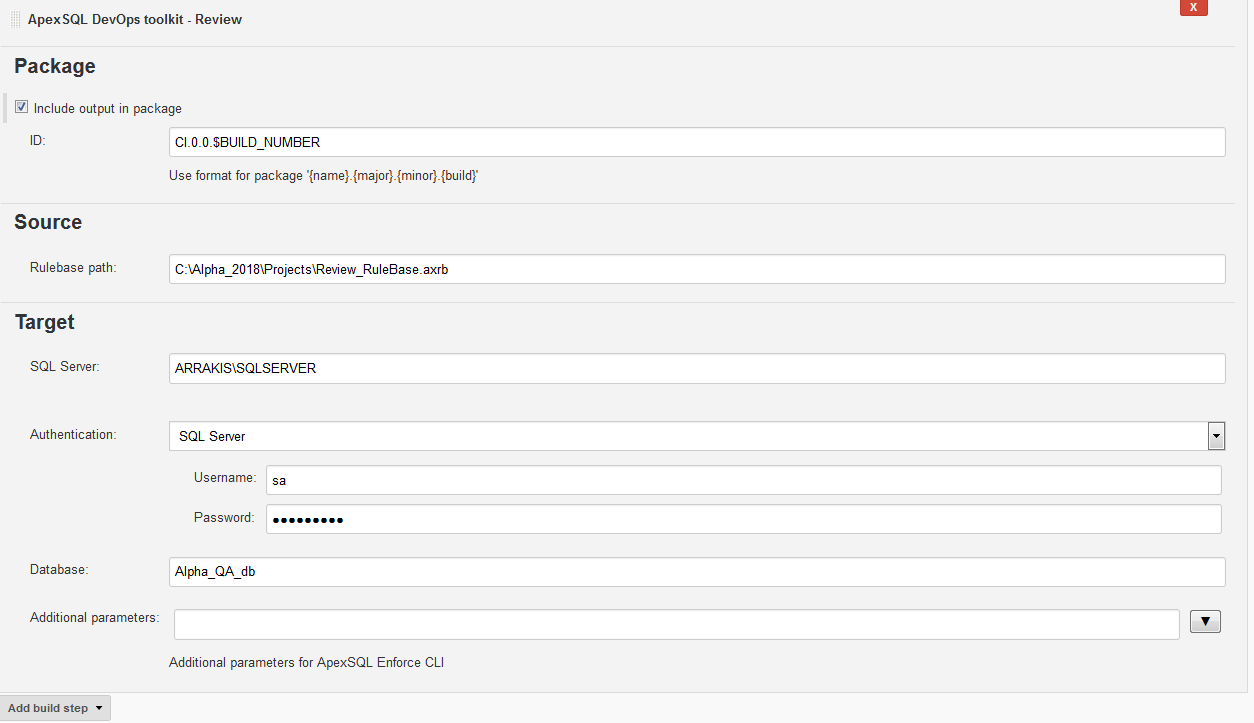
ApexSQL DevOps toolkit – Review
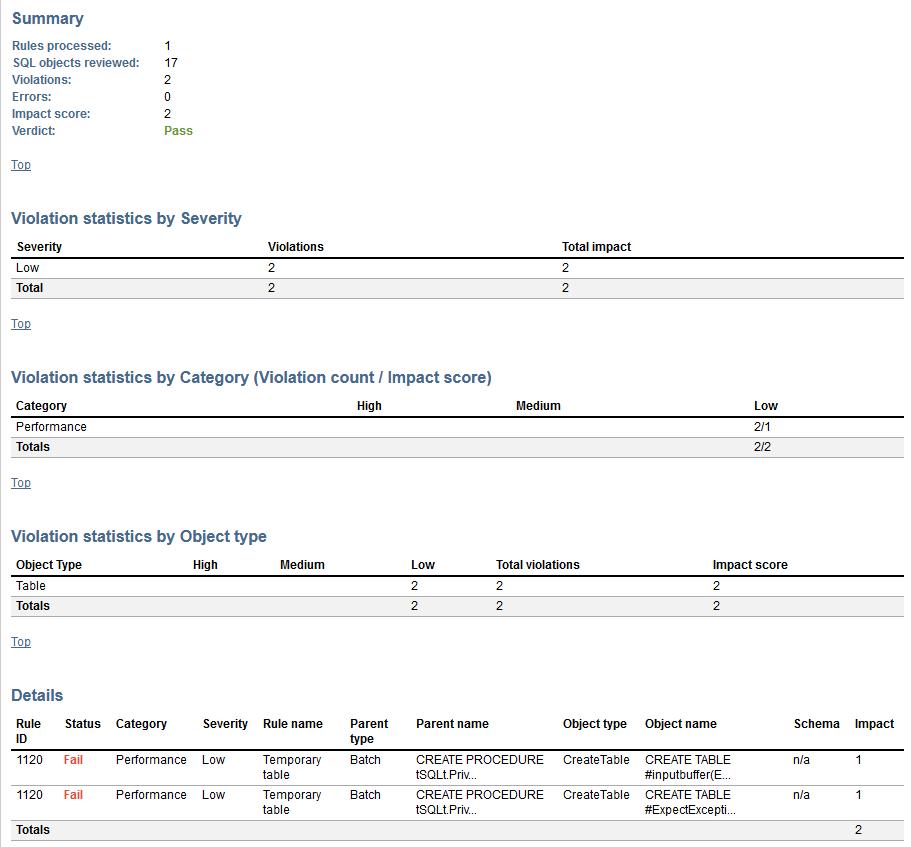
This step is the next in line of testing steps and it is used to execute a checkup of database changes against the custom rulebase created with ApexSQL Enforce. The custom rules and criteria for enforcing the database best practices are saved in the rulebase file and those can be used as a method to review the quality of changes and approve them for deployment or return them to development. In case there are failing objects and they surpass the criteria threshold this step will fail and detailed report will be generated with the information which database object failed the checkup and why.
- Note: for more details on how to select the set of rules to form a custom rulebase see the article How to enforce best practices rules against your database
In the Source section for this task’s configuration the Rulebase path: field has to be filled with the path to the created rulebase file.
Additional parameters field can be used for some ApexSQL Enforce CLI switches. For example the rulebase is set with the compilation of rules but they are not all activated as that possibility exists so not all of the will be applied in the step. If that situation occurs it is would be easy to activate all of them with proper CLI option without the need to update the rulebase.

- Note: For detail information on available option switches for the Review step see the article ApexSQL Enforce Command Line Interface CLI switches
When Include output in package option is used the rulebase review report will be stored in the package file.
ApexSQL DevOps toolkit – Package
This step will create database script folder out of test database. This will include implemented triggers from the Audit step and audit architecture if created in the process. But all other synthetic test data and tSQLt framework objects will be left out and the script folder will be stored in a NuGet package file with the name found in the ID field of the Include output in package option if set. In order for Package step to accomplish that it is necessary to have a pair of tools, ApexSQL Script for the schema objects and ApexSQL Data Diff for the static data in case it was included with the ApexSQL DevOps toolkit – Build step.
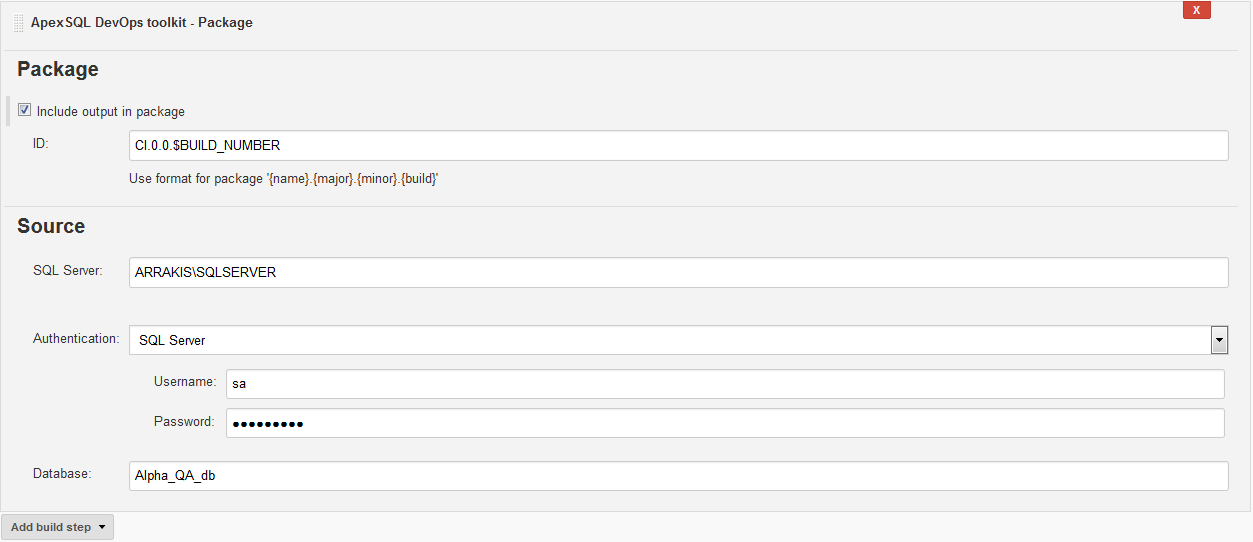
The Source section in this step has to be populated with connection parameters to the test database in order to use it for script folder creation.
With all these steps executed the final result will be a NuGet package file which can be forwarded to release manager to review all the information and release it i.e. push it to a continuous delivery job.
FAQs
Q: Is the order of the steps predetermined?
A: Except for the Build step at the beginning and the Package step at the end, the position and number of other steps is arbitrary.
Q: Do execution output files get generated if the packaging option is not used?
A: Yes, output files will be generated and stored in a single location just not wrapped in a package.
Q: Where are the execution output files located?
A: The output files are located in the Jenkins working folder, i.e. workspace folder which is by default located in the chosen Jenkins installation folder. Every execution of the created ApexSQL DevOps toolkit Jenkins job stores outputs in a separate folder created upon execution for easier identification.
Q: What happens if neither project file nor CLI options are included?
A: Every ApexSQL tool has its own set of factory-defaults. The best way to see what are the defaults is to start a new project from tool GUI and examine selected default options. Those options will also be the CLI defaults.


