


It is not unusual case that database projects require multi development environment, staging or QA environments.
Initial work on database projects starts with establishing a baseline. What is a baseline? The baseline is a database version that is identical to the current production database version which will be used for further developments but positioned on non-production environment.
Providing a database to different environments to establish a baseline can be time consuming process, especially if it is done manually using standard SQL backup/restore option. This is where database cloning concept can help optimizing the time invested for provisioning a database.
For more information about cloning concept and mechanisms and solution see:
SQL database provisioning via Database clone using PSDatabaseClone PowerShell module
ApexSQL DevOps toolkit has introduced the Provision step in standalone and plugin variants. The Provision step is intended to help configure the cloning solution explained in the article above with visual elements and automate it if necessary.
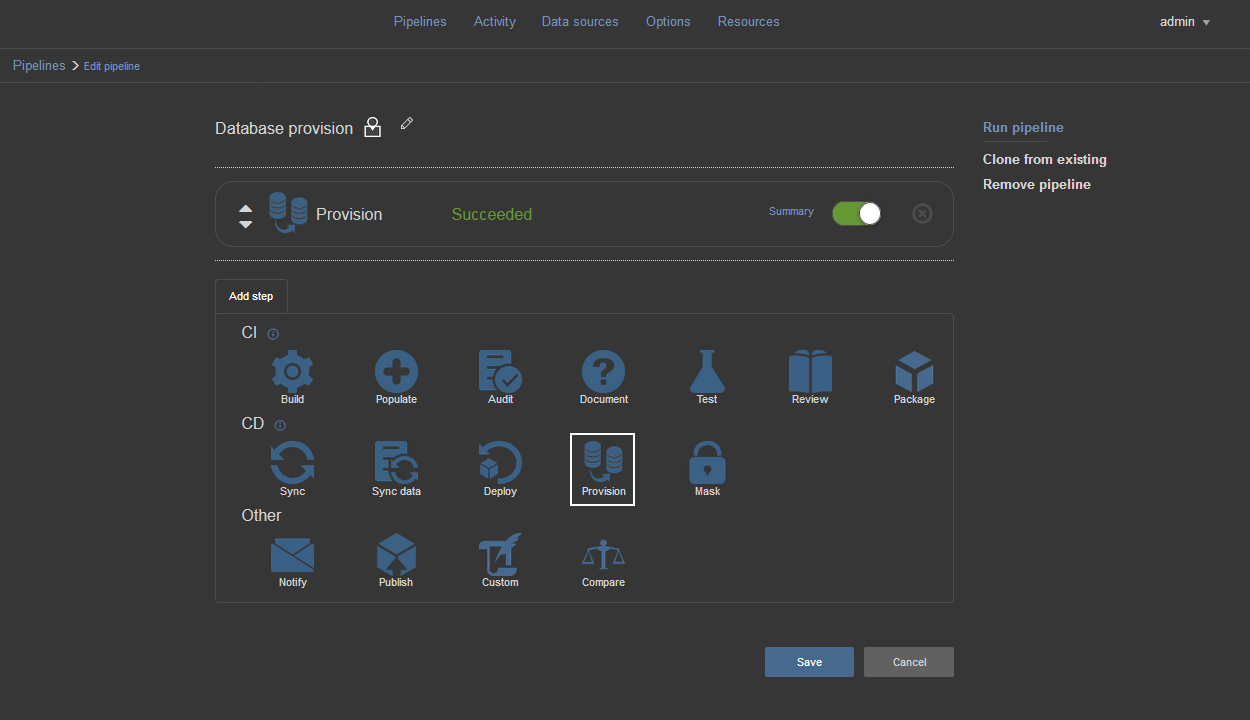
Configuring the Provision step
When Provision step is added to a pipeline configuration offers two options, to clone database using the Image or Backup sourcing method.
Backup based provisioning
The Backup method is the option to use if setting the 3rd party utility is not done. This method uses a standard SQL backup and restore procedure via PowerShell execution to clone the existing database.
Configuring this method is quite straightforward. In the select box labeled Database it is necessary to select a database type data source from which a backup will be created. The backup is created in the location set as default within SQL Server configuration. If data source for desired database is not yet created, use Add button to create one.
For the Target it will be necessary to select database data source with configured SQL Server instance and database name which will be used to restore backup. Use Add button to create such data source if not previously done.
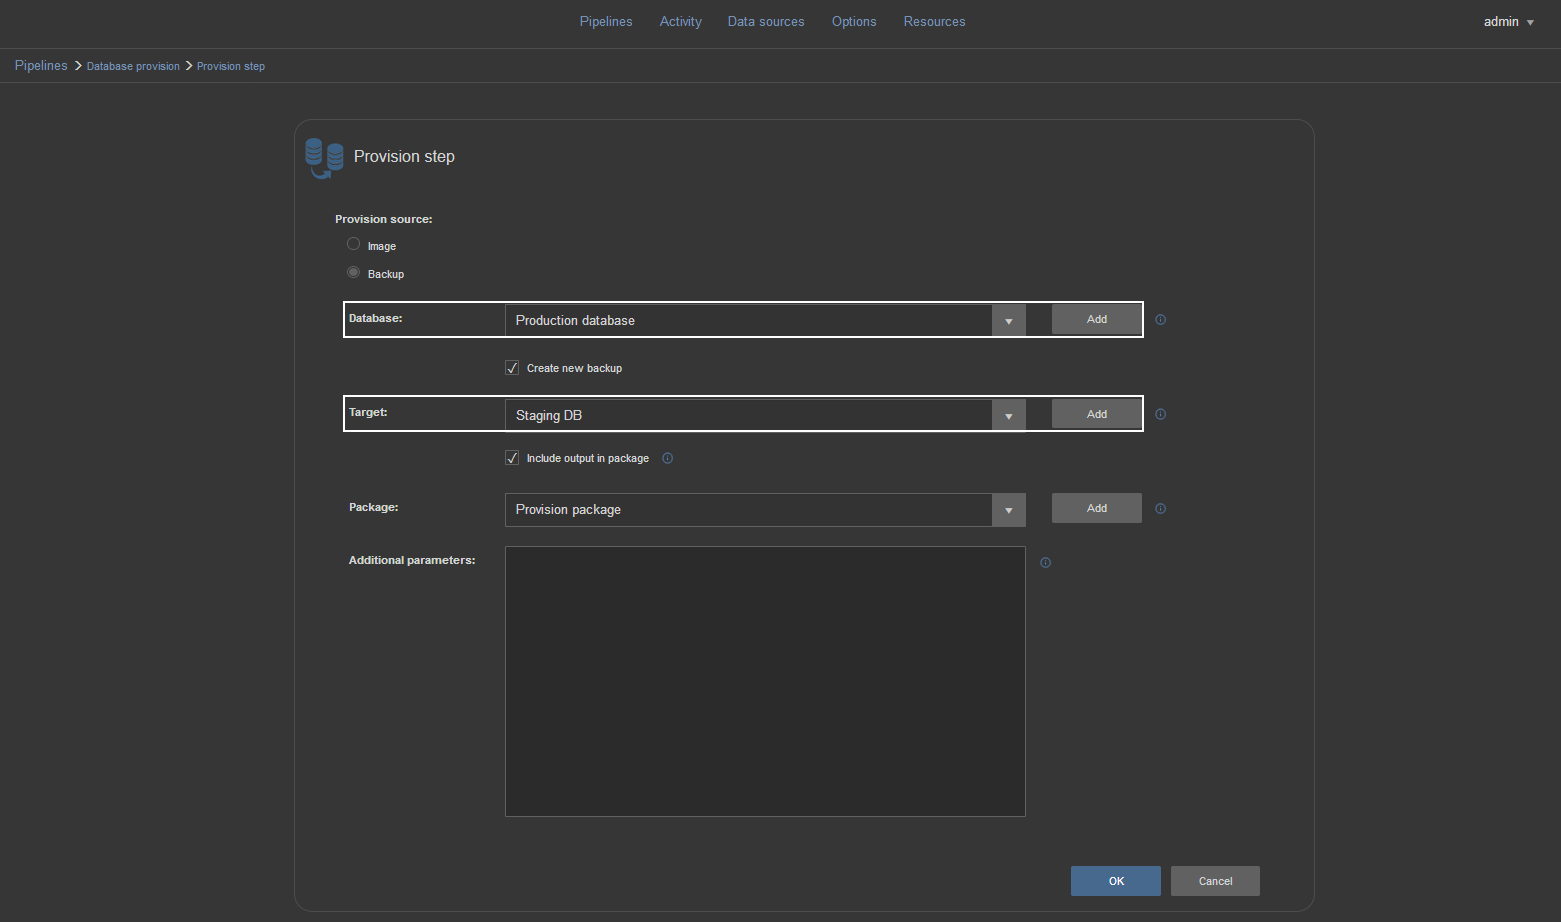
The Create new backup option is selected by default and will create backup of the selected database. However, if there is already a backup file present for the specified database in the default SQL Server location, unchecking this option will allow the selection of desired backup:

The include output in package option, when selected, allows to store the backup-restore process execution summary in a NuGet package.
The Additional parameters field is reserved for additional PowerShell execution switches regarding the Backup-SQLDatabase cmdlet
Image based provisioning
To use the image based provision sourcing method some requirements will have to be set. The details about requirements can be found in this article: How to setup image based SQL Server database provisioning with PSDatabaseClone
The image based set of options contains two sections, to create image from database and to clone database from image. These operations can be used together in sequence or individually depending on available or needed “material”.
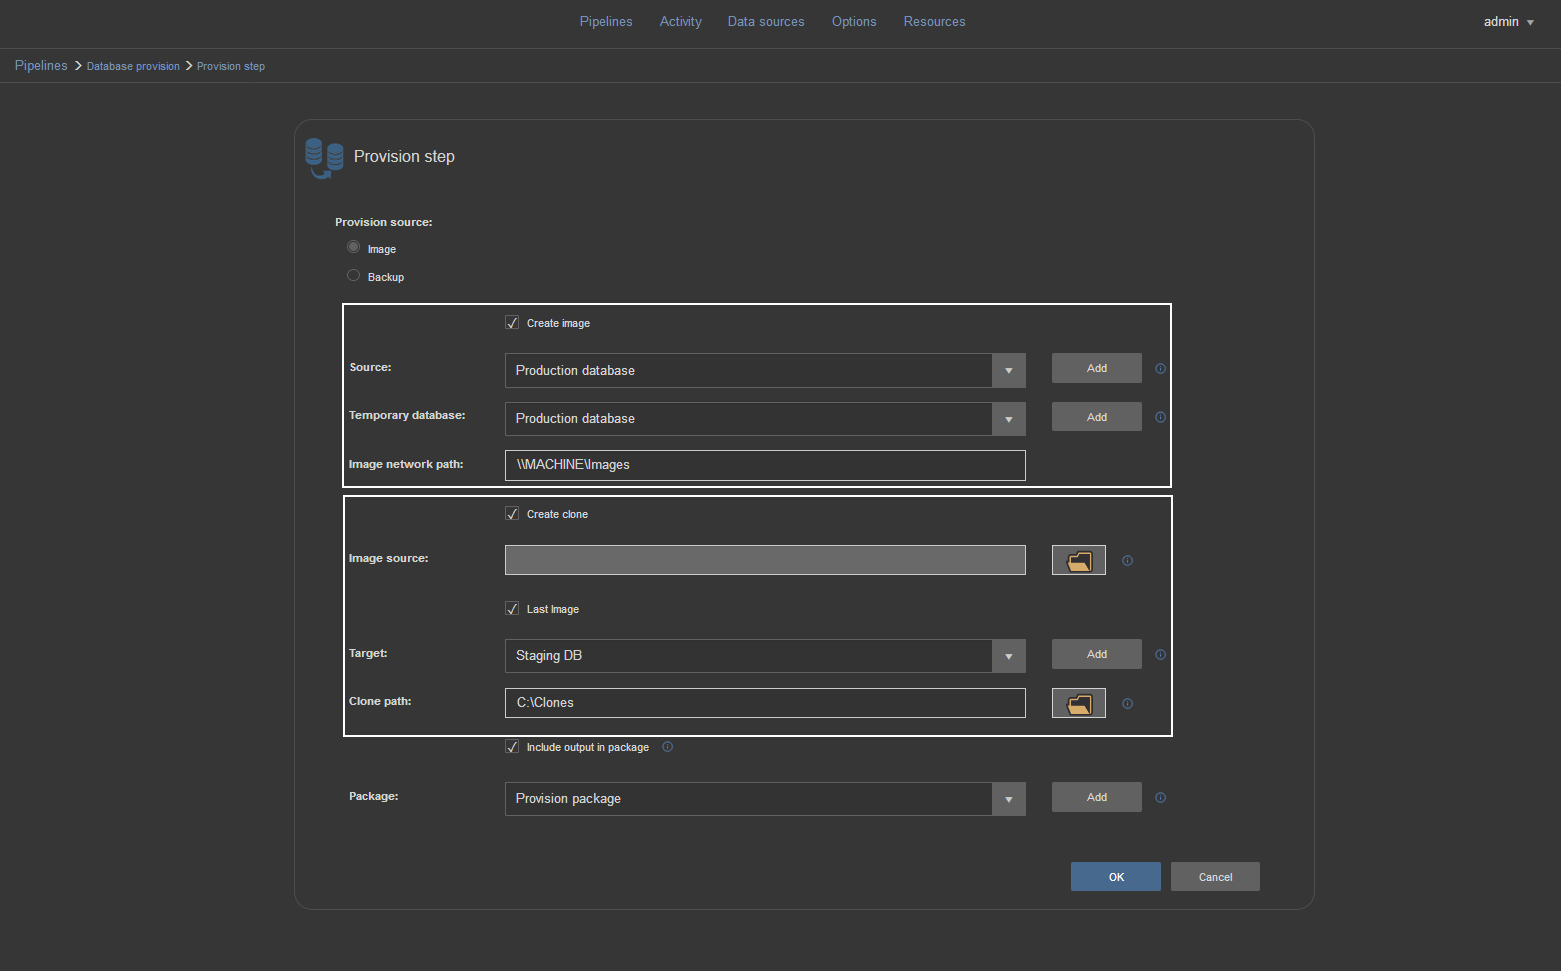
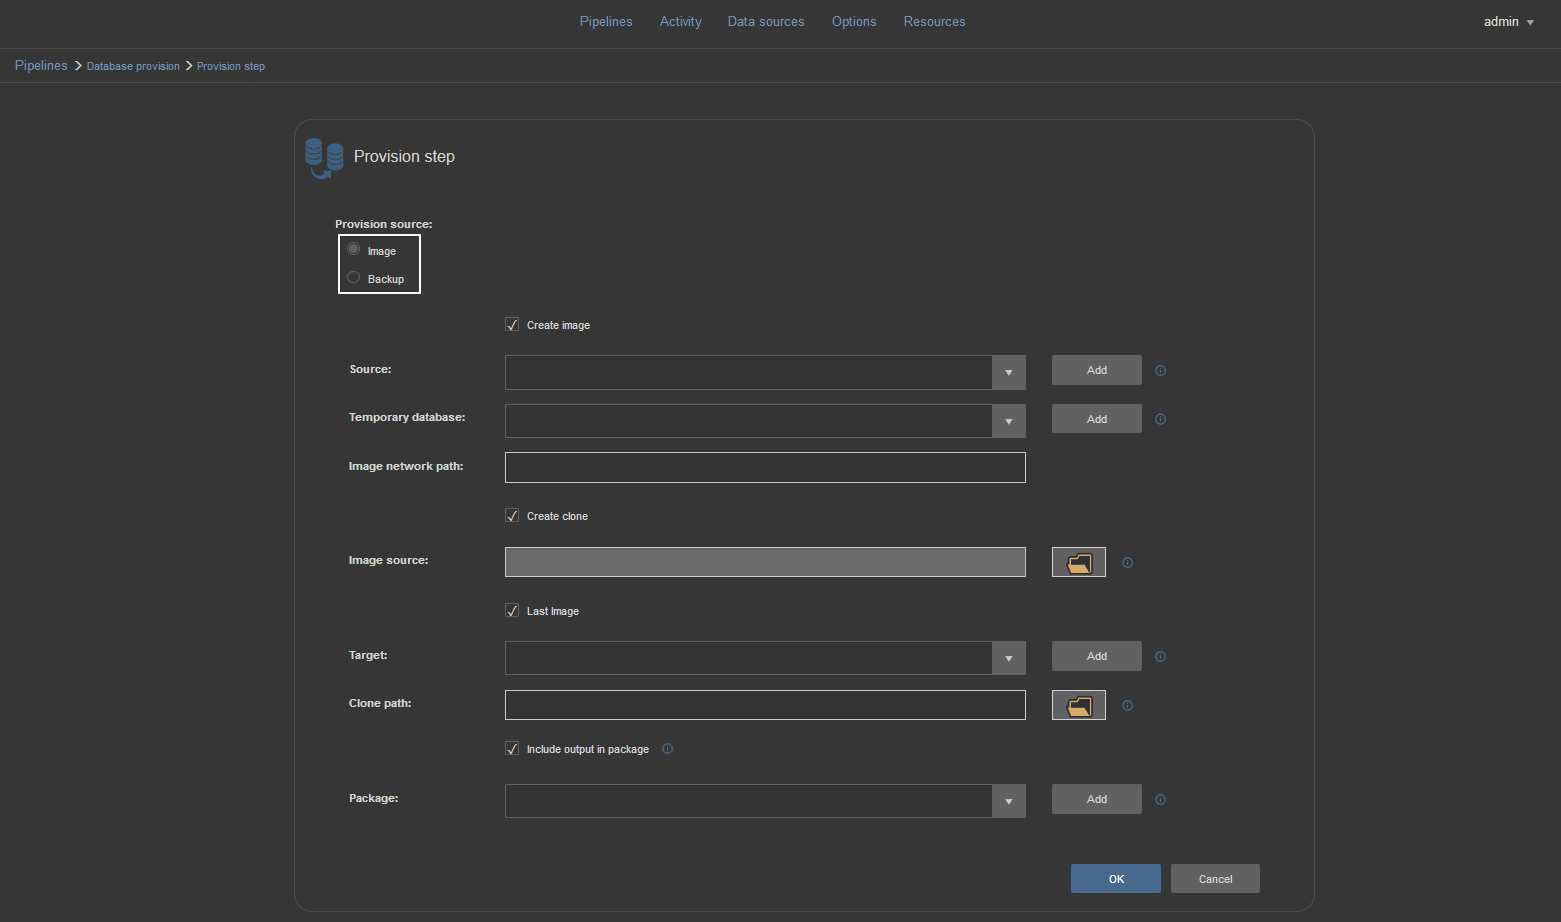
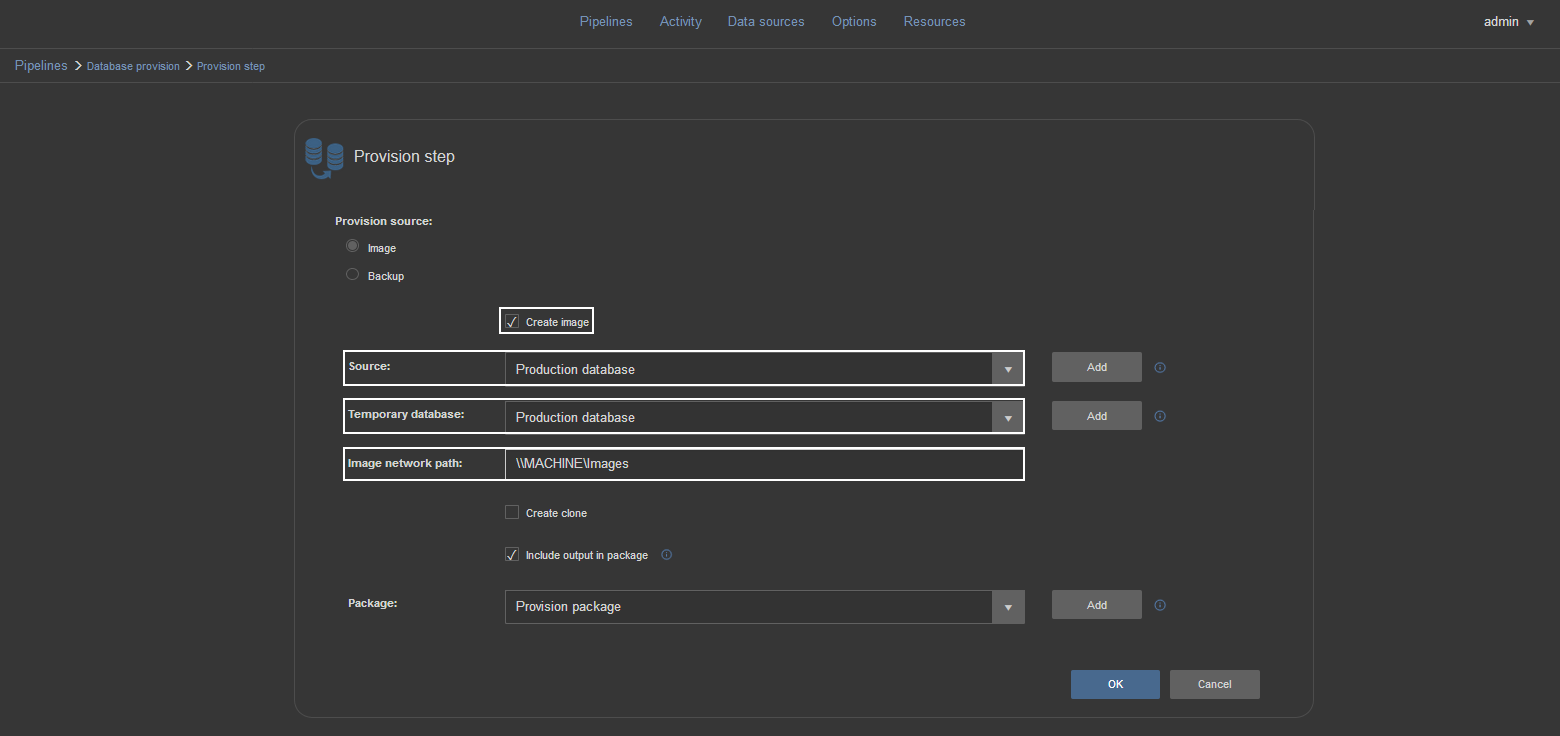
When the Create image option is checked the step will create virtual disk file, store it in the set network location and save database image on created virtual disk.
Required fields from top to bottom of this section are:
Source – database type data source which requires cloning. It will be used to create backup (in SQL Server default location) and restore it on Temporary SQL Server in virtual disk file named after this database with a timestamp as suffix.
Temporary database – This is information needed to create temporary SQL Server instance on virtual disk in order to attach database image restored from created backup. This can be considered as “dummy” SQL Server and to simplify the configuration it is enough just to repeat the selection used in the Source field
Image network path – this is where UNC path for the shared folder should be typed in. This is going to be designated location to store virtual disk file.
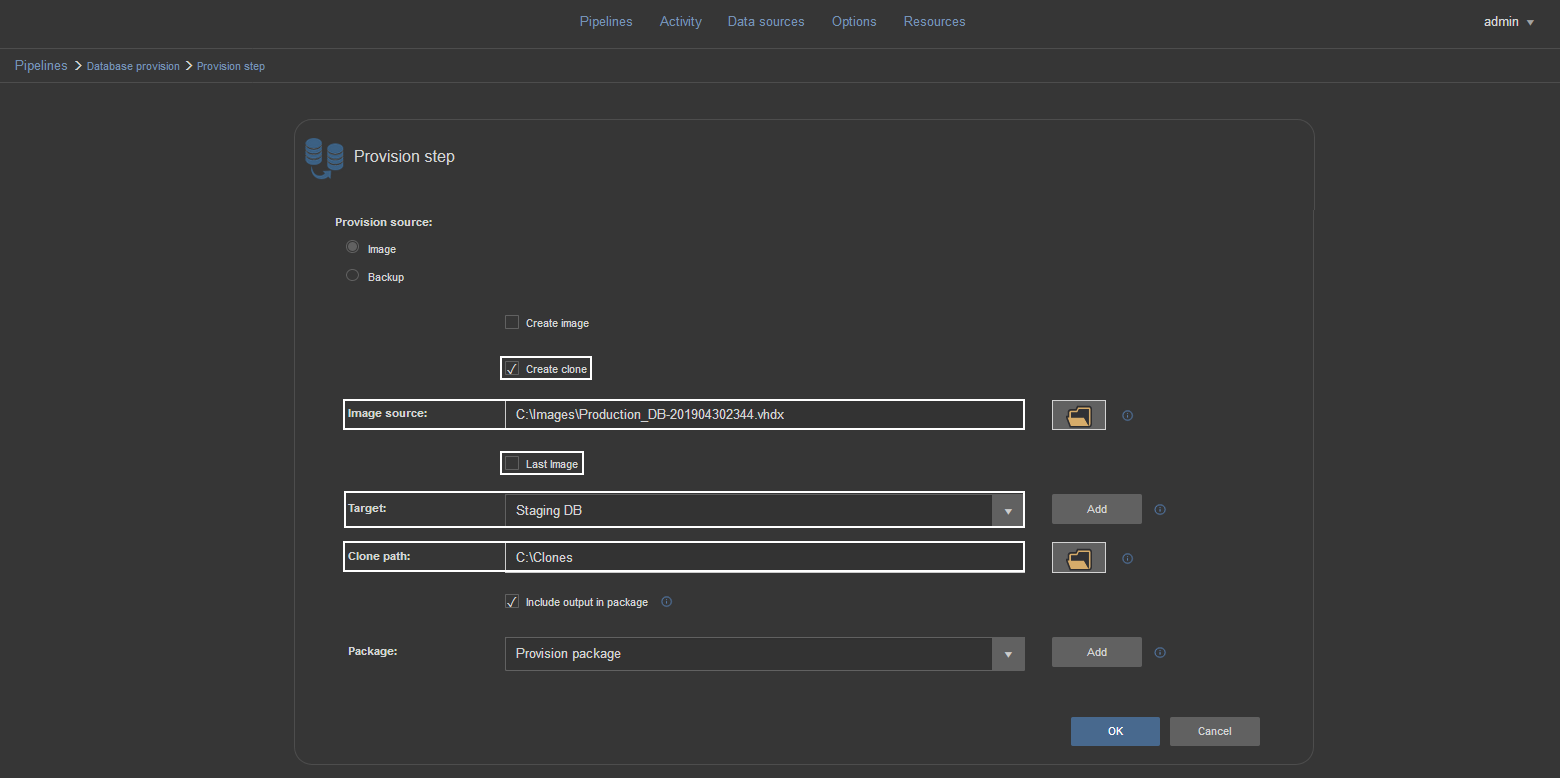
To clone a database from image stored in virtual disk the Create clone has to be checked. This option will create image clone in a designated location and attach database from that clone to a target SQL Server. Parameters required to set this process are:
Image source – the field requires full path with filename for the virtual disk file that contains database image. By default the field is disabled when Last image option is checked. The Last image option instructs the PSDatabaseClone module to read it’s configuration and take the image with the latest timestamp saved there as source. In case Create image option was used with this Provision step configuration this will be the sourced image
Target – This selection provides information about SQL Server instance and database name to attach to that instance to be create as clone
Clone path – requires designated path to where virtual disk file containing clone will be saved.
The include output in package option, when selected, allows to store the execution summary in a NuGet package.
As explained at the beginning this configuration will provide parameters for PSDatabaseClone execution and the module is required to be present on the same machine as ApexSQL DevOps toolkit.
Masking sensitive data
With the provisioned database which, naturally, contains full scope of data, always comes the question about sensitive data. A production database will be provided to variety of people to work on them and sensitive data will be available for reading. Usual solution for this issue is data masking.
Data masking allows users to work on same data structure, with same data types as in production only replaced with “garbage” data.
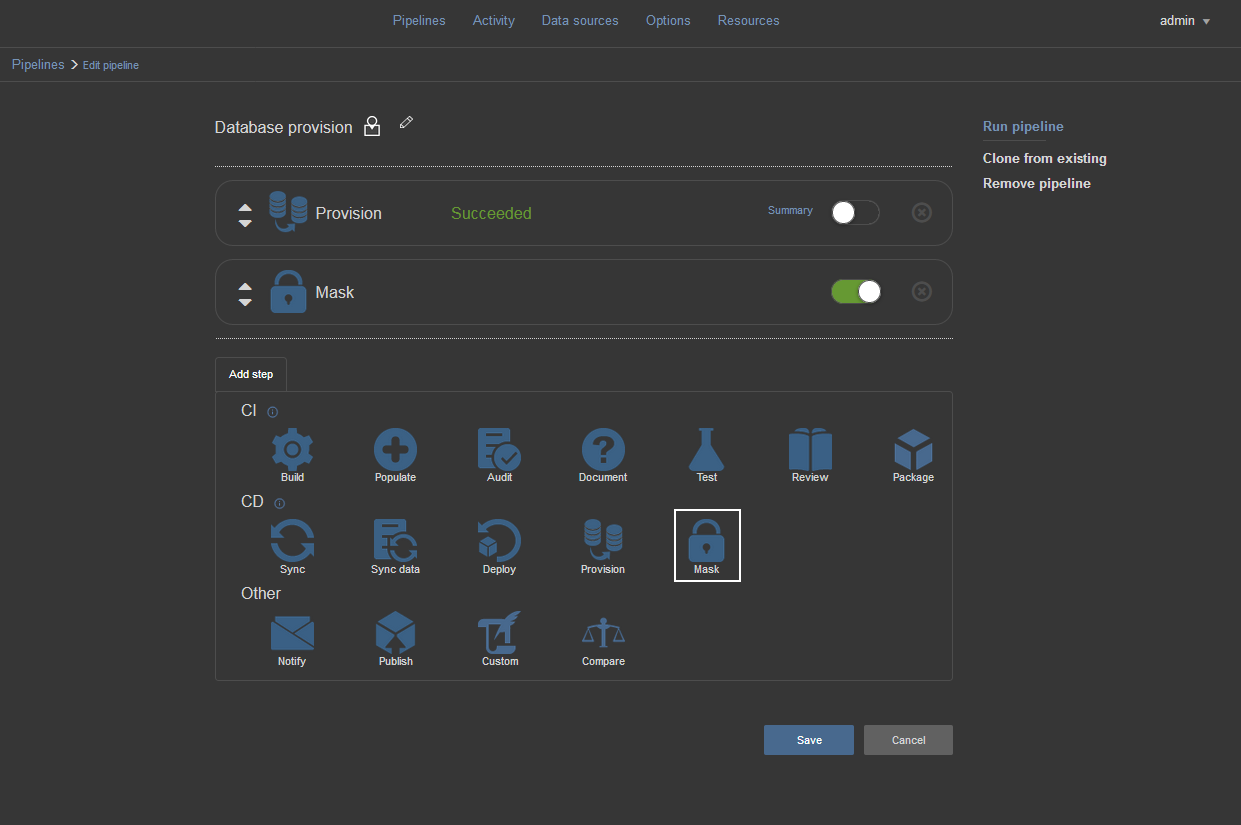
After successful execution of the Provision step the Mask step available in ApexSQL DevOps toolkit can be used. In order for the step to work the ApexSQL Mask will have to be installed on premise.
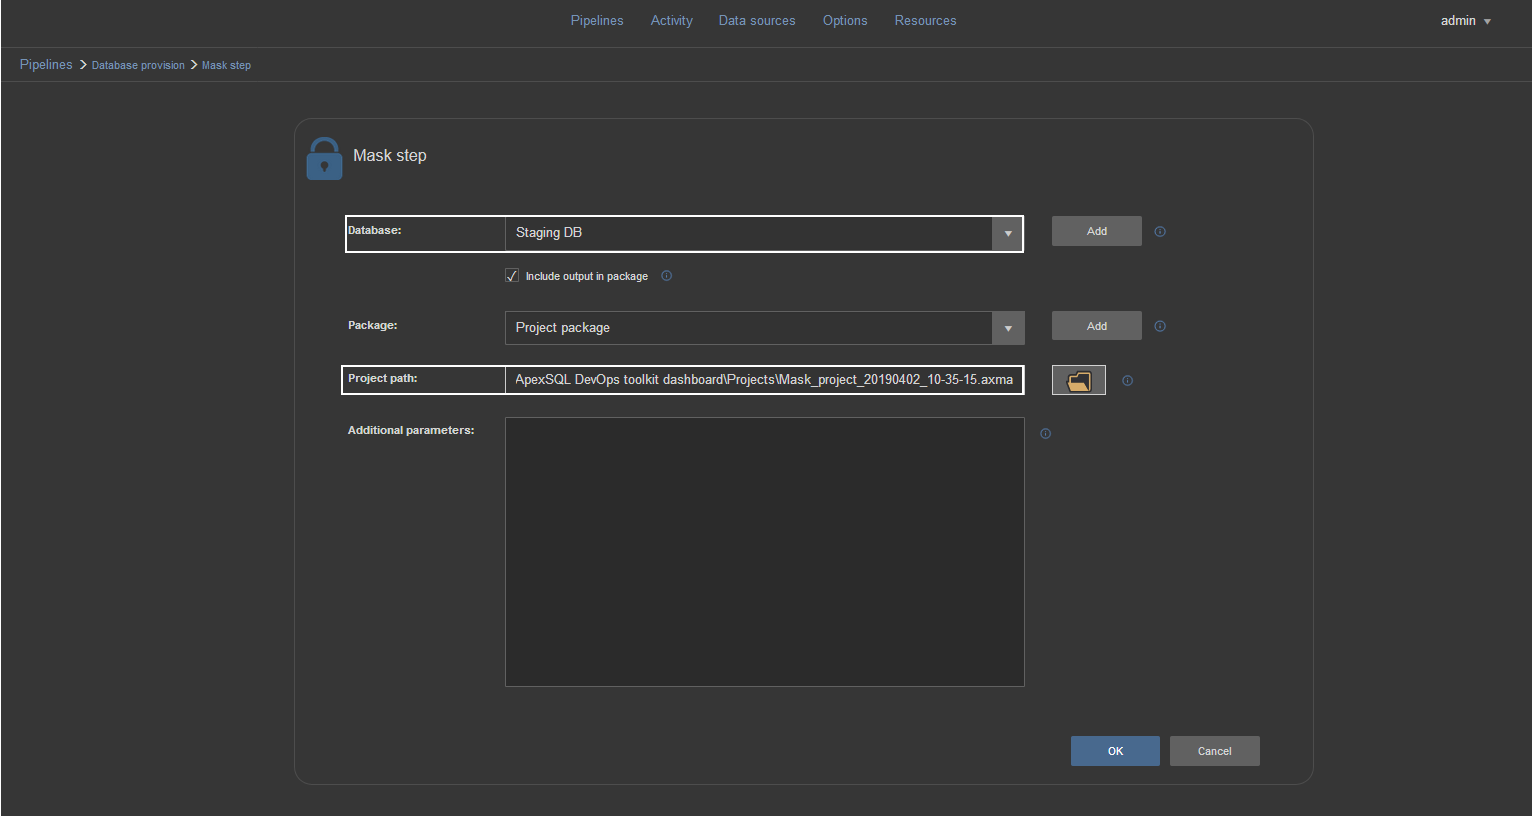
The Mask step configuration is done in few easy steps. First parameter is a database type data source that requires masking data which should be selected in the Database field.
Second parameter, which is mandatory, is a project file created with ApexSQL Mask and full path to the project filename will have to be provided in the Project path field.
The project file should be configured and saved with this tool to address the fields with sensitive data (for which the tool provides set of filters to automatically detect some data like personal contact information, social security number, credit card number, etc.), to apply the preset or custom filters and replace the data with some randomly generated data based on the column name, data type and other parameters.
Note: More details on tool features can be found in following article: ApexSQL Mask – SQL Server data masking
With Include output in package the masking summary with the information which fields are masked and which which generator type will be saved in the NuGet package.
The Additional parameters field is reserved for additional ApexSQL Mask CLI option switches.
After the Mask step execution the database data will be safe for unattended access.


